Monthly Archives: August 2017
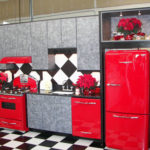
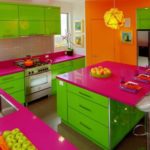
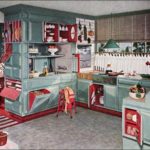
Colorizing the Kitchen
Home decor is often viewed as simply a matter of aesthetics — what looks attractive. But proponents of color psychology believe that the colors you use to decorate your home can have a profound effect on the emotional well-being of you and your family.
“Color is a universal, nonverbal language, and we all intuitively know how to speak it,” says Leslie Harrington, a color consultant in Old Greenwich, Conn. and a noted expert on the use of color in residential and industrial decor. “What color you paint your walls isn’t just a matter of aesthetics. It’s a tool that can be leveraged to affect emotions and behavior.”
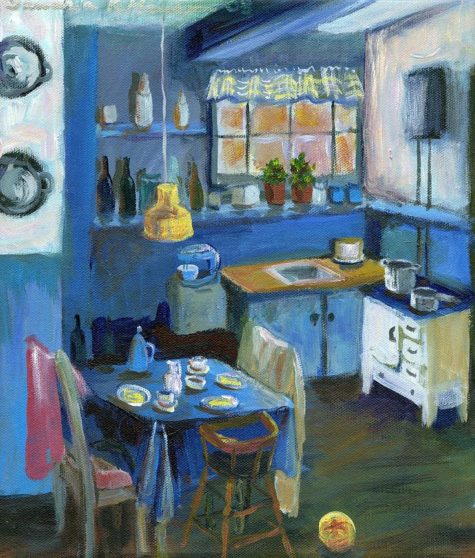
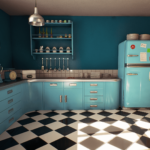
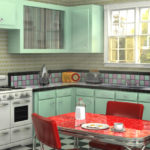
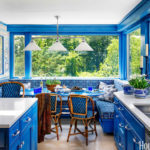
Color consultants say that if you have fond memories of spending time in the kitchen when you were a kid, it might make sense to recreate the color scheme in your grown-up kitchen. “If you grew up in a blue-and-white kitchen and have great memories, blue and white may be the best colors for you and your family,” says Smith.
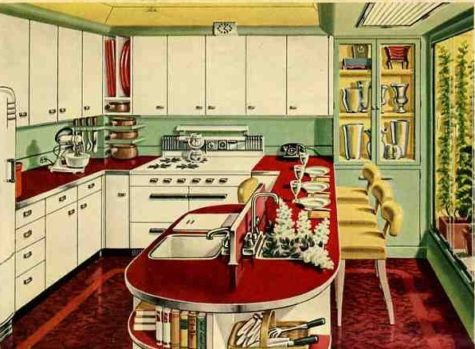
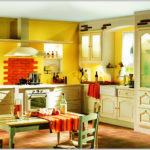
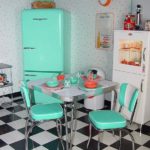
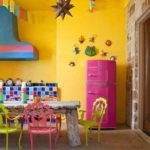
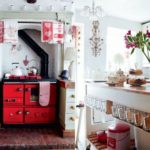
If there’s no particular paint scheme you remember fondly, reds and yellows can be great colors in the kitchen as well as in the living room and foyer. But watch out if you’re watching your weight: in addition to stimulating conversation, color consultants say that red may prompt you to eat more, if only subtly. “If you’re on a diet, you might want to keep red out of the kitchen,” Harrington says, adding that the restaurant industry has long recognized the appetite-stimulating power of red decor.
The Best Paint Colors for Every Type of Kitchen
Painting your kitchen walls is one of the quickest, and easiest ways to re-do a kitchen. Before you rush out and buy gallons of paint, think carefully about what your dream kitchen looks like. Experts agree that it’s not just the color on the walls that determine how a kitchen looks and feels. How the wall paint color relates to the cabinetry, countertops, tiles, molding, appliances, lighting and flooring is very important.
Before you buy paint, test sample swatches on your walls and observe how the colors look at various times during the day and evening. Bring all your color influencers into the room so you can see how the paint looks with all the various elements.
Paint Color Basics
- Tip #1: Colors can change
Keep in mind that natural sunlight in the kitchen will change in intensity throughout the day. Morning light appears differently than evening light, and shadows can affect the color perception. Color is essentially light – how we perceive a color depends greatly on how light is reflecting off of that color. There is a term used to describe this color-changing experience: illuminant metameric failure. It simply means that two colors may look similar in one light condition but might not match in another. So understanding the light patterns in your kitchen, and knowing what other colors will be going into the kitchen, is incredibly important.
- Tip #2: Select your paint color at home
Don’t choose a paint color while standing in the paint store aisle. Bring home actual paint samples (many brands offer small sample jars) that you can apply to your walls. Paint these swatches next to cabinetry, flooring, countertops and any fabrics you plan on using in the space. Observe how the paint changes during the day and notice if any of your other kitchen materials are affected by light hitting the paint and reflecting onto the surface. For example, a strong red wall color may, at certain times of the day, reflect a pink hue onto white cabinetry or flooring.
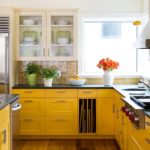
- Tip #3: Warm colors work
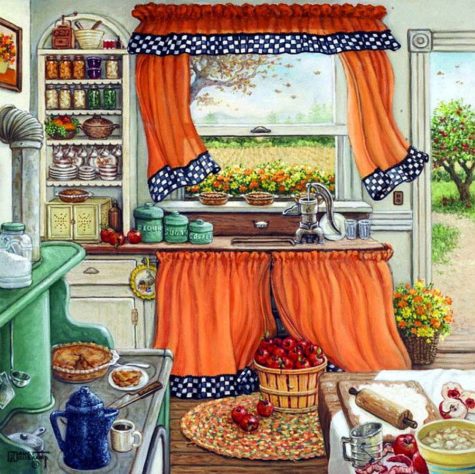
There’s a reason we see a lot of warm, earthy tones in the kitchen. Kitchens harken back the days of open fires and slow roasted foods. Studies have shown that our appetites increase when we see red or orange colors. Although warm hues may be a popular choice for kitchens, it doesn’t mean you have to ignore blues and greens. Pair cool tones with warm neutrals like a warm gray or warm orange. You’ll be surprised how mixing the palette can create the kitchen of your dreams.
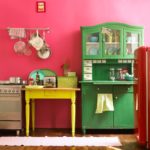
- Tip #4: Paint isn’t just for walls
Don’t forget that paint can be used on a variety of kitchen elements: cabinets, tables, chairs and other decorative objects. If your favorite paint color won’t work on the walls, try using it on a piece of furniture instead. Vintage pieces or new pieces can be painted (or spray painted). Test the underside or backside first to make sure you’ve selected the right type of paint for your project.
Best Colors For:
- Northern Exposure:
Northern light is cool, indirect, and even in appearance, making it the preferred light of artists and painters. Light from northern exposure won’t shift as much throughout the day, so expect a more even color tone in the room. The cooler sunrays will enhance cooler colors like blues and greens. Even cool tones of white will look good in northern light.
- Southern Exposure:
Southern light is stronger, more direct and tends to shift throughout the day. This might make your paint colors look very different at different times. You might notice that the strong sunlight makes paint colors reflect onto nearby surfaces. Kitchens with a southern exposure can do well with all walls being painted with the same color but keep in mind that during the day, each wall might appear to be a different shade. As the warm light will draw out warmth in the color, choose earthy colors.
- Eastern Exposure:
An eastern exposure kitchen will have strong sunlight first thing in the morning and lots of shade in the afternoon. Expect shadowing throughout the day as the sun moves across the sky. You can play up the effect of the sun by having a kitchen with contrasting colors. Think light cabinets and darker walls.
- Western Exposure:
Kitchens facing west will have strong sunlight in the afternoon and into the early evening. Dark colors will help absorb excessive light (and heat). Combine strong cabinet colors with a lighter tone like Ivory Brown. Light cabinets might do well with an offset color.
- No Windows:
A windowless kitchen will need to rely on artificial light. The best kitchen will have a combination of task lighting, overhead light and ambient light and the types of bulbs you use will greatly influence the type of light. Incandescent and halogen bulbs cast warmer, more yellow, tones. These bulbs will bring out warmer hues and cast a warm glow in the room. Fluorescent or cooler bulbs will cast a blue or green hue into the space. Try a neutral blue.
- Tiny Kitchen:
You don’t have to steer away from dark colors in a small kitchen. In fact, having a mix of contrasting colors can help the kitchen feel larger. Depending on your cabinet color, a strong paint like Rapture (4001-6B) has enough blue and red, as well as gray, to make it work with a variety of other colors. Adding rows of shelving and utilizing the kitchen’s vertical space can help break up the paint while maximizing storage.
- Open Floor Plan:
Open kitchens, with nearby dining rooms or family rooms, will need to be color-conscious when it comes to walls. Not only will your paint color need to match the kitchen elements, you’ll want to make sure that it coordinates with the other rooms as well. When selecting a color, try a gray-infused neutral that will go with a variety of color palettes.
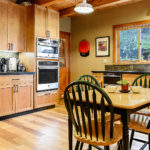
- Lots Of Wood Cabinets:
If you have a lot of wood cabinetry in your kitchen you’ll want to be smart about your color selection. Do you want the cabinetry to disappear? Try a paint color that is a shade or two lighter than the cabinets. Do you want to compliment the wood and show it off? Find a paint color from a different palette that has complimentary tones.
- Outdated Countertops:
If all you can afford to do is repaint your walls, don’t worry. Paint can help downplay or distract from any unattractive features in the kitchen. Colors that dominate, or play up your favorite color, will do well. Consider painting three of the walls the same color as the cabinets (to hide them) and use the fourth wall as a strong accent color.
- Stainless Steel Appliances:
Stainless steel appliances have a cool, but gray, appearance, making them a good neutral for the kitchen. However, kitchens with too much stainless steel in the kitchen run the risk of looking cold and utilitarian. Offset the cold by introducing a warm color.
- Black Appliances:
Black appliances, like stainless steel, can look cold and dark. In some kitchens they may appear like black holes within the space. So balancing these strong elements is key for the kitchen. Depending upon the cabinet colors, a warm brown can create a sophisticated look next to black.
- If You Rent:
The best reason for using a neutral paint color on the wall of a rental is that it will be much easier to paint over once you move out. But neutrals don’t have to be boring. If you prefer cool tones, a gray-blue color will work with nearly any color scheme. Warm neutrals will also work well.
- If You Have A Dark Backsplash:
Do you want your backsplash to stand out or disappear? If you want it to stand out, then choose a much lighter color. Some black backsplashes can pair well with similar dark colors.
- If You Have A Light Backsplash:
Light backsplashes, like white or cream, can work well with a variety of paint colors. A bright chalk white will really show off the veining in white marble, for example. Sophisticated grays can also be a great compliment to light colors. Be careful about really dark colors next to white – the color may reflect onto the surface and change the color to one you don’t want.
- If Your Kitchen Also Functions As An Entryway:
If your kitchen serves as the main entry to the home, you’ll want to be less conscious of the color and more aware of the type of paint you use. Be sure you select a paint designed for heavy traffic and can easily wipe down, like a semi-gloss finish. Texture is important too. A smooth wall will show marks faster than a more textured one.
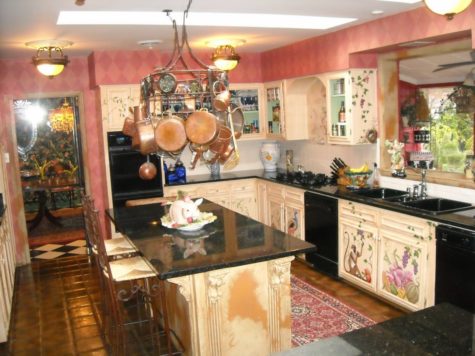
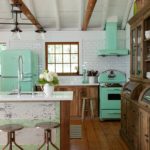
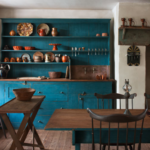
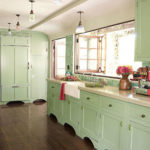
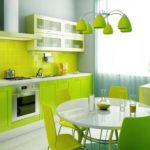
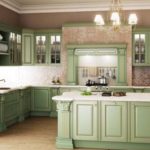
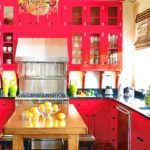
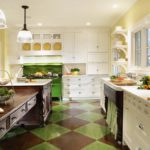
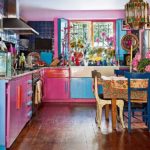
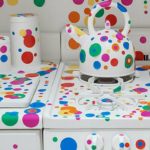
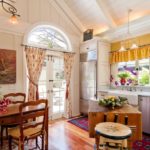
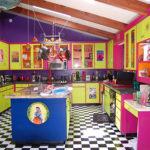
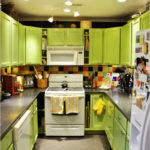
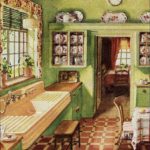
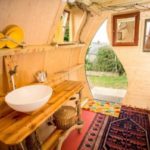
Idea Gallery
This is a gallery of a wide variety of kitchen styles and colors for ideas and inspiration:


Sources:
For A Well Organized Kitchen
Now that we’ve completed Feng Shui in the bathroom, I think it might be a good idea to head on into the kitchen and make sure it’s ready for all the cool stuff we’re going to make for our luxuriously delicious baths.
And even if you aren’t planning to make a bunch of cool bath products, a well-organized kitchen will help you cook as efficiently as possible and waste less food. Here are 10 great tips for organizing the heart of your home.
- Declutter Your Kitchen
Decluttering is the first step to organizing any room, and kitchens tend to have more unique kinds of clutter than other rooms: ice cream makers and other wedding-registry items, gadgets you were suckered into buying from TV infomercials, useless knife sets, and so on.Weed out the kitchen tools you never use, reevaluate whether you really need more than the essential kitchen items in your kitchen, get rid of the bulk spices that have already expired, reboot a junk food-filled pantry, and use up food in your freezer at least twice a year.
It’s easy to tell when you need to purge a few items from your kitchen—the overflowing drawers will tip you off to that. What’s harder is knowing what should stay and what should go. Unlike other rooms in your home, most things in the kitchen actually have a function and therefore feel like they should remain on hand (even when they’re jammed in the back of your cupboards). To begin your purge, Hello Kitchen recommends that you:
- Lay a queen-size quilt on the floor, somewhere near your kitchen (move some furniture if necessary).
- Referencing the list below, remove items from your kitchen one by one, coloring in each circle as you go. Place the items on the quilt.
The idea behind placing things on a queen size quilt is that the remaining items should all be things that can now be donated or given away.
This checklist can help you decide which kitchen tools to purge or not.
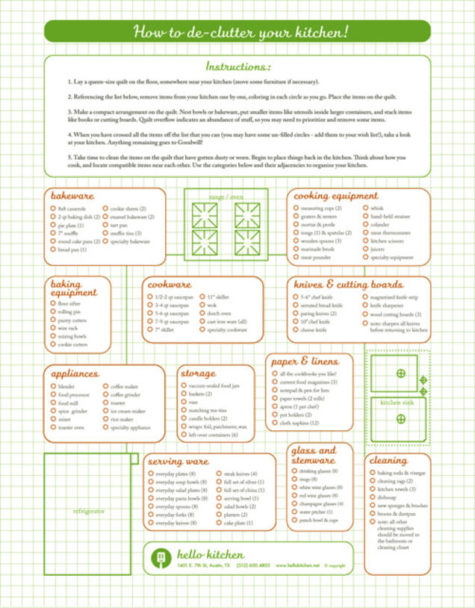
You can grab the free, printable PDF (kitchen_clean_out) from Hello Kitchen to get started on your kitchen audit. Just click on the link, and then click on the attachment to open the PDF file. Or, follow this link: How To Declutter Your Kitchen.
And just in case you want to be sure that you really do keep everything you might need, scroll down to the bottom of this post for a list of the top 5 must have tools for any kitchen
- Opt for Space-Saving, Uniform, See-Through Containers
One of the main contributors to kitchen chaos: Mountains of mismatched food storage containers. You only need a few types of food storage containers to maximize the amount of space you have in your cupboards. We prefer square or rectangular containers that stack up well. If possible, use containers that can go from fridge to microwave to dinner table to dishwasher. We also recommend organizing your spices with cleanly labeled, identical containers, perhaps on a magnetic spice rack or arranged in jars in a drawer with the tops labeled for easy identification.
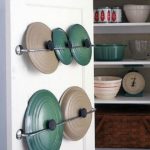
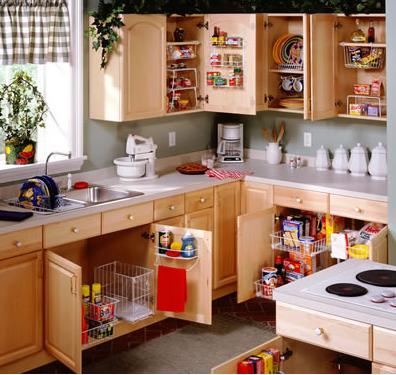
- Make Use of the Back of Your Cabinet Doors
The inside of your cabinet door is wasted space. Instead of leaving that surface blank, organize your measuring cups and spoons there, store pot covers on the back with inexpensive hooks, build a knife block into the back of the door, hold cutting boards in a magazine rack on the door, and pretty much mount anything to the back for easy access. You can also just paint the inside of the doors with blackboard or whiteboard paint to keep a running grocery list and weekly meal plan.
- Create Sections with Tension Rods
Tension rods are a surprisingly awesome organization tool throughout the kitchen. You can use it for hidden paper towel storage, organizing cleaning bottles under the sink, creating an extra shelf for spices, and creating pantry dividers or lid organizers in drawers.
- Get Rid of Wasted Dead Space
Got a kitchen with awkward, unusable spaces? Yeah, me too. If you have trouble seeing or reaching items at the back of a space, such as the cabinet under the sink, the inner depths of your fridge, or the corner of your pantry, a Lazy Susan could help. For that weird space between your fridge and the wall next to it, build a roll-out pantry or a sliding spice rack (you might be able to use an IKEA shelf to create your own). If you’re desperate for more space in your kitchen, turn those false drawers in your kitchen into usable storage space. You can also create a secret toekick drawer at the bottom of a kitchen cabinet on the cheap.
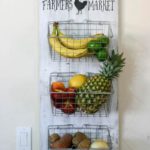
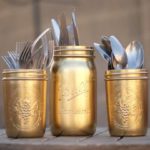
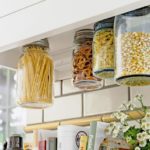
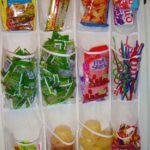
- On The Fly Kitchen Organizers
Here we have a number of ideas for kitchen organizers that you may not have thought of. I didn’t include the tutorials, because I think they are easy enough to figure out:

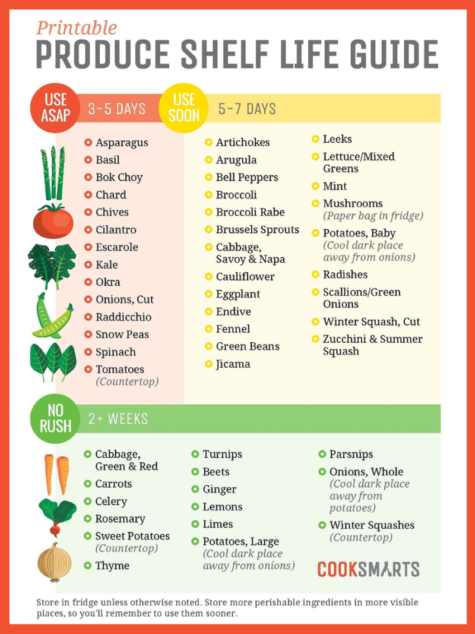
- Know Which Foods Go in the Fridge, Freezer, or Pantry
Part of having an organized kitchen is having your ingredients stored properly. It wastes less food and it makes it easier to inventory what you have before you go grocery shopping. Here are our general guidelines for storing foods so they last longer in the fridge or freezer and which foods you don’t need to refrigerate. Don’t want to memorize them? Print out these charts and hang on your fridge to keep track of your food inventory and also know when foods are about to expire. Likewise, this graphic illustrates how long essential pantry foods will last.

- Store Food in the Fridge Properly
It’s not just a matter of keeping foods in or out of the fridge, however. Within the refrigerator there are ideal spots for different types of foods. Dairy, for example, is best kept on the upper shelf where the temperature is most constant, while meat should be in the bottom of the fridge, where it’s coldest and any leaks wouldn’t contaminate other foods. Check out more fridge storage guidelines here or this infographic.

You might also want to organize your fridge with a first-in-first-out (FIFO) method, like grocery stores do or use an “eat me first box” in your fridge to make sure you don’t waste food.
- Maximize Pantry Space So You Can See and Reach Everything
Out of sight really is out of mind when it comes to food storage. In the cupboard and pantry, make sure you can see and reach everything with things like stacking shelves, Lazy Susans, and clear storage containers. You can also group items in your pantry by meal (e.g., pastas next to tomato sauces) so you remember what to cook. For hard-to-stack cans of food, create a can holder using a magazine rack or organize canned goods in your cabinet with a closet rack. The back of your pantry door is a perfect spot to hang an over-the-door shoe holder to gather snacks, seasoning mixes, and more.
- Create Kitchen Work Zones
You’ve probably heard about the kitchen work triangle, the triangular layout between fridge, oven, and sink that makes it easy for a cook to move about the kitchen. Whether or not your kitchen conforms to this ideal, it’s helpful to think of your kitchen in terms of work zones: food storage, dishware storage, cleanup (sink and dishwasher), prep, and cooking zone. Store items according to their related zone. If you tend to have more than one person cooking the meal with you, you might create a second prep zone. Alternatively, you might want to add a baking zone or other specialty zones so everything is organized and kept in the proper places.
- Store Items Logically
That leads us to the last and most important point: Have a place for everything and everything in its place. Julia Child’s kitchen had a place for everything, with pots and pans hung on pegboards with their outlines drawn around them so she could put everything back in its place. Items you use most often should be easiest to reach, while you can put items you hardly use (e.g., turkey carving tools) higher up in the cabinets. Group your items next to the tools you use most with them (e.g., can opener by the cupboard you store cans in, baking ingredients with the baking pans).
For Maximum Cooking and Cleaning Efficiency
Whether you’ve just moved into a new space, are settling into a summer rental, or are just frustrated with your kitchen, here are some ideas to help you arrange your kitchen for maximum cooking and cleaning efficiency that will making mucking about in the space a lot more fun.
- Start with what you have:
You may love them, you may hate them, but unless you’ve got the money for a full scale renovation, your sink, stove and refrigerator aren’t going anywhere. Their position will dictate where everything else goes. Cleaning them up inside and out, can go a long way towards making them presentable.
- Create stations:
Taking a cue from restaurant kitchens, mentally assign stations for all of the tasks that you do in your kitchen: cleaning, storage, prepping, cooking, putting food away. If you bake a lot, you might also want a baking station.
- Organize items according to task:
The point is to organize the kitchen so that there’s as little unnecessary movement as possible. If, after you’ve washed the cutlery from tonight’s dinner at the sink, putting it away means walking across the kitchen to do so, chances are it will never get put away, no matter how pretty the cutlery drawer organizer is.
Move things around so that what you need is in arm’s reach: Cutlery and dishes should be near the sink; spices and cooking implements, whether rubber spatula or skillet, should be near the stove; put knives and chopping boards near your prep area; store sugar, flour, rolling pins, cookie sheets and standing mixer near your baking area.
- Out of reach:
Put things you rarely use — the turkey platter you pull out at Thanksgiving, the holiday-themed cookie cutters — higher up or lower down. Having to get on a ladder, or even bend your knees, means you’ll use something less frequently.
- If necessary, buy two:
I use cinnamon for cooking and for baking, so I’ve got one canister near the stove and one in my baking area. While I’m not suggesting you buy two food prep machines, consider doubling up on little items like spices and spatulas.
- Merchandise your storage:
Yes, I confess, my kitchen is always ready for its close up. I like my kitchen organized, I also like it pretty. Arranging items by size and color as well as by how often you use them can go a long way towards making your time in this room pleasant.
- Pretty but also useful:
If the canister that you use to store flour is hard to open, it’s not useful. Before you buy something, try it out in the store and consider how you’ll use it. Does it feel substantial in your hand but also light enough that it’s easy to use? Can you open a container with one hand? I’ve removed rubber sealant rings from many a flour container in order to make them easier to open.
- Stick with the place you’ve given for things:
With everything in my kitchen assigned a spot, it’s easy to see what I have and what’s missing. With a quick glance into my refrigerator, I can tell that I’m out of butter or milk or low on veggies. Since I always keep these things in the same place, a glance at my kitchen cupboards tells me I’m out of glasses and I’d better get washing!
An efficient set up based on what type of cooking you do can be very helpful.
For the Daily Cook
For you, an efficient setup is all about access and speed―quick in, quick out.
- The Strategies
Keep necessities within easy reach to save time. Make a place in the zone around the stove and the sink for essentials: oil, vinegar, knives, cutting board. Put ingredients and tools near where you will be using them: Keep the basket of garlic near the cutting board, sugar and flour near the stand mixer, and your best-loved pan on the front burner.
Use under-cabinet space and exposed shelving. A battery-operated under-cabinet lighting strip won’t dangle a cord or steal an outlet from the microwave, while an under-shelf cookbook holder pulls down when you need it and folds back up when you don’t. Things get lost on deep shelves. Put them in baskets that you can pull out and inspect at eye level.
Put the walls to work. Hang racks or pegs to keep utensils, pot holders, and dish towels in sight. Oversize Post-it notes or hanging rolls of paper (found at stationery and art-supply stores) are useful for reminders.
Make recycling efficient, too. Streamline end-of-meal cleanup by putting a bin for bottles and cans next to the one for regular trash (pull-out recycler, instead of out in the garage or in the mudroom.
For the Sunday Cook
When you’re too busy to cook, one weekend session―making dinners to freeze―reduces daily stress. Your kitchen setup should facilitate that.
- The Strategies
Keep essentials front and center. Stackable storage containers, large plastic mixing bowls, and other tools left on the counter won’t be in the way during the week and will be ready to go on Sunday.
Invest in equipment. A food sealer is just the thing for turning blanched green beans, fish fillets, and muffins into future instant meals. A scale is useful for weighing ingredients, which some cooks consider a faster and more reliable way to measure for bulk recipes. A calculator speeds the doubling and tripling of recipes.
Organize the freezer. When food items get crammed in willy-nilly, you won’t know what you have on hand. Instead, make designated sections (prepared meals, vegetables, desserts). Use dividers, baskets, or multilayer ice caddies to keep containers neat and accessible. And be sure to label everything with both what’s in the container, and when you cooked it up.
For the Come-on-in Cook
You like to share conversation―and kitchen prep―with a friend, a mate, your kids. Your goal: to arrange things so that two (or five) can work as efficiently as one.
- The Strategies
Make things easy for helpers to find. Bring things into the open with a wall-mounted utensil rack. Rachel Siegel, owner of Spruce, an organizing company in Berkeley, California, suggests storing tools by function.
Create parallel work stations. Set up separate work areas with equal access to commonly used tools and ingredients. A trash bin with a wide foot pedal can be moved about easily to serve cooks on both sides of an island or a counter.
Make the room kid-friendly. Create a zone where kids will feel welcome to help or just visit. For safety, move cleaning products and knives to adult heights. Stock up on kitchen tools made for kids and plastic bowls. Twin cutting boards let you chop the onions on your side of the island while your friend preps the apples on hers.
For the Entertainer
If you’re a cook who enjoys an audience, all the kitchen’s a stage. Create an illusion of effortlessness that belies a tightly organized support system.
- The Strategies
Set a mood. Clear vases of fresh herbs or beautiful bowls of picture-perfect produce will whet guests’ appetites. Install a dimmer to bring down the lighting, and if you entertain regularly, consider built-in speakers to keep the music flowing through the kitchen.
Use glass cupboard doors for display. Use glass-front cabinets to showcase what you love most, whether it’s your best china, an antique-pitcher collection, or even canisters filled with pastas in different shapes and colors.
Keep party gear handy. Create a place for platters and trays―with tray dividers to maintain order―so you don’t have to hunt for them. Give candles, place mats, and other table toppers a dedicated drawer. Use an index-card box to store recipes, past menus, friends’ food preferences, or wine labels. (Soak a bottle to remove the label, let it dry, paste it onto an index card, and jot down tasting notes.)
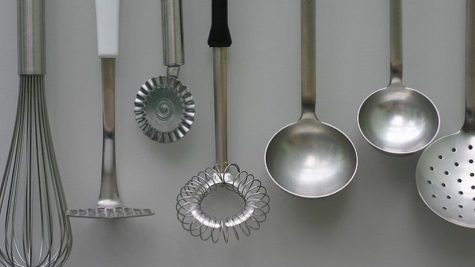
Five Must-Have Tools for Any Kitchen
Here are five kitchen-related things you really need and how to use them efficiently. These items do not represent everything you’ll need for all your cooking, in any kitchen, for every recipe, throughout your entire life. What we’re listing here are five core purchases that any kitchen should have, along with the best advice we’ve seen on how to get the most for your money out of them.
The tips and research for these items are pulled from one editor’s experience growing from a single dude who calls his mom to make mashed potatoes to a fairly reliable home cook who makes the big dinners, along with a few great reads:
- Three decent knives, sharpener for two of them
If we were crazed minimalists, we’d say you only truly need an eight-inch, plastic-handled stainless alloy chef’s knife, one you can find at a restaurant supply store for $10 (more on that later). You should test out any chef’s knife you’re looking at, and consider santoku-shaped blades if you do a lot of mincing or fine chopping. The key is making sure any knife feels right in your hand. The handle and weight in your hand are just as important as the blade, since proper use and sharpening should take care of that. Other than that, a sharp, sturdy paring knife and a cheap-as-you-can-get serrated bread knife have you covered for everything else. Skip the boning/fileting and utility knives, because you definitely don’t filet fish or slice giant mozzarella wheels that often.
How do you keep your knife sharp? Popular Mechanics has a good two-paragraph primer. Using a two-sided sharpening stone:
Lubricate the coarse side of the stone with mineral oil or water; then push the blade (at a 22- to 25-degree angle) across in a sweeping motion, like you’re cutting a thin slice off the stone. “Flip the knife and work the other side until a slight burr forms along the edge,” Montagno says. “Switch to the fine side of the stone, lift the blade to a slightly higher angle and hone off the burr to create a razor-sharp micro bevel.”
Obviously you can skip this process with the serrated bread knife, which can probably cut through loaves of bread long after you’re dead.
- Five pots and pans
How you save money here depends on how you cook. Unless you make a lot of meat dishes with reduction sauces containing browned bits, you really need just one cheap medium-sized nonstick skillet for your day-to-day cooking, small and larger-sized metal saucepan, a pasta-sized pot with a lid, and one serious, large (12- or 14-inch) steel pan with steep sides for your grander culinary ambitions, stir-frys, and bigger meat meals. We’re serious on the nonstick skillet being cheap, if safe-looking, because even the most expensive kind inevitably flake off, chip, and lose their egg-repelling properties over time.
Note: We don’t intend to imply you should completely cheap out on your pots and pans. Good cast iron pans, treated well, can last a lifetime. We’re just suggesting the multi-piece sets with every single size of pan, pot, and boiler, with three different lids, aren’t really necessary for cooking.
Everything else? That’s where it gets discretionary. One doesn’t spend three months’ salary at Sears to make sure they’ve got every tool for any imaginable home project, but instead builds a tool set over time. Roasting pans, springform cake pans, loaf pans, double boilers—try to borrow them for rare occasions, make do with makeshift versions, or possibly get lucky at your local Goodwill. Otherwise, another trip to the restaurant supply store is in your future.
- A restaurant supply store, or an Asian market
If you’re thinking about buying your cookware from a store in a mall, strip or otherwise, don’t do it. Similarly, don’t buy multi-pot sets, especially the kind signed by a chef you’ve seen on television. The best value for your dollar is found at your local or regional restaurant supply store. That’s where the restaurants you recommend to friends buy their stuff, and they make their money on volume. For certain kinds of cooking hardware, Asian food markets and “trading companies” often stock a lot of really cheap goods. For recipes that require random equipment you’re not sure you might use again, they’re often the smart buy.
- Serious instant read thermometer
You don’t have to spend a lot on this, but it’s crucial to buy quality instead of cheap. That’s spoken as someone who loves to grill, and whose wife does not like to eat on the bleeding edge of food safety. Go too cheap and you end up with unreadable LCD screens, melted plastic, and seriously slow updates that leave your food overcooked and the chef overworked.
- Reliable, small kitchen scale
When you’re new to stove-top cooking, you’ll want to get precise with your meat, vegetable, and starch measurements to ensure everything stays flavored in proportion. When you start dipping your toes into baking, that’s when you’ll really be glad you have a scale. The way you pack flour, the moisture in the air, and the random sizes of ingredients like eggs or fruits can seriously impact the outcome of a baking recipe—unless you’re weighing things in proportion. You don’t have to spend a lot, but you do want something digital, that holds up to 10 pounds, and which can “tare,” or set itself to zero, when you’ve got a container on it that doesn’t count in the measurement.
Sources:
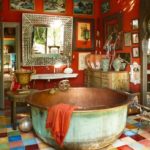
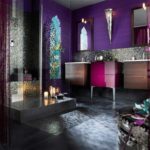
Feng Shui In The Bathroom
I found this great little article about How A Bathroom Flushes Prosperity & What You Can Do About It. And I thought it was time to take a peek into our bathrooms, especially now that we are making all that wonderfully luxurious and delicious bath stuff.
Bathrooms and toilets have a really bad reputation as far as feng shui is concerned. This is because bathrooms and toilets have the tendency to drain or flush away the positive “Qi” energy of your home.
Hence, if “Qi” enters the bathroom, n rest assured that chances are it’s being flushed right out of your house and we certainly don’t want that to happen.
Since each and every part or corner of a house is related to an aspect of life, a bathroom in one particular corner or part would affect that specific area of life, and without proper precautions, will drain the luck or benefits of that aspect of life.
A bathroom in the center of your home:
A bathroom in the center of the house is usually considered bad feng shui. As the center of the house is the heart of the space in feng shui, also called the yin-yang point, you want to have it open, light and with a sense of beauty to it. Take these steps to fill your center home bathroom with good feng shui:
- Keep the bathroom clean and tidy
- Add art, candles or flowers to the room
- Position several air-purifying plants in the bathroom
- Be aware of the light quality in the room and add a dimmer switch to adjust the light if the room has no window
A bathroom facing the front door:
The reason a bathroom door facing the main door is considered bad feng shui is simple: the Universal energy, or Chi, comes into the house through the front door. If your bathroom is facing the front door, most of the good energy will escape through the bathroom, leaving little or no good feng shui energy to nourish the house. Use these practical tips to improve the potentially bad feng shui situation of a bathroom door facing your front door.
- Keep the bathroom door closed
- Create good feng shui in the bathroom
- Create a focal point near the entry to direct energy away from the bathroom
- Focus on good feng shui in the entry area to enhance the energy in the area
A bathroom in the money area:
A bathroom in the feng shui money area can certainly be a challenge. The first thing to do when you are dealing with any challenging feng shui area is to commit to keeping it very clean and orderly. There can be no good feng shui without cleanliness and order, and this especially applies to a challenging bagua area. Next, you can explore feng shui money area decorating tips and see which ones are possible to apply in your home. They include:
- Decorate the area with lush green plants
- Use pleasant scents, fresh flowers, and candles in the area
- Decorate with images of natural landscapes
- Add a water feature or mirror for good feng shui
A bathroom facing the kitchen area:
Having the kitchen and the bathroom doors face each other is very bad feng shui. You don’t need to know much about feng shui to intuitively understand that this is not a good setup for a healthy home. When two doors are opposite each other, the feng shui energies flow faster in and out of the spaces guarded by the doors. The solution is to create as much division between the two areas as possible. Use these tips:
- Keep the bathroom door closed
- Keep the bathroom clean and filled with good feng shui energy
- Use a divider screen, bamboo curtain or a tall plant to define the boundary between the two rooms
- Use different paint on the kitchen door wall and the bathroom door wall to define the areas
- Create a focal point between the two areas
A bathroom above the bedroom area:
A bathroom located above the bedroom is not good feng shui. An important factor to consider in looking for feng shui cures is how busy the upstairs bathroom will be. Combat the bad feng shui using these tips:
- Limit the upstairs bathroom to occasional use, such as a guest bathroom
- Relocate the bed if it is situated directly beneath the bathroom
- Use very light colors in the upstairs bathroom
- Use design features on the bedroom ceiling such as crown molding or a decorative medallion around the ceiling light
A bathroom over your front door:
If you have a bathroom above your front door, it is very important to take care of its good feng shui, as the quality of energy that comes through the front door determines the quality of energy in the house. Use these tips to address the challenging feng shui of a bathroom over your front door:
- Keep the bathroom clean and tidy
- Strengthen the bathroom feng shui element and keep the door closed
- Create a separation between the two spaces with a bathroom rug or deep color floor
- Position a crystal chandelier in the main entry
- Strengthen the feng shui of the main entrance with tall vertical elements
A bathroom under the staircase:
Stairs have a bad reputation in feng shui, although it isn’t as bad as the reputations of bathrooms. If you have a bathroom located under a staircase, you’ll need to take steps to address this challenging feng shui situation. Both areas require special attention to enhancing good feng shui.
- Keep the stairs well lit and in good repair
- Use light colors for the staircase
- Position a crystal chandelier at the bottom of the staircase for good feng shui
- Move a bathroom located under a staircase if possible
- Keep the feng shui elements of the bathroom strong
- Keep the door to the bathroom closed at all times
- Decorate the bathroom in colors appropriate for its sector
A bathroom in the south-east sector:
Since South-East part of a house is related to wealth, a bathroom in this part will drain away all the money from the house; joblessness, sinking income, increasing debt and even bankruptcy are some effects of South-East bathroom
For bathrooms located in the South-East sector of your home, follow the basic recommendations for good feng shui in any bathroom. Keep the door and toilet lid closed and keep the bathroom clean and tidy. In addition, these tips can improve the feng shui of the room:
- Position several air-purifying plants in the bathroom
- Hang a mirror on the bathroom door (following feng shui mirror guidance)
- Use metallic colored gold, silver or gray rugs, preferably in circular shapes
- Hang a metallic wind chime in the area
- Burn candles in the room frequently
A bathroom in the north-west sector:
The North-West part of the house deals with helpful people and luck from heaven, a toilet in this part will drain away all those from you. No help from anyone, backstabbing, office politics, discredit etc. are some effects of North-West bathroom.
North-West sector bathrooms should follow the basic recommendations for good feng shui. Avoid clutter and don’t position a mirror to reflect the toilet seat. Replace any leaky faucets to prevent them from flushing away money. In addition:
- Use lush houseplants in the bathroom
- Put a container with water in the room
- Use a blue rug on the bathroom floor
- Never use metallic chimes in a North-West bathroom
General Rules For Good Feng Shui in the Bathroom
A bathroom has to be somewhere in the house. Doesn’t it? The answer to that it yes, but remember, it’s vital to minimize – or possibly eliminate – the draining or flushing of chi and the “good” from your life.

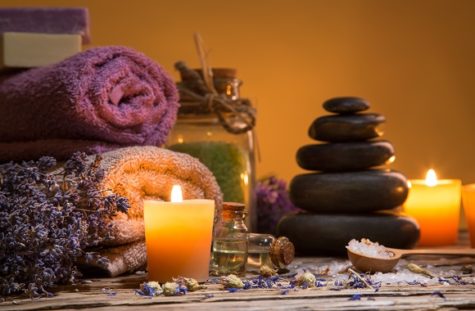
The main feng shui cure – and the most solid one – to neutralize the negative energy of a bathroom is to actually take good care of your bathroom. If you focus on creating good energy in your bathroom if you transform your bathroom into a beautiful spa – why would you need protection from its energy then?
There are any ways to create a bathroom that has a clear, fresh and nourishing energy, you just have to put some time and effort into creating good energy, and then maintaining it.
Here is a list of general bathroom tips:
- Always keep the bathroom door closed.
- Make sure to keep the toilet lid closed.
- Replace any torn curtains with new ones.
- Keep the bathroom clean, fresh and airy.
- Use a good air freshener.
- Make sure that the bathroom receives ample sunlight and fresh air.
- Keep windows, ventilators and doors of bathroom clean.
- Get the best essential aromatic oils for a relaxed bath.
If there’s a bathroom in North-East or South-West then;
- Hang a metallic wind chime in the bathroom.
- Make sure that there are no Chinese symbols on the chime.
- Make sure that no one passes or sits under the wind chime.
- Place metallic colored rugs such as gold, silver or grey; circular shaped ones must be preferred.
If there’s a bathroom in South then;
- Hang a crystal ball in the window of the bathroom; the rainbow lights from the crystal will reduce the bad fire energy.
- Make sure to cleanse the crystal ball as it’s going to absorb negative energy.
- Alternatively, you can also use a crystal geode which is a rock with hollow center.
- lace square shaped skin colored rug; you can also opt for yellow, pink or chocolate brown colored ones.
If there’s a bathroom in North then;
- Place some lush green houseplants in the bathroom.
- Put a square shaped rug in shades of green.
If there’s a bathroom in East or South-East then;
- Place glitter lamps in the bathroom and make sure to turn them on for around 2-3 hours daily.
- If glitter lamps aren’t your thing then you can light candles in the bathroom.
- Triangular rugs in shades of red are best for such a bathroom.
If there’s a bathroom in West or North-West then;
- Just place an urn with water in the bathroom.
- Place blue shaded rug; if possible, get a wavy shaped one.
What to Avoid
- Avoid clutter in the bathroom; in fact avoid it everywhere.
- Avoid mirrors reflecting toilet seats.
- Avoid leaking taps and faucets; replace them immediately else they’ll flush away the money.
- Replace broken items, such as, soap dispensers, shampoo bottles etc.
- Don’t keep old and worn-out toothbrushes in bathroom.
- Avoid a bathroom or toilet at the center of home.
- Avoid bathroom door facing bedroom, kitchen or dining room.
- Avoid locating a bathroom adjacent or near to house entrance.
- Never have a bathroom above kitchen or main door.
- Avoid locating a bathroom or toilet under staircases.
- Never place metallic wind chimes in North, North-West or West bathroom.
- Never try to place metallic things in the South-East bathroom; it’ll drain away all the money from house.
Mirrors and bathroom doors:
The reason mirrors are sometimes recommended in feng shui for the bathroom door is because a mirror can make a wall or a door energetically disappear, so to speak.
A mirror also pushes the energy back; this is why, for example, it is always recommended to avoid a mirror facing the main door.
A mirror outside the bathroom door is sometimes used in feng shui as the mirror pushes the energy away from entering the bathroom, thus the energy is prevented from going down the drain. Bathrooms have a very bad reputation in feng shui, so a mirror on the bathroom door became a popular feng shui cure for it.
You have to decide for yourself if a mirror on the bathroom door is something you would like in your home decor scheme. And if it makes sense to you.
If you do love mirrors, the best place to have them is not on the bathroom door, but actually in the bathroom.
Mirrors bring the feng shui energy of the water element, and this is excellent for any bathroom as it cleanses – energetically speaking – and refreshes the stagnant and stale energy. Busy bathrooms create a lot of low or challenging energy very quickly, so instead of trying to pretend that there is no bathroom there – which is the goal of placing a mirror on the door, I suggest to actually deal with the energy of the bathroom in the first place.
Another point to consider is this: when you place a mirror on the bathroom door, you actually make the door disappear, too! And doors are very important in feng shui as energetic guardians of any given space, they create good containers for specific energies.
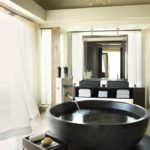
Sinks:
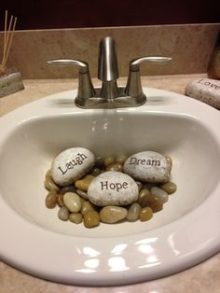 Here is a cute idea for the bathroom sink so that the energy doesn’t simply run away down the drain. Of course, the stones you use would have to be maintained so that they wouldn’t attract anything furry or green… like algae or soap scum, but it’s really a cute idea, and worth doing, if you like it!
Important points:
The first and foremost thing about feng shui cures that work is that they have to be really liked by you and make sense in your overall home decor style.
If you bring a so-called powerful feng shui cure that is supposed to work but looks totally out of sorts in your space, I assure you it will not create good feng shui for you. Maybe even quite the opposite.
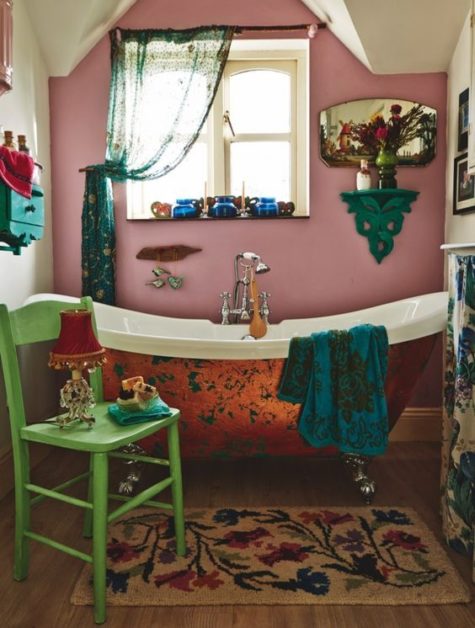
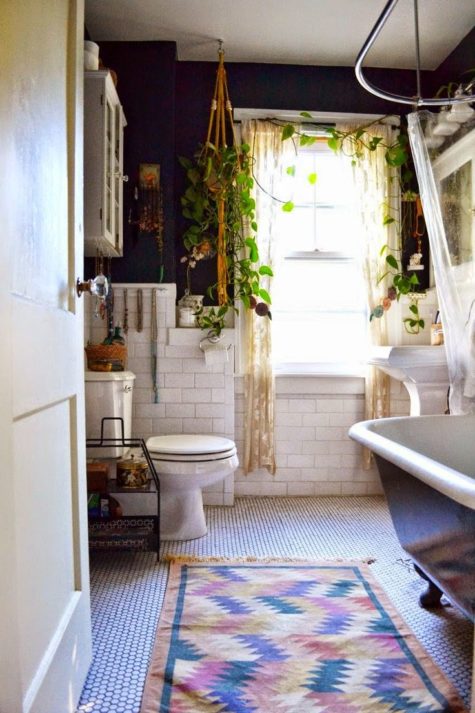
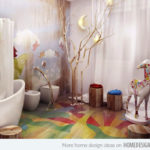
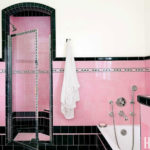
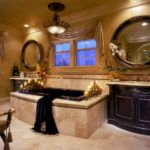
Last but not least:
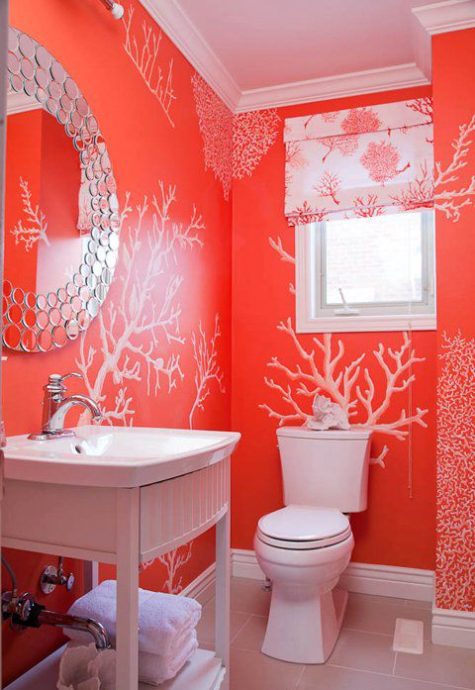
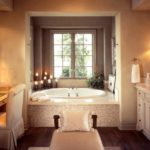
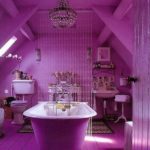
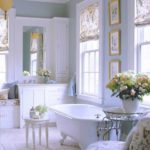
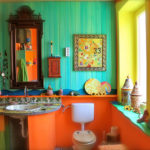
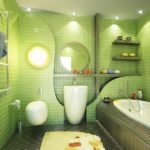
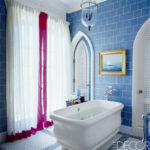
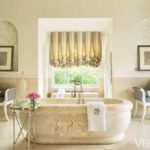
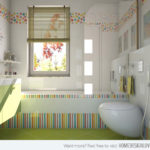
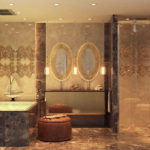
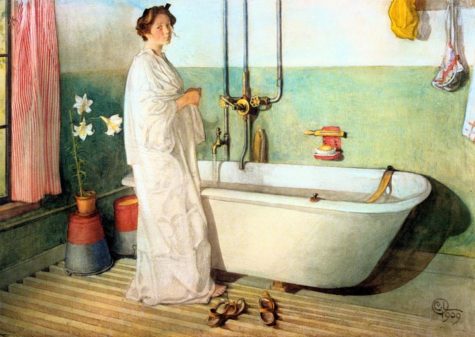
Lastly, I thought it might be fun to upload a gallery of really amazing and wonderful bathrooms so that we can drool, and fantasize, and dream…


Sources:
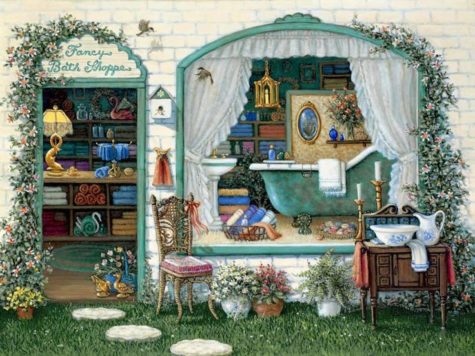
Luxuriously Delicious Ideas For The Bath
In yesterday’s post, we learned that Flower cleansing baths purify and uplift. So, I thought it might be luxuriously fun and interesting to explore the world of do it yourself bath products.
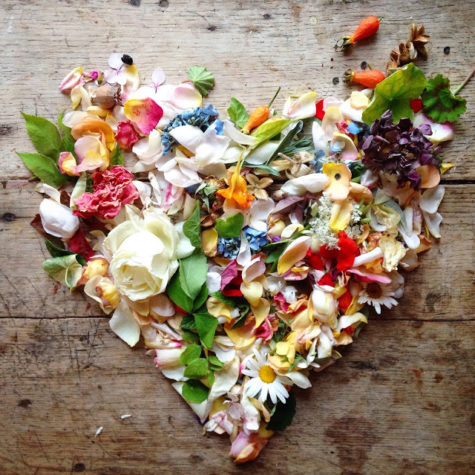
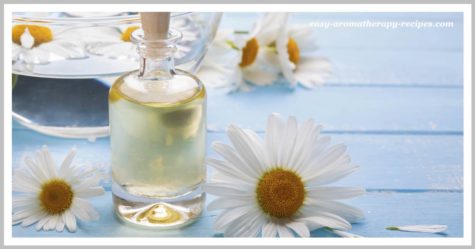
Some of the oldest beauty treatments in the world incorporate flower petals and oils. Flowers not only enhance the fragrance of DIY recipes and can be used for aroma therapy, but they also have chemical properties that can be used to benefit your skin and hair. On this page, you’ll find different ways to add some flower power to your DIY beauty routine.
Some of these recipes use oils, fresh petals and dried flowers. Regardless of whether you’re picking your own flowers or buying them, it’s important to avoid blooms that have been treated with pesticides. Look for organic ingredients whenever possible, because commercial flowers can be subjected to particularly heavy pesticide treatment.
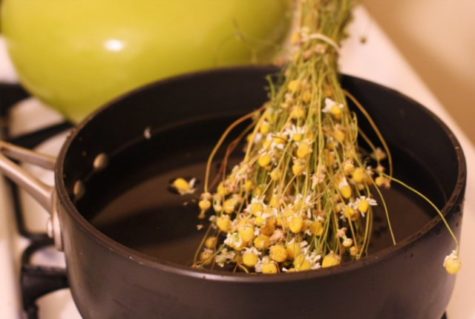
A Floral Facial
Facial steams can help improve circulation to the face and open pores, while this blend can help soothe skin. Plus, treating yourself to a facial steam can be incredibly relaxing. The petals of the calendula flower, also commonly called marigold or pot marigold, are anti-inflammatory. The chamomile has been shown to have calming properties.
Ingredients:
- 1/4 cup dried calendula petals
- 1/4 cup dried chamomile flowers
Instructions:
Boil 2 quarts of water and remove from heat. Add the flowers and let them steep for two minutes. Then, place your face at least 12 inches over the pot (getting too close can burn), and drape a towel over your head to create a tent over the pot.
For an even more relaxing experience, you can add a few drops of lavender or peppermint essential oil. Allow the steam to bathe your skin for a minute and then come out for a few breaths of fresh air. You can repeat this process about five times.
After the steam, you can rinse your face with cool (not cold) water or a mild cleanser, and follow with a moisturizer.
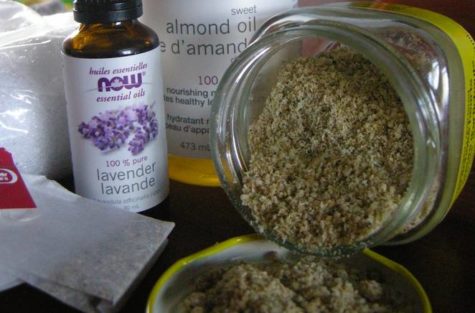
Oatmeal Almond Facial Scrub
“If you wouldn’t eat it, then don’t put it on your face.” Skin is porous, and everything that goes onto it eventually makes its way inside. Since all conventional facial cleansers, scrubs, and moisturizers are full of toxic chemicals, it’s best to avoid them completely. By sticking with edible ingredients – items that you already have in your kitchen, or can buy easily – you’ll rest assured knowing that you are not harming your body over the long term.
Best of all, there are no nasty plastic microbeads to contaminate the local water supply.
This homemade facial scrub leaves your skin feeling refreshed and silky smooth. The oatmeal exfoliates, the almonds moisturize, and the lavender-chamomile combination is soothing.
Homemade Oatmeal Scrub with Almonds, Lavender, and Chamomile
- 1/4 cup raw almonds (or 2 tbsp almond flour)
- 4 tbsp oatmeal
- 1 tbsp cornstarch
- 1 tbsp chamomile flowers (I used the contents of chamomile tea packets)
- 2 tsp sweet almond oil + 5 drops lavender extract — OR — 2 tsp lavender oil
Chop raw almonds in a spice grinder or food processor until they are a fine meal. Skip this step if using almond flour. Add remaining ingredients and blend well until mixture is a soft granular powder. To use each morning, put half a tablespoon of this mixture in your palm and add just a couple of drops of water. Rub hands together to make a paste. Gently rub and massage it onto damp skin in circular motions to exfoliate. Wash off with warm water and a warm, damp washcloth; end with a splash of cold. Keep the scrub in a well-sealed glass jar and it will stay fresh for months.
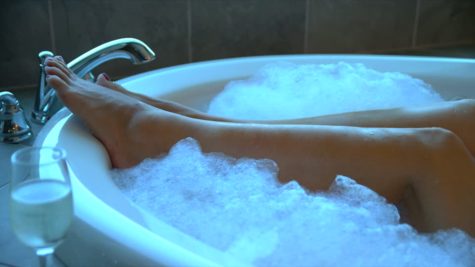
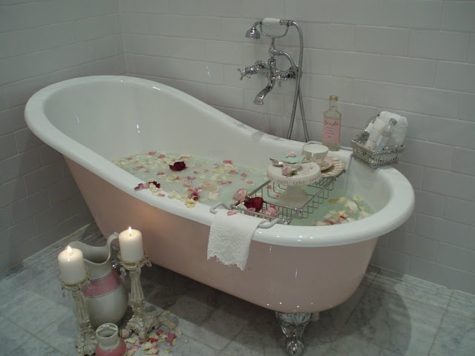
Luxurious Baths
People have been bathing in various things for years; Cleopatra bathed in asses’ milk while Mary queen of Scots preferred to soak in a tub of hot wine.
Even today most of us won’t even contemplate getting in the tub without adding a little something to it! Unfortunately, most of us end up adding a few cheap bubbles that have absolutely no value to our skin what so ever, and why when we can transform our bath into a heavenly therapeutic experience.
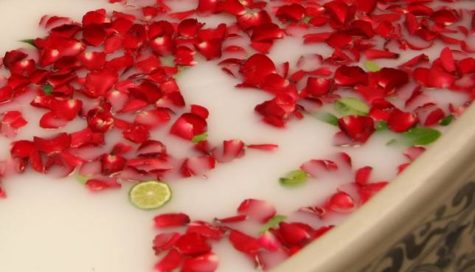
A Delicious Milk Bath
A milk bath is a bath taken in milk instead of water. Often other scents such as lavender, honey, and essential oils are added. Cleopatra, Elizabeth I of England, Elisabeth of Bavaria, and others have historically acclaimed the beautifying benefits of these baths.
Cleopatra was definitely onto something when she indulged in daily beauty treatment milk baths. It turns out the natural lactic acid found in milk is a form of alpha-hydroxy-acid (an ingredient which can be found in some of the most expensive exfoliating products). This type of acid gently dissolves proteins to exfoliate dead skin cells, which reveal fresh, younger looking skin underneath.
The lactic acid found in milk is extremely mild, so don’t worry, it won’t strip or irritate the skin. In fact, milk is quite soothing on dry skin.
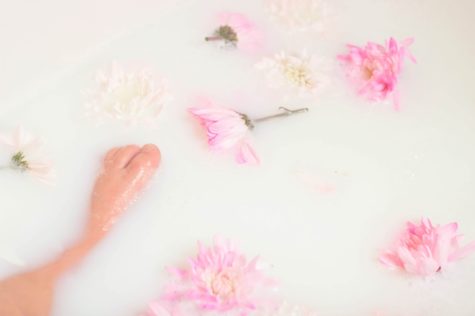
Milk is also rich in vitamins and minerals — most notably Vitamin E and zinc — which help slow the process of aging and retain skin’s natural elasticity.
Milk baths seem to be making a comeback in modern times as well. Many upscale spas in major cities offer a number of milk treatments such as hot milk and almond pedicures! That sounds divine!
But you don’t have to spend a lot of money at a fancy spa (or travel back in time) to reap the benefits of milk in your beauty routine. Milk bath recipes are some of the quickest, easiest homemade bath products you can make.
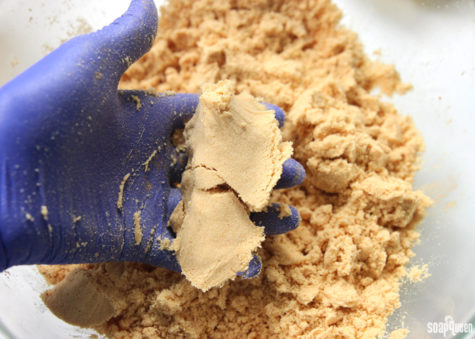
A Simple Scented Milk Bath
Here is a simple recipe that you can mix up in minutes and add your own scent to as well.
Ingredients
- 2 cups whole powdered milk
- 1/2 cup cornstarch (soothes and relieves dry, itchy skin)
- 1/2 cup baking soda (skin softener)
- Essential oil of your choice (I put in about 10 drops of lavender)
Directions
Combine the powdered milk, cornstarch and baking soda in a large glass container. Put the lid on and shake the jar until the powders are completely mixed.
Remove the cap and add the essential oil. Re-cap the jar and shake to combine. Let sit for 24 hours before using, to let the ingredients and the essential oil completely combine. Store in a cool, dark place.
To use, pour 1 to 2 cups of your milk bath under hot running water. Lie back and relax!
A couple of tips:
- This is one time when lowfat is NOT your best bet. The higher the fat content of the milk, the more nourishing it is for you skin.
- Goat’s milk and cow’s milk have higher amounts of fat which provides more conditioning, but you can also use rice, soy or coconut milk (great alternatives for vegans.)
- Also, lactose intolerant folks don’t have to worry about bathing in milk. The milk isn’t being drunk, so there won’t be any digestion problems.
Make up your own recipe:
It’s very simple to experiment with your own recipe, all you need is powdered or fresh milk. You could even experiment with a can or two of goats milk. From this base, you can branch out and add one or more of the following:
- Honey
- Oatmeal
- Essential Oils
- Herbs – fresh or dried
- Spices – nutmeg, allspice, etc
- Flowers – fresh or dried
- Seaweed
- Sea salt
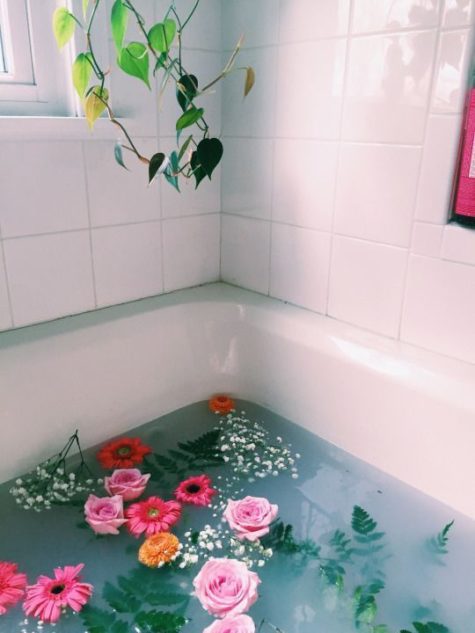
A Floral Feng Shui Bath
To create essential yang chi and clear your mind and rejuvenate your body, simply bathe in a bathtub that has been sprinkled with the petals of at least five different flowers in the five colors of the five elements. There should be pink, yellow, white, blue, and green petals from flowers or herbs, like rosemary, in your bath. You may also wish to include Bach flower essential oils in your bathe to help create a beautiful aroma as well, or use fragrant flowers such as lavender, jasmine or gardenia to perfume your water. This uplifting ritual will help to infuse your body with beautiful yang energy and soothe your mind.
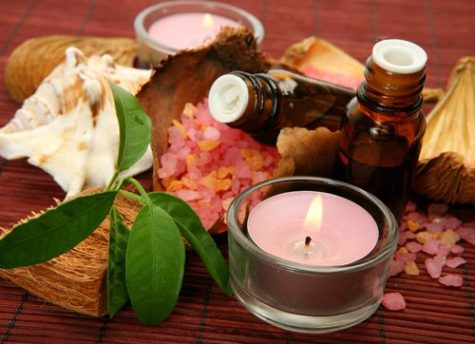
Luxuriously Aromatic Bath Oils
Adding essential oils to your bath water is one of the best aromatherapy treatments there is, more aroma molecules are released from the oils whilst in the bath than during a massage. As you soak in the bath the hot water softens the skin which in turn speeds up oil absorption, this allows the essential oils to become more effective and potent on both the mind and body.
They are not just a simple and easy way to add a touch of luxury to your bath; they will moisten and nourish your skin, along with treating the everyday ailments that you may be suffering with.
You will also notice the aroma of the oils is so much stronger in the warm water; it’s almost like sniffing a bunch of flowers. So the next time your thinking of having a bath add a few drops of your homemade bath oil, lie back, close your eyes and enjoy.
The basic principle in making bath oils is to select essential oils for their properties and fragrance, then add them to 4 tablespoons of base carrier oil.
The easiest base oils to use in your homemade bath oils are the light base oils such as Castor Oil, Almond Oil, Jojoba Oil or even simple Sunflower Oil.
Pour your base oil into a dark or clear glass bottle or jar. If using a clear glass jar you will need to protect the oils from waning by storing the finished oils in a dark place, a bathroom cupboard is perfect for this.
Add about 20 drops of your chosen essential oils cover and shake well.
Leave the homemade bath oil to blend and mature for about 2 weeks before using.
How To Use Your Bath Oils
- Simply add 1 tablespoon of scented oil to the bath and swish around to disburse. Once in the bath use a sponge to massage the oil into the skin.
- For an extra beauty treatment whilst soaking in the bath, mixing a few elderflowers with some live yogurt will make a great little face pack that can clear the skin and help prevent wrinkles.
Bath Oil Recipes
Happiness Bath Oil
This homemade bath oil leaves you feeling warm and happy inside!
- 4 tablespoons of base carrier oil combined with:
- 10 drops Sandalwood
- 5 drops Jasmine
- 5 drops Rose
- 5 drops Bergamot
This bath oil has a wonderfully rich and floral fragrance. A simple combination that will leave you feeling very calm and relaxed.
- 4 tablespoons of base carrier oil combined with:
- 20 drops Jasmine
- 8 drops Orange
Revitalising Oil
All of the essential oils in this recipe have been chosen to help relieve stress and depression. This uplifting oil will defiantly to put a spring back in your step.
- 4 tablespoons of base carrier oil combined with:
- 12 drops Geranium
- 6 drops Sandalwood
- 6 drops Lemon
- 2 drops Clary Sage
Relaxing Oil
Very Sweet, very fresh and very relaxing, what more can I say!
- 4 tablespoons of base carrier oil combined with:
- 12 drops Sandalwood
- 8 drops Orange
- 4 drops Rose
- 2 drops Pine
- 2 drops Lemon
Alcohol Based Bath Oil
Adding a small amount of spirits will help to distribute the oil in the bath more evenly. You will need to combine;
- 3 fl oz (100ml) Castor Oil
- 4 tablespoons vodka or brandy
- 10 drops essential oil(s) of your choice.
As with the other bath oil recipes, pour into a dark or clear glass jar or bottle (protecting the oils from daylight if using clear glass) shake well and leave to mature for 2 weeks.
Add 2 tablespoons to each bath and swish it about.
Shampoo Based Bath Oil
Baby shampoo is another very efficient carrier of oils, again helping the oils to disburse quickly and evenly in water.
- 4 fl oz (125ml) base oil (Almond Oil or Sunflower Oil
- 4 tablespoons mild baby shampoo
- 10 drops essential oil(s) of your choice
Pour the base oil into a glass bottle or jar, add the shampoo and give it a good shake.
Add the essential oil, shake again then leave to mature for 2 weeks, not forgetting to protect the oils from daylight. Add 2 tablespoons to each bath and swish it about.
Singular Bath Oils
Adding oils to a bath really doesn’t need to be completed, you can start by adding a single essential oil to your bath water. Essential oils normally last about 2 years if kept in a cool dark place and you literally only need a few drops so they are very cost effective.
I’ve listed below those that I would recommend as the best singular all rounders that can be used and enjoyed at any time of the year.
Tips
- Before adding any oils to the bath make sure you close the bathroom door so that you can keep as much of the scent in the room as possible.
- Add the oils drop by drop and don’t be tempted to add more, working on the theory that adding twice as much will get rid of a headache quicker doesn’t work and may just end up irritating the skin.
- On average you will need about 10 drops per bath, but with some of the stronger smelling oils you will only need 5 drops. Stronger smelling oils include; eucalyptus, peppermint, bay, basil, lime, lemon, thyme, rosemary.
10 Best Essential Oils for the Bath
- Bergamot for depression – 5 drops
- Chamomile for insomnia or itchy skin – 7 drops
- Frankincense for sedative, calming and mood sweetening – 8 drops
- Geranium for relaxing yet uplifting and energizing – 10 drops
- Jasmine for apathy, stress or fatigue – 8 drops
- Lavender positive, soothing and relaxing – 10 drops
- Neroli for hypnotic with antidepressant properties – 8 drops
- Patchouli for energizing and invigorating – 5 drops
- Rose for happiness and pleasure very romantic – 10 drops
- Sandalwood for sensual and mellowing a good aphrodisiac – 8 drops
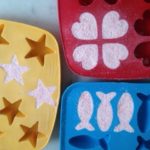
How to Make Bath Oil Beads
Bath oil beads are easy to make at home using a few specialty ingredients that you can find at natural health stores and drug stores. They can be used to promote relaxation, and healing essential oils can be used for various skin types and conditions. This recipe for bath oil beads yields approximately 10-20 beads, depending on their size.
- Step 1
Grind 2 teaspoons Epsom salts and 1 teaspoon sea salt in a clean coffee grinder or spice mill until a fine consistency is reached.
- Step 2
Combine 3 teaspoons baking soda, 1 teaspoon citric acid, 2 teaspoons corn starch, 1 ½ teaspoons goat milk powder, and the ground-up salts in a small mixing bowl. Mix thoroughly.
- Step 3
Combine 1 ½ tablespoons cocoa butter with ½ tablespoons virgin coconut oil in a small saucepan. Heat the mixture over low heat until completely melted, stirring occasionally.
- Step 4
Add 6 tablespoons of the dry ingredient mixture to a small mixing bowl, and stir in the melted cocoa butter mixture slowly. Add 20-25 drops of essential oil of your choice, or a combination of essential oils, and then mix thoroughly.
- Step 5
Form the resulting mixture into several small, round bath oil beads with your hands. These can be any size you like, but the smaller you make them, the more you’ll have to use per bath.
- Step 6
Add a handful of bath oil beads directly to your warm or hot bathwater, and soak in the tub to enjoy. Store the bath oil beads in a glass jar with a tightly-fitting lid and keep it in a cool, dry place.
Bath Salts Basics
Bath salts are easily prepared, and are much preferable to the commercial mixtures, which tend to be irritating to the skin. They are also an easy alternative to using herbs in the bath, as this tends to be messy. The basic ingredients are table salt, baking soda (sodium bicarbonate) and Epsom salts (magnesium sulfate). Some herbalists also use borax. Add the ingredients to a large bowl or plastic bag in these proportions:
Basic Recipe For Bath Salts
- 3 parts Epsom salts*
- 2 parts baking soda
- 1 part table salt (or Borax)
Mix thoroughly. From this base, you can create any fragrance bath salts you desire. You can make up a large quantity of your favorite bath salt, or two or three fragrances, if you prefer. Simply divide the above mixture and set aside those portions to be separately mixed with the fragrance and colors of your choice.
It’s wise to add the power of colors to bath salts. Use plain food coloring for this purpose, letting it fall drop by drop onto the salt base. If two or more colors are required to mix an exotic hue (such as purple), mix these in a spoon first and then add to the salts to avoid creating a two-toned product.
Recommended colors for bath salt mixtures are included in many of the recipes. For those who read “Color: White,” you can simply leave them untinted. Add many drops for a darker colored bath salts; fewer for a lightly hued bath salts. Mix the color into the salts with a spoon until it is evenly distributed. Or, if you are using a plastic bag, you can shake and work the bag until you are satisfied with the color.
Now add the essential oils drop by drop, one ingredient at a time, until the scent seems right. Mix with a spoon (or shake) until all salt particles are moistened. Be prepared to spend some time doing this, perhaps a half hour or so. Here is where the plastic bag comes in handy!
If the Bath Salts are mixed for a ritual purpose, visualize the energies within the oils merging with each other and with the salt as you mix. Keep the salt’s goal in mind while you stir. Use or store until needed.
You can make your own bath salts blends using essential oils and oil blends for specific purposes, or you can follow this tag for specific bath salts recipes: Bath Salts

Golden Buddha Bath Salts
Lightly mix the ingredients together and place them in a jar for storage. A great prosperity blend.
- 1 cup salt
- 8 drops lotus oil
- 2 drops cinnamon oil
- 8 drops sandalwood oil
- 3 drops myrrh oil
- 2 drops allspice oil
Prosperity Dragon Smoke Bath Salts
Lightly mix the ingredients together and place them in a jar for storage.
- 1 cup salt
- 5 drops cherry oil
- 2 drops anise oil
Lavender Mineral Bath
Mix all ingredients well (adding the essential oil last) store in a glass jar or tin and use ¼ cup per bath.
- ½ cup solar dried sea salts
- ¼ cup Epsom salts
- ¼ cup dead sea mineral salts
- 40 drops lavender essential oil
Magickal Uses: clairvoyance, cleansing, consecration, happiness, healing, love, passion, peace, peace of mind, protection, psychic protection, purification, tranquility.
NOTE: Epsom Salts should not be used by diabetics or any other person with circulatory problems.
Bubble Baths
Bubble baths are simple to make. All you need is a bottle of clear organic shampoo, essential oils, and a handful of fresh or dried herbs (optional). Here’s an easy recipe:
Lavender Bubble Bath
- 1 bunch Lavender
- 1 large bottle clear organic shampoo
- 5 drops Lavender essential oil
- Clean wide-neck jar with screw top
Place Lavender head down in the jar. Cut down to fit. Add shampoo and Lavender oil. Close and place in sunny window. Strain and re-bottle. Use 1 tbsp. in a bath.
Magickal Uses: clairvoyance, cleansing, consecration, happiness, healing, peace, peace of mind, protection, psychic protection, purification, tranquility.
Bath Bombs
When I was younger, I loved bath bombs, but avoided them as I’ve gotten older because store bought versions typically contain artificial ingredients such as dyes and fragrances.
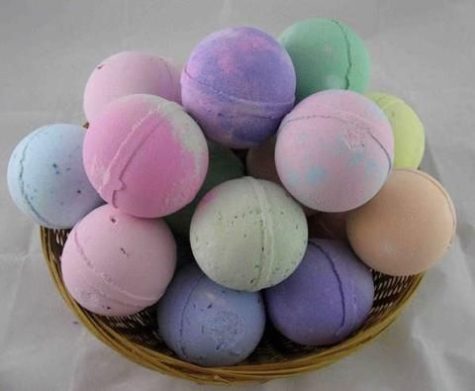
These homemade bath fizzies are a great solution! Made from nourishing sea salt or epsom salts, alkalizing baking soda and fizzing citric acid with a nourishing oil and vanilla base.
These can be packaged for a great gift or made countless ways for relaxing baths anytime! They are simple to make with kid-safe ingredients and are completely versatile. Let the kids think of ways to mix up the scents, colors, and other customizations.
Bath bombs only take seconds to make, so it is important to have the ingredients on hand and measured before you start. Most of the ingredients are pantry staples in many homes, but make sure you have these on hand:
- Baking Soda
The backbone of this recipe is alkalizing baking soda. It is a necessary complement to the acidic citric acid and part of the fizzing reaction. Food-grade aluminum free baking soda is best.
- Citric Acid
The more obscure ingredient in this recipe that a lot of people don’t have on hand is citric acid. It is necessary for the fizzing reaction that makes bath bombs feel like bathing in champagne. You can find citric acid on amazon, here’s a link: Citric Acid
- Corn Starch or Arrowroot
Corn starch provides the silky feel that we all love from bath bombs. I usually use organic corn starch powder in this recipe. Arrowroot also works but doesn’t provide quite as silky of a finished product.
- Salt, Oil and Liquid
These are all very versatile and you can pick any combination that you have on hand. You’ll need some kind of:
Oil: Pick a simple oil like olive oil, almond oil or coconut oil or get more fancy with sea buckthorn oil, argan oil or apricot oil.
Salt: Stick to basic salt or take it up a notch with epsom salt or another favorite salt option.
Liquid: Basic water works, but I also love using organic witch hazel for some extra skin soothing.
- Scents and Colors
This is where the options get endless. Use your favorite essential oils, add dried herbs or make them scent free. You can even add some natural dyes to change the color.
- Other Equipment
These are easy to make with measuring cups and your hands, but for a fancier and more uniform product, it helps to also have a digital scale to get the proportions exactly right.
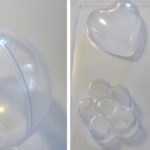
- Molds
For the easiest version, just form these into balls with your hands, but if you are making as gifts or just want fancier shapes, molds are the way to go. You can buy actual bath bomb molds at amazon if you’d like. But you could also use those plastic holiday ornaments that come apart or Easter eggs for the molds if you already have either of those on hand. Some tutorials recommend greased muffin tins. I think those silicone ice cube and candy molds would also work just fine.
Here are a bunch of different ideas for molding your bath bombs:


- Added bonus
It seriously makes your whole room smell amazing while you make these!
Bath Bomb Basic Recipes
I found two basic recipes and am including them both here:
Bath Bomb Recipe 1
- 8 ounces Baking Soda (about 1 cup)
- 4 ounces Citric Acid (1/2 cup)
- 1/2 cup (4 ounces) Sea Salt or Epsom Salt
- 4 ounces Cornstarch (about 3/4 cup)
- 2 tablespoons oil of choice (this is my personal favorite but any liquid oil will work)
- 2 teaspoons witch hazel (or water) plus a little more if needed
- 1 teaspoon vanilla extract (or more water)
- 30-40 drops of Essential oils or powdered dried herbs (ginger is great)
Bath Bomb Recipe 2
- 4 oz. baking soda
- 2 oz. corn starch
- 2 oz. citric acid
- 2 oz. Epsom salt
- 1 to 1 1/2 teaspoons water
- 1 teaspoon essential oil
- 1 1/4 teaspoon oil (I like coconut or olive oil here)
- 1-2 drops food coloring (optional)
Makes two bombs (you can easily double or triple this recipe).
Instructions:
In a bowl combine the dry ingredients. Whisk to remove any clumps, corn starch tends to be clumpy. In a small glass jar stir together the wet ingredients. If you’re using coconut oil, give it a quick melt in the microwave or stove top first so it will more easily combine with the other ingredients.
Slowly pour the liquid mixture in with the dry mixture, whisking as you go. If you see the mixture fizz or foam, you may be adding the liquid too quickly. Once all the wet ingredients are combined with the dry, take a small amount in your hand and squeeze it together.
Mixture should hold together when squeezed without crumbling. It should stick together fairly well in one or two big chunks.
If it’s still too powdery to hold together, just add a tiny bit more water (or witch hazel) and mix until it does hold together.
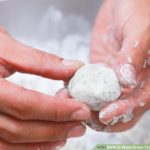
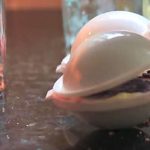
If you are using a mold that makes a ball, fill each half of your bath bomb mold with the mixture until it’s just overflowing a little. Press together, then gently remove one side of the mold. Place the bath bomb on a tray and allow to dry out just a little (10-12 minutes) before removing the other side. Once you are ready to remove the other side, gently invert the bath bomb so the uncovered side is facing down, then gently remove the other half of the mold from the top. The key word, if you haven’t noticed, is gently. These can fall apart on you very easily if you’re not careful. If a bath bomb does crack in half while you’re removing it, you can gently press it back on top of the other half, or remove all the mixture back to the mixing bowl and start the molding process again. I had this happen to a few, so don’t fret, it’s easy to fix.
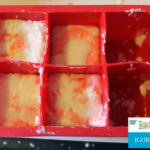
If you are using tins or trays, quickly push mixture into the greased muffin tins or any other greased container. Press in firmly and leave at least 24 hours (48 is better) or until hardened. It will expand some and this is normal. You can push it down into the mold several times while it is drying to keep it from expanding to much. Using the metal molds will create a stronger and more effective final bath bomb.
Note: I have seen some reports of the bath bomb sticking to these type of molds and refusing to come out., so be sure it is well greased.
Once they are completely out of the mold, allow them to dry out for 8 hours or overnight. Once very dry, you can wrap them in plastic wrap and store in a dry place until you’re ready to use them, or you can gift them to friends.
Tips and Variations:
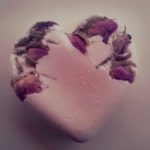
You can add dried flower buds, like lavender buds, to these pretty easily. Just remember to use food grade dried flowers to avoid flowers that might have been grown with pesticides as you don’t want to soak in a bath with that. No thanks! Do keep in mind that after using a bath bomb with dried petals, you will have to remove these from your tub. So if that bothers you, then leave the buds out.
If you want to create two tone bath bombs, just mix up your batter in two separate bowls and only add the food coloring to one. Easy!
Here’s a YouTube tutorial:
Bath bombs are a great way to relax in the tub after a long day of dealing with kids, cooking, and all the other activities that motherhood entails. If you’ve never tried them, I highly encourage it, as it’s one of my favorite things to do at the end of the day.
Fool proof homemade bath bombs These turned out to be a lot of fun to make, and they are even more fun to use! I highly recommend giving them a try, or you could make a batch to give away to friends or family. Enjoy!
Sugar Scrubs
Those expensive sugar scrubs you see in department stores and spas… they cost pennies to make! Sugar scrubs are a simple beauty recipe with countless variations, and they can be incredibly moisturizing and exfoliating to the skin.

They can be used on face, body, and (especially) feet, for silky skin. You can add endless ingredients for your desired outcome, and they take under ten minutes to make.
Ingredients
- 1/2 cup sugar (white or brown sugar- preferably organic)
- 1/2 cup oil (olive oil and coconut oil work great)
- Optional: essential oils of your preference
Instructions
- Mix all ingredients and store in an air tight jar.
- Use 1 tablespoon as needed in the shower. Scrub skin with the mixture and rinse will. it will leave your skin feeling like silk.
Sound simple? It is!
Variations
- Pumpkin Pie Scrub: 1 cup of brown sugar, 1/2 cup coconut oil, 1/2 tsp vitamin E oil and 1/2 tsp pumpkin pie spices (or just 1/2 tsp cinnamon)
- Vanilla Brown Sugar Scrub: 1 cup brown sugar, 1/2 cup almond oil, 1/2 tsp Vitamin E oil and 1 tsp real vanilla extract
- Lemon Hand Scrub (for after washing dishes): 1 cup white sugar, 1/2 cup olive oil, 1/2 tsp vitamin E oil, 15-20 drops (or more) of lemon or orange essential oil
- Vanilla Lavender Relaxing Facial Scrub: 1 cup white sugar, 1/2 cup almond oil, 1/2 tsp Vitamin E oil, 1/2 tsp real vanilla extract and 15 drops lavender essential oil
These last on the counter for up to 2 months (or more) and smell good enough to eat… Actually, they are good enough to eat, but don’t… sugar is bad for your intestines!
Salt Scrub
As an alternative to the sugar scrub, here’s a recipe for a salt scrub:
Pink Himalayan Salt Scrub
- 1 cup of Salt (your choice)
- ¼ to ⅔ cup of Oil (again, your choice, for this scrub I used equal parts of jojoba, avocado and coconut)
- 1 T Glycerin
- ½ t Vitamin E
- Approx 20 drops of essential oils (or more depending on oil and strength desired)
Instructions:
- Add ingredients to the bowl and mix well.
- Scoop into your jars and enjoy!
Variations:
For a grapefruit and ginger scrub, add the following ingredients to the basic recipe:
- 1 tsp grated fresh ginger,
- 1 tsp ground Frankincense
- zest of grapefruit
For a citrus and poppyseed scrub, add the following ingredients to the basic recipe:
- 1 tbsp poppyseeds
- zest of citrus fruit
10 Steps to Your Most Heavenly Bath Ever
- Find the Quiet
The most essential factor for total decompression? Silence. Leave your phone in the other room. Tune out the noisiness of the world. Breathe.
- Dim the Lighting
Turn down the lights for a soothing ambiance, then burn a candle (or three). The warm, flickering light and aromatic scent will make your bathroom feel much more spa-like.
- Set the Temperature
Run the water hot, but not too hot. Select your preference to the touch, but bare in mind that water temp should be no more than 95 to 101°F. Any hotter will actually irritate your nervous system and make it harder to relax.
- Add Some Salt
Sprinkle Epsom salts into your tub as it begins to fill. These small miracles dissolve in water to soothe aching muscles, ease cramping, relieve stress, increase circulation and even detoxify your skin. Trust us, you’ll feel the difference.
- Add Some Suds
Next, pour some grown-up bubble bath in right where the faucet stream meets bath water. Not only will this pamper your skin, the scent and comforting bubbles will help you reach a deeper state of relaxation.
- Sip and Soak
This is a time to sit back and fully indulge. Our indulgences of choice? A crisp glass of white wine or soothing herbal tea to drink at leisure, depending on the mood.
- Lather Up
Clean skin is healthy skin. Work a rich, moisturizing bar soap into a foamy lather and cleanse from head to toe.
- Exfoliate Well
Before bath time is over, use a soft bristle body brush or loofah to gently buff, rid dead cells and reveal your softest skin.
- Dry Off
Getting out of the bath is never easy. But it will be light years better if you’re wrapping up in a plush, cozy robe afterward.
- Seal the Deal
Once you’ve properly dried, treat your skin to one last layer of pampering: A restorative body oil to lock in moisture…then promptly crawl into bed silky smooth and squeaky clean.
My Sources:
I pretty much looted the internet for all this cool info. Here’s a list of links to all the places I found cool stuff. If I missed a few, well… I’m sorry!
Sources:
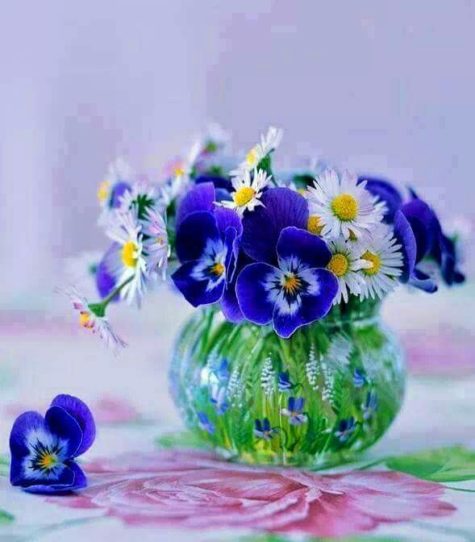
Stopping To Smell The Roses

One of the most powerful ways to improve your home and life is by adding plants and flowers.
Feng Shui and Flowers
Beautiful plants and flowers lift the energy of your home, bringing beautiful healthy growing chi. And the most auspicious part of plants? Flowers. They are are the yang expression of a plant.
Flowering blooms aren’t just lovely to look at, they can promote love and are regarded as symbols of good fortune and bring auspicious energy. You can use them to brighten up your home by displaying them in vases in your home. A mixed bouquet brings bright, happy yang energy to the house. Think of flowers as the way a plant smiles – and those smiles create happy feelings for you, your family, and visitors to your home.
Bear in mind, though, that dried flowers are generally regarded as dead energy, making them unsuitable for lifting chi. Here are some more important guidelines on flower feng shui.
- Display flowers as an offering.
If you’d like to imbue fresh, spring-time or renewal energy for yourself or your home, place flowers in a vase according to the energy you wish to inspire. For healing energy, select white flowers, for love choose pink, and for wealth, display purple or gold flowers.
- Offer flowers to those in need.
When friends or family members are ill, offer them a bouquet of white flowers, such as magnolia or lilies. If friends or family are in need of more prosperity, offer a bulb flower, such as narcissus to inspire greater wealth. Golden-colored chrysanthemum and narcissus are always a good choice, too, for promoting wealth chi, particularly when moving into a new home, beginning a new undertaking, or at the beginning of the New Year. Pink hued flowers represent fond affection and happiness and are perfect for friends and creating loving ties.
- Singles should display peonies.
The Chinese have long held that peony flowers are the flower of romance and many a young Chinese woman displayed red peonies, the ultimate symbol of youthful love and romance. Singles who wish to marry should display a vase of peonies or a painting of the blossoms in the living room, where they represent seeking love versus in the bedroom where the flowers are a symbol of carnal love.
- The lotus is the flower of enlightenment.
As a symbol of purity, the lotus rises from the muddy waters to bloom, symbolizing rising above the worldly problems. Buddhas are often shown seated in a lotus and the Buddhist chant Om Mani Padme Hum literally means “Hail to the Jewel in the Lotus.” As such, it’s highly regarded as a symbol of great good fortune and enlightenment. The flower represents unending success and ceaseless abundance. Display these in a vase or as a painting or figure to inspire your life and home.
- Orchids are the career flower.
Despite their reputation as fickle flowers, orchids are quite simple to raise and bring beautiful career chi to those who display them. Purple orchids bring opportunity and success and are regarded as the most beneficial color to display. In a living room, the orchid bestows family luck and harmony.
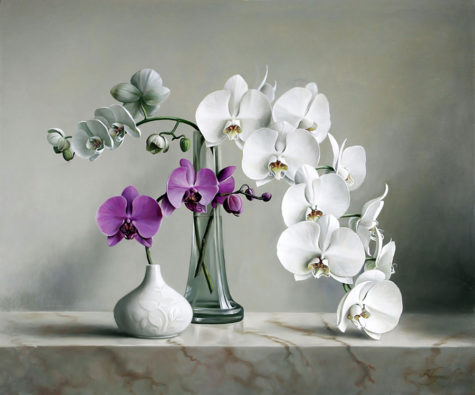
- Flowers to symbolize prosperity, success, and wealth.
Chrysanthemum seen so abundantly in floral shops and in fall gardens represents bumper harvests, abundant joy and a long, fruitful life. Other flowers that represent acquired wealth include bulb flowers such as narcissus, tulips, paperwhites, gladiolas, iris or lily.
- Flowering branches represent longevity, overcoming adversity.
Whether it’s a plum, cherry, or peach branch, flowering branches because they typically bloom in winter represent overcoming obstacles. These are wonderful reminders of succeeding after difficulties and of longevity.
- Flower cleansing baths purify and uplift.
To create essential yang chi and clear your mind and rejuvenate your body, simply bathe in a bathtub that has been sprinkled with the petals of at least five different flowers in the five colors of the five elements. There should be pink, yellow, white, blue, and green petals from flowers or herbs, like rosemary, in your bath. You may also wish to include Bach flower essential oils in your bathe to help create a beautiful aroma as well, or use fragrant flowers such as lavender, jasmine or gardenia to perfume your water. This uplifting ritual will help to infuse your body with beautiful yang energy and soothe your mind.
- Choose color combinations carefully.
Although beautiful, red flowers are not regarded as auspicious for giving to someone who is ill and should be avoided when visiting someone sick or giving at the beginning of a relationship as the color can be overpowering and “flame out” the romance. Red peonies symbolize passionate, amorous love and can reawaken a dormant sex life for a couple when displayed in the living room.
When giving flowers in a new relationship, opt for sentimental colors such as pink or yellow or a combination of these colors. Red and white flowers should never be put together, but a rainbow of colors is always a good color option as long as all colors are represented. Purple is regarded as auspicious and harbinger of prosperous times and success, as is gold. Purple, gold and white are especially harmonious and auspicious.
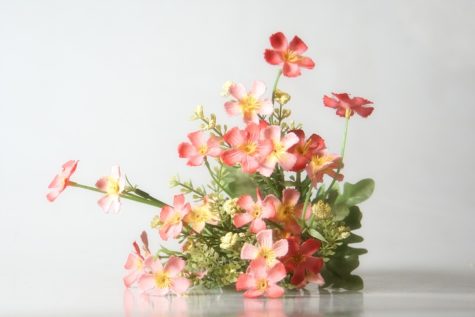
Have you ever gazed at a lush and beautiful floral arrangement and wished you knew how to pull one together? Now you can. We turned to a flower pro to give us her flower arranging tips, tricks, and styling shortcuts so you’ll never have to shell out money for a store-bought bouquet ever again.
Flower Arranging 101
- Create a foundation with foliage. This is the framework for the arrangement. Build a pleasing, asymmetrical shape that leans on the lip of the vase and has a high point in back. Make sure it’s not too thick, so there’s room for the flowers.
- Add large “face” flowers, cutting stems at different lengths so some blooms nestle low and others extend. The crisscrossed foliage stems in the vase work like webbing to hold flowers where you want them. Take your time, experimenting until it looks good.
- Weave in wispy elements, like climbing flowering vines or ferns, in three strategic spots: up high on one side, down low (spilling out of the vase), and in the middle, as if they’ve pushed their way through a cluster of larger blooms.
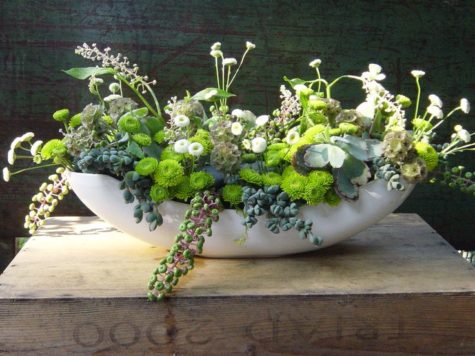
Flower Arranging Tips and Tricks
- Use opaque vases instead of glass. They hide messy stems and quietly complement flowers rather than competing with them.
- Mimic the randomness of nature. Think asymmetry, odd numbers, and varied depth and height when arranging.
- Don’t be afraid to cut tall flowers very short.
Playing with scale can give even a solitary bloom a lot of impact: Imagine looking down into the face of a single sunflower in a low, round bud vase.
- Clip backyard plants to make arrangements more interesting.
Shrubbery or garden foliage, like forsythia, coleus, begonia leaves, and ivy, can add depth to a display. And don’t dismiss beautiful weeds, such as Queen Anne’s lace.
- Opt for slender-necked vessels if you’re unsure about your skills.
Vases with smaller mouths do the work for you—holding flowers artfully without letting them plop—so even the most basic display looks gorgeous.
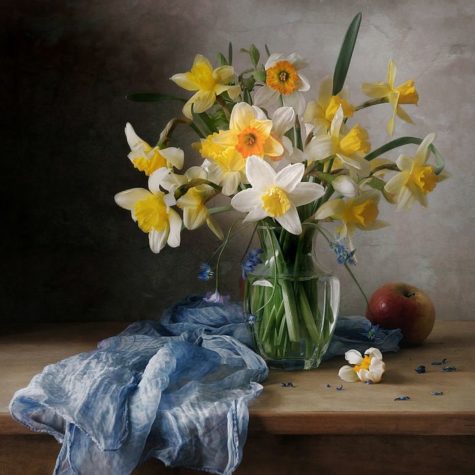
The Only Vases You Really Need
- A tall, fluted column, slightly wider on top than on the bottom, holds supermarket bunches, bouquets from guests, and any long-stemmed roses that come your way. A height of about 10 inches works well.
- A small footed urn is perfect for a centerpiece. It’s low, so it won’t interfere with dinner conversation, and it offers a nice view from above. Six inches tall by eight wide makes a statement but isn’t hard to fill.
- A trio of bud vases in complementary shapes can work as a cluster centerpiece or be separated to showcase single gorgeous blooms. Choose one medium-height, one tall, and one squat, all with narrow mouths.
Think Outside The Box
There are a wide variety of items that make for wonderful flower holders and vases. Some of them allow for a small jar or vase to be placed inside, others are watertight enough to be used alone. I found a bunch of images that I think will give us some really great ideas:
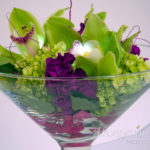
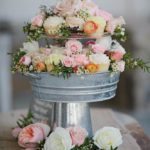

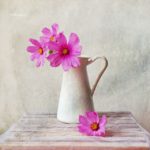
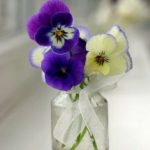
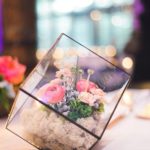
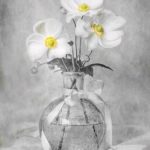


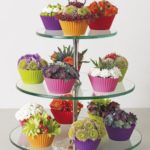
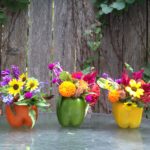


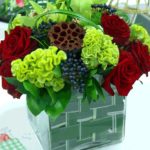

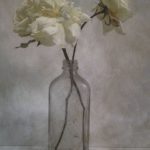
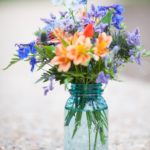
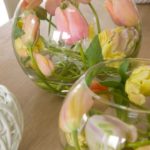
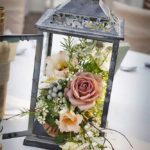
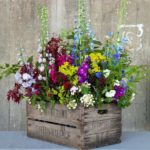

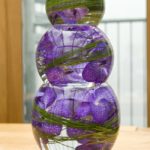
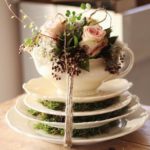
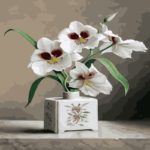
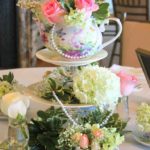

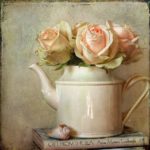


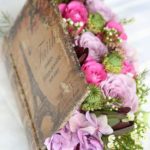
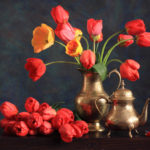

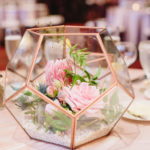
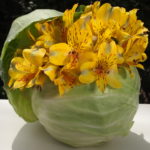
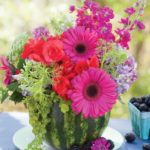
Some of these ideas might require some expertise and more than a little thought, but they really got my creative juices going. What about you? See any that you’d like to try?
The Language of Flowers
The language of flowers, sometimes called florigraphy, was a Victorian-era means of communication in which various flowers and floral arrangements were used to send coded messages, allowing individuals to express feelings which otherwise could not be spoken. This language was most commonly communicated through Tussie-Mussies, an art which has a following today.
I think it might be fun to make a flower arrangement with a message, here are some ideas. Much more can be found here: The Language of Flowers, and here: Dictionary of the Language of Flowers
- Domestic (happiness) – Honeysuckle (Sent Monthly); Holly;
- Encouragement – Golden Rod;
- Excellence (unpretending excellence) – Camellia japonica;
- Family (family union) – Pink Verbena;
- Feeling (warmth of feeling) – Peppermint;
- Feelings (warm feelings) – Spearmint;
- Friendship (everlasting) – Arborvitae;
- Friendship (lasting) – Pear Blossom;
- Friendship (true) – Oak Leaf Geranium;
- Fruitfulness – Hollyhock; Orange Blossoms;
- Gay Life – Peony;
- Gentility – Pompom Rose;
- Gladness – Myrrh;
- Good Luck – Camellia; Mugwort;
- Good News – Guelder Rose (Snowball-tree);
- Good Wishes – Sweet Basil;
- Goodness – White Zinnia; Snowball;
- Grace – Yellow Jasmine; Pink Rose; Multiflora Rose; China Rose;
- Gratitude – Campanula; Canterbury Bells; Dark Pink Rose;
- Happiness – Dandelion; Mugwort; Rose (Red and yellow together);
- Happiness (domestic) – Honeysuckle (Sent Monthly); Holly;
- Happiness (return of happiness) – Lily of the Valley;
- Happiness (rural) – Tulip-tree;
- Happy (love) – Bridal Rose;
- Happy (marriage) – Peony;
- Heart (light heartedness) – Shamrock;
- Hope – Flowering Almond; Hawthorn; Iris (Fleur-de-Lis); Star of Bethlehem; Snowdrop;
- Hope (hope in adversity) – Pine (Spruce);
- Hope (hope in misery) – Milkweed;
- Joy – Rose (Red and Yellow together);
- Joy (joys to come) – Celandine;
- Joy (of life) – Light Pink Rose;
- Lasting (pleasure) – Everlasting Pea; Parsley;
- Life (gay) – Peony;
- Life (joy of ) – Light Pink Rose;
- Life (long life) – Peach Blossom
- Life (you’ve made my life complete) – Lily of the Valley;
- Light heartedness – Shamrock;
- Luck – Bells of Ireland;
- Luck (good luck) – Camellia; Mugwort;
- Marriage (happy) – Peony;
- Pleasure – Red Poppy;
- Pleasure (blissful) – Sweet Pea;
- Prosperity – Peony; Cattail; Wheat;
- Protection – Juniper; White Heather;
- Success – Yellow Poppy; Palm Leaves;
- Victory – Palm Leaves;
- Warm (feelings) – Spearmint;
- Warmth (warmth of feeling) – Peppermint;
- Warmth (warmth of sentiment) – Spearmint;
- Welcome – Mayflower;
- Wisdom – White Mulberry; Iris (Fleur-de-Lis);
- Wish (a wish) – Fox Glove;
- Wishes (good) – Sweet Basil;
- Wishes (wishes will come true) – White Heather;
- Worth – Mignonette; Evergreen (trailing woodland plants that stay green all year);
- Worth (worth beyond beauty) – Sweet Alyssum;

LOL… I couldn’t resist!
Sources:
Let’s Have A Tea Party!
Now that we know a little bit about tea, and we have a recipe for crumpets, why not have a tea party? Tea parties are fun, you can invite family… friends (real and imaginary)… maybe even read some tea leaves. I think this is a great idea.
Timing Matters
Did you know that in many countries, tea time means more than drinking a cup of tea? Teatime is an actual meal and depending upon where in the country you find yourself, this meal could be anything from a scone, to a few light sandwiches and cakes, to a full roast dinner.
I guess I’d better explain. There three kinds of teatime in Britain:
- Afternoon Tea
- Low Tea
- Cream Tea
- High Tea
- Elevenses
- Royale Tea
- Kettle Drums
- Tea Garden
Afternoon Tea
Afternoon Tea is traditionally served between four and five in the afternoon – hence the name. Many people believe that this tradition was first started in 1841 by Anna Maria Stanhope, the seventh Duchess of Bedford. At that time, and in fact right up until the early decades of the 20th century, luncheon was served at twelve noon but dinner was not served until 8:00 or even 9:00 in the evening. The Duchess, so the story goes, complained of a ‘sinking’ feeling in the middle of the afternoon and asked for some tea and a few slices of bread and butter to be served to her in her private drawing room; the Blue Room at Woburn Abbey.
Whether this is true or not, at some point this trend for eating in the afternoon became more widespread and popular and soon ladies across the land who were ‘at home’ would dress elaborately in their finest dresses and visit each other’s houses to partake of afternoon tea.
In addition to the slices of bread and butter, one would offer thin cucumber sandwiches, or salmon sandwiches (with the crusts removed, naturally) as well as cakes, pastries, scones with cream, and of course a Victoria sponge cake. To be able to bake a light and moist Victoria sponge was the true test of one’s cook.
The tea, India or China or in many houses, both, would be served in silver tea pots and poured into fine china cups. Etiquette books contained whole chapters on the etiquette of Afternoon Tea and the tea dress was created to be worn at such social gatherings. Afternoon Tea, was, it should be noted, a social occasion in which only the upper class participated.
That is, until 1864, when the Aerated Bread Company opened a tea shop for middle-class women. Soon Fortnum and Masons, The Ritz, and Brown’s Hotel had all opened tea rooms, and it became quite fashionable for women to visit these tea rooms in the afternoon. These tea rooms were, by the way, the only place where a lady could meet her friends without a chaperone without damaging her reputation.
During the First World War, due to food rationing, ladies stopped taking afternoon tea ‘at home,’ and even when the war ended, the tradition was not taken up again. If one got peckish mid-afternoon, a cup of tea and a biscuit would suffice. If one wanted a full afternoon tea, one went out to a hotel.
In most British homes, afternoon tea consists of a cup of tea and a light snack, be that a biscuit, a piece of cake, hot buttered toast or crumpets. (See our recipe here: Tea and Crumpets)
Low Tea
Low Tea is another name for Afternoon Tea. It is traditionally an afternoon meal including sandwiches, scones, clotted cream, curd, 2-3 sweets and tea. Known as “low tea” because guests were seated in low armchairs with low side-tables on which to place their cups and saucers.
Cream Tea
The cream tea is similar to the afternoon tea, but without the sandwiches and other cakes.
The most famous cream tea is the Devonshire Cream Tea. According to local legend, the Devonshire Cream Tea originates from Tavistock, or more precisely Tavistock Abbey. This Benedictine Abbey was plundered by Vikings in the 11th Century and then rebuilt. The monks fed the laborers who were rebuilding it with a calorie-rich food consisting of bread, clotted cream and strawberry preserve. Over time the bread became scones and thus the cream tea was born. However, the counties of Somerset, Cornwall and Sussex will contest this legend; they all offer cream teas too!
A cream tea consists of freshly baked fruit scones, some clotted cream, butter and strawberry jam served with a large pot of tea. The idea is you pour your tea – no choice this time, just whatever is in the pot – and then construct your scone to eat with your tea. Butter the scone, add some jam and then add some clotted cream to taste. It tastes delicious but can be a bit messy.
Note: The clotted cream does not go in your tea.
High Tea
Whilst high tea sounds very, very grand, it is in fact, a working class meal. High Tea is actually dinner.
When tea was first introduced into Britain it was an expensive luxury, but over time as prices fell it became a staple in the diet of the poor and tea accompanied every meal.
Prior to the industrial revolution, when most people worked in agriculture, the workers would come home at lunch time and eat their main meal then. After the industrial revolution, the working classes could not come home at lunch time and so the main meal of the day took place in the late afternoon, or early evening – the same time as the afternoon tea of the rich. This meal became known as teatime. It was a High Tea if it contained hot and filling foods and just Tea if it comprised mainly of breads and cold cuts. A High Tea consisted of whatever was available – bacon, eggs, meats, stew – there were no hard and fast social rules for this meal except that it would always be accompanied by copious amounts of tea.
Even today the working classes – especially in the north – have their main meal at teatime. When I was growing up the three meals of the day were known as breakfast, dinner and tea – a throwback to the pre-industrial meal times – and tea was always served at 5 pm.
In the south, however, and among the middle classes across the land, these same meals are breakfast, lunch and dinner, with dinner being served at around 7 pm. Teatime does exist as a meal for the children and is served at 5 pm.
Elevenses
Morning coffee hour in England. In Australia and New Zealand elevenses is known as ‘morning tea’, or smoko and can occur at any point between the start of the working day and lunchtime. Many workplaces organize morning teas for staff to welcome new employees, for special occasions such as a birthday, or simply as a regular event. Food will sometimes be provided by the business, but often employees will be expected to bring food to share.
For elevenses, Winnie-the-Pooh preferred honey on bread with condensed milk. Paddington Bear often took elevenses at the antique shop on Portobello Road run by his friend Mr Gruber, for which Paddington would buy buns and Mr Gruber would make hot chocolate.

In the Middle-earth stories by J. R. R. Tolkien, it is a meal eaten by Hobbits between second breakfast and luncheon.
Royale Tea
This is more of a social event where champagne is served upon arrival and sherry is offered at the end of tea.
Kettle drums
A less formal large afternoon party for tea was known during the 18th and 19th centuries as a “kettle drum”. A widespread but possibly false folk etymology suggests that the name “kettle drum” may have originated in the informal tea gatherings hosted by British camp officers’ wives during East India Company rule or the British occupation of India, during which kettle drums are claimed to have served as tea tables in the camps.
Alternatively, “kettle drum” may have been an amalgam of “drum” — 18th-century slang for a vivacious party — and “kettle” for the tea served. At kettle drums, guests traditionally came for short periods and left at will, mingled and conversed with little formality, and partook of tea, chocolate, lemonade, cakes, and sandwiches. Guests were expected to dress for ordinary daytime visiting, but not more formally.
Tea Garden
During the 18th century tea gardens became popular. The whole idea of the garden was for ladies and gentlemen to take their tea together outdoors surrounded by entertainers. They attracted everybody including Mozart and Handel. The tea gardens made tea all the more fashionable to drink, plus they were important places for men and women to meet freely.
Fancy Manners
Since ancient Rome, a cultured person ate with 3 fingers, a commoner with five. Thus, the birth of the raised pinkie as a sign of elitism. This 3 fingers etiquette rule is still correct when picking up food with the fingers and handling various pieces of flatware. This pinky “up” descended from a misinterpretation of the 3 fingers vs 5 fingers dining etiquette in the 11th century.
Bowls vs Cups
Tea cups did not always have handles. Chinese tea bowls influenced the first European teacups. At first, the English made cups without handles in the traditional Chinese style. Not until the mid 1750’s was a handle added to prevent the ladies from burning their fingers. This improvement was copied from a posset cup, used for hot beverages-hot drink made of milk with wine, ale or spirits. The saucer was once a small dish for sauce. In Victorian days, tea drinkers poured their tea into saucers to cool before sipping, this was perfectly acceptable. This is what writers of the period mean by “a dish of tea.”
Originally tea was poured into small handle-less Chinese porcelain bowls that held about 2-3 tablespoons of tea. It is said that the idea of the saucer developed in the 17th century when the daughter of a Chinese military official found it difficult to handle the hot bowls of tea she brewed for him and asked a local potter to devise a little plate on which to place the bowl.
Formalities
On the off chance that we manage to get really posh and get invitations to a formal tea party, here are some tips:
- After sitting down — put purse on lap or behind you against chair back
- Napkin placement — unfold napkin on your lap, if you must leave temporarily place napkin on chair.
- Sugar/lemon — sugar is placed in cup first, then thinly sliced lemon and never milk and lemon together.
- Milk goes in after tea — much debate over it, but according to Washington School of Protocol, milk goes in last. The habit of putting milk in tea came from the French.
“To put milk in your tea before sugar is to cross the path of love,
perhaps never to marry.”
- The correct order when eating on a tea tray is to eat savories first, scones next and sweets last. However, it is not incorrect to eat the scones first while they are hot, then move to savories, then sweets.
- Scones — split horizontally with knife, curd and cream is placed on plate. Use the knife to put cream/curd on each bite. Eat with fingers neatly.
- Proper placement of spoon — the spoon always goes behind cup, also don’t leave the spoon in the cup.
- Proper holding of cup — do not put your pinky “up”, this is not correct. A guest should look into the teacup when drinking — never over it.
- Fingers vs forks — A desert fork should be used for the larger pastries; however fingers can be used for bite-sized cakes.
Reading Tea Leaves
No tea party is complete without reading the leaves. From Reading Tea Leaves, we have this simple 6 step procedure to read tea leaves for yourself or a friend. Tea leaf reading is easy, fun and possibly a little bit enlightening!
Step 1: Make a cup of tea.
Choose a white or light colored teacup. Almost any leaf tea will do nicely. My personal preference is Earl Grey. If avoiding caffeine, you might even choose an herbal variety. The herbal options are delicious: jasmine, peppermint, chamomile… the list goes on and on.
If you do not mind the tiny floating bits, you can open a tea bag and sprinkle the tea into a cup of hot water. A middle eastern option is to sprinkle coffee grounds into a cup of coffee.
Step 2: Steep your tea and quiet your mind.
Steeping time is a personal preference. Green and black teas are usually ready in a minute or two, while herbal teas may take longer.
This is a time to quiet your mind and relax. What you are about to exercise is your mental creativity. Pattern recognition and symbol recollection will require focus and concentration. Distracting conversation, music or activity will detract from your experience. As in beginning meditation, attempt to empty your mind of all thoughts.
Step 3: Sip tea while you find your focus.
Once your tea is cool enough, begin sipping. Leaves may be floating, so do the best you can to avoid consuming too many. If you are right-handed, lift your cup with your left. If left-handed, drink with your right. If ambidextrous, reach for your cup, stop, and then use the other hand.
Now that you are quiet and relaxed, identify the issue foremost in your mind. In meditation practice, one attempts to empty the mind — blocking out all thoughts. As you attempt to think of nothing in particular, is there a stubborn thought that keeps returning to your attention? If so, that is the subject of this reading. Focus on that thought.
If nothing in particular comes to mind, then this will be a general tea leaf reading. Focus on your breath and the taste of the tea. Leave a small amount of tea at the bottom of your cup.
Step 4: Swirl three times and dump.
Hold your nearly empty teacup in your hand and give it three good swirls. The tea leaves will disperse around the interior of cup. Gently dump out the remaining liquid by turning your teacup over into a saucer.
Wait at least three breaths before turning your cup back over. You are ready to begin reading your tea leaves!
Step 5: Identify symbols and jot them down.
Tea leaf reading is a highly personal and subjective process. Because abstract pattern recognition keys into our subconscious, self analysis produces the most relevant reading. One person may see an egg, while another sees a beetle in the same spot. Tea leaf reading is very much like a Rorschach (Ink Blot) Test. We are most likely to recognize symbols having a bearing on or connection with the matter at hand. Therefore, you are the most qualified person to read your own tea leaves.
If your cup has a handle, begin there and read clockwise. If your cup has no handle, begin reading from 12 o’clock. Make a notation of the first symbol you see. Mentally divide the cup into three sections: rim, middle and base. The rim area is above the tea level when you first poured your tea. The base is the level of tea left before you dumped out the remainder. The middle section is the area between the rim and bottom. Note where the symbol is located and if it is next to another symbol. Note whether you see bubbles, twigs or droplets in your cup. Work with quiet concentration and take your time.
Step 6: Create your tea leaf reading.
Translating symbols into meaning is just as personal and subjective as their identification. Individual language, cultural exposure, experience, knowledge and mental state contribute to interpretation of symbols. For example, the letter “K” might first bring to mind your friend Kurt rather than your sister Kirstin. Next to each symbol you wrote down, jot down the meaning that comes to mind first.
Again, abstract pattern recognition keys into our subconscious, so self analysis produces the most relevant reading. You are the most qualified person to read your own tea leaves. That being said, this site provides an extensive symbol lexicon to assist you in identifying and recalling symbols.
The first symbol you saw represents your dominant character or someone near or influential. Symbols in the rim section apply to this moment in time. The middle section represents the near future — usually no longer than a fortnight. Both the rim and middle section represent influences in your outcome. The base of your cup represents the ultimate answer or conclusion.
Sources:
Tea and Crumpets
Now that we’ve worn ourselves out cleaning, decluttering, and rummaging through our closets, I think it’s time for a spot of tea. Even better… let’s have some tea and crumpets!
First up, let’s talk about the tea.
What’s in a tea? Well, hundreds of benefits are hidden within this coloured water that not so many people are particularly fond of. Summer is a great time to take up this wonderful habit, by creating the most appealing iced teas and thus benefiting from their medicinal and restorative powers.
What few of us know is the fact that the word “tea” is correctly used for the following types only:
- Green tea
- Black tea
- White tea
- Oolong tea
- Pu-erh tea
These 5 teas are definitely worth the try. The rest should simply be referred to as infusions. The five kinds are all derived from the Camellia sinensis plant, a shrub native to China and India, and contain unique antioxidants called flavonoids. They all protect against free radicals that can contribute to cancer, heart disease, and clogged arteries. Oolong and black teas are oxidized or fermented, so they have lower concentrations of flavonoids than green tea, but nevertheless their antioxidising power is still high.
Green tea makes you smart and slim
Green tea is supposedly the healthiest beverage on our planet. It contains more than just plain caffeine. Apart from the fact that it produces a response without causing the “jittery” effects associated with too much caffeine, it also has the amino acid L-theanine, which increases the activity of the inhibitory neurotransmitter GABA, which has anti-anxiety effects. It also increases dopamine and the production of alpha waves in the brain.
In other words, these two components mixed together are particularly capable of improving overall brain function.
Apart from making you smart, your drinking at least three cups of green tea a day is recommended to raise the body’s metabolic rate. It is believed that the catechins found in it increase the production of heat within the body, which is related to burning calories. These compounds may inhibit certain chemicals in the brain, thus prolonging this process.
Black tea makes your teeth healthy
Black tea was proved to reduce plaque formation as well as restricting bacteria growth that promotes the formation of cavities and tooth decays. The flavonoids found in black tea kill and surpass cavity bacteria as well as inhibit the growth of bacterial enzymes that form along with that sticky white stuff on our teeth that attracts plaque like a magnet.
White tea keeps your bones healthy
White tea’s antioxidants and anti-aging properties not only protect and help reverse damaged skin, but a regular intake of white tea can improve bone density and strength, and may provide a natural relief from the symptoms of osteoporosis.
Oolong tea makes your skin look healthy and young
According to the Tea Association of the United States, oolong tea falls somewhere between green and black teas, as its leaves are only partially oxidized.
Patients diagnosed with eczema are recommended to drink 3 cups of oolong tea per the day. The beneficial results of oolong tea are likely to be seen in less than a week in these patients. All oolong tea drinkers show remarkable improvement in their skin.
Keep in mind that despite its miraculous effects, oolong tea tends to be very high in caffeine, which is not the healthiest component of this beverage. So if a healthy skin is your aim, try not to exaggerate and drink more than 3 cups a day.
Pu-erh tea is the best hangover cure
In traditional Chinese herbalism, pu-erh tea is considered to open the meridians and warm the spleen and stomach. It helps digestion and cleans your blood. It is often consumed after heavy meals or drunk as a hangover cure or preventative.
The microbial aging of pu-erh tea can result in the production of lovastatin, a natural statin that is used to lower levels of bad cholesterol such as LDL. One study found that the longer this type of tea was aged, the more statin was produced.
So drink up! It is recommended to have a slightly hot cup of tea every time you feel hot, and your body’s temperature will return to its regular value.
How to make a good pot of tea
These are the golden rules:
- Tea loves oxygen – it helps the flavor develop, so always use freshly drawn cold water in the kettle.
- Make sure your pot is clean.
- Warm the pot by swirling a small amount of boiled water in it.
- For black tea, only pour on freshly boiled water and do not over-boil it.
- For green tea, always use the water just at the boil.
- One teaspoon of loose tea per person and one teaspoon for the pot is about right, but add as much or as little to make it to the strength you like.
- Some people believe that sugar masks the flavors in tea. Why not try a fruit tea if you prefer a sweeter taste?
- A tea cosy extends the brewing time and can make the tea bitter and stewed. A removable infuser or teabags can help to get round this problem.
How long should I allow a teabag to brew?
Twinings of London recommends that you allow the teabag to brew for two and a half to three minutes. This allows the flavor to fully develop. Then add milk or lemon or enjoy it black, whatever your preference.
And how long should I allow loose tea to brew?
We recommend that you allow loose tea to brew in a teapot for up to seven minutes. The general rule is: the larger the leaf, the longer the brewing time. Earl Grey and Lady Grey need five minutes, while a smaller leaf tea will only need about four minutes.
Does loose tea make better tea than teabags?
Both have their benefits. For many people, the ritual of preparing loose tea is a pleasure in itself, so this contributes to the enjoyment, while teabags are more convenient. The leaf size is different but the quality in the cup will be the same.
Should the milk go in first or second?
Historically, the ‘milk in first’ rule was to protect the fine bone china it was served in – it’s a very individual thing.
Sometimes I get an oily residue around my cup and on the surface of my tea – what is it?
Because of the small leaf-size in a teabag, the tea can release some essential oils which can sometimes produce a residue. However, this brown residue occurs most often in areas with hard water, so a carbon water filter will reduce this considerably.
How should tea be stored?
Tea absorbs moisture and kitchen smells. To keep your tea fresh and avoid spoiling the flavor, keep loose tea or teabags in a sealed jar or tin.
Some Interesting Tea Lore
- Tea was MONEY:
In the twelfth century when China began exporting tea, TEA BRICKS became the often preferred form of currency. It was light, valuable and in desperate need you could even eat the bricks. Tea contains, along with its many other nutrients, small amounts of protein.
- Green Tea Cleanses the Body and the Soul
Green Tea originated as a large tree growing in the Himalayan jungles. It was cultured into the short bushes grown throughout the world now, by Chinese monks who had discovered its many benefits.
The Taoists claimed green tea as an important ingredient of the elixir of immortality. The Buddhists used it extensively to prevent drowsiness during their long hours of meditation.
The first bowl moistens my lips and throat; The second bowl banishes all loneliness; The third bowl clears my mind of words and books. The fourth cup, I begin to perspire, Life’s troubles evaporate through my pores. The firth cup cleanses my entire being. Six cups – ah, but I can drink no more: I can only feel the gentle breeze blowing through my sleeves, Wafting me away to the Isle of Immortality!
Lu ton, Eight-century Chinese Poet, from In Gratitude for a Gift of Fresh Tea
- Tea Transformed Japan’s Culture
Green Tea was said to be introduced into Japan in 1191 by the monk Eisaid when he returned to Japan with Buddhism. The cult of tea began after Eisai helped cure the famous shogun of Japan Minamoto.
The whole culture of the country evolved around the Japanese Tea Ceremony which uses very finely ground green tea leaves in an elaborate ceremony lasting many hours.
The Tea Ceremony was a worship of the art of life, an appreciation of refinement and purity, a process to go beyond the dreary waste of existence.
- Tea Transformed British Culture
In Britain, tea rapidly replaced much of the beer, ale and alcohol consumption with a beverage that was actually good for you. The British were transformed from an aggressive, meat and beer drinking mass to a more gentle, civilized people.
For the middle class of Britain, the tea parties and tea gardens allowed women and children to get out and socialize for the first time in their history. Many movements such as missionaries, charities and the girl guides started as tea groups.
For the lower class of Britain, tea breaks made life bearable – the tea gave them energy and a lift of spirits which other beverages could not. They spent HALF their food budget on tea (and sugar to put in it) for good reason.

Now that we know a little bit about tea, lets make some crumpets to go with it!
Crumpets
What is a crumpet? This traditional British teatime treat is midway between English muffin and pancake. Like an English muffin, it’s full of holes, perfect for collecting rivulets of melted butter. But it’s also moister and thinner – more like a small pancake.
These are best enjoyed toasted, and spread with butter, jam, and/or clotted cream. Since their holes reach to the outside crust, there’s no need to split them before toasting.
You can make crumpets without English muffin rings (or cleaned tuna cans), but they’ll be perfectly round and ever so much nicer looking if you use rings. Here’s a recipe from King Arthur Flour.
A Great Crumpet Recipe
Ingredients:
- 1 1/2 cups lukewarm water
- 1 cup lukewarm milk
- 2 tablespoons melted butter
- 3 1/2 cups Unbleached All-Purpose Flour
- 2 1/2 teaspoons instant yeast
- 1 teaspoon baking powder
- 1 1/4 teaspoons salt
Instructions:
Combine all of the ingredients in a bowl, and beat vigorously for 2 minutes. A stand or hand mixer, set on high speed, work well here.
Cover the bowl, and let the batter rest at room temperature for 1 hour. It will expand and become bubbly. Towards the end of the rest, preheat a griddle to medium-low, about 325°F. If you don’t have an electric griddle, preheat a frying pan; it shouldn’t be as hot as the temperature you use to cook pancakes.
Lightly grease the griddle or frying pan, and place well-greased 3 3/4″ English muffin rings in the pan, as many as will fit. (If you don’t have English muffin rings, use well-cleaned tuna cans, from which you’ve removed the top and bottom.) Pour sticky batter by the scant 1/4-cupful into each ring; a muffin scoop works well here.
After about 4 minutes, use a pair of tongs to slip the rings off. Cook the crumpets for a total of about 10 minutes on the first side, until their tops are riddled with small bubbles/holes. They should be starting to look a bit dry around the edges. Their bottoms will be a mottled, light-golden brown. Note: They probably won’t be as full of holes as store-bought crumpets; that’s OK.
Turn the crumpets over, and cook for an additional 5 minutes, to finish cooking the insides and to brown the tops gently. This isn’t traditional; “real” crumpets are white on top, but the crumpet police won’t chastise you for adding a little color to the tops.
Remove the crumpets from the pan, and repeat with the remaining batter, until all the crumpets are cooked. Serve warm. Or cool completely, wrap in plastic, and store at room temperature. To enjoy, warm in the toaster. Serve with butter, or butter and jam.
Sources:
Back In The Closet

Now that we’ve gotten excited about decluttering and cleaning out our closets, and it’s time to put everything back… but before we get started with that, here are a few more helpful ideas:
Paint The Closet
The closet is actually a very important “room” or space in the home. It really can make or break a home sale if there’s insufficient closet space. So, taking it one step further, when designing your closet, also keep color in mind.
For the most part when I’m at a color consultation I always ask my client if they’d like to paint their closet. The majority of the time it’s a no because after all, “why do I need color in my closet” anyway?
There are several reason why you’d want to paint your closet:
- It’s probably still the contractors beige or white.
- It’s probably a flat or matte sheen which gets dirty very easily.
- It looks unfinished.
- It’s hard to keep clean.
- Painting is a minor detail that will have a high impact if you have to sell your home.
- It will look better.
- I don’t know what color to choose for my closet.
- I’d have to take all the shelves out or paint around them.
- It’s a HUGE project.
- No one will look inside my closet.
- It’s just a closet.
The best time to paint your closet of course is when you first move into your home and it’s still empty. You’ll more than likely have some type of wire shelving to paint around but it will definitely be worth it.
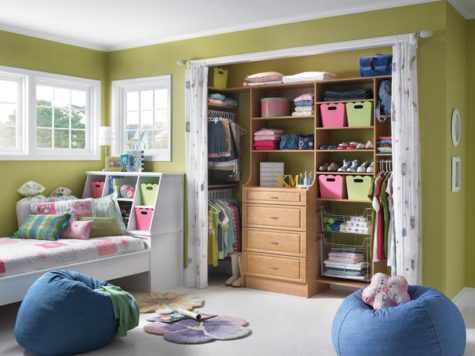
Now to the question – What Color Should I Paint My Closet?
Best colors for a closet:
You may not give much thought to the inside of your closets when painting a room but paint pros say that choosing the right color and sheen will not only improve the appearance of your closet but yours as well. No more reaching into a dark closet and grabbing the navy blouse instead of the black one. Debbie Zimmer of the Paint Quality Institute has some pointers on what to consider when painting a closet.
- An open closet.
Your best bet with a closet or storage space that’s open to the rest of the room is to paint it the same color as the room or a slightly lighter shade. That way it’s more integrated and less likely to draw attention to what’s inside.
- Your primary closet.
You’ll want the closet where you store your wardrobe to be bright so you can actually see the color of your clothing. White or a light color are good choices. Choose a paint with a shinier sheen such as semi-gloss, which will reflect more light.
- Pantry or bathroom closets.
Use a durable paint in your pantry and other closets where you store things that may spill or get sticky. Use a semi-gloss sheen that stands up to scrubbing. As for color, choose one that blends in with the room.
- Your junk closet.
For those catch-all closets where you stash off-season sporting goods, boots, cleaning supplies, or other gear, think about a darker color that de-emphasizes what’s inside. And keep the door closed
- Guest room closet.
You can be more playful with a closet in a guest room that’s used infrequently. Try a contrasting color. That way when your guests open the door they get a pop of color. Zimmer says that darker colors are more forgiving and can make dust less noticeable.
DESIGN TIP:
Interior designers recommend that you keep the color in your closet subtle and neutral. There really is no need to put substantial color in this room. Here’s why:

This graphic represents a neutral closet. The background is an off white or beige and the rectangles are your clothes. We all have just about every color from lights to darks in our closets so having the background a neutral will visually make the closet more appealing and easier to see. It’s really a small detail that will make a large impact in your closet.
Now this closet was painted the same coastal blue that’s been trending for quite some time. So many people have this color in their bedroom and have taken it into their closet but look what happens. It’s very unsettling to see all this color in a closet. The color of your clothes fight with the blue and it just becomes a mess. It’s like painting every room in your home a different and unrelated color. It doesn’t make sense and it’s just ugly! By the way – the color of the “clothes” are the same in both these graphics but see how different they look?
According to Feng Shui principles, white is the ideal color is ideal as it opens the energy more, as well as brings the crisp quality of the metal feng shui element.
So, I was thinking about red or maybe orange… I did some experimenting with the graphic, even made one a bright white. Here’s a sampling of the different colors:


Wow… I really like the black! I wonder if I could make it work in real life, or if it just looks good because it’s on a digital graphic instead of on a wall.

So my friends, whether you have a very large walk in closet or a very small closet, take the time out to finish it. And remember, color matters!
Organizing The Closet
Now that we have our closets painted, it’s time to get them organized. I looked around for inexpensive and easy storage systems, and found something that I think might work just fine. At least for a while.
Now that we’re cleaning up our clutter, you may notice that you have a lot of cardboard boxes that you need to get rid of. Packages are often delivered in boxes, you might get some extra boxes from shopping trips to warehouse grocery stores like Costco or Sam’s Club. It can be a little overwhelming when you look at all of the boxes you’ve brought into your home!
As you’re cleaning up these boxes, you might want to consider using them to make easy, inexpensive storage bins. One of the great things about having so many cardboard boxes on hand is that you have a lot of different shapes and sizes to choose from. If you’ve been meaning to implement a storage solution in a particular part of your home, this might be the perfect time to find something that will fit your needs!

Org Junkie says:
“I like using cardboard boxes for storage in our home because they’re free, and they’re disposable. We move a lot, and I’ve found that often a storage solution that worked in one home won’t work in another. We have another move coming up in the summer, and I’m hesitant to spend a lot on storage solutions that might not translate well to another home. By repurposing cardboard boxes for storage, I’m saving money, and cutting down on the amount of stuff we have to move to a new home.
I also used a smaller cardboard box to store toilet paper in our powder room. Our powder room doesn’t have any cabinets or shelves at all. We were forever having to run to our linen closet to replace our toilet paper rolls, so this new storage solution is a welcome addition in our home.
As you’re going through your cardboard boxes, think about different ways you might be able to use them to help you work towards a more-organized home. The storage solutions you’ve been looking for might be right under your nose! Happy organizing!”
To make the storage bins look great and give them more durability and strength, I think it’s worth revisiting a yesterday’s post and taking another look at these:
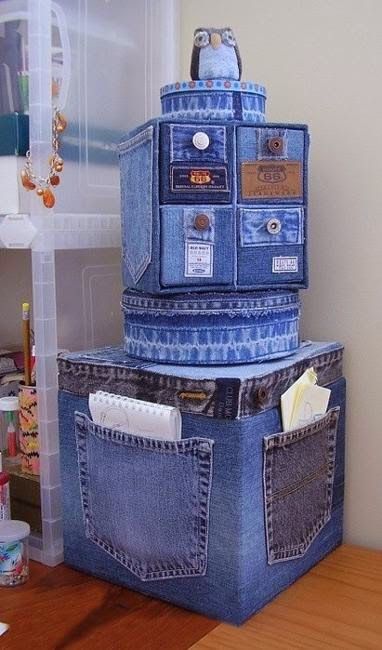
Build Your Own Storage System
From WikiHow, we have a great tutorial for a cardboard box storage system. It looks pretty sturdy, and I think it just might work if it’s not loaded down with anything too heavy. Here’s the tutorial:
If you have a lot of small supplies to store but would rather not invest in a permanent storage system yet, you can make your own from boxes and add to it as your collection grows. It’s not the best, and sturdy system, but it’s flexible, easy and inexpensive, and that might be just what you’re looking for!
Step 1
Get the boxes. Try to use sturdy heavy duty cardboard boxes. Thin, bendy boxes probably won’t work very well. You can use any measurements you want, as long as four long boxes (drawers) fit into one cubic box (compartment). Here are some suggested measurements and quantities:
This box is 13 inches by 13 inches by 13 inches. The “drawers” for this compartment would need to be 6 inches high, 6 inches wide, and 13 inches deep. This gives a 1/2 inch clearance on the top and sides. Make sense?
Step 2
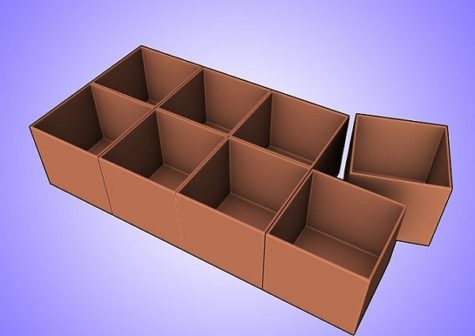
Assemble the square “compartment” boxes into a shelving unit as shown in the picture.
Note: If these cardboard boxes are not as sturdy as you’d like, you can fold the flaps inward and glue them to the sides of the box. I would recommend using a good wood glue and weighting them down with books until the glue dries. Obviously this step would have to be completed before the boxes are assembled into the above shelving unit.
If you have nice thick sturdy cardboard boxes, you can cut the flaps on one side as shown below:
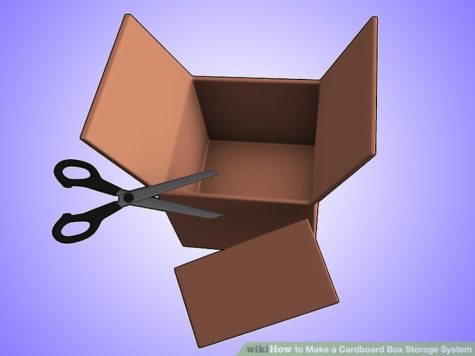
Step 3
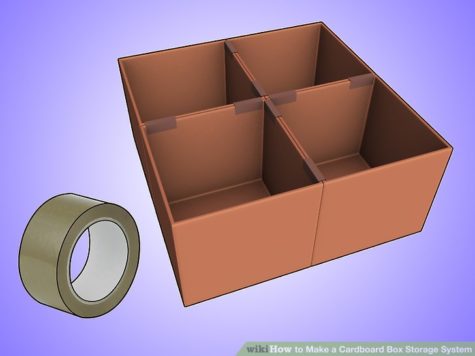
Tape the cubes together – front, back and sides. When taping is completed, put the completed shelving unit against a wall.
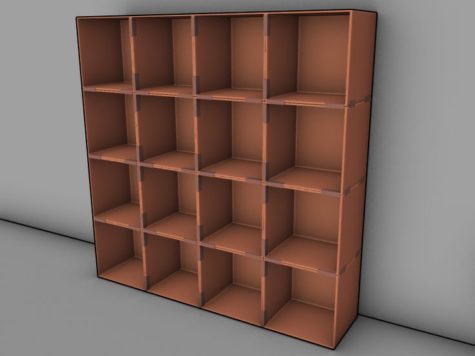
Note: This tutorial shows a storage unit that is a 4 boxes by 4 boxes square… you can make your own to suit your needs. It doesn’t have to be square like this one. I do, however, think it will look better and hold up longer over time if the boxes are the same depth. That’s because the weight is distributed evenly. I haven’t made one of these yet, so I’m not entirely sure.
Step 4
Now it’s time to make the “drawers” for the compartments. This part is optional, and not all of the compartments need to have drawers unless you want them to.
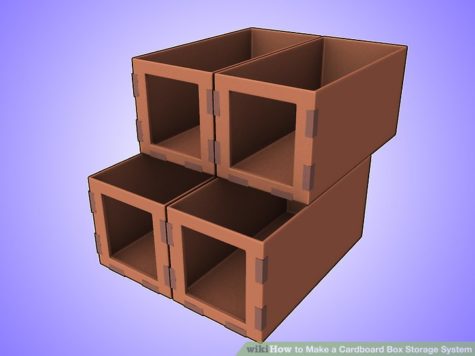
Assemble the long boxes, which will be drawers. Cut the flaps off the top of the boxes unless you want to forego the option of pulling the “drawer” out. In which case, leave the flaps on and tape them well. Cut out a square at one end of the box. Four drawers fit in one compartment.

This tutorial does not include any kind of decoration or spiffing up of the boxes. The drawers are loaded up, inserted, and labeled.
The suggestion is to:
- Sort the drawers alphabetically.
- Alternatively, sort the drawers so that things you use most often are at arm level, easiest to reach, and things that are less frequently used are lower or higher.
- Slide the drawers into the compartments.

Use compartments without the drawers for larger objects.

Use small containers to store small objects. The cannisters are tennis ball cans. Check with your local tennis club – you might get a bunch of them for free.
Community Q&A
These questions and answers were also part of the tutorial, and I thought it might be good to include them here.
Where can I get cardboard boxes?
- Look at the dollar store or ask a local convenience store to save their leftover boxes for you.
- The easiest way is to find a box that is not being used in the house. You can paint it or cover it in duct tape to add strength and color. You can also label and decorate it if you like.
- Local furniture stores are a great resource for heavy duty cardboard. The boxes are really big, but
What if the system is not stable?
- You may want to cover it with duct tape, or add pieces of wood on the bottom and sides to make it strong.
How can I color cardboard furniture?
- You can use all different types of paint, markers, stickers, or any other art tools you can think of!
What is the effect of a cardboard box storage system on the environment?
- By reusing things like boxes, you’re generally cutting down the amount of energy that would be needed for recycling.
- You’re also preserving the environment by cutting down on the energy needed to produce other materials like wood or plastic.
What kind of tape should I use? What tape is best to paint over without it peeling?
- You should use duct tape, it has a strong flexible adhesive that will hold the boxes together, and provides a clean look.
But wait, there’s more!
This is a picture of a whole closet made from super heavy duty cardboard. I wonder where they got that!
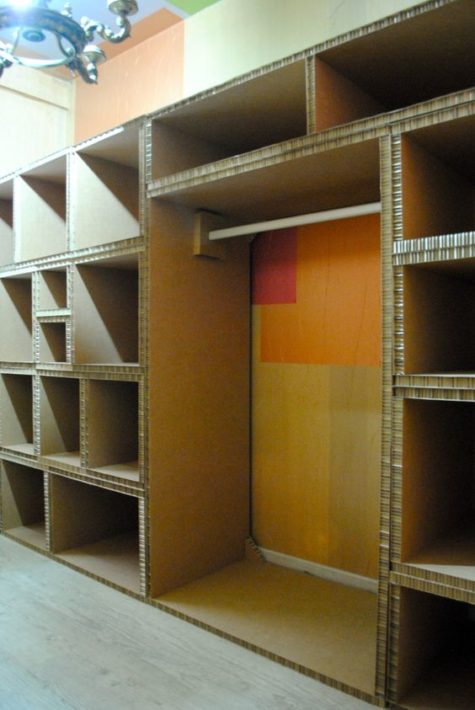
Here are a couple of YouTube tutorials:
Her English isn’t that great, but I like her tutorial because it doesn’t look like an expert make it. Also, I love her idea on how to strengthen the shelving. I recently bought a convection oven, and those corner pieces were in the box. So, I might be able to use them when I make my own.
This is a nicely done tutorial, and I like the idea of using wood between the boxes. This looks very sturdy!
This tutorial was for using big sheets of heavy cardboard, that they got from a local furniture store, and making them into a really sturdy shelving unit. I don’t think you’d actually need a table saw, or power tool for this. A nice sharp box cutter would probably work just fine. He also doesn’t give exact dimensions, so you’d have to think it through and draw a good diagram. He had another tutorial where he tested it to see how much weight it would hold, and I was impressed. So am also considering this as a viable idea, I think it might actually be capable of holding books !!
And here is one more. It’s really short, but she makes it look so easy. I like the idea of using nuts and bolts to attach the boxes together. Her finished product looks a little rough, I think it needs some contact paper, paint, fabric, and/or bling.
Making it pretty:
I found a variety of tutorials about how to turn a cardboard box into something that looks cute. These are visual only, and don’t come with written directions, but I think you can get the idea from the pictures:
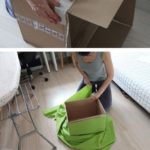


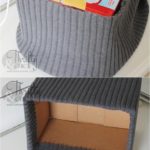
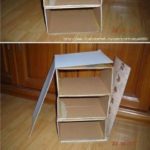
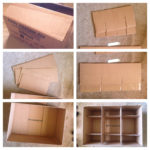
I also found these ideas:

-
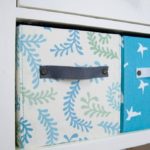
- Fabric is a nice choice. You could even add a handle.
-

- Sturdy fabric and a small framed chalk board makes for a cool storage box.
-
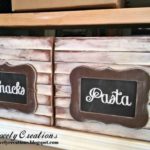
- These boxes have cheap wood slats glued on the sides along with a nice framed chalk board.
-
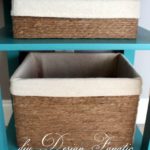
- Wrapping twine around the outside, and gluing fabric to the inside makes these boxes nice and sturdy.
-
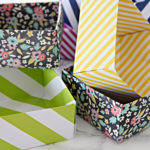
- Wrapping paper is pretty but may not last very long.
So, lets get our closets painted and organized so we can put all our favorite stuff back in them and get started making even more cool stuff out of the left overs!
Sources:
Out of the Closet
So now that we’re ready to tackle our closets, we need (I need) some good incentives to sort through our piles of jeans… t shirts… shoes… socks… clothes I’ll never wear again… clothes I love that are so past their prime I can’t wear them any more…
I found so many fun and creative ideas for old or discarded clothing that I had a hard time figuring out where to start! So let’s start with those old T shirts.
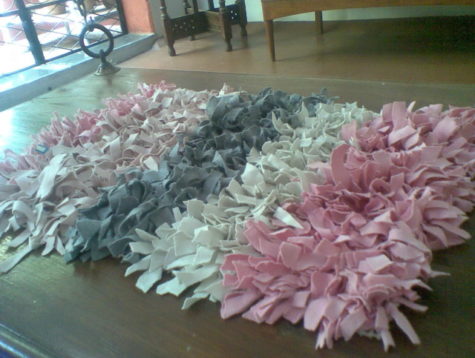
Did you know that old T shirts can be made into really cool rugs that require no sewing skills?
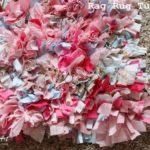
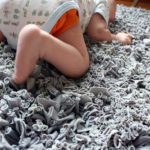

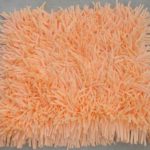


It looks pretty easy. All you need is some kind of backing with holes in it that are large enough to stuff a strip of T shirt into. This could be burlap or even the mesh that laundry bags are made from. I absolutely love this idea, and am really disappointed to discover that I don’t have nearly enough old T shirts!
Here’s a visual tutorial of rug made with burlap as the backing.
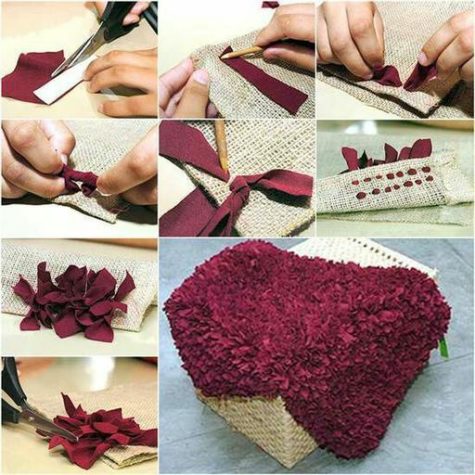
And here are some pics of work in progress:
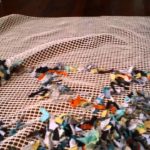


Not big on shaggy rag rugs? How about a round woven rug? Check this one out:
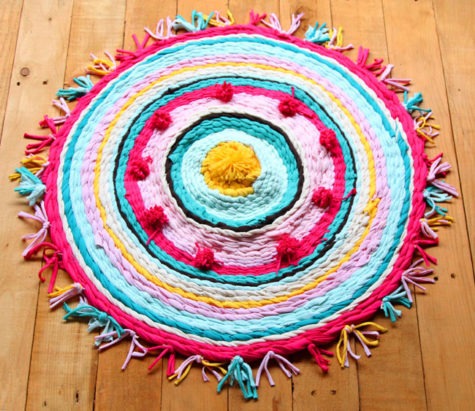
Pretty cute, huh? It’s not hard to make. Here are some pics that show how rugs like this can be made. It looks like a hula hoop is used as the frame.
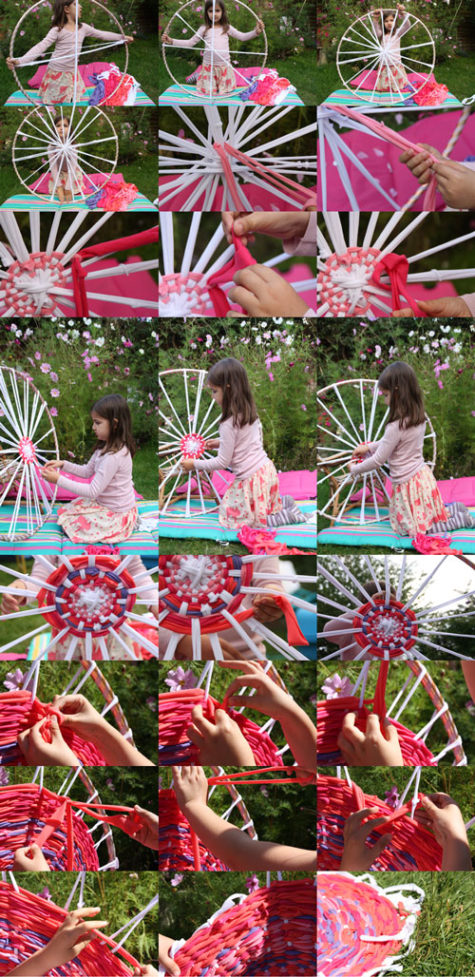
This may not be as easy as it looks. If you weave it too tightly, or if you use stretchy fabrics in strips that are too narrow, you may end up with a sort of limp basket. I found a post about this and a cute picture of a hula hoop rug fail. Here’s the link Project Hula Hoop Rug Fail and a pic:
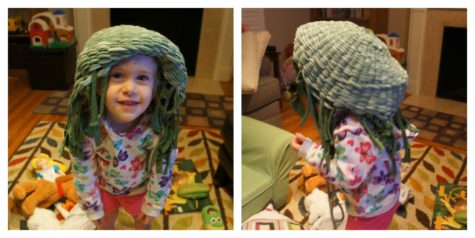
I did find success story pics though, so I think it’s a matter of making sure that the weave isn’t too tight, and that the cross pieces are sturdy and thick. I think old towels might lend themselves to a project like this as well. Be interesting to try. Here are more pics:
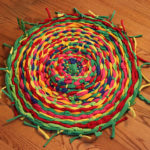
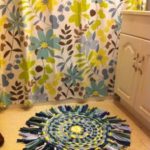
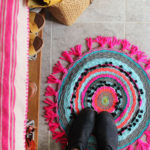
Rugs aren’t the only things that can be made from old T shirts. Here’s a clever idea for making bags from T shirts. It requires no sewing skills whatsoever. I found it at Mommypotamus
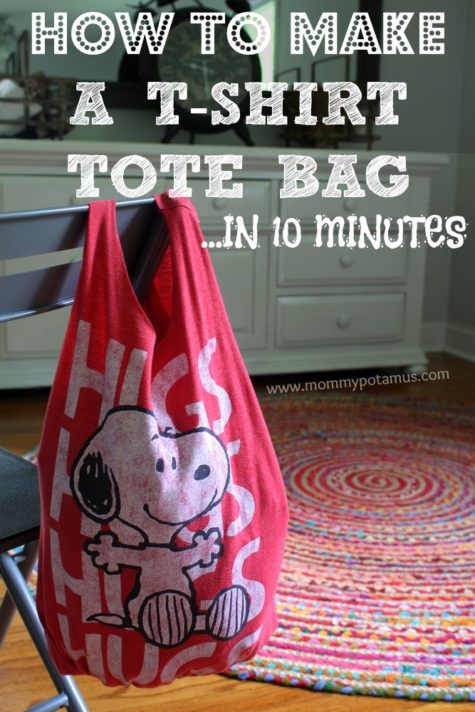
I’ve been looking for an easy-to-carry, washable alternative for the kids to use, and over the weekend I came across the perfect solution. My local thrift shop was selling cute t-shirts for 99 cents apiece that were practically begging to be upcycled into a farmer’s market tote. They’re 100% washable, and when they’re no longer useful as bags I can cut them into rags to clean with.
There was just one problem: I can’t sew. At all.
Fortunately, I came across some no-sew ideas that Katie and I adapted to fit our style (which, if you’re curious, generally favors the color red and anything Snoopy). The took no more than 10 minutes from start to finish, and I love how they turned out.
Supplies:
- Old t-shirt – The thicker the fabric, the sturdier the bag
- Sharp scissors, preferably fabric scissors
- Washable marker (optional)
 Step 1: Cut the sleeves off
If you’d like to fold the t-shirt in half you can cut both sleeves at once so that they are identical.
Or, if your material is too thick to cut them both at once, you can cut one, then fold it in half and use the cut side as a guide for the next sleeve.
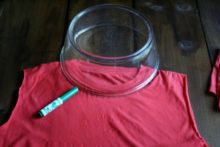 Step 2: Cut the neckline area
If you’d like, you can turn the shirt inside out and trace the outline of a bowl before cutting.
I used both methods and personally, I like free-hand cutting better because I prefer a slightly oval shape to a perfectly round one.
I ended up trimming this one a bit to make it more oval.
 Step 3: Determine how deep you want the bag to be
If you haven’t already turned your t-shirt inside out, do it now. Determine where you want the bottom of the bag to be and trace a line across.
Keep in mind that depending on the fabric used, your tote is likely stretch and become longer when it’s filled with stuff.
 Step 4: Cut fringe
Now grab your scissors and cut slits from the bottom of the shirt up to the line marking the bottom of your bag.
You’ll want to cut both the front and back layers together because they need to match up for the next step.
I cut my slits about 3/4 to 1 inch apart.
 Step 5: Tie Fringe
Okay, this is going to sound really complicated, but it’s NOT, promise. Take your first pair of fringe and tie it into a knot, then tie two more pairs.
Now if you lift your bag you’ll see that although the pairs are pulling the bag together, there’s a hole between each pair. This next step will close those holes.
In the photo above you see three sets of fringe that have been tied in knots. What I do next is grab one strand from the middle set (the one with the arrow pointing left) and tie it in a knot with one of the strands on the left set. Then I take the other strand from the middle set (the one with the arrow pointing right) and tie it in a knot with one of the strands on the right set.
Then I take the remaining strand on the right set and tie it to the next set of strands, and so on and so forth until all the strands are tied. Now turn your t-shirt right side out again and voila, you’re done!
A Couple Of Fun Variations
- Turn the bag right side out when tying the fringe so that it hangs from the bottom.
- Tie the straps in knots, or tie bits of t-shirt scrap to the top as embellishments
More T Shirt Ideas
So totes are fun, and easy but maybe you really love that old T shirt. No problem. It’s really easy to turn T shirts into wall art. All you need is a blank canvas a pair of scissors, and a staple gun. Now staple gun? Thumb tacks will also work:

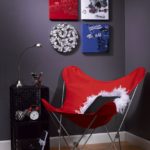
Pillows
Because T shirt material doesn’t fray or unravel, it makes a for a very easy customized throw pillow. Old fleece blankets make a nice pillow as well. These pillows are so easy to make that I don’t think we even need an extensive step by step tutorial.
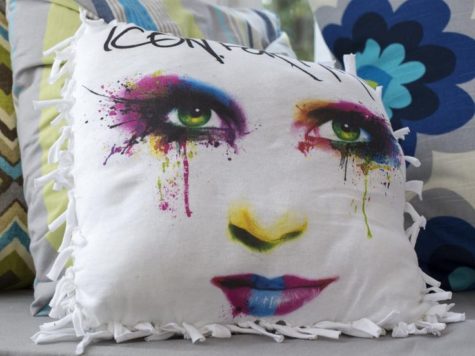
Simply cut the T shirt into as large of a square or rectangle as possible, then cut fringe around the edges. Tie the fringe together, and when you have 3 sides finished, stuff it with batting or insert a plain pillow. Then tie the last side up.
Here’s a series of pics that show how it works:
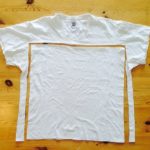
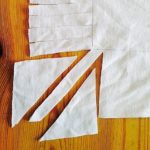
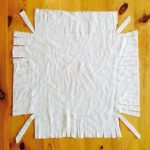


If you prefer a finished edge, you’ll need to do some sewing. Button down shirts can be made into pillow covers, and then unbuttoned and tossed into the washing machine. Simply button the shirt, turn it inside out and lay it on a flat surface. Smooth out the wrinkles and pin it together. Then cut it into whatever shape you like. Once it’s cut, sew the edges, flip it right side out… and Voila!! How fun is that?
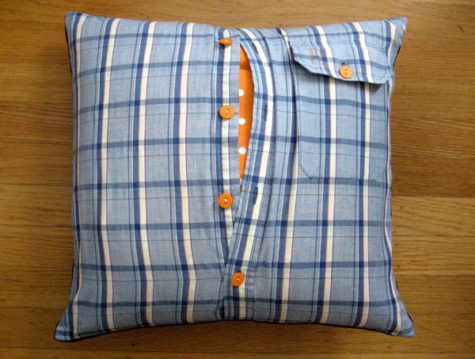
There is a boatload of cool ways to make pillows from shirts and T’s. You could also use old pajama tops and bottoms. The legs from old pajama bottoms would be super easy since two sides are already sewn. I even found a tutorial at Creme de la Craft for turning old sweaters into cool pillow covers. No sewing, no cutting. Here it is:
You don’t need to toss out your favorite sweater just because it’s got a hole! Instead, you can upcycle old or damaged sweaters into cozy pillows. This no-sew tutorial is so easy that it’ll take you less than five minutes to complete. Plus, it doesn’t require any cutting so you can use your sweaters as pillow covers during the summer and wear them again in the winter!
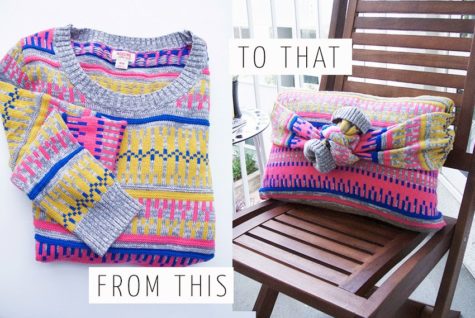
Steps:
- Stuff the pillow inside the sweater, stopping an inch below the underarm seam.
- Pull the sleeves from the back of the pillow and wrap them around the front of the pillow, knotting them together in the center. Fold back the cuffs if desired.
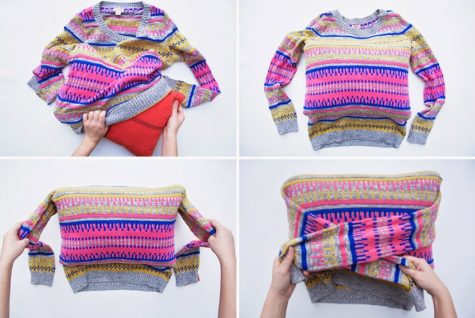
- Turn the pillow upside down to expose the bottom hem of the sweater.
- Tuck in one side of the bottom hem. Tuck in the other side to form a little pocket.
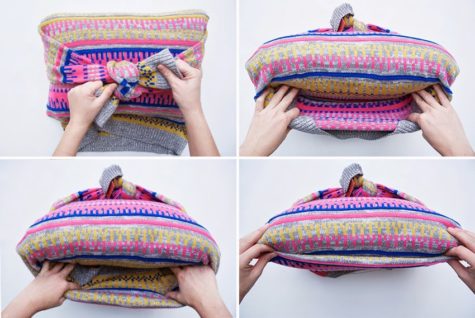
- Turn the pillow on its opposite side to expose the neckline of the sweater.
- There should be a little pocket that was formed on the back of the pillow after you knotted the sleeves in the front. Tuck the neckline of the sweater inside this little pocket so that it is hidden.
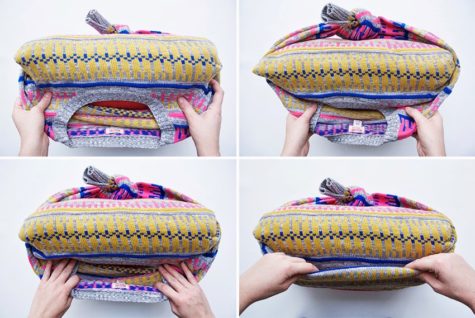
This technique can be used with any long sleeved shirt. I’m not sure if the knot on the back would bother me, and I am also unsure how well it holds up to continued use.

And just in case you’re still thirsty for pillow ideas, here is a nifty collection of a variety of pillows to get your creative juices churning:
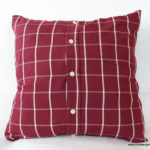
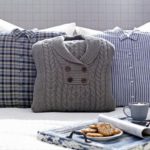


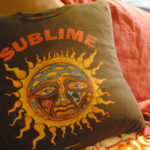


Alright, that’s enough of that… what about all those jeans you have that you can’t wear, but still love?
Jeans
Most of the ideas for jeans that I found require a bit of skill, but these coasters looked pretty easy:
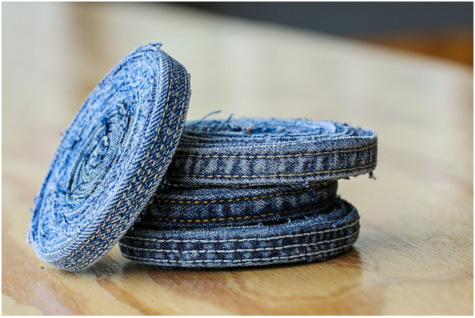
Cut out seams from the legs of old jeans and use them to create gorgeous looking coasters. All you need to do is tightly roll the seam into a spiral and keep gluing it on the inside to ensure it sticks well. Try and create a 3.5” spiral. If you do have a cork lying at home, cut it out and stick that to the bottom of your spiral seam coaster. This one’s just an addition; the coaster is good to be used without it too.
You could also use the jean pockets. Simply remove the pocket from the jean, and decorate the edges with lace, sequins, colorful buttons or anything else you fancy!
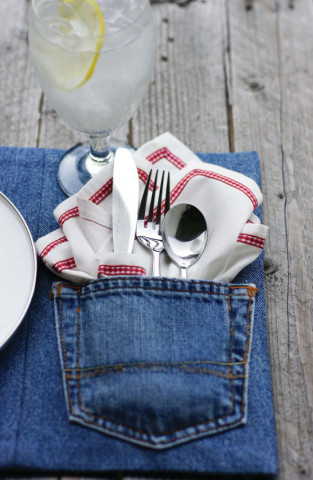 Placemats:
Make yourself an uber cool set of placemats using old denims. All you need is your old denim and some sewing skills. Basic hand sewing would also work/ alternatively you could look at using adhesives. Made from up cycled denims, these can include cute pockets to tuck away the cutlery too.
Workstation organizer:
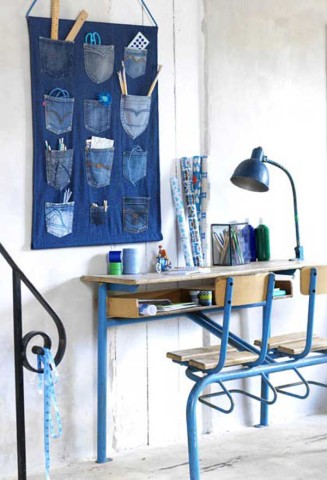
This project requires a bit of sewing. You need denim pockets, an old pair of jeans (use the same ones from which the pockets are being ripped off). A rod for the top and bottom of the organizer, and a cord to hang it with.
Cut open the denim legs and sew them together to get a flat piece of rectangular denim fabric (See image for reference). On this sew the various pockets. Ta da! Your organizer is ready.
An alternate to this could be to use any waste fabric lying at home as the base of the organizer. Another option is sticking the pockets onto a wooden panel.
But wait, there’s more!
Jeans can be used to cover sturdy cardboard boxes. All you need is a supply of jeans, a sturdy cardboard box, a good idea, and glue. More ideas for how to turn those old jeans into something useful are as follows:

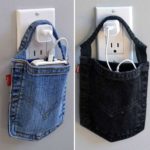

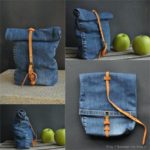


Crocs
Got some crocks that you no longer wear or that have lost their tread?
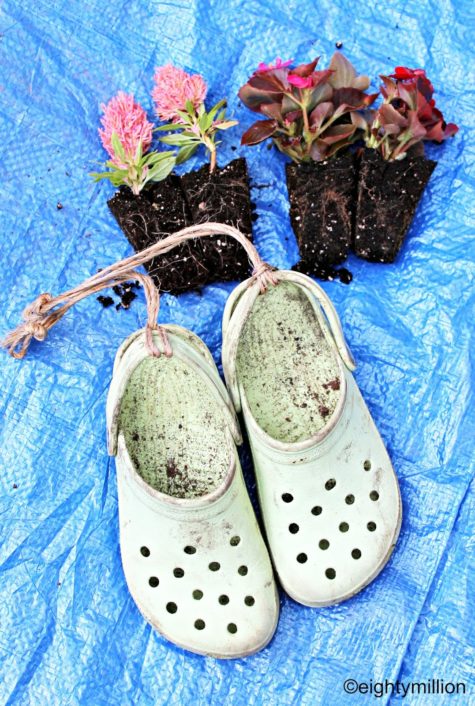
Crocks make great little planters. They have great drainage and they are easy to hang! Fill them with potting soil and plant flowers, hen and chicks or other sedums. If you are worried about the soil falling out through the holes, cover the inside with a piece of burlap. Keep them well watered and voila!
What a great way to grow a little mint garden, or maybe some small herbs like thyme… Here are some great ideas:


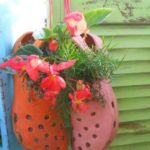

How fun! I wonder if I have crocks in my closet…
Western Boots
Western boots are super cool, and when the time comes to recycle them, there are a lot of options – some are easier than others.
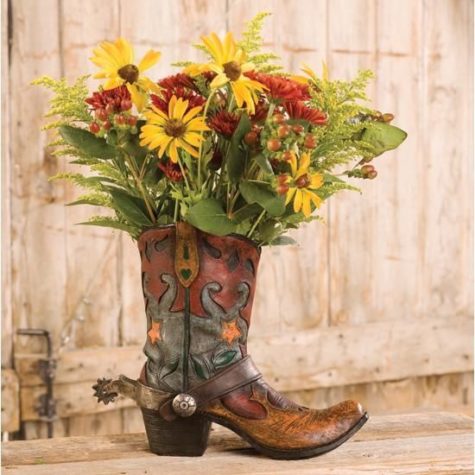
The easiest way to use a favorite boot that will never fit you again is to clean it up, paint it, and turn it into a flower holder. You can put a water filled vase inside the boot to display fresh flowers, which isn’t necessary if you are a lover of dried or silk flowers.


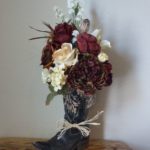
Old boots also make for cool planters. If you opt for the cool planters, don’t forget to make sure the boot has good drainage. If it already has holes in the sole, no worries. But if the boot is still in good shape, you’ll need to drill a drainage hole in the bottom.


Mosaics on boots is a super nifty way to bling up your home. I’d use silicone caulking to attach the mosaic pieces because it allows for a bit of flexibility. You can use mosaic glass, beads, old jewelry… pretty much anything with sparkle and shine. The inside of the boot can be spray painted or covered with fabric or felt. Fun, huh? I love this idea, too bad I don’t have any old boots!


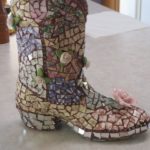
There are tons of other really cool uses for old western boots. Some of these ideas will require some skill and maybe a tutorial or two. You can make a lamp,a bird house, and a bunch of other cool stuff. Well worth the effort if you love western decor, or if you have access to a plethora of old western boots. Here are some pics:


Work Boots and Mud Boots
Work boots, rubber boots, boots with heels, boots of all shapes and sizes are most often used as planters and flower holders. They can also be recycled into cute little fairy houses, of nifty bird houses. You can paint them, mosaic them, or let moss grow all over them. The possibilities seem endless:
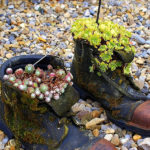
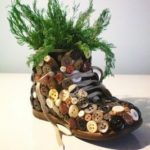


Flip Flops
If you have an abundance of old flip flops and colorful scarves, you can turn them into a really cool pair of sandals! This visual tutorial simply wraps the scarf around the flip flop and the ankles.

The following visual DIY tutorial for upgrading your flip flop fashion uses a braided strap to make the flip flops, but you can use colorful scarves and other fabrics as well.
There are so many possibilities on how you can add your favorite fabric to flip flops, but what I like most about this method is that you can make your flip flops fit perfectly so you don’t have to worry about doing the toe pinch every time you step to keep you flip flop on, or have your feet ache from flip-flops that are too tight.
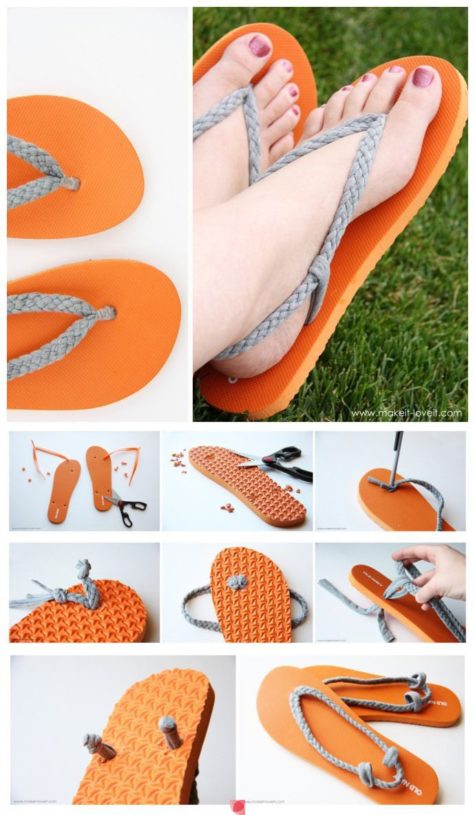
First of all, I found a very inexpensive pair of flip flops at Old Navy. (Or dig in your shoe stash. You know you have some in there.) Then, cut the plastic straps off of both flip flops.
Next, snip pieces of the flip flop away on the back of the flip flop, right around each hole of the flip flop. Don’t cut all the way through, making the hole bigger……..just make a bigger resting spot for your knot to lay (that you’ll be placing here in later steps). Cut about 1/3 of the way through the thickness of the sole.
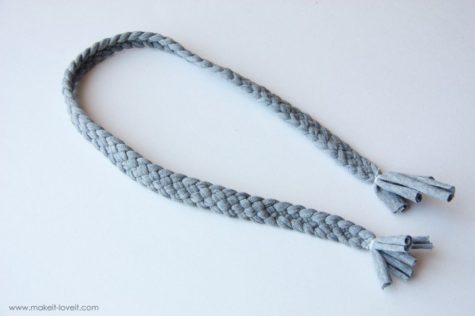 Then, create a long strand of braided knit material. T shirt fabric is great for this. Make sure you’re using a semi stretchy knit fabric so that the strap will fit snugly around your foot. This will help the sandal to stay in place.
To determine whether or not the braided section in long enough……wrap the braided knit around the back of your foot and then up over the top of your foot and down through your toes. And then make sure that there is enough to stick through the sandal and then tie in a knot. (Having a little more than you need helps.) At the ends of the braid, I just wrapped with thread really tightly, and then knotted it (the thread) in place.
Now, you need to shove the raw ends down into the hole by the toes of the sandal. I used a pen (in the “off” position) to shove the ends down in there. The hole will stretch so you can really shove a lot down in there with some effort.
You should have both ends coming out the bottom of the sandal. Be sure that the braid isn’t all twisted on the other side. Next, tie really tight knots into each end of the braid and then trim off the excess fabric. The trickiest part here is making sure that your braid is just the right length.
Then add a little hot glue beneath your knots and into the crevice of the flip-flop that you dug out earlier.
While the glue is still hot, press the knots into the foam sandal and as hard as you can, to really secure the knots in place…….and to force them into the sole of the sandal. (Depending on how big your knots are, depends on how much you should cut out of the sandal. You may feel the knots a bit while walking if you have bigger knots, so keep that in mind as well.)
Now, cut more strips of your knit fabric and make a loop of fabric on each side of the sandal, including the braided strap as you loop the side strap down in place.
After you have both side loops in place, make knots in the bottom and trim off the excess. Glue them in place the same way.
This next step is optional but it really helps make the section that goes between your toes, less bulky. I just wrapped some thread around the toe section over and over again as tight as I could (without breaking the thread) and knotted it in place.
And that’s it. Now your flip-flops are done and ready to wear.
Here are some variations on this theme:

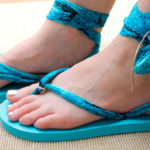

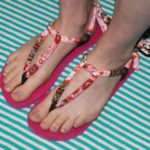


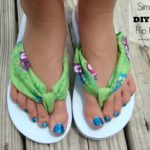
Ok… I think that about does it! Time to get cracking on our closets.
And of course, anything that doesn’t inspire an idea or appeal in any way needs to go bye bye. Either drop it in a Planet Aid bin, the trash bin, or your local thrift store.
In The Closet
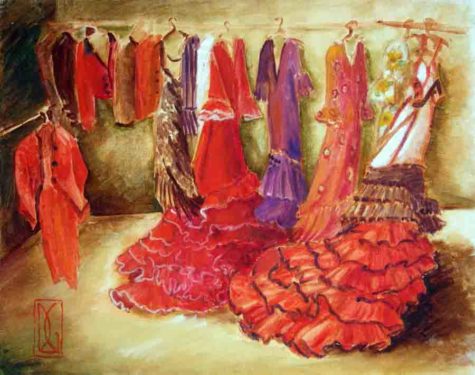
Now that we’ve cleaned up our act, it’s time to take a quick look into our closets. If your life seems unbalanced or chaotic, your closets may be to blame. Think of the state of your closets as a feng shui test of your self-esteem. In feng shui closets, are connected to your innermost, your deepest, and often hidden feelings about yourself. Think of the state of your closets as a feng shui test of your self-esteem.
- How healthy is your self-esteem?
- How clean, peaceful and beautiful is your inner world?
Here is the thing about closets – most people think of closets as an “out of sight, out of mind” deal. Not true. Especially in feng shui terms, where we know that everything is energy. It is important to understand that with the feng shui energy, the “out of sight” strategy does not work. You cannot cover, conceal or pretend not to see low energy, because, in the world of feng shui energy, there are no boundaries.
Unfortunately, most homes have busy, cluttered and just plain ugly closets. This always puzzles me; if you just take a moment to think about it, once you open an ugly and messy closet and put your clothes on, you start carrying this ugly, messy energy with you! Please understand I do not mean this as a metaphor, but as an actual experience.
So, if you are working on improving the feng shui energy in your home, do not neglect your closets, put them high on your feng shui to-do list. For optimal feng shui or energy flow, take a look at your closets’ contents and doors, which may be keeping you awake or causing unnecessary grief. Explore relatively simple ways to redirect the room’s flow and help you get back on track.
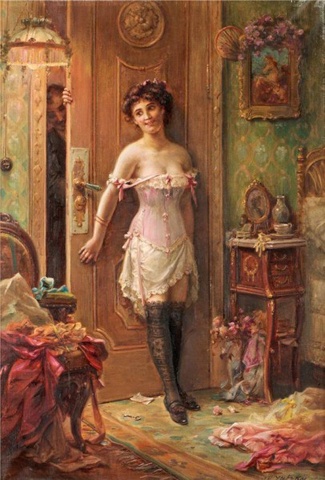
Open your closets and take a look. No worries, nobody is looking, it is just you and your closet.
- What is it telling you?
If your closet is asking for some loving care, here are some easy feng shui tips:
Reflecting on Energy
Mirrors on the outside of bedroom closet doors are a feng shui no-no, reflecting yang energy, which affects relationship, intimacy and sleep, explains Ann Bingley Gallops, a New York city feng-shui consultant. Rather than replacing the closet doors, simply hang curtains in front of them. That way you can close the curtains before climbing into bed, and open them when you get up. If you prefer, cover the mirror with peel-and-stick frosted paper or with wallpaper. Pink, blue and green offer ideal feng-shui curtain or wallpaper colors, representing multiple emotions, including love and tranquility.
Color and Light
If you have a walk-in closet, be sure the lighting is friendly and warm. Good quality lighting is extremely important for your well-being, be sure to pay attention to its quality in your walk-in closets.
No matter big or small, walk-in or not, if your closet has not been given any attention for years, be sure to refresh your closet with a fresh coat of paint.
Yes, I do mean it and I am not crazy. Unless you plan to call California Closets for a complete makeover, you owe your closet space a fresh coat of paint. Plus, you get to take all your clothes out of your closet before painting, which should make the next step much easier!
Clean and Paint
Start by taking everything out of your closet completely. Take a bucket with 1 gallon hot water mixed with ½ cup vinegar and 1 tbsp of tea tree oil. After vacuuming the closet thoroughly, wipe clean the whole closet starting from top to bottom, including the walls and baseboards.
A fresh coat of paint will work wonders at this point. Leave the door open so the paint dries well, it should take 2 to 3 days. If in a hurry, a hand held fan will speed the drying process.
Clear the Clutter
If you open the closet door and don’t know where to begin, it’s best to remove everything. As you do this, sort each item into piles or boxes, such as what you’ll keep, what you no longer want or need, what you plan to donate to charity or sell, and items you plan to throw away.
Before you can apply the principles of feng shui, you need to make sure you absolutely love everything in your closet. The average person only wears 20 percent of his or her wardrobe, meaning that there are likely quite a few pieces in your closet that you could donate or re-sell without ever missing them. Plus, when you look and feel great in your clothes, this has a significant effect on your positive energy and how you see yourself.
To separate what stays and what goes, take everything out of your closet, then try everything on. Each item that fits, looks amazing on you, and makes you feel fabulous, goes back in. Anything that’s dated, worn, stained, unflattering or doesn’t fit stays out — for good. Decide which discarded pieces you could sell on consignment, if you’d like, then bag up the rest for donation.
- Note: Tomorrow we will be exploring some great ways to use these items to beautify other areas of our home, so before you make a trip the Planet Aid bin, stay tuned for what’s on tap bright and early tomorrow morning.
Organize
As you return items to the closet, do so orderly, using woven bins to keep small clutter items neatly out of direct sight. A quick trip to IKEA will arm you with all you need for an organized closet. From baskets to boxes and everything in between, you need to have a clear system as to what goes where. And for how long. Keep your closet up with the seasons and have a clear system of dealing with seasonal clothing.
The Fifty Percent Clearance Rule
This rule means that try to have your closet clear of fifty percent of the stuff so it is clear. There should be enough space in your closet so that you can see what is there without unsettling everything. If there are shoes on the floor of the closet, they should not be touching the stuff hanging in the closet. Try to give away all that you don’t need, doesn’t fit or you haven’t worn in more than a year. When you get rid of old, unworn clothes, you make up more space for fresh new clothes in your closet.
A full length mirror at the back of the closet will give the feeling of space and also help you locate items that are in the back.
Hanger Hangups and Solutions
Something as seemingly insignificant as closet hangers can improve feng shui flow. Match the hanger with its clothing. For example, use durable wood hangers for heavy coats or suits, and satin-covers hangers for lightweight dresses or lingerie. Rather than using hangers, use hooks to create space and improve closet organization. To help closet clutter, add a closet organizer system to help keep your wardrobe orderly and accessible.
Give Your Closet A Cohesive Look
Once you’ve properly aligned your clothes, you’ll want to make sure your entire closet space looks uniform. Simple changes, such as having matching hangers, making sure all hangers face the same way and placing items you can’t hang up in identical, labeled bins can bring unity to your closet. Doing this creates a harmonious flow by ensuring each component is standardized and easy for you to locate.
Beautify
Yes, beautify. This means treating yourself nicely and respectfully and creating a sense of beauty in your closets. Be it a small photo that brings happy memories, some feng shui crystals or well-displayed pieces of jewelry, beauty is the most healing energy and should be everywhere around you.
Easy, isn’t it? Easy and simple. Watch for profound changes coming along as you start treating your home, especially your closets, with proper respect. Ultimately, the respect you show your home speaks of the respect you have for yourself.
7 Closet Makeover Tips
How organized (or disorganized) your closets are can set the tone for your whole day.
If you can pick the perfect outfit with ease, and it emerges from the closet unwrinkled, ready-to-wear and with the right accessories standing by, you’ll begin your day in a more positive mindset. It’s a small thing that, 365 days a year, really adds up.
Whether you have a large walk-in or a small close in a New York City apartment, some of these 7 closet makeover tips are sure to give you better organization and more space.
1. Customize –
Customized solutions, such as clear plastic bins you can stack however you like, wire drawers, or hanging canvas shelves for shoes or sweaters, give you the storage solutions you need. Double hung rods can make the most of a small space, especially if the bulk of your wardrobe is pants and shirts (rather than dresses). Best of all, these do-it-yourself customizations don’t cost a lot.
2. Roll underwear –
Rolling underwear in plastic bins with drawers of different sizes helps you easily sort by style or color. Plus, rolled clothing takes up less space and stays neater.
3. Select the right hangers –
Fine lingerie and evening dresses should be hung on satin hangers. Hang coats on heavy wood hangers. Whatever hangers you select, make sure clothes stay on them, because there’s nothing zen about shirts on the closet floor. Short on space? Select slim profile hangers which can double or triple available hanging space.
4. Store clothes the right way –
In addition to getting the right hanger for each job, fold items that can stretch easily, such as t-shirts and sweaters, and stack on shelves.
5. Think outside of hangers and shelves –
Hang belts, ties, and even jewelry and scarves on pegboard lining the back or sides of the closet walls. A door with pegboard on the inside adds space to a small closet. Use hooks that hang on the closet rod for bags that might lose shape if they get stuffed inside a drawer or tucked on a shelf.
6. Shoe solutions: Bins or board? –
A diagonal plywood board takes up space but displays shoes conveniently and fashionably. Clear plastic bins or hanging canvas shoe shelves are good solutions for a smaller space.
7. Color-coordinate –
Once your closet is organized, you can go the next step by color-coordinating items of the same type (i.e., shirts, tank tops, skirts, pants, etc.) This gives a cohesive, professionally organized look to any closet. It’s easiest to organize items in the order of the colors of a rainbow: Red, Orange, Yellow, Green, Blue, Indigo, Violet, and then black and white.
The biggest challenge to organize is having items with no set space. Keeping an uncluttered home is really easy. Create a place for everything and, when you’re done using it, the item goes back in that place. This is especially true for closets.
You’ll reduce the amount of time you spend putting away laundry, because it will be a no-brainer every time. You’ll also reduce morning stress. You might even spend less money because you’ll know exactly what you have to wear; you won’t fight those “nothing-to-wear-blues” that lead to shopping sprees.
You might not believe that an organized closet can change your life, but you’ll see that it can.
Extreme Closet Reorganization
When it comes to closets, we could all use good chi. Classic feng shui strategies can be integrated into your space so that every time you open those closet doors you experience serenity and calm, rather than disorder and chaos.
If you want to go to extremes, with your feng shui closet reorganization, or if you love to be thorough, you can create a positive energy flow with your pared-down wardrobe. by doing the following:
Place your clothes in this order, going from left to right, for each category:
- Your work clothes: these represent prosperity.
- Your casual wear: the clothes you wear on the weekends or when you’re hanging out with your family and friends represent your relationships with loved ones.
- Your creative wear: anything in your wardrobe that you wear when you’re crafting, gardening, baking and so on — these represent inspiration and your artistic side.
- Your formal wear: these items represent success.
- Your love life items: clothing you wear on date night, and your lingerie, represent love.
Color plays an important role in feng shui, even inside the closet. Once you have your clothes in the right categories, arrange them in the following color order, from left to right within each section: black, brown, blue, green, purple, red, orange, pink, yellow, white, metallic and grey.
Alternatively, rainbows symbolize blessing, hope, and a good future. Rather than opening your closet doors to a chaotic mix of colors, organize your clothes, use the rainbow as a guide — red, orange, yellow, green, blue, indigo and purple, and then black and white — to improve your home’s energy.
Arrange Clothes by Function
Organize your clothes in such a way that there is a system to them. Hang your shirts together, pants, skirts and dresses together. Then hang t-shirts together, tang tops and long sleeves shirts together. Finally arrange each piece of clothing by color. Hang all white dress shirts in one part, blank tank tops in another and so on. The same rule applies to your shoes at the bottom shelf of the closet. Make sure the shoes all point in one direction, facing the door. It’s a good idea to buy new hangers so your closet wears a new and neat look.
To the left of the closet, put your work or business clothes. That’s where your knowledge and prosperity are. In the middle of the closet place your casual, formal and weekend wear for your health, fame and career. Finally put your intimate clothes on the right of the closet to promote creativity.
Organize clothing by type
After you’ve organized by color, arrange your clothing by type within each hue. Place items from long sleeve to short sleeve and long dresses to short dresses (or vice versa). It doesn’t matter how you order your clothing types, just that you stay consistent in each section.
Here are a variety of simple inexpensive ideas for extreme organization. Note the heavy reliance on hangers and shower curtain clips:


Oh my! Does anyone actually have this many clothes? That they love, wear, and must keep?
Sources:
- Radical Self Care Project Overview by shirleytwofeathers - No Comment
- Radical Self Care Image Gallery by shirleytwofeathers - No Comment
- It’s A Wrap by shirleytwofeathers - 3 Comments
- Something To Consider by shirleytwofeathers - 1 Comment
- Nurturing Your Precious Self by shirleytwofeathers - 3 Comments
me: Make Your Own Violet Fire
Abdulrahman: Money Chant – Very Fast
Shirley Twofeathers: It’s A Wrap
Daniel Knirs: It’s A Wrap
Our current project began on July 4. We are exploring the concept and practice of Radical Self Care . Feel free to join in at any time!

Interested? You can visit our current project page, or you can take a look at the About The Project page if you are curious about the concept.
.
Please feel free to join in at any time! No experience necessary.
- Money Chant - Fast
- Money Chant - Slow
- Prosperity Plan
- Amazing Creator
- Cause and Effect
- I Am That I Am
- Spirit Rap
- Lakshmi Spirit Rap
- PowWow Spirit Rap
 Enter your question and receive the wisdom of the Occulatum. You may pose your question in any way that feels appropriate. The answer will come in the form of a small pop up. Try it - your life just might change for the better!

I think it's time to go shopping... maybe even buy some really cool stuff at my online shops!!