Back In The Closet
Now that we’ve gotten excited about decluttering and cleaning out our closets, and it’s time to put everything back… but before we get started with that, here are a few more helpful ideas:
Paint The Closet
The closet is actually a very important “room” or space in the home. It really can make or break a home sale if there’s insufficient closet space. So, taking it one step further, when designing your closet, also keep color in mind.
For the most part when I’m at a color consultation I always ask my client if they’d like to paint their closet. The majority of the time it’s a no because after all, “why do I need color in my closet” anyway?
There are several reason why you’d want to paint your closet:
- It’s probably still the contractors beige or white.
- It’s probably a flat or matte sheen which gets dirty very easily.
- It looks unfinished.
- It’s hard to keep clean.
- Painting is a minor detail that will have a high impact if you have to sell your home.
- It will look better.
- I don’t know what color to choose for my closet.
- I’d have to take all the shelves out or paint around them.
- It’s a HUGE project.
- No one will look inside my closet.
- It’s just a closet.
The best time to paint your closet of course is when you first move into your home and it’s still empty. You’ll more than likely have some type of wire shelving to paint around but it will definitely be worth it.
Now to the question – What Color Should I Paint My Closet?
Best colors for a closet:
You may not give much thought to the inside of your closets when painting a room but paint pros say that choosing the right color and sheen will not only improve the appearance of your closet but yours as well. No more reaching into a dark closet and grabbing the navy blouse instead of the black one. Debbie Zimmer of the Paint Quality Institute has some pointers on what to consider when painting a closet.
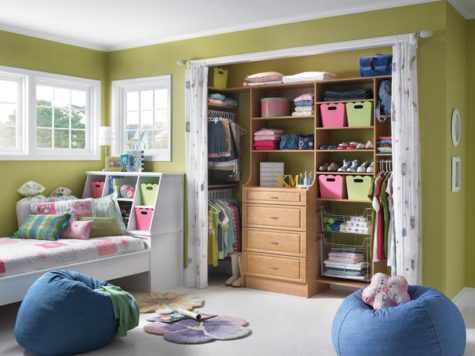
- An open closet.
Your best bet with a closet or storage space that’s open to the rest of the room is to paint it the same color as the room or a slightly lighter shade. That way it’s more integrated and less likely to draw attention to what’s inside.
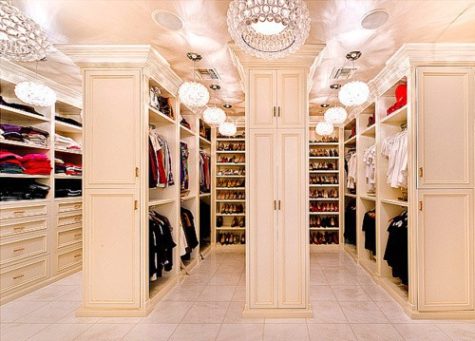
- Your primary closet.
You’ll want the closet where you store your wardrobe to be bright so you can actually see the color of your clothing. White or a light color are good choices. Choose a paint with a shinier sheen such as semi-gloss, which will reflect more light.
- Pantry or bathroom closets.
Use a durable paint in your pantry and other closets where you store things that may spill or get sticky. Use a semi-gloss sheen that stands up to scrubbing. As for color, choose one that blends in with the room.
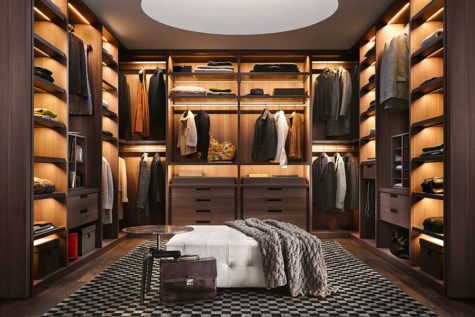
- Your junk closet.
For those catch-all closets where you stash off-season sporting goods, boots, cleaning supplies, or other gear, think about a darker color that de-emphasizes what’s inside. And keep the door closed
- Guest room closet.
You can be more playful with a closet in a guest room that’s used infrequently. Try a contrasting color. That way when your guests open the door they get a pop of color. Zimmer says that darker colors are more forgiving and can make dust less noticeable.
DESIGN TIP:
Interior designers recommend that you keep the color in your closet subtle and neutral. There really is no need to put substantial color in this room. Here’s why:

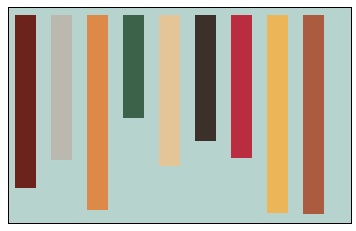
This graphic represents a neutral closet. The background is an off white or beige and the rectangles are your clothes. We all have just about every color from lights to darks in our closets so having the background a neutral will visually make the closet more appealing and easier to see. It’s really a small detail that will make a large impact in your closet.
Now this closet was painted the same coastal blue that’s been trending for quite some time. So many people have this color in their bedroom and have taken it into their closet but look what happens. It’s very unsettling to see all this color in a closet. The color of your clothes fight with the blue and it just becomes a mess. It’s like painting every room in your home a different and unrelated color. It doesn’t make sense and it’s just ugly! By the way – the color of the “clothes” are the same in both these graphics but see how different they look?
According to Feng Shui principles, white is the ideal color is ideal as it opens the energy more, as well as brings the crisp quality of the metal feng shui element.
So, I was thinking about red or maybe orange… I did some experimenting with the graphic, even made one a bright white. Here’s a sampling of the different colors:


Wow… I really like the black! I wonder if I could make it work in real life, or if it just looks good because it’s on a digital graphic instead of on a wall.
So my friends, whether you have a very large walk in closet or a very small closet, take the time out to finish it. And remember, color matters!
Organizing The Closet
Now that we have our closets painted, it’s time to get them organized. I looked around for inexpensive and easy storage systems, and found something that I think might work just fine. At least for a while.
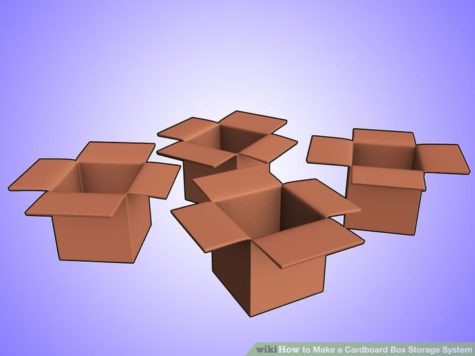
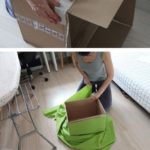
Now that we’re cleaning up our clutter, you may notice that you have a lot of cardboard boxes that you need to get rid of. Packages are often delivered in boxes, you might get some extra boxes from shopping trips to warehouse grocery stores like Costco or Sam’s Club. It can be a little overwhelming when you look at all of the boxes you’ve brought into your home!
As you’re cleaning up these boxes, you might want to consider using them to make easy, inexpensive storage bins. One of the great things about having so many cardboard boxes on hand is that you have a lot of different shapes and sizes to choose from. If you’ve been meaning to implement a storage solution in a particular part of your home, this might be the perfect time to find something that will fit your needs!

Org Junkie says:
“I like using cardboard boxes for storage in our home because they’re free, and they’re disposable. We move a lot, and I’ve found that often a storage solution that worked in one home won’t work in another. We have another move coming up in the summer, and I’m hesitant to spend a lot on storage solutions that might not translate well to another home. By repurposing cardboard boxes for storage, I’m saving money, and cutting down on the amount of stuff we have to move to a new home.
I also used a smaller cardboard box to store toilet paper in our powder room. Our powder room doesn’t have any cabinets or shelves at all. We were forever having to run to our linen closet to replace our toilet paper rolls, so this new storage solution is a welcome addition in our home.
As you’re going through your cardboard boxes, think about different ways you might be able to use them to help you work towards a more-organized home. The storage solutions you’ve been looking for might be right under your nose! Happy organizing!”
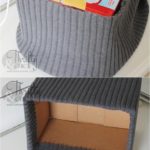
To make the storage bins look great and give them more durability and strength, I think it’s worth revisiting a yesterday’s post and taking another look at these:
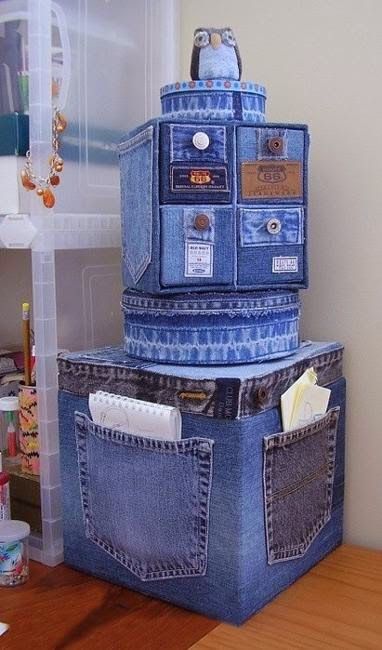
Build Your Own Storage System
From WikiHow, we have a great tutorial for a cardboard box storage system. It looks pretty sturdy, and I think it just might work if it’s not loaded down with anything too heavy. Here’s the tutorial:
If you have a lot of small supplies to store but would rather not invest in a permanent storage system yet, you can make your own from boxes and add to it as your collection grows. It’s not the best, and sturdy system, but it’s flexible, easy and inexpensive, and that might be just what you’re looking for!
Step 1
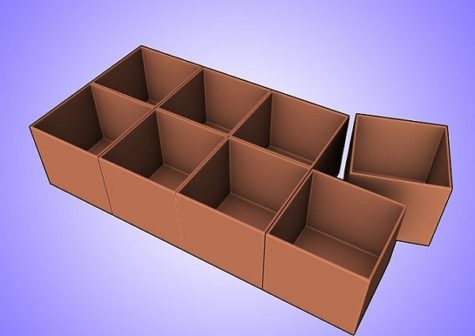
Get the boxes. Try to use sturdy heavy duty cardboard boxes. Thin, bendy boxes probably won’t work very well. You can use any measurements you want, as long as four long boxes (drawers) fit into one cubic box (compartment). Here are some suggested measurements and quantities:
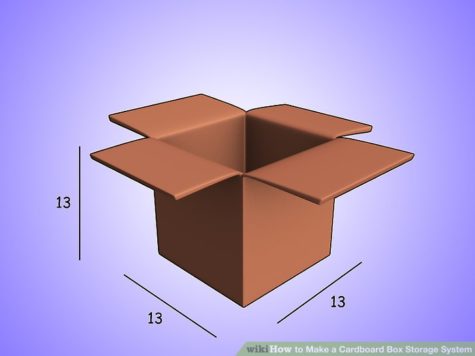
This box is 13 inches by 13 inches by 13 inches. The “drawers” for this compartment would need to be 6 inches high, 6 inches wide, and 13 inches deep. This gives a 1/2 inch clearance on the top and sides. Make sense?
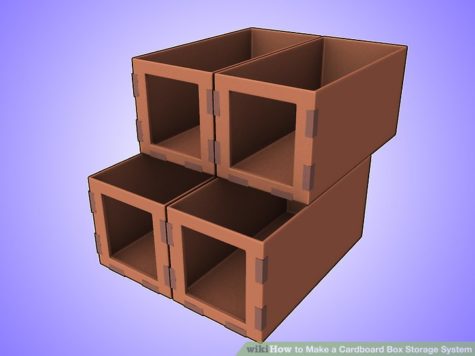
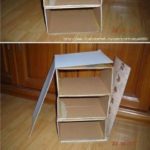
Step 2
Assemble the square “compartment” boxes into a shelving unit as shown in the picture.
Note: If these cardboard boxes are not as sturdy as you’d like, you can fold the flaps inward and glue them to the sides of the box. I would recommend using a good wood glue and weighting them down with books until the glue dries. Obviously this step would have to be completed before the boxes are assembled into the above shelving unit.
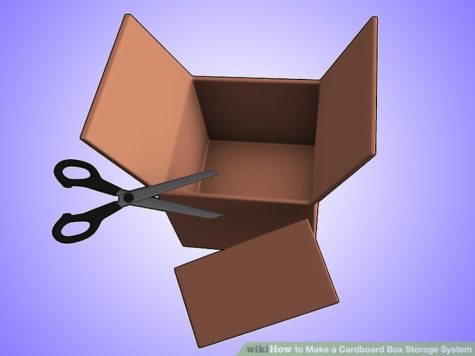
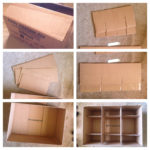
If you have nice thick sturdy cardboard boxes, you can cut the flaps on one side as shown below:
Step 3
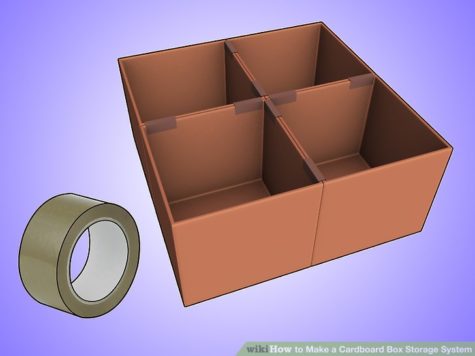
Tape the cubes together – front, back and sides. When taping is completed, put the completed shelving unit against a wall.
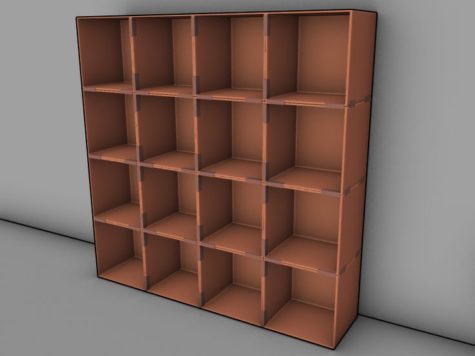
Note: This tutorial shows a storage unit that is a 4 boxes by 4 boxes square… you can make your own to suit your needs. It doesn’t have to be square like this one. I do, however, think it will look better and hold up longer over time if the boxes are the same depth. That’s because the weight is distributed evenly. I haven’t made one of these yet, so I’m not entirely sure.
Step 4
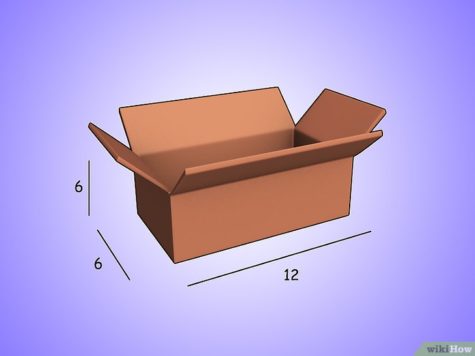
Now it’s time to make the “drawers” for the compartments. This part is optional, and not all of the compartments need to have drawers unless you want them to.
Assemble the long boxes, which will be drawers. Cut the flaps off the top of the boxes unless you want to forego the option of pulling the “drawer” out. In which case, leave the flaps on and tape them well. Cut out a square at one end of the box. Four drawers fit in one compartment.

This tutorial does not include any kind of decoration or spiffing up of the boxes. The drawers are loaded up, inserted, and labeled.
The suggestion is to:
- Sort the drawers alphabetically.
- Alternatively, sort the drawers so that things you use most often are at arm level, easiest to reach, and things that are less frequently used are lower or higher.
- Slide the drawers into the compartments.
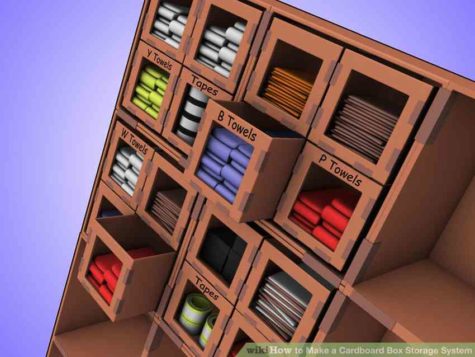
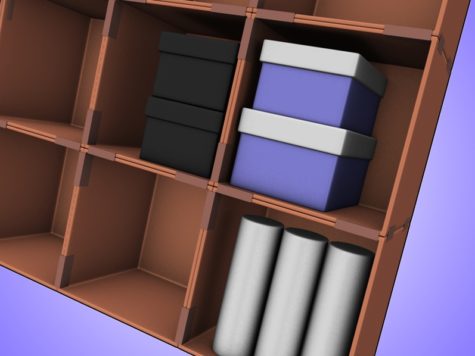
Use compartments without the drawers for larger objects.
Use small containers to store small objects. The cannisters are tennis ball cans. Check with your local tennis club – you might get a bunch of them for free.
Community Q&A
These questions and answers were also part of the tutorial, and I thought it might be good to include them here.
Where can I get cardboard boxes?
- Look at the dollar store or ask a local convenience store to save their leftover boxes for you.
- The easiest way is to find a box that is not being used in the house. You can paint it or cover it in duct tape to add strength and color. You can also label and decorate it if you like.
- Local furniture stores are a great resource for heavy duty cardboard. The boxes are really big, but
What if the system is not stable?
- You may want to cover it with duct tape, or add pieces of wood on the bottom and sides to make it strong.
How can I color cardboard furniture?
- You can use all different types of paint, markers, stickers, or any other art tools you can think of!
What is the effect of a cardboard box storage system on the environment?
- By reusing things like boxes, you’re generally cutting down the amount of energy that would be needed for recycling.
- You’re also preserving the environment by cutting down on the energy needed to produce other materials like wood or plastic.
What kind of tape should I use? What tape is best to paint over without it peeling?
- You should use duct tape, it has a strong flexible adhesive that will hold the boxes together, and provides a clean look.
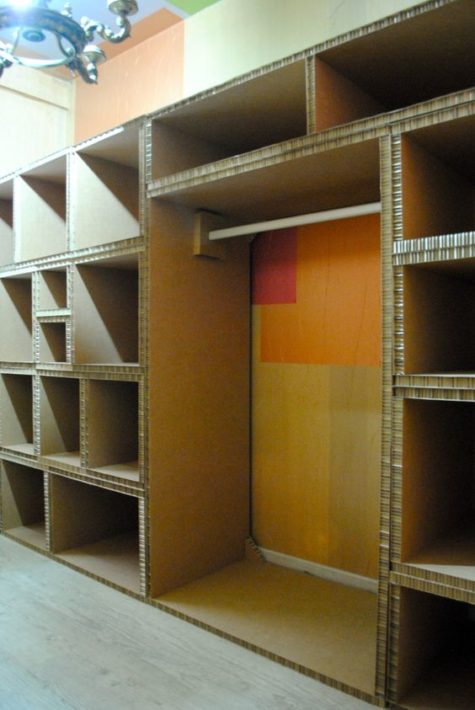
But wait, there’s more!
This is a picture of a whole closet made from super heavy duty cardboard. I wonder where they got that!
Here are a couple of YouTube tutorials:
Her English isn’t that great, but I like her tutorial because it doesn’t look like an expert make it. Also, I love her idea on how to strengthen the shelving. I recently bought a convection oven, and those corner pieces were in the box. So, I might be able to use them when I make my own.
This is a nicely done tutorial, and I like the idea of using wood between the boxes. This looks very sturdy!
This tutorial was for using big sheets of heavy cardboard, that they got from a local furniture store, and making them into a really sturdy shelving unit. I don’t think you’d actually need a table saw, or power tool for this. A nice sharp box cutter would probably work just fine. He also doesn’t give exact dimensions, so you’d have to think it through and draw a good diagram. He had another tutorial where he tested it to see how much weight it would hold, and I was impressed. So am also considering this as a viable idea, I think it might actually be capable of holding books !!
And here is one more. It’s really short, but she makes it look so easy. I like the idea of using nuts and bolts to attach the boxes together. Her finished product looks a little rough, I think it needs some contact paper, paint, fabric, and/or bling.
Making it pretty:
I found a variety of tutorials about how to turn a cardboard box into something that looks cute. These are visual only, and don’t come with written directions, but I think you can get the idea from the pictures:


I also found these ideas:
-
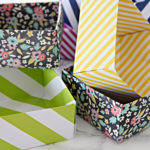
- Wrapping paper is pretty but may not last very long.
-
- Fabric is a nice choice. You could even add a handle.

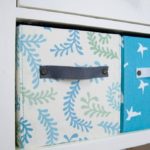
-

- Sturdy fabric and a small framed chalk board makes for a cool storage box.
-
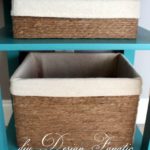
- Wrapping twine around the outside, and gluing fabric to the inside makes these boxes nice and sturdy.
-
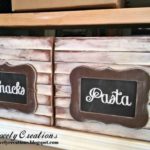
- These boxes have cheap wood slats glued on the sides along with a nice framed chalk board.
So, lets get our closets painted and organized so we can put all our favorite stuff back in them and get started making even more cool stuff out of the left overs!
Sources:
- Radical Self Care Project Overview by shirleytwofeathers - No Comment
- Radical Self Care Image Gallery by shirleytwofeathers - No Comment
- It’s A Wrap by shirleytwofeathers - 3 Comments
- Something To Consider by shirleytwofeathers - 1 Comment
- Nurturing Your Precious Self by shirleytwofeathers - 3 Comments
Liana: A Prosperity Prayer
B. Joy Barrett: beautiful-turquoise-upholstered-accent-chair-for-living-room-with-within-colorful-accent-chairs-colorful-accent-chairs-transforms-the-look-of-a-room
Claudette Losier: Why Does It Work?
me: Make Your Own Violet Fire
Abdulrahman: Money Chant – Very Fast
Our current project began on July 4. We are exploring the concept and practice of Radical Self Care . Feel free to join in at any time!

Interested? You can visit our current project page, or you can take a look at the About The Project page if you are curious about the concept.
.
Please feel free to join in at any time! No experience necessary.

- Money Chant - Fast
- Money Chant - Slow
- Prosperity Plan
- Amazing Creator
- Cause and Effect
- I Am That I Am
- Spirit Rap
- Lakshmi Spirit Rap
- PowWow Spirit Rap
 Enter your question and receive the wisdom of the Occulatum. You may pose your question in any way that feels appropriate. The answer will come in the form of a small pop up. Try it - your life just might change for the better!


I think it's time to go shopping... maybe even buy some really cool stuff at my online shops!!

Leave a Reply