Interior Decorating
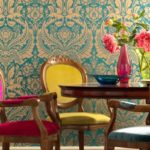
All About Yellow

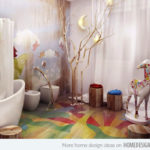
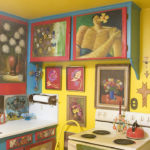
Yellow is the color of sunlight and as such is a cheerful and happy color. Yellow expresses the need for constant stimulation and activity. It is an inspiring and expressive color which expands the mind and the capacity to understand. Yellow is associated with the mentally adventurous. It is the color of the solar plexus chakra.
Yellow is the color of gold, butter, and ripe lemons. Yellow is commonly associated with gold, wealth, sunshine, reason, happiness, optimism and pleasure, but also with cowardice, envy, jealousy and betrayal. It plays an important part in Asian culture, particularly in China.
Yellow enriches, stimulates, lightens and activates many of the systems of the body. It tends to encourage orderliness and clarity. It can act as a mild sedative to relieve many fears and give a mental lift. Gradual and consistent exposure to yellow light decreases blood pressure and heart rate and increases energy and endurance.
Yellow is the color of the mind and the intellect, vitality, power and ego. It is optimistic and cheerful, however it can also suggest impatience, criticism, and cowardice.
Yellow links with and stimulates the solar plexus, or psychic center (the third chakra). It can be used for psychic burnout or other psychic-related conditions or ailments. Activates and cheers up depressed and melancholic people. Gives lust for life.
Yellow is a very favorable vibration for mental or intellectual activity, as it promotes a clear state of mind. Yellow heightens your awareness and alleviates depression, sadness, or any kind of despondency. When studying, having objects of lemon yellow around will help the memory functions of the brain. If exam-stress is a problem, a bright golden yellow encourages relaxation and reduces nervousness.

More About The Color Yellow
The word “yellow” comes from the Old English geolu, geolwe, meaning “yellow, yellowish”, derived from the Proto-Germanic word gelwaz. It has the same Indo-European base, –ghel, as the word yell; –ghel means both bright and gleaming, and to cry out. Yellow is a color which cries out for attention.
The English term is related to other Germanic words for yellow, namely Scots yella, East Frisian jeel, West Frisian giel, Dutch geel, German gelb, and Swedish gul.
According to the Oxford English Dictionary, the oldest known use of this word in English is from The Epinal Glossary in the year 700.
In Ancient Egypt, yellow was associated with gold, which was considered to be imperishable, eternal and indestructible. The skin and bones of the gods were believed to be made of gold.
The Egyptians used yellow extensively in tomb paintings; they usually used either yellow ochre or the brilliant orpiment, though it was made of arsenic and was highly toxic. A small paintbox with orpiment pigment was found in the tomb of King Tutankhamun. Men were always shown with brown faces, women with yellow ochre or gold faces.

Seeing Yellow
Although yellow occupies one-twentieth of the spectrum, it is the brightest color, the most luminous of all the colors. It’s the color that captures our attention more than any other color.
In the natural world, yellow is the color of sunflowers and daffodils, egg yolks and lemons, canaries and bees. In our contemporary human-made world, yellow is the color of Sponge Bob, the Tour de France winner’s jersey, happy faces, post its, and signs that alert us to danger or caution.

Wearing Yellow
Wear yellow to present a cheery, uplifting effect. Use it around your office to help keep a clear your mind, and improve memory and decision making.
Put yellow in your life when there is:
- Confusion and indecision, poor memory.
- Fear and anxiety caused by unknown factors leading to nervous and digestive disorders.
- Nervous exhaustion, nervous breakdown, “burn out,” panic attacks, hot flashes.
- Poor memory, inability to concentrate or study.
- Tendency to SAD, or lethargy and depression in dull weather.
- Irritability, tension, restlessness, feelings of depression and inability to make decisions.
Questions to ask yourself when drawn to yellow:
- Is there a need to start thinking clearly?
- What are you afraid of?

Healing With Yellow
Yellow is associated with the solar plexus chakra. Yellow activates the motor nerves. It generates energy for the muscles. Disturbance in the supply of yellow energy to any part of the body can cause disturbance of function in that area including partial or complete paralysis from the deficiency of sensory and/or motor energy. Its complement is violet.
Yellow activates the motor nerves. It generates energy for the muscles. Disturbance in the supply of yellow energy to any part of the body can cause disturbance of function in that area including partial or complete paralysis from the deficiency of sensory and/or motor energy.
Yellow is a mixture of red and green rays. It has half the stimulating potency of red and half the reparative potency of the green. Hence, it tends both to stimulate function and to repair damaged cells. Yellow light directed at the intestinal tract for short periods is a digestant. For longer periods, it acts both as catharsis and as a cathartic. It also stimulates the flow of bile and has an anthelmintic action (antagonistic to parasites and worms).
Yellow predominantly affects the solar plexus chakra, and it is stimulating to the mental faculties of the individual. It can be used for depression. It helps awaken an enthusiasm for life. It awakens greater confidence and optimism. It is also effective in the treatment of digestive problems. It is beneficial to the stomach, the intestines, the bladder, and the entire eliminative system as well. It is very effective in the treatment of most headaches. It helps to balance the gastrointestinal tract.
Sources:
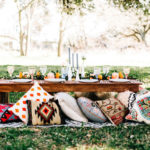
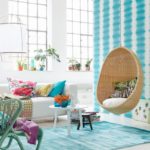
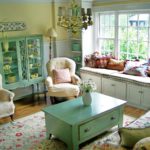
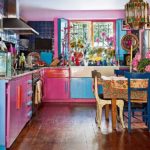
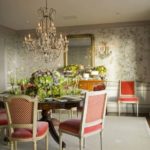
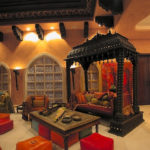
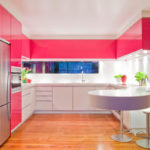
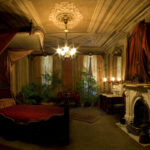
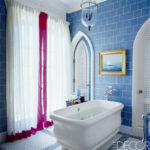
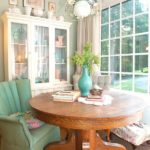
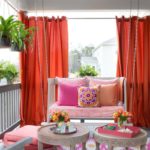
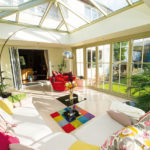
A Gallery of Home Interiors
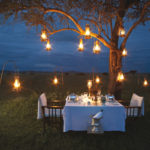
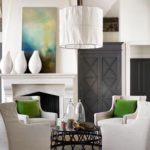
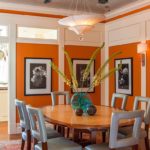
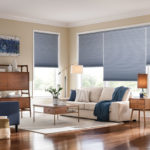
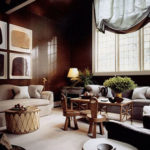
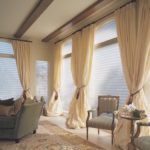
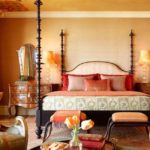
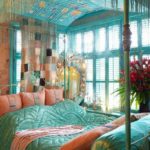
We explored a wide variety of home interiors over the 30 days of this project. I thought it might be fun and interesting to see them all in one place. I also included some of the “outdoor rooms.” There were so many images that I may have missed one or two when compiling what might be one of the largest collections of home interiors in a single post! LOL. Enjoy!


It’s A DIY Roundup

There was so much information packed into each of our Living As If… project posts, and it occurred to me that going back to find a specific how-to might be more than a little bit challenging! So I thought it would be a good idea to provide the images as a sort of DIY gallery and sneak peak.
- From our post: Deliciously Aromatic Cleaning Products

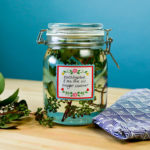
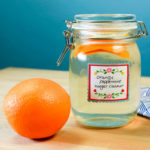
Recipes for cleaning products that not only do a good job of cleaning, but also are easy, inexpensive, and smell great!
- From our post: Let’s Clean Up Our Act

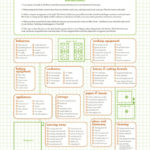
This wonderful little printable list makes all those overwhelming household chores seem easy by putting it into a schedule that makes sense.
- From our post: Getting Mugged


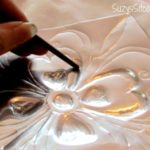
In this post, we explored how to decorate mugs using sharpie pens. There is a detailed how-to and a bunch of useful tips from people who have tried it.
- From our post: Leave Your Troubles At The Door


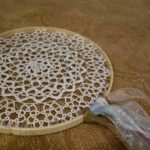
This post is all about leaving your troubles at the door, and one of the things we learned was how to make a dream catcher with a doily and an embroidery hoop. Super easy… and it looks great!
- From our post: Out Of The Closet


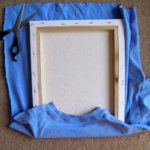


We cleaned out our closets, and then found a boatload of cool ways to upcycle all of our old t-shirts, jeans, sweaters, and yes… even flipflops and crocs. This post is loaded with ideas and how-to’s.
- From our post: Back In The Closet


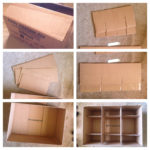


This post was all about how to use cardboard to easily and cheaply create sturdy, practical, and usable storage spaces in your home and closet. Lots of great ideas here!
- From our post: Tea and Crumpets


This post features a recipe for crumpets, and a tutorial for making a great pot of tea.
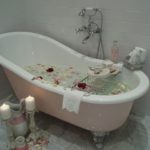
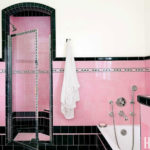
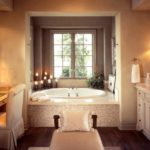
- From our post: Luxuriously Delicious Ideas For The Bath


This post was jam packed with ideas for the bath, recipes, and how-to’s. Among other things, we learned how to make bath bombs and milk baths. There is a bunch more on the post itself.
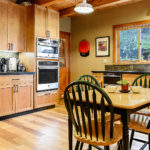
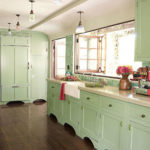
- From our post: For A Well Organized Kitchen


These are some super cool printable ideas for kitchen organization.
- From our post: Almost A Vacation


In this post, we learned a very easy way to make a super simple hammock. Plus we discovered an amazing recipe for a picnic basket pie!
- From our post: Let’s Go To The Opera


A great recipe for opera cake! Looks super yummy if anyone has the courage to try it!
- From our post: Clean and Clear

A detailed how-to all covering ways to easily clear the energy in your home.
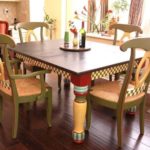
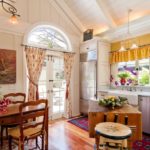
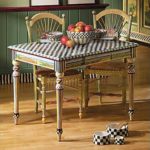
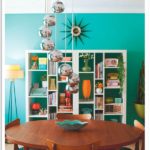
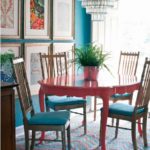
- From our post: Refurbishing The Dining Room


Ranging from making cool embossed tin (or aluminum) ceiling tiles to how to re-cover a dining room chair. The diy projects in this post were all about creating a super cool dining room.
- From our post: Let’s Go Outside


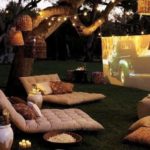
As part of this project we explored outdoor fire pits and also some cool fountain ideas… along with a bunch of other cool and interesting stuff.
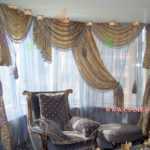
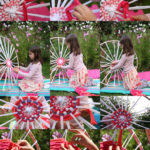
- From our post: Letting The Outside In


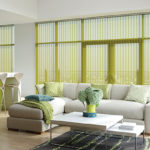
These are some of the visual tutorials on making cool beaded curtains, and a couple of other things as well. The ones shown here are pretty complete in and of themselves, but there is a step by step tutorial on how to make a beaded curtain in the post.
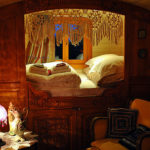
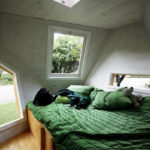
- From our post: Is it nap time?
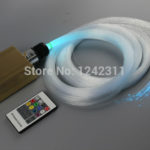


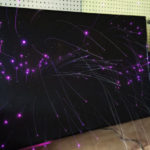
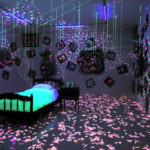
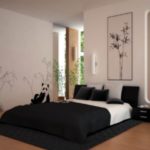
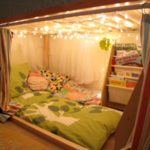
This post was all about getting a good night’s sleep, and included a cool LED optical fiber ceiling project. It’s not a step by step how-to, but it does give the basic idea of what’s involved.
- From our post: Come On In and Have A Seat


This post was all about the furniture, covering it up, reupholstering, and also painting it. Here is a collection of the how-to images. I didn’t include them all, just enough to give an idea of what’s involved. For the complete tutorials, you’ll have to visit the post.
Living Room Feng Shui
Living rooms have always been an integral and important part of any home – be it an apartment or an independent house – and that’s because living room is the only place in your home where most of the social and family gatherings happen.
As a place of entertaining guests and a space of family chatting, gathering and relaxation, the living room is supposed to be lively and harmonious. The living room Feng Shui is related to personal wealth and health, as well as the peace and happiness of the whole family.
The living room is an essential part of a house and it is also one of the most vulnerable parts of a home. Vulnerable because, in majority of houses, living room is the first room that someone goes to once they enter from the main door and Qi energy isn’t an exception.
Now, imagine a house, in which the Qi entering the home – obviously via living room – is very fast and agitated (fast moving Qi in feng shui is called as Sha-Qi and it’s very inauspicious) or extremely slow and almost still (which is, again, very inauspicious); this Qi will – definitely – interact with family members and bring all sorts of unwanted, unexpected and tormenting situations in life; below is a list of a few – in fact very few – such situations.
- Loss of wealth, money and even leading to bankruptcy.
- Degradation in health and lethal medical conditions.
- Defamation of social reputation.
Now, a feng shui living room is the one that has the ability to transform any type of Qi (extremely fast or dead slow) in to positive Qi (a steady and calmly moving one). The positive Qi is believed to attract wealth, health, good luck and lots of name and fame, which is – after all – what we all want to have. This is – without a doubt – the number one reason to make the living room in your home a feng shui complaint one.
To make it really easy for you to understand and achieve a feng shui living room, we’ve divided the process into steps.
Basic do’s for good feng shui in the living room:
- The living room must be roomy, comfy and pleasing.
- It must receive ample sun light and must be ventilated.
- Place the sofa against a solid wall; it doesn’t need to touch the wall, you can keep 1-2 inches distance.
- While sitting on the main sofa, you must be able to see the main door. If entrance isn’t visible then use a mirror to see the door.
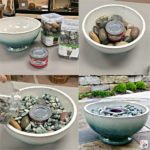
- Place a bowl with crystals, coins, and various wealth symbols on coffee table.
- If there’s a beautiful landscape outside your home, then hang a mirror in such a way that it reflects that landscape. This brings in the positive Qi energy.
- Hang images, posters or pictures that are lively and positive such as a pleasant landscape or smiling faces etc.
- Make sure to cover the TV screen when it’s off else it becomes a sort of mirror.
- Place 2 Foo Dogs on either side outside the main door, as if guarding your home.
For north side of living room
- An aquarium in north brings wealth and auspicious opportunities.
- Keep eight red and one black fish in aquarium.
- Square or rectangular shaped aquariums are best; round ones will also do.
- A water fountain in north also attracts wealth and luck.
- The fountain must flow towards the room and not outwards.
- Hang picture of beautiful water body such as meandering river or a boat/ship sailing (make sure the boat/ship sails into the room).
- Try to use black and blue colors in north.
- TV in north attracts good luck in career.
- Avoid keeping any plants in north side of the living room.
- Avoid placing a fireplace in north side of the living room.
For south side of living room
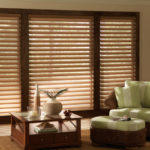
- Place candles, wood furniture and other wooden décor items.
- You can locate a fire place in south.
- Try to use more of red, pink, orange, and green colors.
- Place TV or plants to get fame and respect.
- Avoid aquarium or anything related to water in south side of the living room.
- Avoid placing mirrors on the south walls.
For east and southeast side of living room
- Put wood items like picture frames, lamps, book shelves etc.
- Hang coins tied with red ribbon in east corner (brings wealth and money).
- Hang dragon painting (looking in to the house) on east wall to bring wealth.
- Place dragon headed tortoise with coin in its mouth in southeast corner (this brings wealth).
- Place a three legged money toad in southeast; it brings money and wealth.
- Use more of green and brown colors in east or southeast.
- Plants in southeast bring wealth and money.
- Plants in East direction attract health.
- Keeping an aquarium in southeast attracts wealth and luck.
- Avoid having a fireplace in the southeast side of your living room.
For west and northwest side of living room
- Keep metal décor objects such as bowls and trays.
- Put metal figurines, furniture, candle holders, photo frames etc.
- Use blue, gray, gold, tan, and bronze colors.
- A family picture in metal frame on west wall brings luck.
- Avoid aquarium or anything related to water in the west or northwest side of the living room.
- Avoid placing mirrors on the west walls.
- Avoid having a fireplace in the west and northwest side of your living room.
For northeast and southwest side of living room
- You can place crystals and other minerals objects.
- Keep pottery and ceramics, such as show pieces, pots, bowls etc.
- Mustard, clay, brown, tan and russet toned colors are best.
- Cut glass and hand-blown glass objects can be kept.
- A fire place in southwest enhances romance and love.
- A fire place in northeast helps in peaceful thinking; also brings luck in education.
- Avoid keeping any plants in the southwest or north east side of the living room.
What you must avoid in the living room
- Avoid windows behind the main sofa.
- Never place the sofa under a beam; this brings head related medical troubles.
- Avoid L shaped sofas.
- Any mirror shouldn’t reflect clutter, dirt or anything negative as that negativity will be attracted to your home.
- Make sure that your image isn’t seen in the mirror while you’re standing at any door.
- Avoid hanging pictures that depict negative emotions such as a weeping girl, vicious animals, war, crime, loneliness etc.
- Avoid clutter and mess in living room (actually this should be avoided everywhere).
- Avoid having a door directly facing the door of living room.
- Avoid turbulent or rough sea paintings as they depict struggle.
Decorating the Feng Shui Way
In feng shui terms, the main challenge with decorating a living room is to create a space that has the ability to not only be beautiful and practical but also have a strong, fresh, clean, and happy energy. A living room that is beautiful and works well on a practical level usually takes quite a bit of planning and persistence (along with the desire to decorate, of course!)

- Clutter
A living room that is clean and clutter free is the only foundation for good feng shui. Yes, we know you might have heard that many times, but this essential first step has to be emphasized again. There can be no solid and good feng shui energy in a space that is infected by clutter, the two of them cannot co-exist; it is either one or the other.
- Air and Light
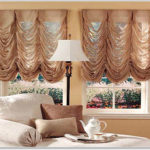
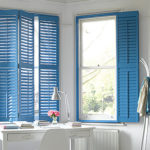
The next step in good feng shui living room decorating is to be sure your room gets as much natural light and good quality air as it possibly can. Good quality air and good quality light create the foundation of good feng shui energy, and there are many ways to help you do the best with this feng shui step. For example, if you have only a few small windows, decorate with mirrors to bring more natural light, as well as be sure to layer your indoor lighting.

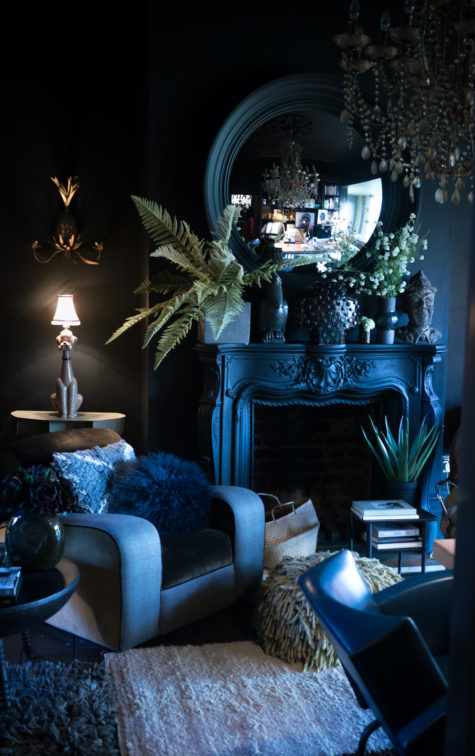
A bright and sunny living room will bring prosperous family luck to the family. Dark colors should be avoided in the decoration of the living room, as it may bring bad luck to the family.
- What does layering your lighting mean?
Simply stated, it means you have several different levels of lighting. So, in addition to a ceiling fixture, you will also have a floor lamp and several table lamps, for example. If you limit your living room lighting to just your ceiling lamp or just a floor lamp, this will tend to create a sad and potentially depressing quality of feng shui energy in your room.
- How about fresh air?
The benefits of fresh air to your health are obvious, so along with opening your windows often we highly suggest you go for a good quality aromatherapy diffuser to benefit from the healing power of pure essential oils. Stale air and poor lighting are big enemies of good feng shui, so be sure you pay attention to the quality of air and light if you want to have good feng shui in your living room.
- Be Practical
Having a welcomed, relaxed (and beautiful!) space for both children and adults to spend time in can be a challenge. Well, we should include pets, too. It is important to know that you can create a very beautiful living room, but if it does not work on a practical level and you keep worrying about your kids messing it up or do not want your pets to be there, then no matter how beautiful your room is, this is not good feng shui.
Basically, a good feng shui space is a space that does the best job for its specific purpose, and beauty at the expense of practical use is just not good feng shui.
Contrary to the popular belief, children can help you with keeping the living room clean, it is just a matter of clear organization and clear communication, of course. If each item in your living room has its own space, the possibility of mess and clutter is greatly diminished, and everyone can feel happy and enjoy good feng shui energy.
Color Matters
Ok, now that we are done with the basics – no clutter, good organization, good quality air and light plus practical beauty, let’s move on to the more specific feng shui decorating tips for your living room.
We start with the color scheme, of course, because color is an expression of light and it has the biggest impact on our mood. It is also very important for good feng shui because each color is an expression of a specific feng shui element.
- Feng shui elements
In feng shui, each color is considered to be an expression of one of the 5 feng shui elements: Fire, Earth, Metal, Water, and Wood. Each of these 5 elements “governs” a specific area of your home (according to the feng shui energy map of your space called bagua). When your choice of color is focused on strengthening and nourishing the feng shui element of the area you are decorating, this results in good feng shui energy.
This feng shui color guide will help you choose best colors to create a harmonious feng shui home. Choose the feng shui colors according to the energy you need and bring them into your space with the wall color, art, photography, or various decor items.
Choosing a good feng shui decor scheme for your living room usually requires a bit of work. It is best to start with understanding the feng shui bagua, or energy map of your home. This is our next step.
- Define and use the bagua
The bagua is the feng shui energy map of your space. In order to create best feng shui energy in your living room, it is best to define the bagua of your home first. Once you know the feng shui area of your living room, you will have clarity on the best choice of colors, shapes, and materials based on the feng shui element that needs to be supported there.

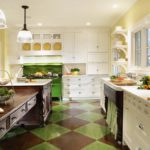
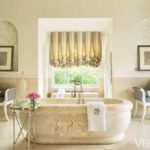
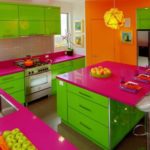
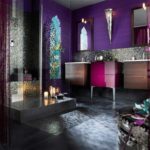
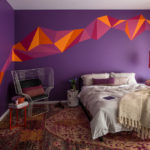
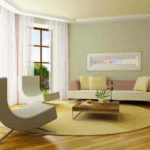
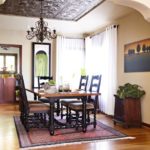
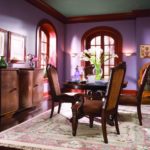
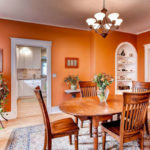
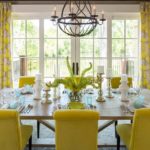
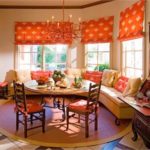
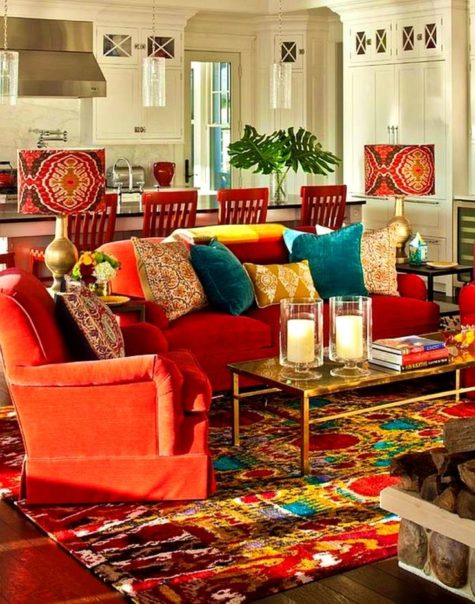
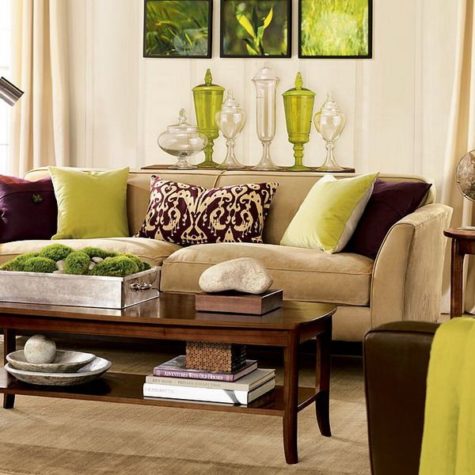
For example, if your living room is in the South feng shui bagua area, then it is excellent to decorate your living room with colors of the Fire and Wood feng shui elements. So colors red, orange, yellow, purple, along with green and deep brown will all create excellent feng shui energy in your South facing living room.
By the same token, a black or blue color scheme is not recommended for a South facing living room because it will create a weak feng shui energy due to the clashing effect of feng shui elements (blue and black colors are the expression of the Water feng shui element that puts down the Fire needed in the South area).

If this all sounds too complicated for now and you just want a shortcut to the best feng shui colors for your living room, here they are:
- East room colors:
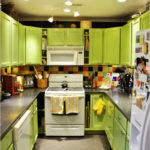
If you are looking for best colors for an East facing room, be it a living room or a child’s room, then the colors of the Wood element – green and brown – are your best friend.
Blue and black colors are also good feng shui for an East room. Limit red and purple colors.
- Southeast room colors
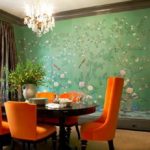
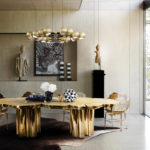
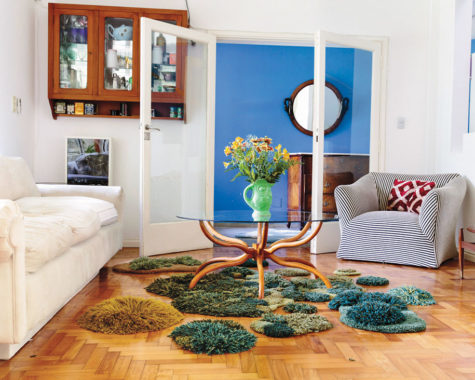
Southeast area rooms love the same colors as the East area – green, brown, blue and black, with one addition – golden tones, as traditionally Southeast is considered to be the Money area in one’s home, so bring some gold colored treasures into a Southeast living room or dining.
- South room colors
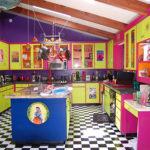
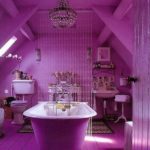
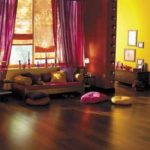
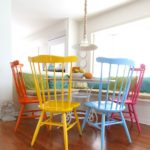
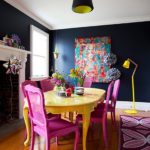
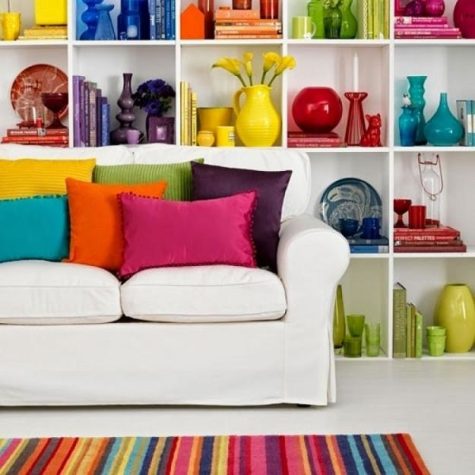
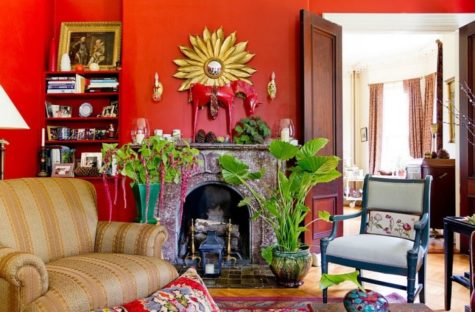
South rooms have a lot of fire and they love it! Feng shui-wise, best colors to create good energy in your South facing rooms are the Fire and Wood element colors – red, orange, purple, pink, strong yellow, as well as green and brown. Try to limit a strong presence of blue and black colors in your South facing rooms.
- Southwest room colors
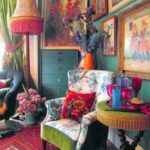
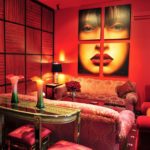
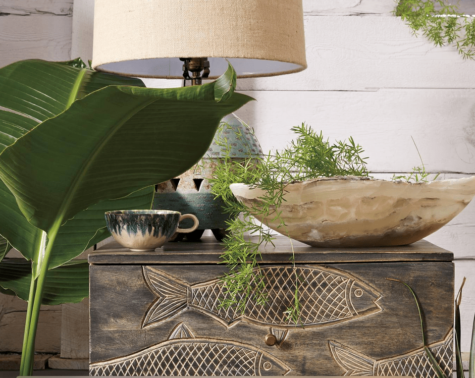
Best feng shui in Southwest facing rooms is created by the warm and nourishing earthy colors – meaning colors of clay, pottery, earthenware, bricks, etc. Fire colors are also excellent for a Southwest room, so you can also go for warm red, pink or coral.
Considering that this area in feng shui in connected to your love and marriage energy, add a touch of romance with a floral print or some sensual fabric in blush skin color tones.
- West room colors
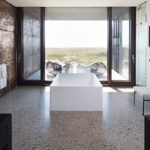
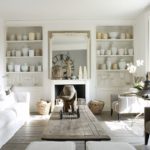
A West facing room needs (and loves) a strong presence of the Metal feng shui element, which is expressed in colors gray and white, as well as all metallic finishes. It also loves the warmth of nourishing earthy colors.
Avoid a strong presence of fiery colors, deep blues and blacks.
- Northwest room colors
Northwest area rooms also love the Metal feng shui element, so the same colors are good here: grays, whites, all metallic finishes and warm earthy colors from nature. Avoid fiery colors, avoid black and blue colors. As this is the area connected to Heavenly Blessings in feng shui, a small metal Buddha statue can work very well here.
- North room colors
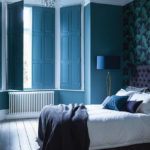
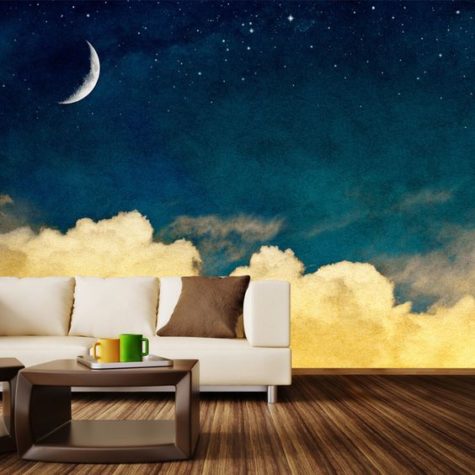
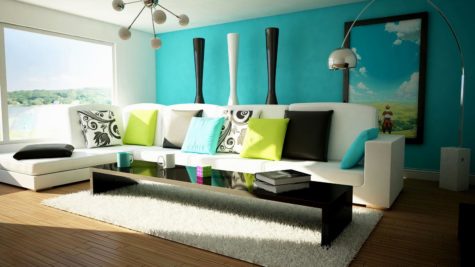
North loves water, water and more water! So, all shades of blue and black colors are excellent here. White, gray and all metallic finishes are also helping create good feng shui in a North facing room. Avoid a strong presence of earthy colors.
- Northeast room colors
A Northeast facing room loves the Fire and Earth feng shui elements and is connected to the energy of spiritual growth and cultivation.
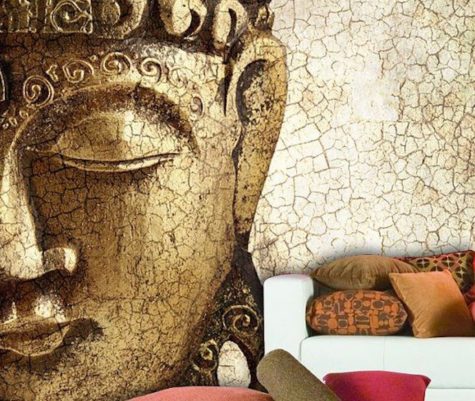
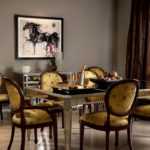
This golden Buddha wall mural expresses perfectly the best feng shui energy for the Northeast location. Color-wise, all earthy colors plus red, oranges, purple, magenta, as well as golden finishes are excellent here.
- Fire Element Colors
A balanced fire feng shui element in your home or office will bring supporting energy to all your career efforts and will help achieve recognition. Fire element also nourishes one’s sexual energy and inner warmth.

Fire is the dominant feng shui element of South bagua area of your home or office. Northeast and Southwest feng shui areas also benefit from good fire element energy in your decorating.
Fire feng shui element colors are: Red, Orange, Purple, Pink, Strong Yellow
- Earth Element Colors
A strong and harmonious feng shui earth element in your home or office will help create stability, nourishment and calm protection for all your relationships. The earth element is also needed to maintain one’s health and inner balance.
Earth is the main feng shui element of Northeast and Southwest bagua areas. The center of your home and office is also governed by the earth feng shui element.
Feng shui earth element colors are: Light Yellow, Beige/Skin Color, Earthy/Sandy Colors
- Metal Element Colors
Feng shui metal element brings the qualities of sharpness, precision and efficiency; its balanced presence will help you live with clarity and lightness. A good presence of metal element in your home or office will help sustain the energy of calm, crisp clarity and eliminate distractions.
Metal is the dominant feng shui element of West and Northwest bagua areas. North bagua area of your home or office also benefits from the presence of metal element.
Feng shui metal element colors are: Gray, White
- Water Element Colors
A harmonious feng shui water element will bring a refreshing energy of calm, ease, purity and freshness. Water element is also the ancient symbol of abundance, thus a potent feng shui cure for wealth. This related to the use of fountains and mirrors as wealth feng shui cures.
Water is the feng shui element of North bagua area of your home or office. East and Southeast bagua areas also benefit from a strong water element.
Feng shui water element colors are: Blue, Black
- Wood element Colors
Lush and healing, the feng shui wood element brings the energy of vibrant health, vitality, and growth. Wood element is also an expression of abundance, thus it is used as a feng shui cure for wealth and prosperity. This is related to the use of plants and the money tree in feng shui.
Wood is the feng shui element of the East and Southeast bagua areas of your home. South bagua area also benefits from a strong presence of wood element.
Feng shui wood element colors are: Brown, Green
- Some thoughts about color
Color is like music, nourishing and uplifting, and the more colors you harmoniously absorb throughout the day, the higher your sense of well-being. Do not be afraid to bring vibrant colors into your space as color is light, and light is our number one nutrient.
Shapes and Materials
Just as there are specific colors that will help you create good feng shui energy in your living room, there are also specific decorating shapes that can strengthen the desired prosperous and happy feng shui energy in your living room.
Each shape is an expression of a specific feng shui element, so choose the best shape based on the bagua area of your living room. For example, if you have a North facing living room, then wavy shapes resembling the flow of water can create wonderful energy.
The same principle applies to various decorating materials. To continue with the example of a North facing living room, best feng shui decor materials for it would be predominantly metal, glass or mirror-like surfaces. The materials to avoid (in excess) in a North facing living room are Wood furniture or decor items, as well as a lot of earthenware. Because plants belong to the Wood feng shui element, too many plants will weaken the feng shui energy of a North facing living room, so choose wisely.
- East Room Shapes and Materials
Shapes: The decorating shapes you can freely use in an East facing room are square, rectangular, wavy shapes and organic nature shapes such as pebble shape, for example. These shapes stand for specific elements that are good for the main feng shui element of the East area (Wood). Avoid a strong presence of round or triangular shapes.
Materials: Wood furniture and decor elements are the absolute best choice for the East area. Mirrored surfaces, tiles and brick surfaces, as well as all natural fiber rugs can also help create good feng shui energy. Avoid a strong presence of decorating items made from metal.
- Southeast Room Shapes and Materials
Shapes: Rectangular, square and wavy/flowing shapes are all good for a Southeast area room. As in the case with the East area, avoid too many round or triangular/fiery shapes.
Materials: The materials you can freely use in a southeast facing room are wood, natural crystals, earthenware, mirror-like surfaces, natural materials and rugs such as jute, sisal, etc.
- South Room Shapes and Materials
Shapes: The decorating shapes you can freely use in a south facing room are triangles, stars, pyramids, diamonds (all shapes associated with the fire feng shui element) and rectangular shapes. Avoid wavy/water like shapes and too many mirror like surfaces. Also best to limit a strong presence of square shapes (as in a big square coffee table, for example).
Materials: Wood furniture, all natural fibers such as jute, sisal, linen, etc; fireplace and candles are all good for a south area room.
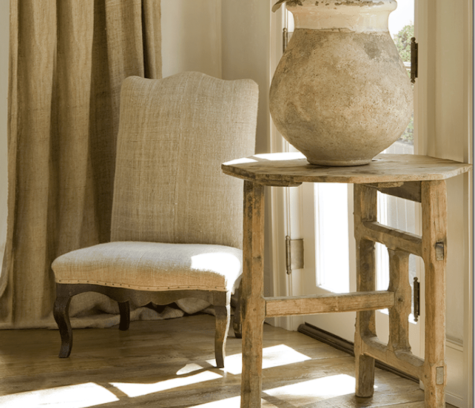
- Southwest Room Shapes and Materials
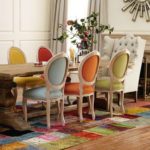
Shapes: Sensual, receptive/yin energy shapes (as pictured above), as well squares, triangles, diamonds, pyramids, stars (fire feng shui element shapes) are the absolute best choice for the southwest area.
Materials: The materials you can freely use in a southwest facing room are: all earthenware, rock crystals, as well as candles and/or a fireplace. Avoid too many mirror like surfaces or a strong presence of wood furniture pieces and decor items.
- West Room Shapes and Materials
Shapes: Round and square shapes are all good for a west area room. Avoid too many fiery shapes (triangles, pyramids, stars, diamonds).
Materials: The materials you can freely use in a west facing room are metal, glass and all earthenware and rock crystals.
- Northwest Room Shapes and Materials
Shapes: Round, oval and square are the absolute best choice for the northwest area. Avoid a strong presence of triangles, diamonds, stars and pyramids in your decor pieces.
Materials: The materials you can freely use in a west facing room are metal, glass and all earthenware (clay, pottery, ceramics, etc), as well as natural crystals.
- North Room Shapes and Materials
Shapes: Round, oval and wavy/resembling water movement are all good for a north area room. Avoid squares.
Materials: The materials you can freely use in a north facing room are metal, glass and mirror like surfaces. Avoid a strong presence of wood furniture pieces and decor items.
- Northeast Room Shapes and Materials
Shapes: Triangles, pyramids, diamonds, stars and squares are the absolute best choice for the northeast area. Avoid too many round shapes or mirror like surfaces.
Materials: The materials you can freely use in a northeast facing room are all earthenware (clay, pottery, ceramics), rock crystals, candles.
- Important Points
Please be sure not to overthink your decisions; read all about the feng shui guidelines and then follow your own energy as to what is best for your space. Feng shui is a complex art and science that works on many levels, and often your intuition can be your best guide!

Watch for Balance
While it is important to emphasize the colors and shapes that are most needed for good feng shui in your living room; to completely avoid other colors and shapes would be a mistake. An all-pink color living room in your love area or an all-blue color living room in your career area is not really good feng shui.
Feng shui is all about health, balance, and harmony, and we need all 5 feng shui elements in our environment in order to thrive and be happy. So, good feng shui in your living room is based on a subtle dance of all colors and shapes, with two or three taking the main stage based on the feng shui bagua requirements.
For example, you can still have a mirror (Water feng shui element) in the South bagua area (ruled by the Fire feng shui element) if you do not make it into a focal point. For this purpose, choose a mirror with a fiery shape (like a sunburst mirror) and Fire element material (gold finish is a good expression of the fire element).
Arranging the Furniture
Ok, we are done with the complex (but very important!) subject of choosing the best feng shui decor elements according to the bagua area your living room is located in. Now we can finally focus on the best furniture arrangement in your living room – something that many people actually start with.
The best feng shui living room arrangement is an arrangement where all your family members (plus guests) feel at ease and relaxed. This means there is enough breathing room for everyone, and the basic design principles are taken into consideration.
Working with scale and proportion, creating a good relationship between your furniture pieces, creating good conversation areas – these are all well known decorating principles that you are probably familiar with (and can easily find many online resources to help you). Feng shui agrees with the importance of all these principles with just one condition – there has to be a good Chi flow.
- Create A Flow and Go with It
The notion of Chi flow is one of the main principles of feng shui that has to be respected if one wants to benefit from good energy. The Chi – another name for Universal energy – has to flow smoothly in your living room, nourishing it and filling it with energy.

Chi flow can be viewed as water flow, so with this comparison in mind take a look at your living room arrangement and decide if the water (imaginary water as Chi flow) coming in from the living room door would flow smoothly and cheerfully about your living room. Will it get stuck in some areas? Will it easily escape through a big window without having the chance to actually nourish your living room?
Play and experiment with several furniture arrangements until you find the one that allows for the easiest and most graceful flow of Chi/energy.
- How To Check The Flow of Chi
One of the basic ways to check the energy flow in your home is to imagine Chi, or energy, as water. If water were to flow into your home – starting at the main door – where would it stop or stagnate?

Would the water flow harmoniously and smoothly to all areas of your home, gently refreshing it, or would it rush right out the back door in a forceful motion? For example, when you have big objects or specific home design elements in a straight line, the energy will flow more quickly and forcefully, which is generally considered bad feng shui.
One of the first things people remember about feng shui is the benefit of curved lines over straight lines. This is true not only for the outside of one’s home but for the inside, too.
 So the first thing to watch for in checking the energy flow in your home is the presence of long, straight lines that create a harsh quality of energy. More often than not, they will contribute to a considerable leakage of energy, as well as an unfriendly, cold feeling in a home.
This is especially true if you have an opening, such as a door or a big window – at the end of the straight line.
The second thing to watch for is having blocked areas in your home, meaning areas where the energy just get drained, sucked in or pushed back. Stay with the image of water flowing into your space and ask yourself: “Would water encounter many blockages as soon as it enters my home?”
This can happen when you have a wall facing (and in very close proximity to) the front door, for example. In feng shui we call them blocking walls. This can also happen when you arrange the furniture in a way that blocks the energy from flowing smoothly into the room.
Other feng shui scenarios that can contribute to either the leakage or the blocking of a good Chi flow in your home are as follows:
- A Main Door or big window in Line with the Back Door
- A Mirror Facing the Main Door
- Stairs Facing the Main Door
Be sure to position your furniture in a way that allows for a smooth flow to all areas of your home and avoid any blockages and stagnant areas, such as cluttered closets, for example, as they tend to create bad feng shui energy (Si Chi).
A good flow of Chi will create good, healthy energy in your home.
Avoid Sha Chi and Keep Good Company
At any time during your living room decorating process, be sure there is no attacking energy – called Sha Chi in feng shui – pointing at areas where your and your family spend the most time. In your living room, Sha Chi is the attacking energy that can be created by sharp corners from furniture such as coffee tables or bookcases; architectural features such as the fireplace mantel or various decor elements such as big candleholders or modern lamp bases, for example.
To avoid the detrimental effects of Sha Chi, place your furniture pieces and major decor items so that no sharp energy is pointing directly at any seating areas (or play areas if you’ve created some in your living room for your kids).
Sharp objects, such as knives and swords, firearms and animal specimens, should not be hung on the wall because they will produce Yin and lead to quarrel or violence.
The living room should not be decorated with beast paintings but the paintings about flowers, plants, landscape or fishes, birds, horses, white cranes and other auspicious animals. However, if you prefer to tiger, eagle and other beasts, you should make the beast heading out to form a pattern of defense. Never make the beast heading inward, or you will be threatened and bring accidental disasters to your family.
Another aspect of bad feng shui energy is called Si Chi, which is basically low, sad, and depressing quality of energy. Hopefully, you will never have to deal with it! To prevent it from taking roots in your living room, be sure to use basic feng shui space clearing steps after a strong family argument, unpleasant guests, etc. Even better, make a habit of clearing the energy in your space regularly, this is easy to do and a pleasure to experience.
Here’s a how to: Clean and Clear
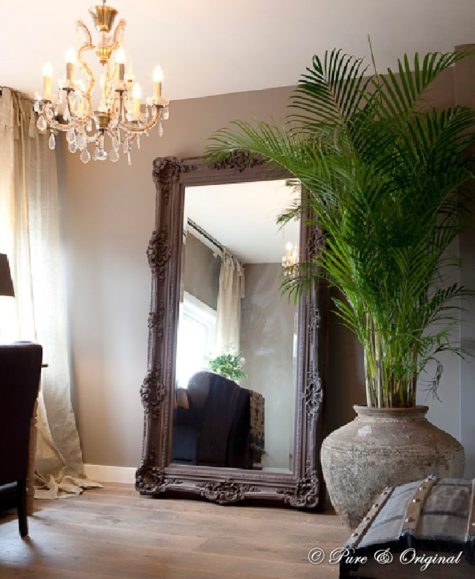
About Mirrors
Mirrors are the #1 feng shui decorating must for any living room and in any bagua area. Why? Well, mirrors are such multitaskers – they bring more light, make the space look and feel bigger, add beauty and dimension to any space.

Feng shui-wise, mirrors also bring the water feng shui element – the energy of calm, freshness, and renewal. Mirrors are also the bringers of abundance, so go find yourself a perfect mirror for your living room!
Just remember that the sofa should not have a mirror behind it. When you sit on the sofa, this will expose your head to others from the mirror, which is ominous. It is okay if the mirror is beside the sofa.
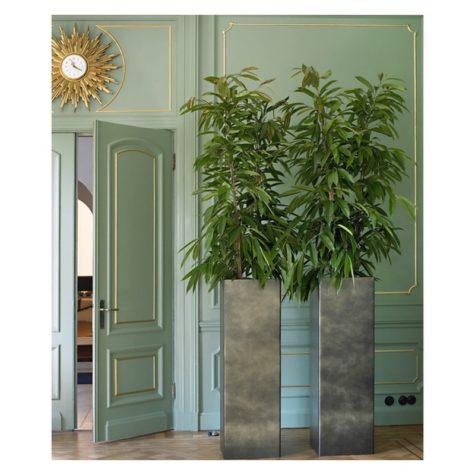
Plants
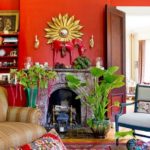
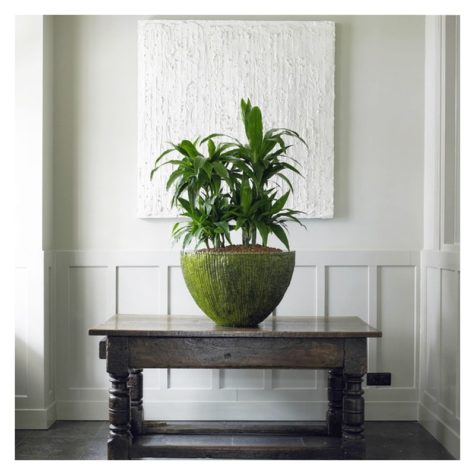
Feng shui is all about bringing the outside in, meaning replicating the vibrant and potent energy of nature in our own often poorly designed homes. If you can find a big beautiful plant that can thrive in your living room, know that this is excellent feng shui! If not, go for a small artistic grouping of several smaller plants.
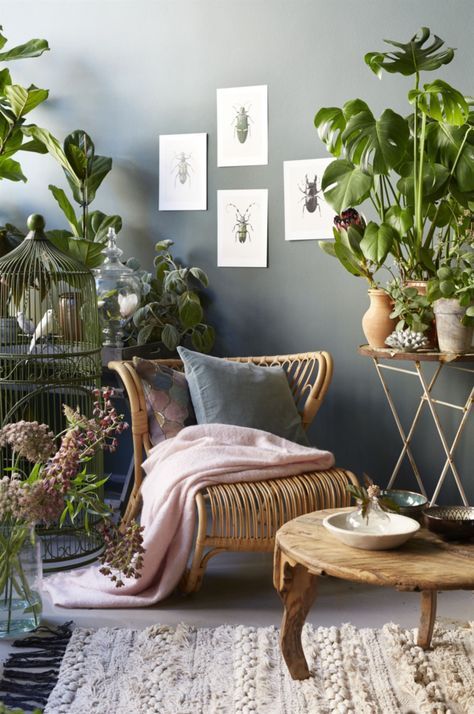
Below is a list of top 10 air-purifying plants, as defined by NASA research in the early 1980s. Bring them to your home, bring them to your office, and let them do what they do best – clear the air and fill it with oxygen!
Areca Palm.
- Scientific Name: Chrysalidocarpus Lutescens
- Removes: All tested indoor air toxins.
- Benefits: Very popular and easy to care for plant.
Leaves have a gracious flow that will soften the energy of any home or office space.
Lady Palm
- Scientific Name: Rhapis Excelsa
- Removes: Most indoor pollutants.
- Benefits: One of the best plants to improve the indoor air quality.
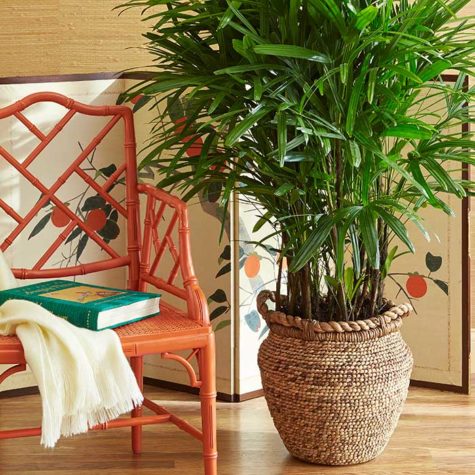
Very popular and easy to care for.
Bamboo Palm
- Scientific Name: Chamaedorea Seifrizii
- Removes: Benzene, Trichloroethylene, Formaldehyde.
- Benefits: Most resistant to insect infestation.
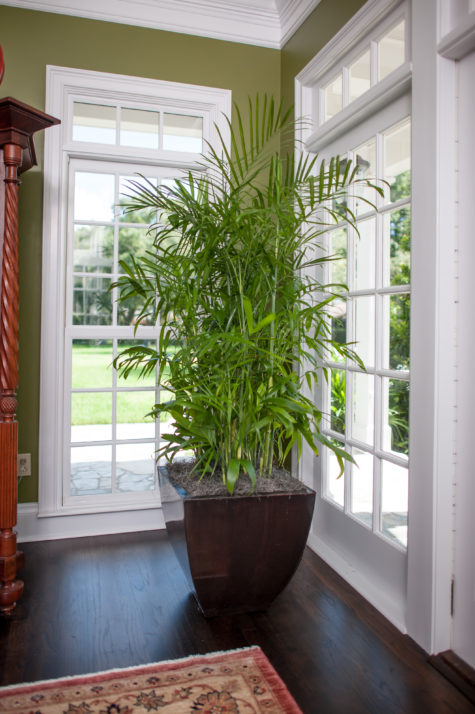
Adds a peaceful, tropical feeling to any environment.
Rubber Plant
- Scientific Name: Ficus Robusta
- Removes: Most pollutants, especially formaldehyde.
- Benefits: Will survive in dim light and tolerate cool temperatures.

Excellent ability to remove toxins from any indoor environment.
Dracaena Janet Craig
- Scientific Name: Dracaena Deremensis Janet Craig
- Removes: Most pollutants, especially trichloroethylene.
Benefits: Best in Dracaenas family for removing home or office chemical toxins.
English Ivy
- Scientific Name: Hedera Helix
- Removes: Most pollutants, especially formaldehyde.
Benefits: Easy to grow, very adaptable, except for high temperatures.
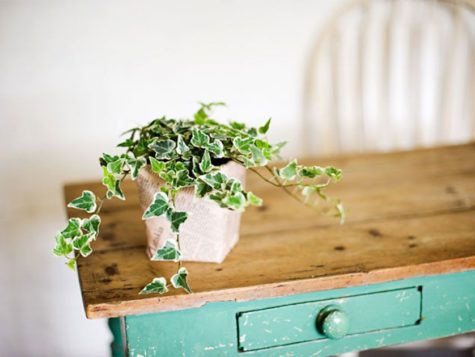
Another hardy, very popular plant, often used in public spaces.
Dwarf Date Palm
- Scientific Name: Phoenix Roebelenii
- Removes: Most pollutants, especially xylene.
- Benefits: Can tolerate low levels of light.
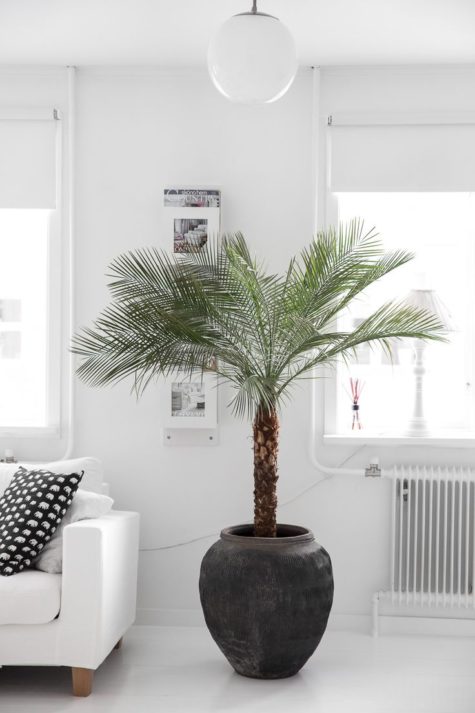
A slow grower that can reach a height of about 5 to 6 feet.
Ficus Alii
- Scientific Name: Ficus Macleilandii “Alii”
- Removes: Most pollutants, especially formaldehyde.
- Benefits: Easier to care for than the Ficus Benjamina, can loose some leaves while adjusting to a new space.
 There are 3 types of Ficus Alii: the standard tree, the bush and the braids (several entwined trunks.)
Boston Fern
- Scientific Name: Nephrolepis Exaltata “Bostoniensis”
- Removes: Most pollutants, especially formaldehyde.
- Benefits: Beautiful and lush, a favorite for any home or office.
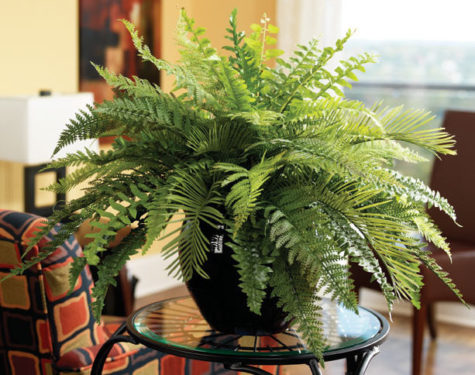
It does require attention in order to thrive.
Peace Lily
- Scientific Name: Spathiphyllum sp.
- Removes: Alcohols and acetone, Trichloroethylene, Benzene and Formaldehyde.
- Benefits: Beautiful plant with gentle white flowers, easy to care for.
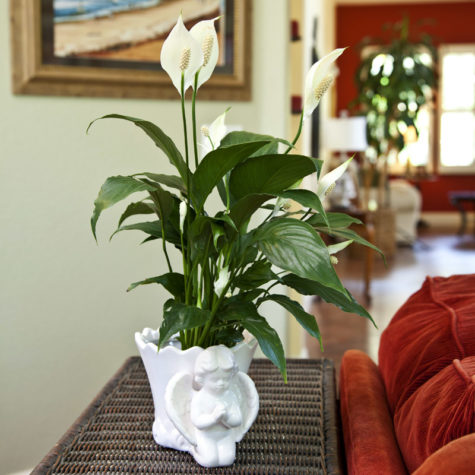
Strong and peaceful energy.
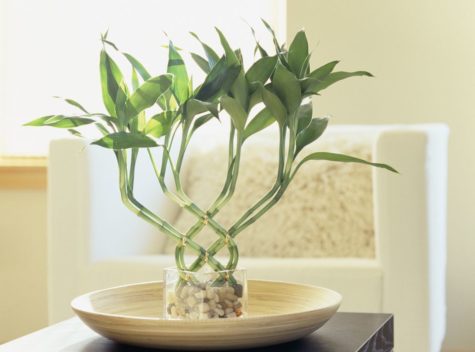
Lucky Bamboo
The lucky bamboo is one of the most popular feng shui cures for home or office. You can see quite a few types of feng shui lucky bamboo in most floral shops nowadays. However, the lucky bamboo in feng shui applications is often one of the most neglected feng shui cures, too.
I have seen countless of feng shui “lucky” bamboo plants that are struggling to survive, have a poor neglected look, and the only luck in them is the “lucky to be alive” factor!
Even though easy to care for and a very tolerant plant, the feng shui bamboo still needs your love and attention, as it likes to look good, just like you do. Do not be afraid to touch your lucky bamboo and take good care of it.
Ultimately, the feng shui lucky bamboo is considered lucky because of its peaceful vitality and strong growth, so it is best to learn to take really good care of it, just like you take care of all your other plants.
- So why is the feng shui lucky bamboo considered lucky?
Bamboo in itself is an amazing plant that brings a very peaceful and wise energy into your home. It teaches the ultimate wisdom: how to be flexible and hollow (open) on the inside so that the spirit can freely flow and heal your being.

If you are lucky enough to have bamboo growing in your garden, you know how soothing, almost transcendental, the sound of it is. The same is true for bamboo feng shui wind chimes, as well as the energy of bamboo floors.
Generally, here is why this specific feng shui cure is considered lucky; this will help you see if the feng shui lucky bamboo you bought at the corner store fits into this category.
A little indoor bamboo plant is considered lucky in feng shui when it combines/represents all five feng shui elements, as these elements are considered to be the foundation of a harmonious universe.

The five elements in feng shui are Water, Wood, Fire, Earth and Metal. Here’s how the feng shui elements are expressed in a lucky bamboo feng shui cure:
- WOOD: the bamboo plant expresses the feng shui Wood element (all plants do).
- EARTH: the rocks that create the foundation of growth for the lucky bamboo represent the Earth element.
- WATER: the water the bamboo needs for its vibrant growth is obviously representing the Water element.
- FIRE: the feng shui lucky bamboo plants usually have a red ribbon tied to them (red color is the expression of the Fire element).
- METAL: the glass pots that most lucky bamboo plants come with represent the Metal element. If your feng shui lucky bamboo is planted in a ceramic pot, it will usually have either a metal coin (Chinese coins for good luck), or a metal figurine, such as the Laughing Buddha.
The number of stalks in the lucky bamboo as a feng shui cure has a specific meaning that is taken into consideration when placing the lucky bamboo plant for good feng shui. You can sure have as many stalks as you feel will look good in your space, but generally, there are some guidelines to follow when you want to use the power of numbers for good feng shui.
Here are the most popular numbers of lucky bamboo stalks:
- 2 for Love and Marriage
- 3 for Happiness
- 5 for Health
- 8 for Wealth and Abundance
- 9 for Good Fortune.
Where should you place your feng shui lucky bamboo?
The best feng shui placement of your lucky bamboo plant is in your Wealth and Money or Health and Family bagua areas. If you are working with the classical feng shui bagua, these are the Southeast and East feng shui areas of your home.
Crystals
Crystals are the absolute darlings of feng shui, and I mean the natural rock crystals, untreated and unfaceted. There is such a variety of crystals out there, many of them really affordable; all waiting to adorn your living room.

Natural crystals bring the grounding energy of the earth feng shui element, much needed with our modern lifestyle.
Family Photos
Displaying happy family photos is great feng shui for your living room. It creates happy, warming energy that spreads throughout the home and uplifts your mood on occasional sad or stressful days. East area of your room is the best spot to display family photos but anywhere in your living room is still excellent feng shui.
Buddha
The serene and peaceful presence of Buddha can grace your home with more peace and real, meaningful moments. There are many Buddhas – from Kwan Yin to the Medicine Buddha, from White Tara to the Laughing Buddha.
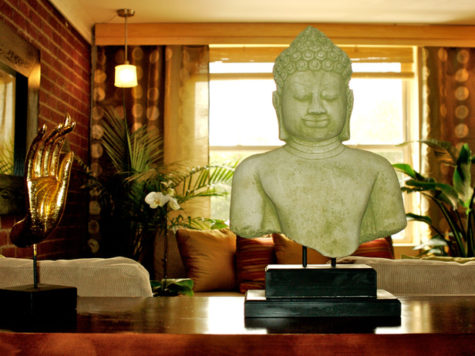
There are also many specific Buddha mudras you can choose for your living room decor.
Fire and Passion
Fire is the element of passion, excitement, joy, warmth and love. It makes it easier to connect with your loved ones and truly enjoy their presence. A good and balanced fire feng shui element also helps you be genuinely present in this moment instead of being stuck in what happened a couple hours ago (or worrying about an imaginary future).
Be sure you find your own expressions of the fire feng shui element for your living room – be it with wall art, pillows, and throws or a beautiful rug.
- Candles
Candles purify the energy of negative residues, as well as make any room more calm and peaceful. They also bring a quiet sense of romance and joy, so be sure to grace your living room with a few candles in beautiful candleholders. Of course, candles are also the expression of the fire feng shui element – the element that many of us need to keep and nourish in our relationships with others (and ourselves, too).
By fire energy I mean a solid, nurturing, warm, life-giving fire energy – not the destructive, hollow and angry one. There is a fine balance with all your feng shui decor solutions – you just have to play and experiment until you find the right balance for your living room and for your family.
Other considerations
- Should be visible as soon as entering into the door.
The living room should be visible as soon as entering into the door. According to Feng Shui knowledge, if the living room is behind the bedroom or kitchen, your life will have no privacy, leading to digression and mistakes in work or business.
- Should be in the center of the house.
As a place for the whole family, the living room should be in the center of the house. If a bedroom is transformed from part of a spacious living room, the living room will be the worst one.
- Layout should be rectangle or square.
The overall layout of the living room should be a rectangle or a square rather than the irregular or polygonal spatial pattern. The square living room will improve your luck in terms of both blessing and wealth, and also make the infinite positive energy staying in the home.
- Wealth Direction
You should pay special attention to the wealth direction which is generally at the oblique 45℃ position facing the living room as soon as you enter into the door. The wealth direction should be tranquil and avoid a water dispenser, audio equipment and other shaking items, or your will have your wealth affected and suffer from financial loss.
- Furniture Placement
The furniture should be placed properly. According to Feng Shui knowledge, the storage cabinet in the living room should cling to the wall and the sofa should face the door or TV, and never have its back to the door.
If the sofa backs the door, your interpersonal relationship will be disharmonious and you may easily encounter villains or have disputes with others.
- Avoid Beamed Ceilings
If the living room has a spanning beam, the ceiling should be covered with decorations, or the beam will bring you the sense of pressure and bad luck and make you nervous.
Here’s a nice fix:
- Floor should be even.
The living room floor shall not be uneven; instead, it shall be flat and avoid too many too many stairs or the sense of high and low. Some living rooms adopt the design of high and low partition to make the obvious change of high and low floor. However, this kind of design makes the family luck full of ups and downs.
- Living Room and Doors
If you are sitting in the living room can see the doors of all rooms, the privacy will be poor and you may feel open to the external world.
- Decoration
The living room should be decorated with the circular-shaped decorations since it is a family and friends gathering place requiring the lively and harmonious atmosphere. The circle is a symbol of Yang and dynamic, so the circular-shaped lighting, ceiling and decorations can create the warm and lively atmosphere.
But wait, there’s more!
Here’s a small gallery of living rooms that I didn’t find a place for in the post. Enjoy!
Sources:
Come On In And Have A Seat
Today, it’s all about the seating. My living room furniture is the most poverty stricken area in my house with the exception of the bathtub with the missing faucet. I have been looking forward to exploring what can be done about it ever since the beginning of this particular project.
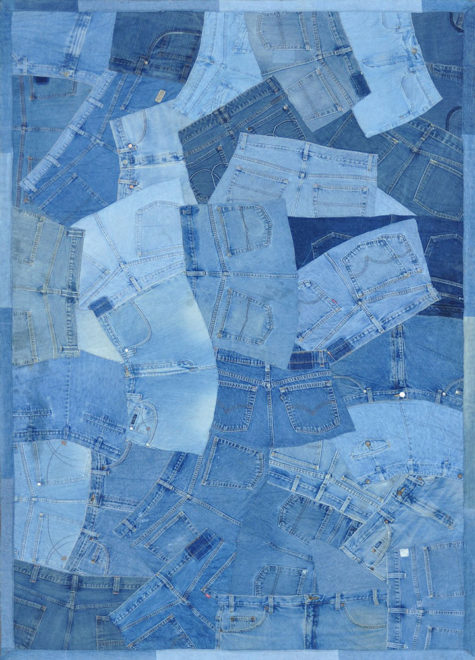
When we cleaned out our closets, I got really excited about all the cool stuff that could be done with blue jeans, and it occurred to me that it would be really fun to recover my sofa and chair with old blue jeans. For example:

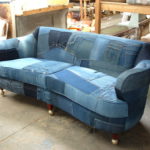


Pretty cool, huh? And, sadly, it’s going to be complicated… and require courage, a sewing machine, plus a learning curve of unknown proportions. But it’s something that I want to try to do, so with that in mind, here are a variety of tutorials on how to recover sofas and chairs.
Let’s start with the easy stuff first. There are a number of tutorials for covering sofas and chairs with drop cloths. The biggest expense here is the drop cloth. On the up side, drop clothes can be dyed in a variety of cool ways, and if you were so inclined, you could even make curtains to match. Doesn’t look too difficult.
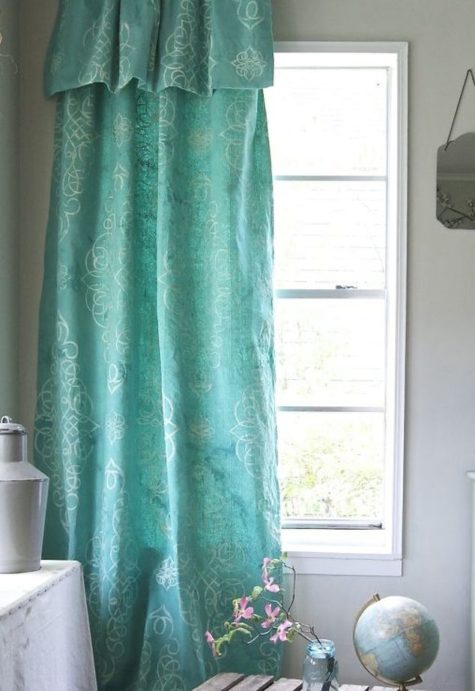
The simplest way is to just do a simple cover up by tossing the drop cloth over the couch. Voila! Even better if it has been dyed and decorated and looks super cool. The following tutorial is from Home Talk, and it shows how to stencil and dye a drop cloth to make curtains. I don’t see why this method couldn’t also be used on a throw for your couch.
Stencil and Dye Your Own Drop Cloth Curtain
We take a look at a wonderful DIY project by Stephanie Jones. She shares how she took a regular canvas drop cloth and gave it some stenciled style and color with Chalk Paint® decorative paint by Annie Sloan. She says: “I wanted to add a little softness, warmth and boho pizazz to a less-than-lovely window at our studio.”
Stephanie started by washing and drying her 4×15 canvas drop cloth. You can easily find one at your local hardware store. This step helped soften up the fabric, which allowed it to more easily take the Chalk Paint dye she would use later on.
Using Old White Chalk Paint, a roller and a large Moroccan-inspired stencil, Stephanie, along with her team of helpers, stenciled an allover pattern onto the drop cloth. To help everything stay in place as they worked, they smoothed the drop cloth onto a flattened-out box that had been spritzed with low-tack adhesive.

“To avoid seepage, don’t forget to off-load excess paint from the roller onto folded paper towels before rolling,” notes Stephanie.
Since the look she was going for was a bit faded, she chose to stencil before dyeing; however, if you’re looking for a crisper, brighter look, you’ll want to stencil after dyeing.
Next, she mixed Florence Chalk Paint® with a little bit of Provence Chalk Paint® and poured it into a large plastic tub filled with water. Stephanie used a mix ratio of 1 part paint to 20 parts water and let the loosely bunched drop cloth soak for about an hour.
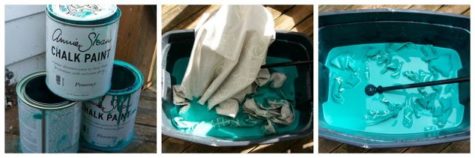
Once finished soaking, Stephanie hung the drop cloth on a clothesline outside to drip-dry overnight. She then used a steam iron to soften it.
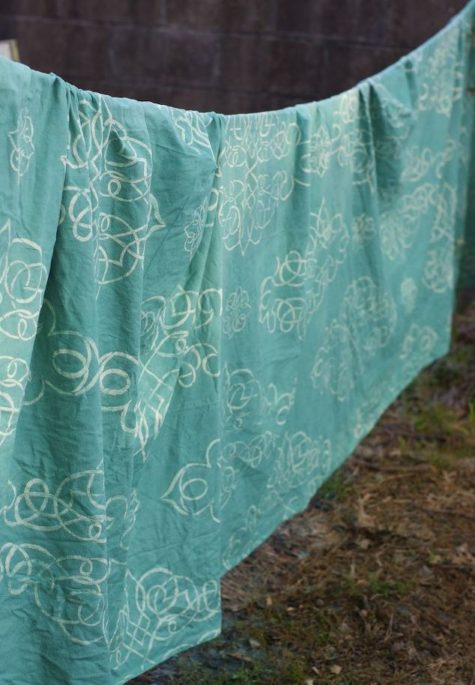
When all was dry and ready to hang, Stephanie draped the finished drop cloth over a plumbing-pipe curtain rod and scooted it to the side to hide an awkward corner in her studio. Voilà – hardware store chic!
If you don’t like that loose look, or if you’re already covering up your sofa like this, and want something a little more permanent looking, here’s a tutorial on how to make a loosely fitted slip cover (once again using a drop cloth).
Cover A Sofa With No Sew Drop Cloths
Here’s a simple tutorial from A Beach Cottage:
- Buy the biggest drop cloths you can find and then cut them up, you get more bang for your buck this way
- Take all the cushions that you can off of the sofa
- Lay your drop cloth over the sofa seat area only and roughly estimate what’s the best way to cut the drop cloth fabric to best fit the seat area of the sofa double folded and with a big enough overhang to tuck and fold into the crevices of the sofa
For example: With the drop cloth I had I simply folded it down the middle and cut it in half giving me two pieces of double folded fabric
Important note: You want the fabric double folded because a single piece of fabric will slip around much more (ask me how I know this or ask a Beach Cottage kiddo if they sat on a sofa with a single piece of drop cloth and promptly the whole lot slid to the floor)
The amount of fabric you have to tuck in is key to it not slipping and sliding around when you actually want to sit on the thing.
- Cut your fabric – don’t worry about edging you won’t see that
- Fold your drop cloth piece so it is double folded, lay it on a table or floor and smooth it out and line up the edges…trust me do this bit.
- Lay this piece of fabric over the seat of the sofa, smooth, smooth, smooth
- Push and tuck, push and tuck- all the over-hang fabric needs to be squeezed tightly into the crevices of the sofa.
Note: this tight pushing and squeezing is what will stop the ‘cover’ slipping around and falling off when you sit on it
- Lay the other piece of fabric out and put the cushions on it, now wrap up the cushions like a parcel, leaving the bottom of the cushions with the opening of the fabric
- Place cushions on the sofa and then put your hands underneath and again squeeze and push the excess fabric in tightly so the fabric won’t move around too much when you sit down.
- Add texture to the arms of the sofa with crochet, knit or stripe, smooth and tuck this tightly into the sofa too
- Add lots of pillows and cushions in different shapes and patterns for interest and depth.
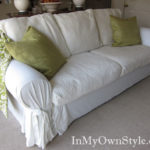
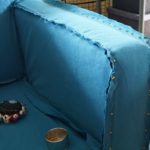
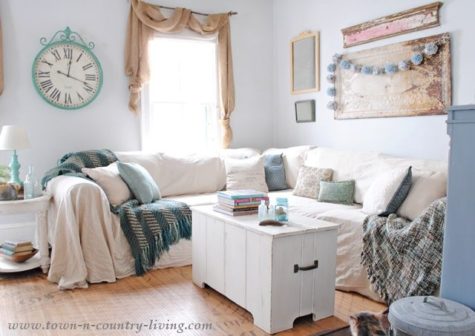
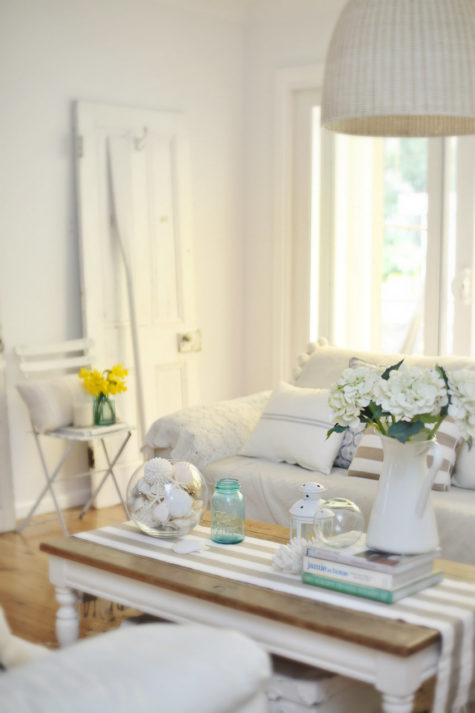
Your couch or chair will look better, and hold up longer under normal wear and tear if you put the cushions on top of the couch cover. Like this one from In My Own Style:
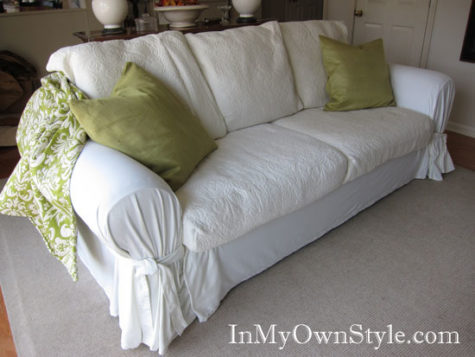
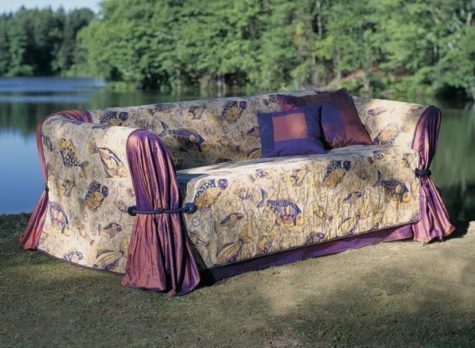
You can also add ties at the arms to give a more finished look. I don’t think it would be too hard to figure out how to add the ties, and the cushion covers are pretty easy too. The ones in the picture are made from a bed spread, and tied underneath.
- Here’s what she had to say about the cushions
“I am all about easy and a believer in what you can’t see can easily be faked. I found white quilts on clearance at the store I used to work at. I used them to make cushion covers. I sewed covers for the bottom cushions that are semi – boxed covers that are tied on with ribbon on the bottom.”
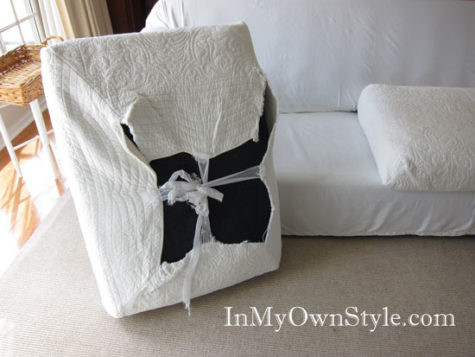
“Here is the underside of the cushion. The cover is more like a gently fitted wrap around cover. You can see I had to really scrimp on the amount of quilt fabric I had. I was determined to make it work. It is uneven, but no one sees it. I used these same covers with the old slipcovers I had on this sofa/chair. I have washed them many times and the ribbons and uneven edges don’t matter one bit.”
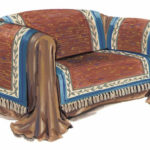
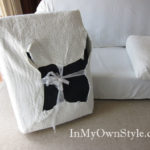
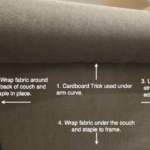
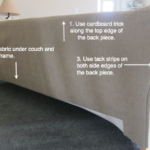
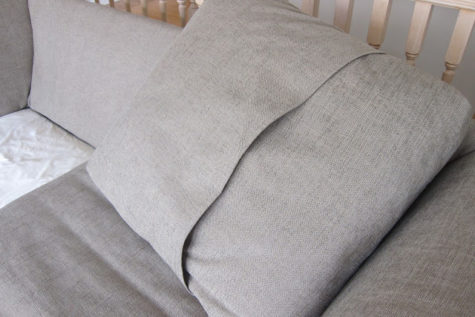
Alternatively, you could also make a “couch wrap.” This is a cool idea and a great way to keep a loose couch covering in place and looking good.
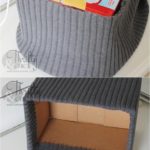
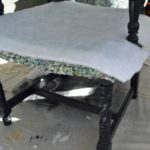
This is really super simple. The hardest part will be to figure out what to use for the heaver covering. Here’s a visual tutorial:
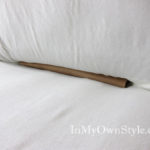
Keeping that pesky slip cover tucked in:
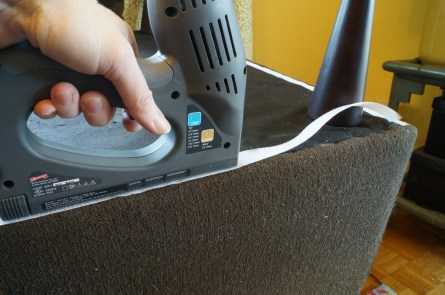
To keep a one-piece slipcover from moving and getting un-tucked, push cardboard tubes into the crevices to hold the extra fabric down. Here I used a long tube that fabric came on and a tube from a roll of foil. Both are more rigid than a paper towel tube. You may have to use different size tubes depending on how big your crevices are.

Push the tubes back into the crevice as far as they will go. If slippage is still a problem, you can wrap rubber bands around the tubes. The rubber helps to keep the fabric from slipping. You could also use PVC pipe.
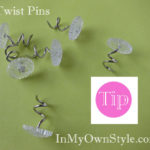
To hold pleats in place or any part of the slipcover that won’t stay the way you want it – use twist pins. You can find them at any sewing store or online. These are clear plastic, but they also come in decorative shapes and finishes that look like nail-heads.
You just screw it into the pleat or fabric you want to stay in place.
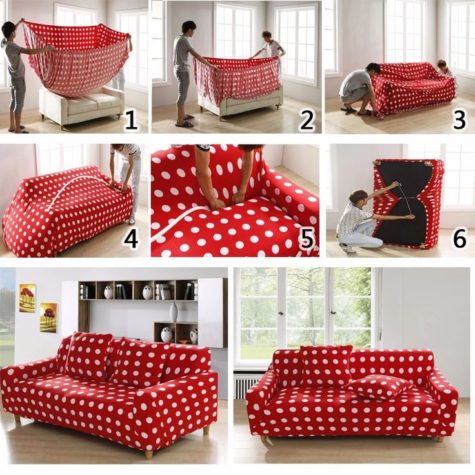
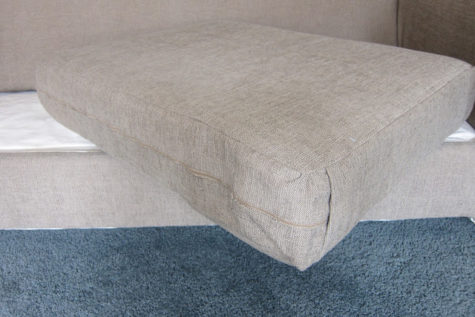
If you have a small couch and a large fitted sheet, you could opt for this method. I like how simple it looks, and after a bit of research, I realize that it’s actually a stretchy pre-made couch cover. 🙁
That being said, I don’t see why a person couldn’t use a stretchy knit fabric, or even a sturdy fitted sheet and do the same thing. It would probably work even better if the bottom cushions were on top of the couch cover.
If you like this tailored look, you could make a fitted slip cover yourself. I have a great tutorial for that as well. It’s from Maggie Overby Studios.
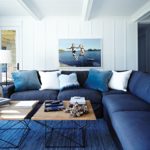
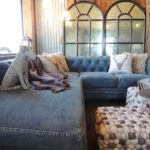
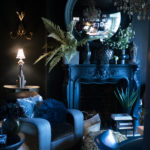
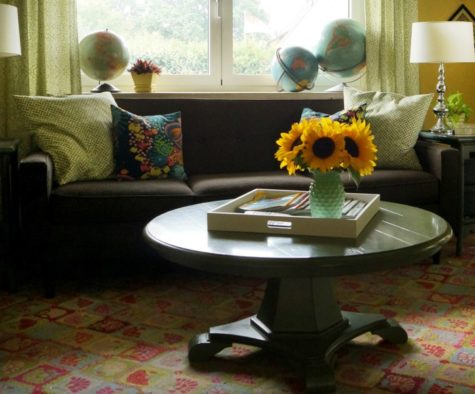
A Blue Velvet Sofa!
It is no secret that I have a thing for blue velvet sofas. I have been drooling over them for a while now but guess what? I finally got my own, well sort of…
My blue velvet sofa is actually an Ikea Hack!
Here is what I started with, my 8-year-old mid-century style sofa with brown tweed upholstery. I love the straight lines of this sofa but what was I thinking buying a brown sofa? Oh yeah, that was 8 years ago when I had small children with grubby hands… Now I have big children with grubby hands but at least they understand when I say not to eat on the sofa. (If only I could get them to listen.)
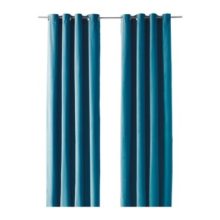
After hemming a pair Ikea SANELA curtains for a client I had a bit of fabric left over, and I got the idea that this pretty blue velvety fabric might just work on my sofa. I ran a piece of scrap through the washing machine and was pleasantly surprised to find it washed beautifully.
 I’m sure your thinking why didn’t I just buy velvet fabric? Well, nice velvet is very expensive and the inexpensive options usually have a shine to them that just looks cheap. Also the nicer silk and cotton velvet (velveteen), needs to be dry cleaned. These curtains were machine washable, exactly what I needed.
So my blue velvet sofa is actually a slipcover made from curtains in dark turquoise. They cost only $70 for two 55″x 118″panels, minus the grommet tops one pack gives you over six yards of beautiful velvety fabric. For my slipcover I used four panels (two packages) and had quite a bit of fabric left over.
When I started working with the fabric I also noticed that it has a bit of stretch to it, perfect for the tight-fitting slipcover I was looking to make.
This is not a slipcover sewing tutorial but I will give you a few personal pointers if you are considering sewing our own but have never sewn a slipcover before.
1. When fitting your slipcover, pin you fabric on the sofa inside out ( I like a tight upholstered look so I pin mine tightly.) Once pinned remove the slipcover and sew right along the pin line, removing the pins as you go. I do this in sections and keep adding on, usually taking the slipcover on and off several times as I sew.
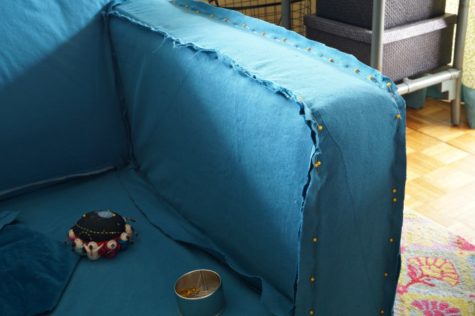
Since I was using curtains I tried to take advantage of the hemmed edges. I ran the finished edges of the curtains along the bottom of the sofa it saved me the step of hemming the slipcover at the end.
If you want to take an extra step towards an upholstered look, add a strip of Velcro along the bottom edge of your sofa and slipcover so you can tuck the edges under for a tight fit.
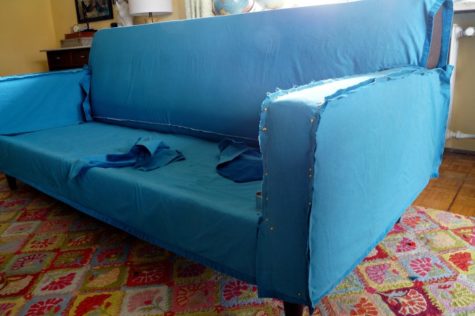
This last tip is specifically for sewing velvet. Watch that you keep the direction of the velvet going in the same way whenever possible. Velvet will look dark in one direction and lighter in another. If you are not careful you may have one cushion looking like it is a different color than the rest.
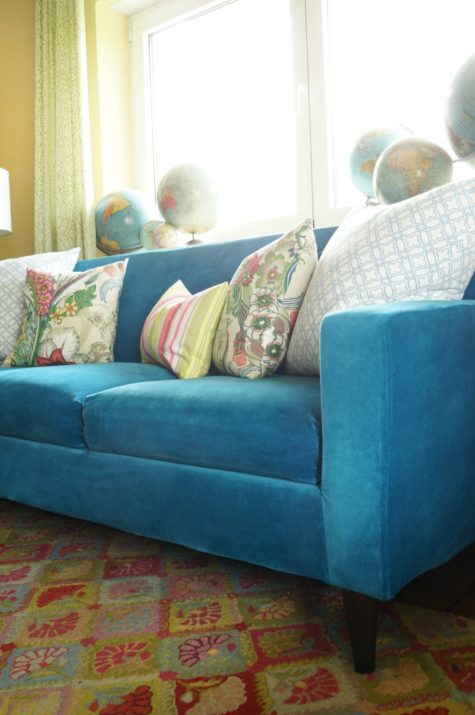
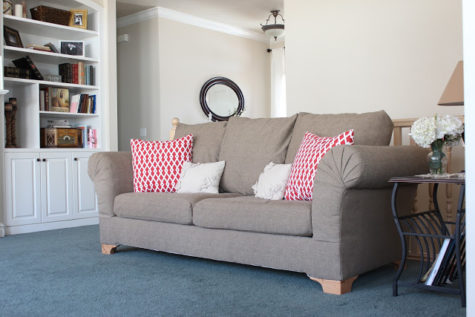
The end results look like this… After a days work and $140 investment in fabric, I have my very own blue velvet sofa. Add few new pillow covers and I have a whole new look.
This seems like a fair amount of work, and would require a sewing machine, and I thought it might be fun to share a vision of the possibilities:
![]()
Ok, yes, that chair isn’t covered with a slip cover, but I think a person could make one that was similar. But what if your couch or your chair is a total mess and needs to actually be reupholstered? Then what? Well, if a trip to Craig’s List isn’t in your future, or if you’ve always wanted to know how to reupholster a couch or chair… hang on to your hats, because I have a tutorial.
It probably isn’t as hard as it looks. But it does have a certain fear factor, and I’m sure there’s a learning curve. So, before I share the tutorial, I’m going to share a gallery of some super cool upholstered couches and chairs. Hopefully this will get us over the hump and inspired to take on a challenge.

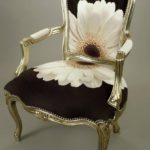
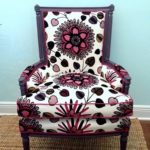
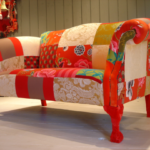
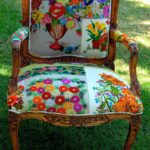


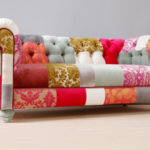


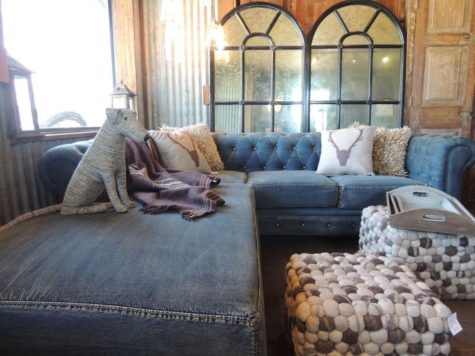
I love these, and with my idea for a blue jean covered couch in mind, I thought I might figure out what size the individual pieces would need to be, and then sew blue jean pieces and parts into appropriately sized squares of “upholstery” material. Here’s an example of what it might look like:
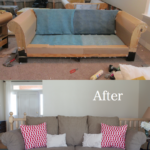
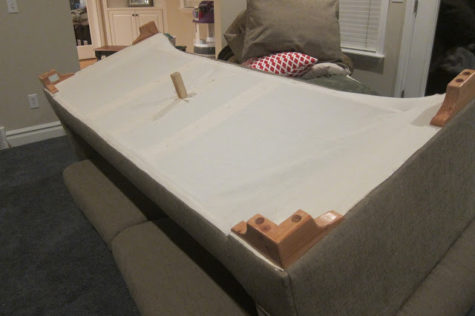
So, are we ready for the tutorial? I’m sure it’s way easier than it looks. The scariest part is that you have to take your furniture down to the bare bones… After that it’s just a matter of measuring, cutting, layering, and attaching it. Here’s a step by step tutorial from Do It Yourself Divas.
DIY Strip Fabric From A Couch and Reupholster It
I don’t exactly have $$ right now to buy the couch of my dreams, but lucky for me, my husband and I were able to reupholster this beauty. We found a living room set that included a large sofa, love seat, chair and a half, and an ottoman for $50. Engineer hubby and I totally transformed the sofa AND an ottoman for $200. We are going to go through the steps of stripping the fabric off of the couch and reupholstering the couch.
This proves that almost anything can become something new.
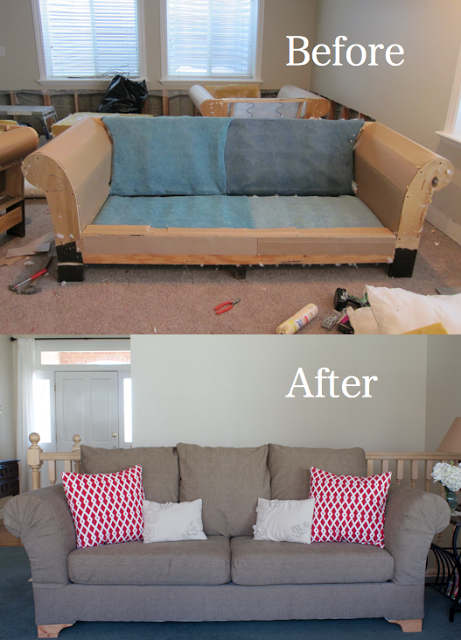
Use your imagination when finding the right couch. The diamond in the rough is usually really rough at first. So, look past dingy, pastel colored, floral fabrics and look at the general shape and structure of the piece to find the right candidate for reupholstering. Here are some things to consider when looking for the right couch:
Step back and look at the couch to determine how many “sections” you will be reupholstering. The “visible” sections for my couch were arms, back of back rest, front of back rest, sides (under arms), front bottom, pillows, and cushions. There were two “hidden” sections which included under the couch and under the seat cushions.
Typical upholstery fabric is sold on a large bolt that is about 54″ wide. Knowing this may help you estimate how much fabric you will need per section.
- Cost to reupholster.
A sofa can take anywhere between 12-20 yards of fabric depending on its size and shape. Keep that in mind when choosing fabric; things can get pricey. We used 16 yards on our couch.
- Is the structure sound?
Can I reuse the tack strips or any upholstery hardware? Will the feet need to be replaced or renovated? Are the foam cushions worn out or do they have plenty of body left? Is this couch more comfortable than a $200 couch I could buy new? Will any odors remain once the fabric and batting have been removed?
Our couch was easy to reupholster because the seat cushions and the pillows were detached. I imagine it would be harder to reupholster a couch that had cushions and pillows sewn onto the body of the couch, but I’m sure it can be done with a little determination.
You will need:
- Couch
- Heavy Duty Upholstery Fabric
- Inexpensive fabric to use in “unseen” places, i.e. muslin
- Staple Gun/ Staples
- Cereal Box Cardboard (we will explain later)
- Batting
- Spray Glue
- Zippers, thread, or anything else needed to sew cushion covers
- Any replacement items for worn out material, i.e. foam or feet
- Pliers
- Hammer
- Sewing Machine or a friend who has one
- Fabric Scissors (hands down, the best fabric scissors.)
- Measuring Tape
- Any other job specific tools
Here’s the criteria we used to find the right fabric…
No continuous pattern. Patterns, such as stripes, can be difficult to line up during reupholstering and may require more material to make patterns align.
Fabric with a sturdy weave. This may go without saying, but make sure to get a durable fabric that is meant for furniture if you want your legacy to last.
How much? Remember the sections I talked about? Measure the length of each section and add a few inches extra on each end so you have enough fabric to work with. It would be bad to not have enough, so measure a little generously. We didn’t have to worry about the width since 54″ wide fabric fit each section on our couch perfectly. As I mentioned above, we used 16 yards on our large sofa.
- Price point.
We are on a budget and the fabric had to fit within that budget, so we didn’t waste time looking at fabric above a certain price point. Our fabric was about $9 a yard.
Strip it down
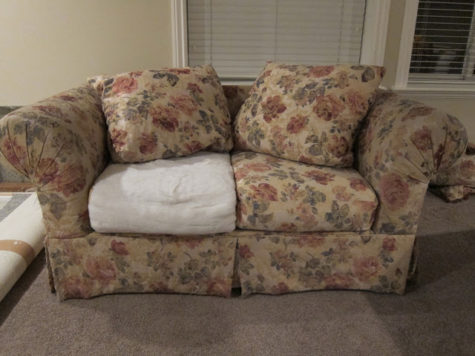
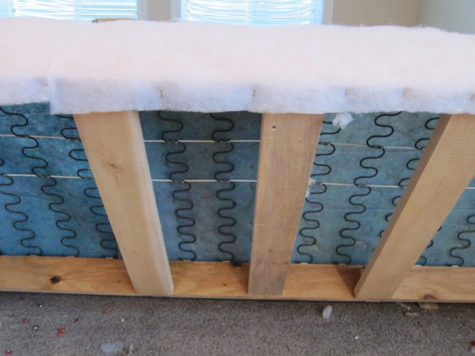
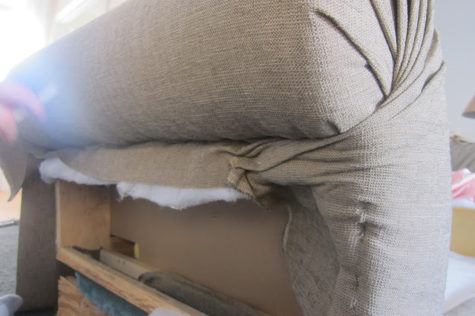
Unfortunately I didn’t take a picture of the fabric on the sofa before is was ripped off. Hubby was anxious to get going and started ripping off fabric, batting, and foam, so to give you an idea of what it looked like with it’s original fabric, here is the love seat.
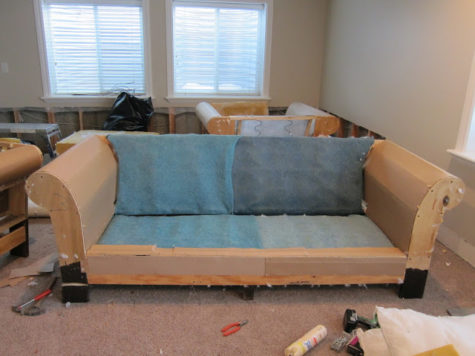
Here is the sofa all stripped down with the seat cushions and pillows set aside. Engineer hubby ripped off the fabric, the batting from the whole couch which he thought was holding in all the odors. He also removed the foam from the arms. When we realized that foam is really expensive, we salvaged the original foam and “Lysol-ed” it liberally 😉 All that remained of the couch when we were done stripping it, was the wood structure, cardboard on the arms, springs, the blue mesh material covering the springs, foam (foam not pictured), and metal tack strips.
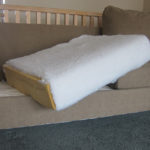
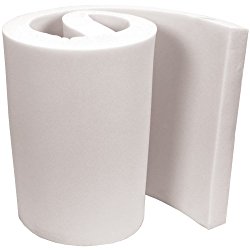
In our case, the next step was to put the foam back on the arms. Foam only covered the front, sides, and tops of the arms. Sadly, I don’t have a picture of this so just use your imagination. I did however attach a photo of a roll of foam you can purchase. It’s called High Density Urethane Foam 1″x24″x30″.
Remember, any staple dimples or irregular shapes in the foam may show through when you cover it with new batting and fabric, so use spray glue on the back and try to staple it nice and evenly on the edges.
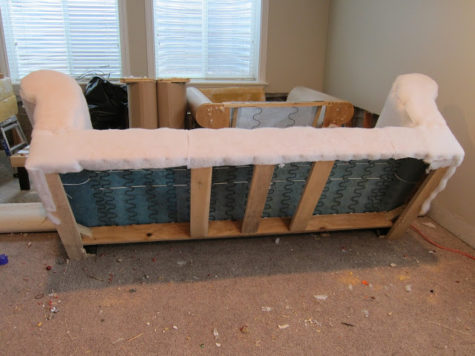
New batting stapled into place. You will notice some dimples caused by the staples, but these were not too severe and were easily smoothed out once the fabric was stretched over it. We used about 3 packages of 8oz batting that had been pre-cut for a queen size quilt. (10oz would have been better but it wasn’t in stock). You can buy it at Walmart.
Roughly cut it into pieces that cover each section of the couch. Sections meaning, front of arms, around each arm, front of couch, and back of couch. Just go for it, it doesn’t have to be perfect.
Notice the feet have been removed. Also notice all the yucky stuff that came out of the couch when it was stripped. Among the “treasure” was 75 cents, “the lost sock”, cocoa puffs, the top hat from a Monopoly game, and much more.
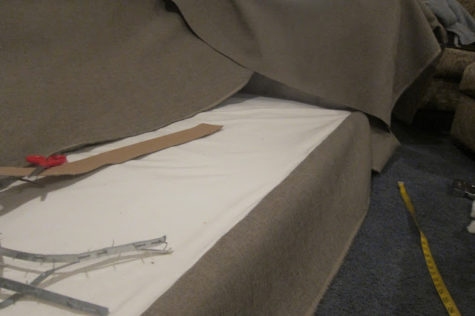
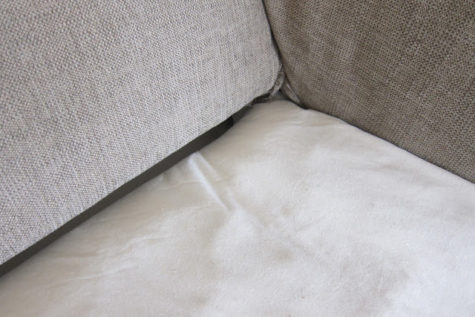
We first attached muslin over the seat cushion springs/base (see finished product below).
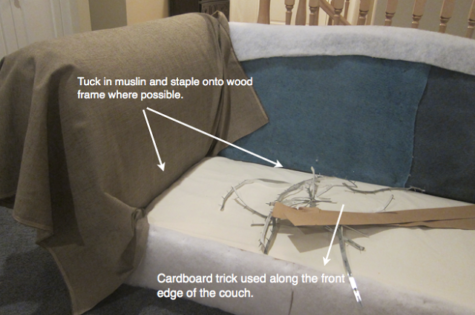
Locate areas on the frame of the couch where you can staple the muslin. Cut muslin to fit. Be generous and give yourself plenty of fabric to work with.
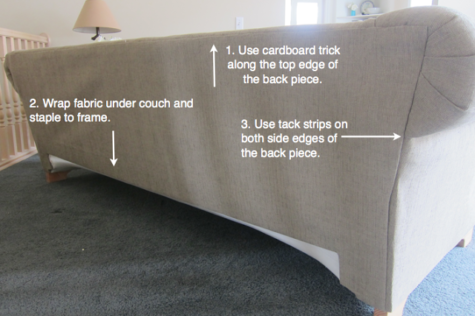
Use the cardboard trick, described two paragraphs below, along the front edge of the couch in order to hide staples and give a uniform edge.
Fold the muslin over the stapled cardboard strip and tuck under the arm and back.
Pull the muslin tight and staple to the frame. You will be working under the couch at this point in order to staple the muslin to the frame.
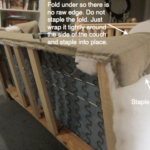
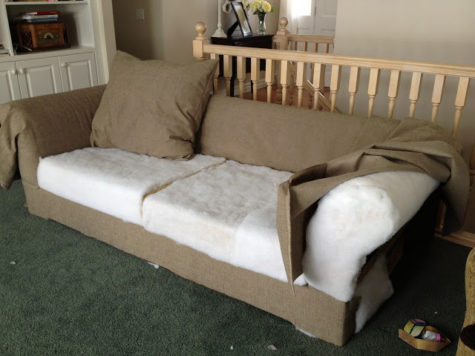
Drape a large piece of fabric over the arm of the couch and staple in the joint. Notice how we have a lot of extra fabric hanging off the front and back of the arm. That fabric will be folded into a fan later on.
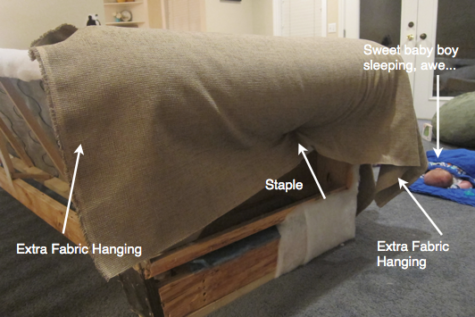
Use the cardboard trick to attach the fabric to the front of the couch. The cardboard makes it so you don’t see any staples and you will see how.
- Place the fabric “right side” to the muslin and a couple inches away from the edge of the couch.
- Cut a few strips of cardboard (cereal boxes work great) about 1/2″ wide and as long as the couch goes.
- Staple through the cardboard and the edge of the fabric into the wood frame.
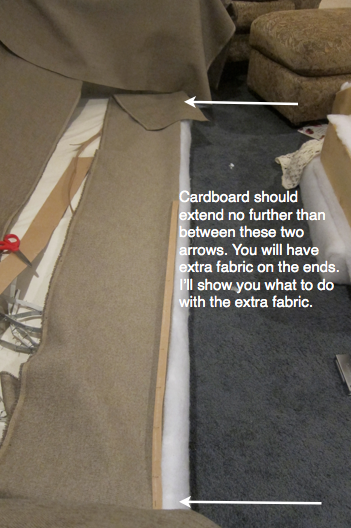
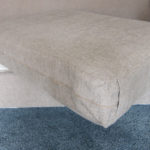
Flip the fabric over and you have a nice, clean, finished look for the front part of your couch.
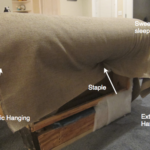
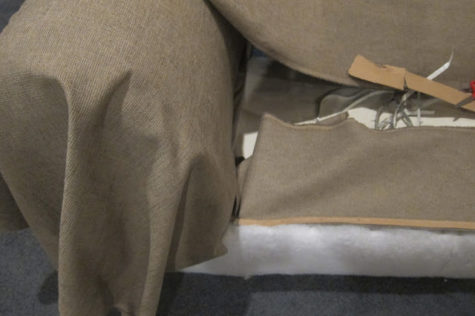
Staple the fabric to the bottom. Wrap and staple the fabric around the sides of the couch about 5 inches.
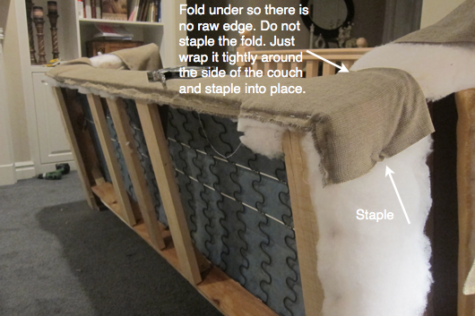
Notice the front bottom piece. It is tightly secured with staples, no raw edges showing. The back fabric piece is just draped over the back for fun at this point; the next step is to work on the arms again.
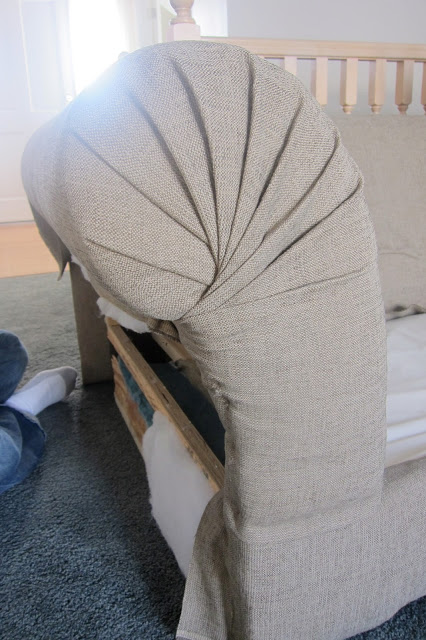
Arms. This is the trickiest part.
- Start from the outside of the arm and work your way up, around, and down creating small folds.
- Staple as you go; you can always pull the staples out and readjust.
- When you get close to the end, fold the fabric under to give it a clean finish and staple in place.
- Don’t staple on the front of the couch, just pull the fabric tight and staple it in place on the sides of the couch.
- The fold at the bottom of the arm should cover the fold you made earlier on the front bottom piece.
Trim away bulky fabric as needed. Notice where we stapled. All these staples will be covered by the side fabric piece.
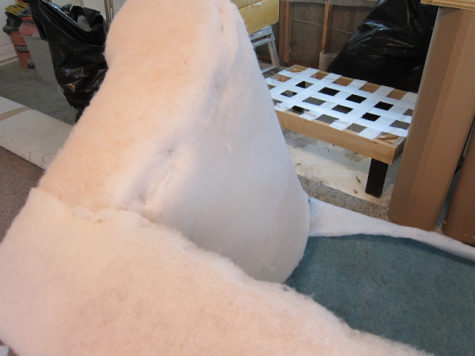
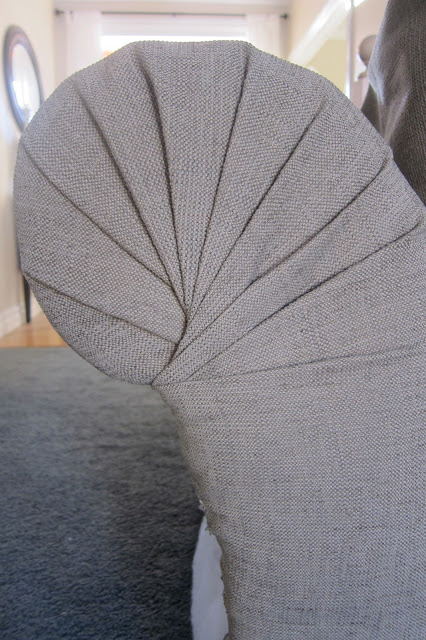
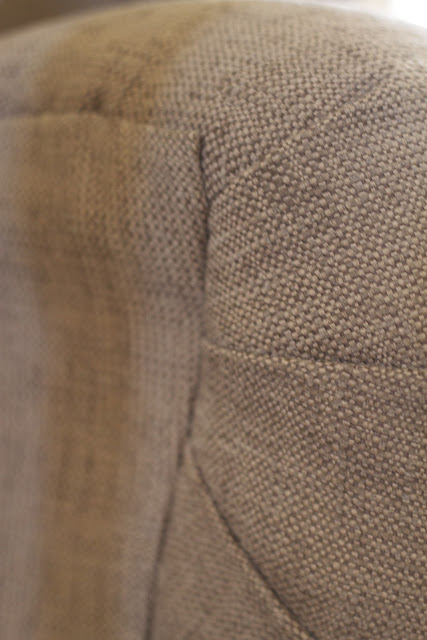
Move to the back of the arm and follow the same process creating a fan with the extra fabric.
We applied a little bit of super glue behind the small fan folds to keep them in place. So far so good four months and three kids later!
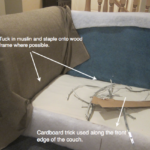
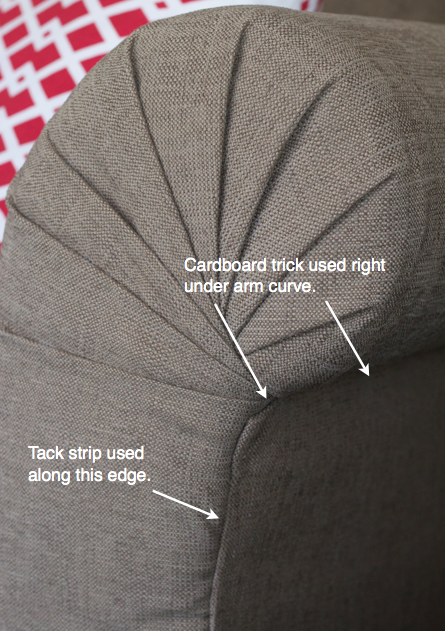
Here is an overview of what you will be doing to attach the side piece. Notice the order.
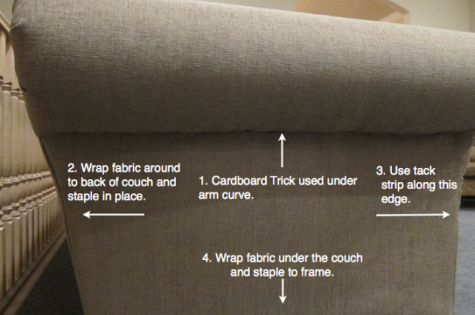
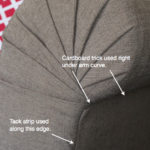
- First, use the cardboard trick to attach fabric under the arm curve.
- Second, staple fabric around the back of the couch and staple in place.
- Third, use a tack strip to secure fabric in place on opposite side. This little strip of metal allows us to create a finished edge much like the cardboard trick.
- Along the edge, push tack strip through the back of the fabric.
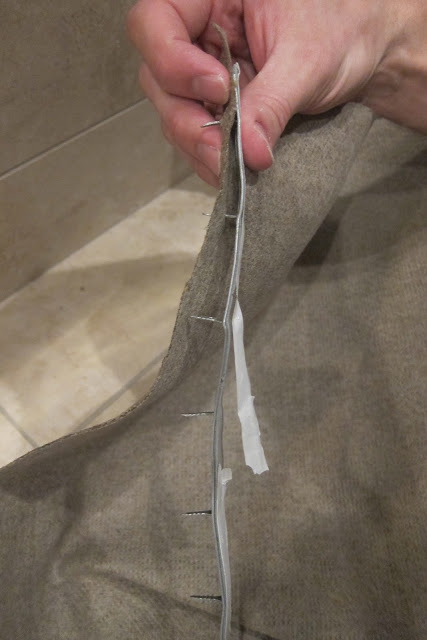
Fold it over so that the back of the tack strip is against the back of the fabric.
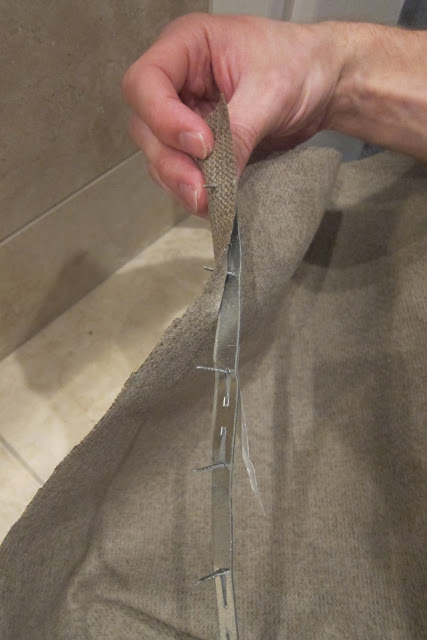
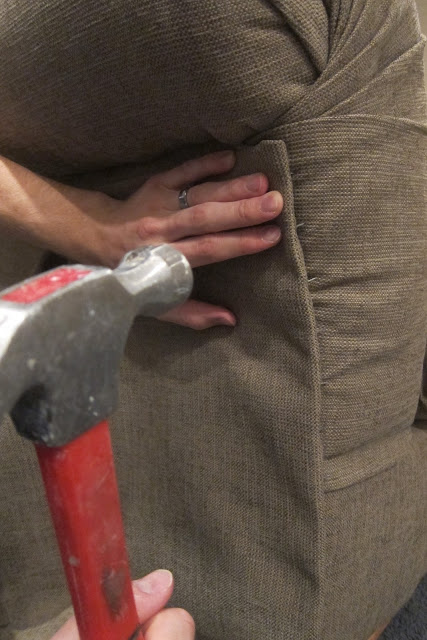
Hammer the fabric and tack strip into place along the side. Wrap and staple bottom edge of fabric onto the couch.
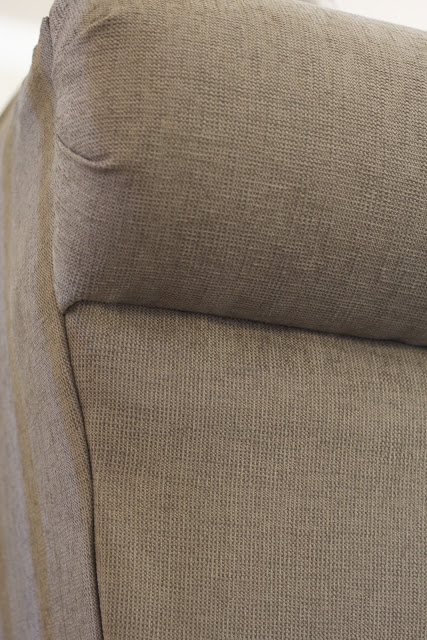
This is what the side should look like finished.
Attach fabric to the “front” of the back rest.
- Use cardboard trick to staple fabric in place along the top of the back frame.
- Flip fabric over to the front of the couch, pull it tight, tuck in bottom, and staple to frame. Make sure the “right side” of your fabric is showing once you flip it over.
- Fold under raw edges on the sides and staple to frame from behind the couch.
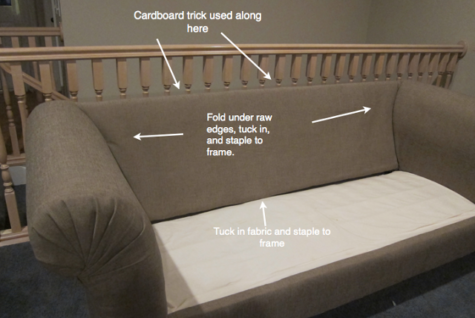
Add back piece.
- Use the cardboard trick along to top of the back. Flip fabric over.
- Begin working on the bottom.
- Wrap bottom fabric under couch and staple. The staples under the couch will be covered by muslin later.
- Then work on the sides of the back piece using tack strips. All staples should be hidden.
Here is a closer view of the back rest so you can see more clearly what we did and where we used the cardboard trick. Notice that the “front” back piece actually wraps over the top and down the back of the couch a few inches. Then the “back” back piece is stapled on top of the “front” back piece.

Attach the muslin to the “unseen” underside of the couch. No need to make it look pretty. Just cut a piece to fit the bottom and just staple it on. Start on one side and work your way around. Then attach the feet.
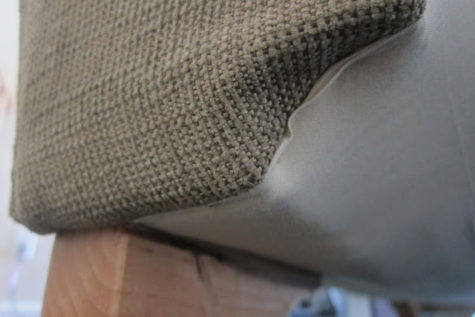
Here are the feet Engineer Hubby designed and made since we didn’t like the original feet. We really liked the blonde look, but you could always stain them.
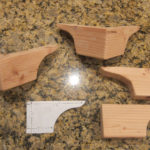
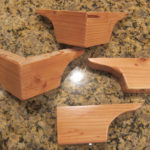
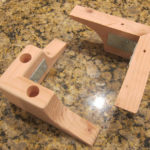
We added the center block for extra support.
Wrap cushions in new batting as pictured.
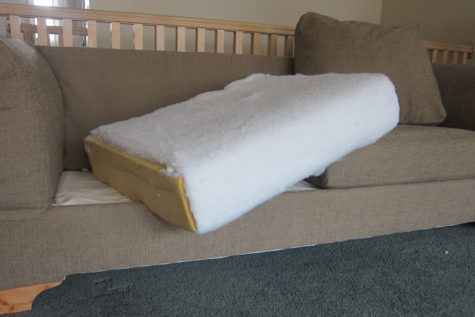
Use spray glue to secure the batting to the foam cushion. Now for the cushion cover… I used THIS tutorial.
How to Make a Cushion Cover
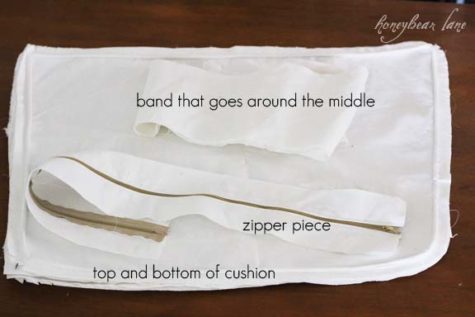
Start with these four pieces:
- The two main pieces-top and bottom of cushion
- The middle band
- The zipper piece you created from this zipper tutorial
To get your top and bottom of your cushion, set your actual couch cushion on top of the fabric you want to use and trace around it with a fabric pen. Then cut it out, about a 1/2-1″ out from the line you drew (for your seam allowance and piping.) Cut two.
Note: If you are tracing an asymmetrical piece you will need to make sure that you keep the RIGHT sides opposite. To sew piping onto your fabric, follow this piping tutorial. The middle band you create by measuring the height of the cushion (for the width) and the perimeter around, minus the zipper length. Give yourself several (like 5-6) extra inches tacked onto the perimeter.
I’m not going to share the whole tutorial here, but I think this will give a basic idea of how to do it. The full tutorial can be found at Honey Bear Lane.
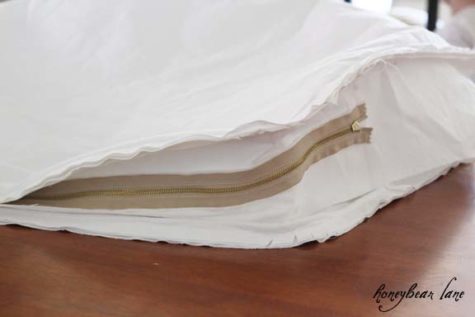
The finished product looked like this:
Make Pillow Covers.
I made simple envelope pillow covers so I didn’t have to sew on a zipper. I used this tutorial from Make It Love It.

I didn’t want the corners of my pillows to poke out, so I just sewed them down into the form.
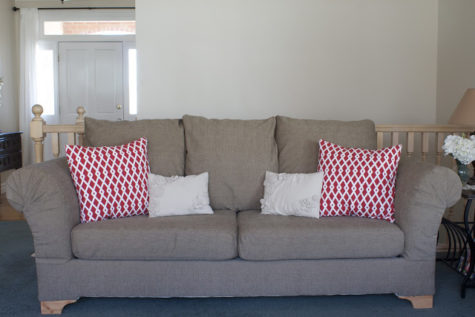
All done! I promise this look isn’t too hard to achieve. Just have patience and always over estimate on your fabric so you have enough.
Wowsers! Well, if that looks too complicated, you could always knit something!
Knitted upholstery !!
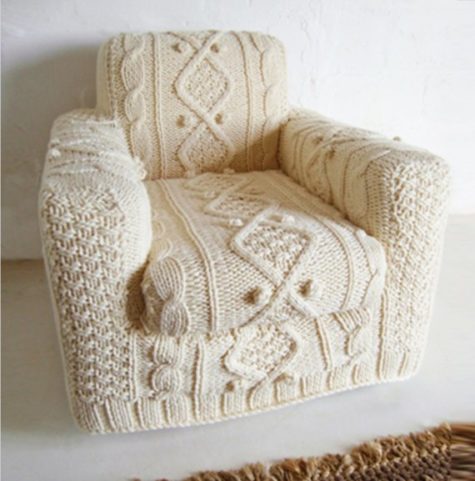
Your cat will love it, I promise! LOL! Here are some more knitted sofa and chair covers just for fun:
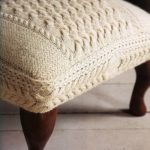
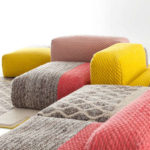
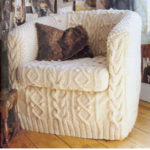

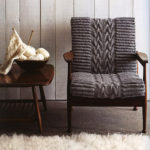
Or You Could Just Paint It!

Here’s a video about how to paint a velvet sofa and keep it soft! If your sofa or chair is in decent shape, and still comfortable, maybe this is a viable option!
And yes… it’s true! You really can paint your upholstered furniture!

Painting velvet requires more patience than painting other fabrics. Maison Decor gave the chairs three coats of paint. They watered down the paint slightly by using a wet brush and spritzing the velvet lightly with a water bottle mister. Watering down the paint helped it spread evenly. Amy explains that watering also kept the fabric from soaking up too much paint, which can lead to cracking.
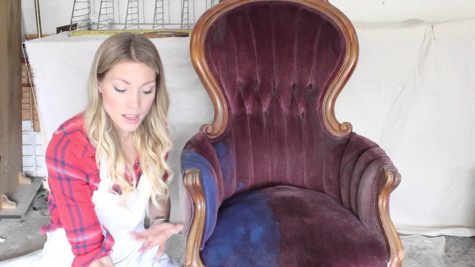
“The nap of the velvet needs to have the paint worked into it, but not so as to disturb the way it lies,” Amy adds.
Following the three coats of paint, with drying time in between coats, Amy and her team sanded the surface with 600 grit sandpaper, which helped restore the fabric’s smooth feel. Then they waxed the upholstery, which created a smoother finish and protected the chairs.
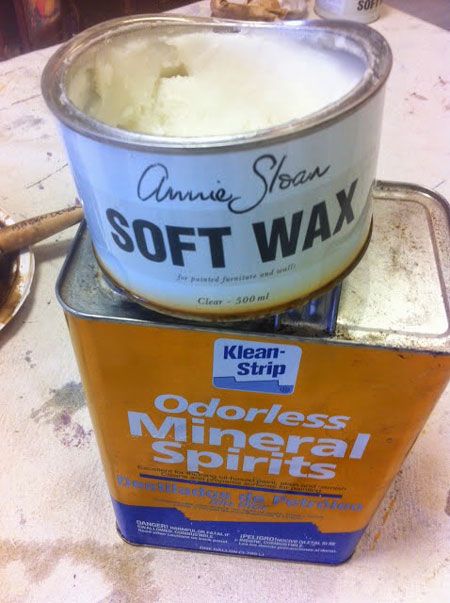
Amy explains that she used a 50/50 mix of Annie Sloan’s Soft Clear Wax and odorless mineral spirits, and applied the mixture with a wax brush. They waxed in the direction of the nap, wiping away excess. The key element was allowing the wax to dry completely, which required three weeks.

As for people skeptical of sitting on waxed velvet, Amy assuages any fears. “Often people ask, can you sit on a waxed chair? Won’t it come off on your bottom? The answer is no!” She attests, “In our house we have a pair of painted and waxed chairs in our dining room, and it’s been two years now of daily use with no wearing off of paint or wax. Now that’s something I can feel comfortable recommending to everyone.”
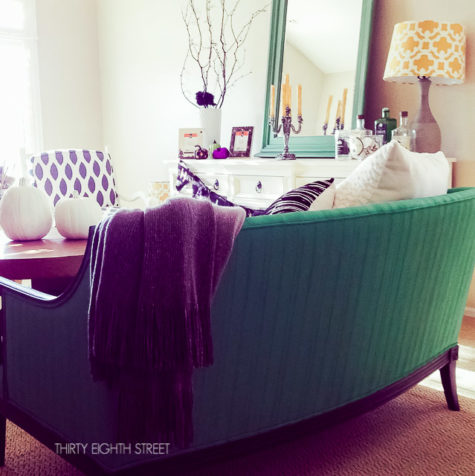
Ok… I think that’s about enough of that!
Bedroom Feng Shui
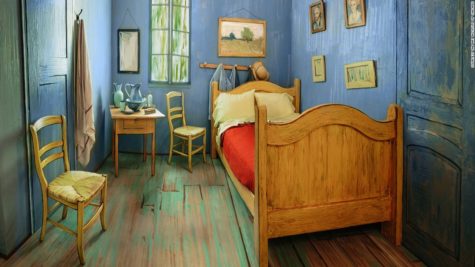
The bedroom is an obvious respite from a tiresome world for many reasons: It provides comfort, warmth and familiarity in the face of great stress, hard work and exhaustion.
While it’s certainly wonderful to have a room full of the furniture of your dreams, it’s even more important to address the feng shui characteristics of your bedroom. As pleasing as material items are, the placement of certain items, the colors and even the materials can make an enormous difference in the state of your life affairs.
Bedroom arrangements in feng shui embrace the primary function of your bedroom, which is to serve such activities as sleep, relaxation and sex. Feng shui principles incorporate the right elements and furniture placement to enhance your overall health and well being. These principles ensure the continued flow of chi energy through the balance of yin (female) and yang (male) energies.
Feng shui in the bedroom can bring new and unexpected harmony to life. The benefits range from the financial to the professional to the romantic.
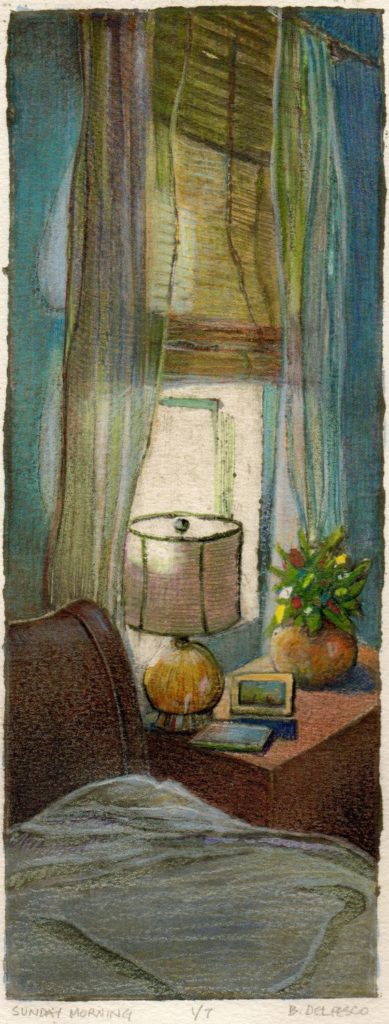
The idea of a perfect feng shui bedroom may bring different images to different people, but they will all have one thing in common – pleasure and dreaming as the keywords. In a good feng shui bedroom, every item will reflect the clear intent for love, healing, and relaxation.
What do you think?
I collected a wide variety of beautiful images of some spectacular bedrooms. Beautiful as they are, most of them would definitely NOT give me a good nights sleep, or a feeling of security, safety and complete restfulness. Here they are. What do you think?
And now that I’ve completed the post and read all the feng shui information, I have a pretty pretty good idea as to why they don’t “feel” quite right for a cozy and comfortable night’s sleep.
What to Do
Your bed should be placed in the “command” position or far away from and unaligned with the door. The door should be visible from the bed. This placement encourages the natural flow of chi, which in turn promotes restfulness, sleep and motivation; all of which are conducive to a successful professional life.
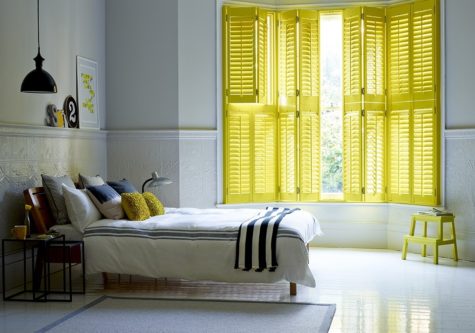
Early to bed, early to rise and to enjoy the sunlight. Natural light is the ideal way to start the day, not only because it releases such positive energy, but also because it raises serotonin levels, which can make your workday more productive.
What Not to Do
Don’t place clutter of any kind, especially work-related items,underneath the bed. Any type of mess has its own unique, negative energy that can disturb everything from sleep to health.
Don’t place a desk in the bedroom. If this is unavoidable, then don’t pile the desk with paperwork, bills and other work or finance related items. If these items must be in the bedroom, use a fabric or a folding screen to separate the area from the rest of your bedroom, which should be your resting area.
3 Steps To A Good Feng Shui Bedroom
So you’ve heard a lot about creating good feng shui in your bedroom and you know that it is so very important to have good energy there, right? You might also be a bit skeptical about feng shui, or maybe intrigued but convinced that it’s impossible to create good feng shui in your bedroom.
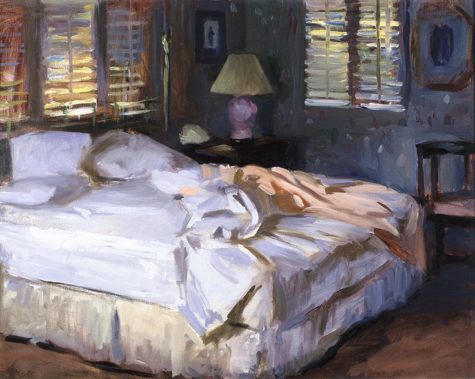
Here come 3 easy steps (read: rules) to help you get an easy grasp on good bedroom feng shui and even enjoy it in your bedroom on a constant basis!
- Step 1 – Create A Good Energy Foundation
What does a good feng shui energy foundation mean? It is basically a set of building blocks on which all other good things can be created. There are several factors that make a good feng shui energy foundation in your bedroom.
- The first one is the abundance of fresh, clean air.
- Second is the quality of natural light.
- Followed by the “no clutter” rule and the “no electrical equipment” rule.
These are firm rules like “no computer in the bedroom” or “no cell phone close to the bed”, and definitely “no TV or exercise equipment in the bedroom”.
Why? Mainly because they create high EMFs for which you pay dearly (often without understanding why you are not feeling well). They also slowly but surely destroy all the goodness you want to have in your most intimate space – the energy of genuine love, deep connection and sexual healing.
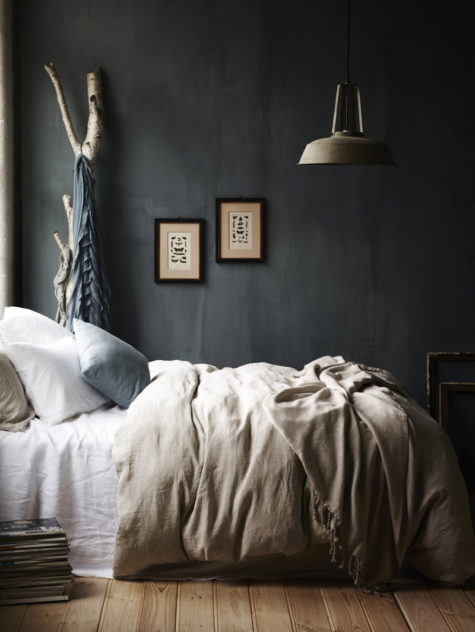
Basics like keeping the window open for a fresh air flow, letting natural light in, not storing any clutter in your bedroom closets or under the bed have to become just that: basics that you do not think about, argue or make it hard to implement.
- Step 2 – Put Your Bed In The Best Spot
Find the best furniture layout with your bed in the so-called commanding position and/or facing one of your lucky feng shui directions.
Have access to your bed from both sides and have (no matter how small) nightstands on both sides of bed.
Be mindful not to have a mirror facing your bed or any sharp angles pointing at you while you sleep. Understand what makes a good feng shui bedroom layout and see if yours is close to having good feng shui.
If you feel like moving your furniture from time to time, this is perfectly fine, just be sure you know the best spots for your major furniture pieces. A good placement of furniture – especially your bed – in your bedroom will allow for a stable and harmonious flow of energy which every room needs (and more so a bed-room!)
- Step 3 – Beautiful Color and Decor
Beauty is like food, energy-wise. An ugly space can literally poison your energy, while a beautiful, harmonious one will elevate, nourish and heal you.
Do your best to create and maintain a sense of beauty in your bedroom and have only items that you love to be surrounded with.

Follow basic feng shui colour guidelines, such as the one that recommends earth colour tones as best colours for the bedroom (look at a wide range of colours: from deep chocolate browns to light sand colours), and be sure to add sensual, romantic touches in a fire feng shui element colour (red, pink, magenta, lavender or coral orange colours.)
Bring only art that makes you happy and inspired, use comfortable natural bedding and have either candles or dimmer switches to keep the energy soft and nourishing.
Your bedroom is the outward expression of your love for yourself, so start loving yourself more as love leads to all things good, no matter you are sharing your bedroom with a loved one or only with yourself.
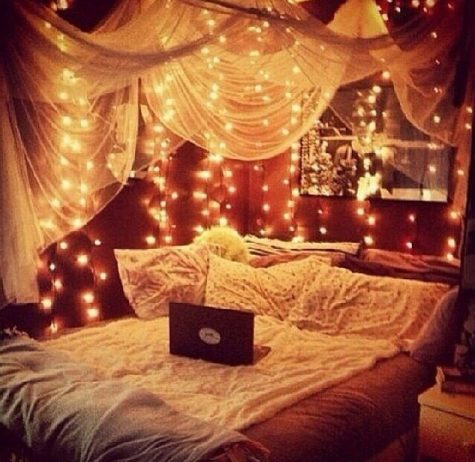
Ultimately, love does not come from outside, but is rather an expression of your own ability to feel love. So express it more, as well as nourish and strengthen this expression with good feng shui in your space.
Good luck in creating an excellent feng shui bedroom!
To Encourage Career Growth
While the right design tips will go a long way in positively influencing your professional life, several elements and objects in particular encourage growth in this area. They include:
- Water:
Water has a powerful effect on career growth in feng shui. Its dual energy and serenity mirrors the very qualities necessary for a successful professional path. Despite that, its presence in the bedroom is generally frowned upon since it generates too much yin energy. Place a small table fountain or an elegant piece of artwork depicting water in your home office or North sector of your home, but never in the bedroom.
- Mirrors:
Mirrors are equally beneficial as they relate to careers and feng shui. However, they should not directly face the bed since they can drain your energy. Mirrors are also associated with the water element, which shouldn’t be placed in a bedroom. According feng shui guru Lillian Too, the purpose of mirrors is to reflect negative chi energy away from you.
- Colors:
Yellow is a stimulating color that easily keeps your brain focused, while green is exceptionally calming. Colors like red, purple and gold are heavily associated with wealth. However, these colors are dramatic and deep, and hence should not be used in abundance. Instead, use them as creative accent pieces for your bedroom’s gentle color scheme. Lampshades, candles and small trinkets are excellent items to touch with these brilliant hues.
- Other Considerations:
The key to success in both finance and career is to increase the amount of positive energy in your life. This can only be accomplished if your bed is stable and supported by a strong headboard to protect your personal chi as you sleep.
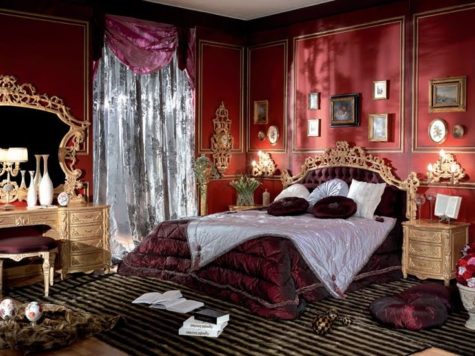
Placement of The Bed
While the aesthetic elements are the first things generally noticed in a bedroom, the most important feature is truly the position of the bed. As the largest piece of furniture in the room and the place where you rest, the bed is particularly important. The wrong placement can jeopardize your health.
- The ideal placement for your bed is diagonally across from the door. This placement gives you privacy and also allows you to see anyone entering your bedroom.
- Never place your bed directly across from the door. This placement puts you in a sleeping position where your feet point toward the door. This is known as the coffin position and is the worst possible position since it’s considered the position of death and is very inauspicious.
- Avoid placing your bed in front of or underneath a window since chi energy enters and leaves a room through the windows. If your bed is in this pathway, the chi energy will flow over you as you sleep, causing a restless sleep.
- Don’t place the mattress directly on the floor. This is very inauspicious since you’re in the main pathway of the chi energy.
- Floating beds look very appealing, but lack the feeling of support and safety. Choose bed frames with proper support so that you can feel more relaxed.
- Having a headboard against the wall gives you a subtle sense of security that’ll help you fall asleep easier. This has to do with our survival instincts and sense of security.
- Never place your bed on a wall shared by the bathroom, or kitchen.
Note: If the size or configuration of your room, especially window location, prevents you from following feng shui guidelines, then you can apply corrective feng shui cures and remedies.
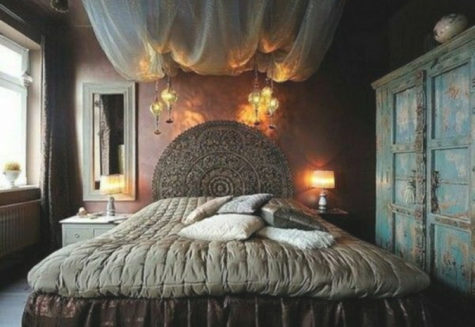
One easy solution to inauspicious wall placements that cannot be avoided is to use a thick headboard for your bed, which acts as a buffer, and can minimize wanted noise that disturbs your sleep.
Additional Bedroom Furniture
Everything you place in your bedroom has a profound effect on the flow of chi energy. You want to ensure auspicious energy flows easily between the bedroom door and windows. By keeping this natural pathway free of clutter and large pieces of furniture, such as chairs and armoires, you’ll prevent stagnant chi and enhance all activities that take place inside your bedroom.

The bedroom is the most yin place in a home. Think of a comfy cave: dark, cozy, small. There should be a sense of enclosure, and freedom to move within it. Keeping that goal in mind, there are three main rules for your bedroom, which advise against:
- Placements that block natural pathways and doorways.
- Cluttering the bedroom with too much furniture.
- Placements that create poison arrows directed toward the bed.
Poison arrows are created whenever you place an armoire or dresser so that the sharp edge of the corner is angled directly at the bed.
If you can’t avoid placing furniture so that it create poison arrows, then you can remedy this by suspending a multi-faceted crystal ball from the ceiling so that it is between the poison arrow and the bed. Another solution is to use a runner for a a dresser to conceal and soften the corner edges.
Don’t place large furniture by your bed. Some people like putting large bookshelves right by the bed. It provides easy access to books for those who enjoy reading right before going to sleep.
Small bookshelves are fine. However, if you have bookshelves that are more than six feet (180 cm) tall, then you are better off without the bookshelf. The reason is that the large furniture can give you that invisible pressure that makes you feel oppressed. It’s similar to the feeling you get when you drive right next to a truck or when you’re standing right under a monumental structure.
You can place nightstands on either side of the bed; just be sure that the nightstand isn’t higher than the mattress, since this creates a poison arrow targeting the bed. Chairs and other pieces of furniture should also be set in the bedroom according to the same guidelines.
If your armoire doors have mirror insets, then you want to place it where it doesn’t reflect the bed. If this is unavoidable, then you need to cover the mirrors when sleeping.
Mirrors
Mirrors can be used in a bedroom, but with great discretion. There are placements you want to avoid such as placing a mirror directly across or over a bed. You simply don’t want to reflect the bed in a mirror. This invites a third party into your marriage or relationship and results in infidelity. Some practitioners believe that a mirror can also startle the soul when it steps from the body for its nightly astral travels.
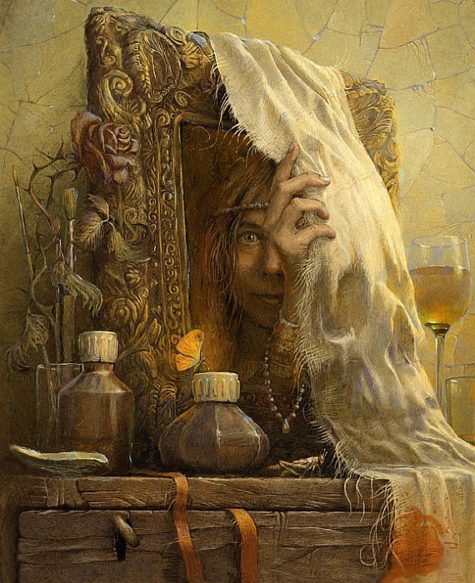
If you must place your bed so you don’t have direct line of sight of the bedroom door, you can place a mirror so that you can see the door from the bed, just be sure not the mirror doesn’t reflect the bed.
Clutter
To create chi balance, you must first rid your bedroom of all clutter and work-related equipment. Dirt and dust create stagnant chi which can result in such things as illness, disharmony within your relationships and loss of wealth.
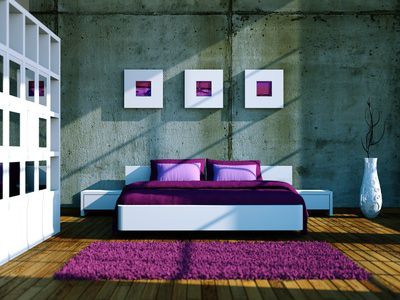
One of the biggest stress producers in most of our homes is… CLUTTER! Even if you consider yourself a hopeless clutterbug, give yourself the gift of creating a clear and clean sanctuary in your bedroom. Be ruthless!
Fresh Air
Open the windows often or use a good quality air-purifier to keep the air in your bedroom fresh and full of oxygen.
Be mindful of the quality of air in your bedroom. You cannot have good feng shui in your bedroom if the air you breathe in is stale and full of pollutants. Please note, though, that plants in the bedroom are not good feng shui unless your bedroom is fairly large and the plants are located far from the bed.
- Essential Oils
Essential oils can also help you purify the air in your bedroom, but be sure to choose actual essential oils (they have healing properties) vs fragrance oils (which are mostly toxic).
If you are new to the world of essential oils, you can first look into the basic properties of most popular essential oils and choose which ones you would like to use in your home. There are many essential oils that are easy to love and use, lavender is certainly the number one essential oil because of its versatility and wide array of healing properties.
Your bedroom, for example, will definitely benefit from soothing sensual scents of lavender, rose, ylang ylang, or jasmine, while a home office can improve its energy with a good dose of peppermint, clary sage, or lemongrass in the air. I love diffusing a mixture of eucalyptus, peppermint, and some citrus oils (tangerine, grapefruit or orange) in my office space, especially in colder season when I cannot have the windows wide open.

Once you have made your choice of pure essential oils for feng shui purposes, how do you actually use them?
Spraying an essential oil mix into the air is the easiest, quickest way to change the quality of energy around you. There is a variety of essential oil mists on the market – from love energy mists with soothing, sensual oils to travel jet lag mists to help strengthen your immune system.
If you want to make your own mix, all you need is a spray bottle, preferably glass. Next, fill the bottle with pure water and add several drops of essential oil. Shake it and test it, see if you like the scent, then maybe add a couple more drops.
The easy to follow guideline is 8-10 drops of your favorite essential oils to 8 oz water (I always tend to make it more concentrated, though, but it depends on the oils I am using). Experiment and find the right ratio for you. Making your own essential oils air spray is really easy, and you can just use it in your space as needed.
Desks and Work Spaces
Work and sleep don’t mix, so don’t place a desk in your bedroom. This is a poor idea for a feng shui optimized bedroom. For good health and rest, keep your work separate from this rest area.
If your bedroom must also double as a work space, then select furniture such as secretary or other cabinet style desk that can be closed and out of sight when not being used. If you live in a small space, you can try dividing your work area and your bed with a curtain.
Electronics and Television
Electronics are out, too. They contribute electrical currents to the room that can disrupt your sleep.
Most feng shui experts believe that all electronics should be banned from the bedroom. “I want to say a special word here about televisions. Get it out of the bedroom! You’re inviting strangers into your bedroom every time you turn the TV on, bringing that often harsh outer world into your private chamber. Perhaps more importantly, you are distracting yourselves from each other.”
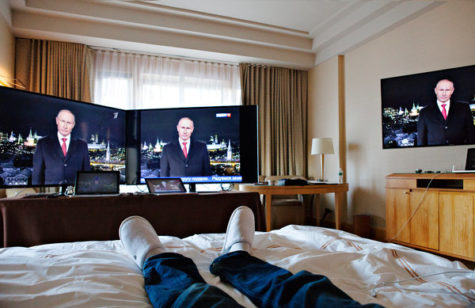
In a practical world, televisions and laptops are often a necessary evil in your sacred bedroom space. It’s impossible to get away from technology, so a compromise solution is to place your TV in an armoire or other cabinet that can be closed when you’re finished watching TV for the night. Close your laptop when not being used and store inside a night stand or drawer. That way they are at least out of sight and your space while you rest.
Some say that TV has a similar effect as a mirror, however, most of us use LCD’s now, and I can hardly see any reflections from that. So I don’t think the mirror-effect applies anymore.
Though some claim that TV helps them sleep, the light and sound from the TV are actually causing us to stay awake longer than needed. The light from the TV is a form of artificial light that has the tendency to keep us awake by delaying the release of sleep-inducing hormone, melatonin. Further, whatever show or movie that you’re watching can also invoke strong emotions that’ll keep you awake longer than usual.
Some experts also mentioned that electronics in the bedroom, such as TV, brings electromagnetic field that can potentially harm us. I’m not sure how it affects our sleep, but I do know that strong electric currents create strong electromagnetic fields that can cause many health consequences, which is why you shouldn’t live close to power lines.
Color Matters
You can decorate the bedroom walls in color, texture, patterns and artwork. You can use feng shui compass directions to aid you in color selection. Choose colors that are restful. Soft colors like cream, peach, and pale pink are good choices. A soft yellow is considered particularly beneficial. Blues are nice.
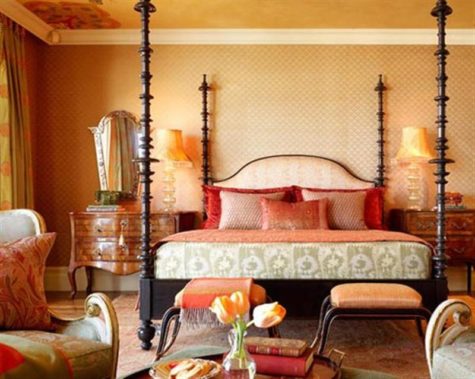
The best feng shui bedroom colors for are considered the so-called “skin colors”, and we know the colors of human skin vary from pale white to rich chocolate brown. Choose colors within this range that will work best for your bedroom decor.
Avoid vibrant colors as the main theme of your bedroom. These colors include bright orange, pink, and yellow, and they are not suitable for your bed linens, curtains, and your bedroom walls.
Brighter colors tend to shout out at you, which can amplify your emotions and give you more energy. They also reflect more light, which is known to disrupt your biological clock and keep you awake. If you desire to use bright colors, you may need to dim down the bedroom lights to balance out the brightness. Another method is to use the bright colors as accents rather than the main theme.
Color is usually used to enhance a particular kind of energy (element), or to balance the yin/yang relationship. Some feng shui consultants work with color a lot, others not so much, saying that there are more powerful ways to affect the energies. Personally, I love color and use it a lot because it can have a tremendous impact on how we feel in a space.
Choosing Art For The Bedroom
Choose your bedroom art wisely, as images carry powerful energy. The best feng shui advice for choosing bedroom art is to choose images that you want to see happening in your life; images with nourishing, happy and beautiful energy. Unless you enjoy being sad and lonely, do not use sad and lonely images in your bedroom.

Best art for the bedroom are images related to the emotions of love, happy relationships, body healing, and intimacy.When you select wall art for your bedroom, choose subjects that are happy and restful. Nature images and themes in twos, such as two mandarin ducks, swans, or peach blossoms, promote romance and a relaxing atmosphere.
Humans have an amazing ability to recognize faces and familiar patterns. It is suggested that you remove animal heads (hunting trophies), pictures of faces, and other odd decors from the bedroom, because they can keep you distracted and awake.
Being surrounded with unpleasant images, such as pictures depicting violence or sorrow, can invoke strong emotions that can keep you awake at night. Worse, these emotions can carry over to your dream, making you wake up tired the next day.
If you have any pictures that invokes strong emotions, remove them. Pictures that soothe and relax you are more suitable for the bedroom.
The Ceiling
If you have a choice, avoid putting your bedroom in rooms with sloping roofs and or low ceilings. Low ceilings give an invisible pressure that makes most people feel uneasy. The same is true with slanted or sloped ceilings.
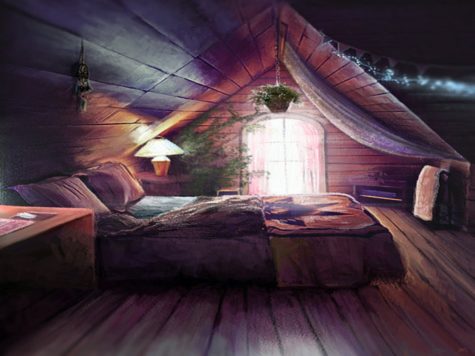
Though the feeling is very subtle, it does give you some sort of unease or feelings of being compressed (worse for claustrophobics), and those feelings carry over whenever you go to bed. This is especially true if you sleep on the side with the lower ceiling. An easy solution is to use a canopy bed. The four pillars that surround you while you sleep have the tendency to make you feel more “supported” from the downward pressure of the ceiling.
A canopy can also provide protection from other negative ceiling elements, like bright light fixtures, a bathroom on the floor directly above you, and a ceiling fan.
Avoid placing your bed directly beneath exposed beams. Just like the sloped or slanted ceilings, sleeping under a beam can also give you a subtle feeling of unease. Beams give you discomfort because it is similar to having a sharp object pointed at you. Also, they can give you a feeling that your space is being chopped up, which can be highly distracting.
The size and shape of the beam, as well as the height of the ceiling, can all play a role on how much discomfort you feel. The easy cure to this is to use a canopy bed. Or you can add a pair of flutes with red ribbons at an angle so the open end is pointing upwards along the overhead beam.
If you have anything hanging right above your bed, such as a chandelier, you will get that same feeling of discomfort because you may not feel 100% safe, and the effects are worse if it is hanging right above your head. The cure is to remove that furniture and place it somewhere else, like right above a dining table, where people will not reside right under it.
- Here’s a nice little gallery of cool canopy beds:
Lights and Lighting
Have several levels of lighting in your bedroom, or use a dimmer switch to adjust the energy accordingly. Good, appropriate lighting is very important, as light is our #1 nutrient and one of the strongest manifestation of energy.
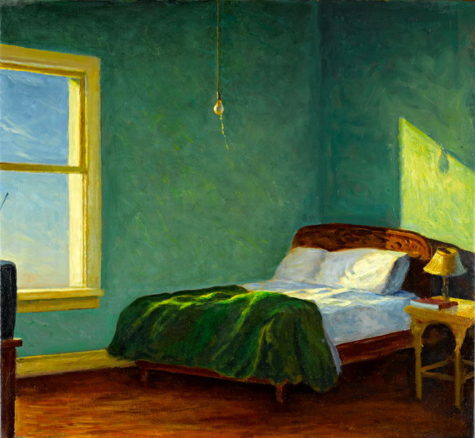
Candles are the best feng shui bedroom lighting, as they not only clear the energy but also create a very intimate, warm and healing atmosphere. When buying candles, check to be sure your candles are toxin-free.
Avoid using harsh overhead lighting. Bright lights keep us awake and can disrupt our sleep pattern. It is true even with artificial lights and especially true for LED lights, which is known to create “light pollution” that causes sleepless nights (this is also the reason why it’s bad feng shui to sleep with your head under a window).
Try to use dim lights with a soothing color, as it can provide the atmosphere and environment as you are getting ready for bed.
Even a little bit of lighting can disrupt your sleep, simply because light can penetrate our eyelids and influence our biological clock.
You are in complete control of the lights in your bedroom. However, you have little or no control of the lights outside of your home. That is why you need blinds and curtains that can completely block out the light from the outside. If your current blinds or curtains have light shining through the cracks at night, it may be worthy to invest in double layered curtains to improve your sleep sleep.

Plants and Greenery
Remove the plants from the bedroom. Plants have an “evening complex” where they grow taller at night. The vibrant growth energy gives off quite the opposite energy you want when you’re asleep.
Also, most plants release more carbon dioxide than oxygen at night. Carbon dioxide has the ability to affect your sleep quality, and is another reason why plants should not be in your bedroom.
Cures and Elements
You can activate various areas in your life by placing feng shui elements and object in your bedroom. For example, you can activate your wealth area in the southeast sector of your bedroom by placing three metal Chinese coins tied together with red ribbon. Improve or enhance your marriage or relationship with a carved pair of rose quartz mandarin ducks on your nightstand.
Bedroom Location
The ideal location of your bedroom is far from any doors that open to the outside world. For this reason, it’s best if your bedrooms are located at the back end of the house, or or at the opposite end from the street.
The main reason is that bedrooms at the back-end are usually much more quiet. Your sleep is less likely to be disrupted from the sound and movement of anything that roams in front of the house, which includes both human and automobile traffic. Because of this, you will also enjoy higher levels of privacy.
If possible avoid placing your bedrooms at the top of the garage. When your bedroom is on top of a garage, your sleep can be disrupted by a variety of factors, including the smell of car exhaust, noise from garage door movements, insects that creeps into your bedroom, and warmer bedroom temperatures. If these four factors are non-existent, this bedroom location should be fine.
Avoid bedrooms under highly active areas. Active areas can include restrooms, entertainment rooms, or other areas where humans are active instead of sleeping peacefully. This usually does not apply to apartments and high-rises, because the bedroom is likely below another bedroom, and the flooring is usually thick and sound-proof.
However, single family homes are a different story. If your bedroom is right under a restroom, your sleep can be interrupted whenever someone flushes the toilet. Or, if you live right under a room of a teenager who has a different sleep schedule, their movements, music, or other activities can keep you awake all night.
Some say that sleeping above the kitchen stove brings bad energy that disturbs sleep and creates health issues.
Bigger Isn’t Better
Don’t oversize your bedroom. If your bedroom is too large, you may wake up tired even if you get a full eight hours of sleep. Some people feel find it hard to fully relax in extremely large bedrooms.
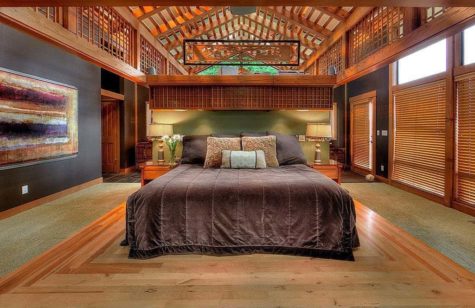
This could be our survival instincts at play. We are most vulnerable when we’re sleeping, and with a larger space, we may feel less in control of our surroundings, causing us to sleep on high alert rather than fully relaxed.
Open vs Closed
Keep all bedroom doors closed at night, be it the closet doors, the en-suite bathroom door or the bedroom door. This will allow for the best and most nourishing flow of energy to strengthen your health, as well as the health of your relationship.
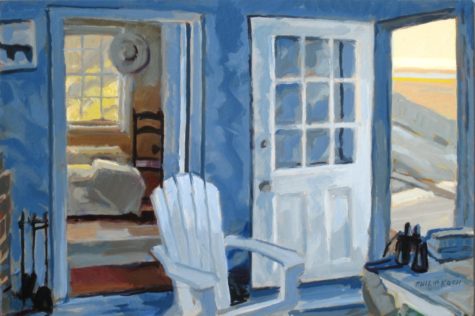
Keeping your bedroom closet clean and organized will further create a sense of peace and calm in your bedroom. Understand the interaction between the doors and windows in your bedroom and be sure the energy is not escaping your bedroom, but rather nourishes and strengthens it.
- Close the window when you sleep
This is mainly true if you live in an urban area, or if the bedroom is facing the street or other potential sources of noise or outside odors. If you live in a rural environment, or if the bedroom is completely private and well protected, an open window might be just fine, providing fresh air and soothing night sounds and scents.
- Open the Window During the Day
After a full night’s sleep, your bedroom is filled with your own carbon dioxide. To refresh the air quality in your bedroom, make it a habit to open the window right after you wake up. This way, your bedroom will feel more nurturing during the night.
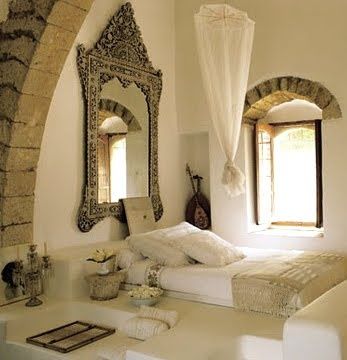
Carbon dioxide is known to adversely affect the quality of your sleep. So even if you live in a region with extreme cold or hot weather, try to keep your window fully open for at least a couple of hours during the day to recycle your bedroom’s air.
- Close your bathroom doors
Many homes have a bathroom attached to the master bedroom. If possible, it’s best to keep the door between them closed at night.
- Close the Bedroom Door
Closing the bedroom door increases your sense of privacy, especially if you live with family members. It can also provide you with a feeling of security, which can further relax your survival instincts to assist you with your sleep.
Closing the bedroom door also cancels out the noise from within your home. These sounds include the humming of the refrigerator or other home electronics, and the noise from your family members or roommates living with you.

Tips and Tricks
- A solid headboard will ensure you have a sound restive sleep since it serves as a wall to insulate you from the outside world.
- Don’t crowd your bedroom with items that don’t belong there.
- Keep clothing neatly in drawers and closets.
- Routinely clean underneath dressers and beds.
- Don’t store things underneath dressers or beds.
- Don’t use your bedroom as a storage area.
- Never place water features or paintings of water scenes in a bedroom. This provides too much yang energy and creates a restless sleep.
- Never place live plants in your bedroom since these stimulate and attract too much yang energy.
- Use subdued, indirect lighting, like that provided by table and floor lamps.
- Remedy any poison arrows created by sharp angles of furniture with multi-faceted crystals or rearrangement of furniture.
- Avoid open bookshelves; books create poison arrow effect. Remedy by adding either glass or wood doors.
But wait! There’s More!
Here is another collection of cool bedroom ideas:
Sources:
Is it nap time?
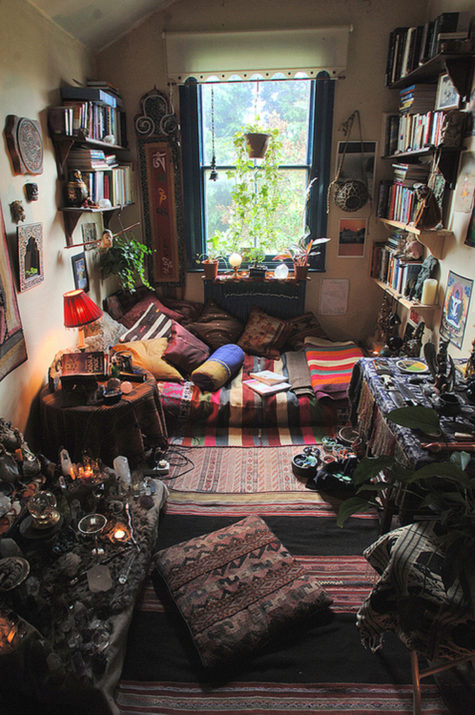
The bedroom can serve as a multifunctional room–such as an office, library, or laundry room–but in the end, it is a sanctuary for sleep. This room should be the most luxurious and personal space in any home – a soothing oasis that is conducive to relaxation and comfort. Here are some tips on how you can design your bedroom for better sleep, which should be considered along with color options, styles, and furniture.
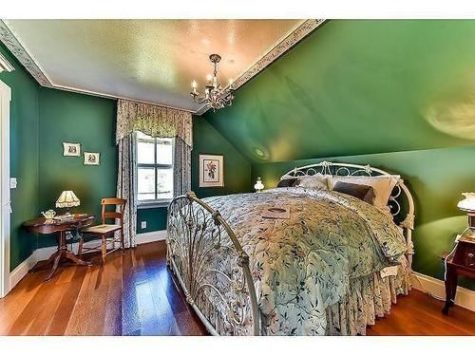
A good mattress is the key to a good night’s rest.
A good night’s rest may be as simple as getting a new mattress. If your mattress is too lumpy, hard, or soft, it will keep you up all night trying to get comfortable. There are many different types of mattresses, such as pillow, foam, innerspring, adjustable, waterbeds, and airbeds; each type has manufacturers who guarantee comfort and better sleep.
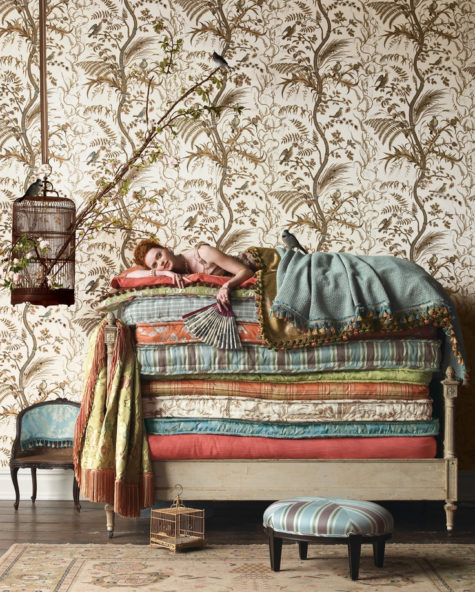
When you shop for a mattress, follow these simple steps:
- Research extensively.
According to Consumer Reports, Casper and Tuft and Needle were rated the highest in overall satisfaction in a survey of almost 62,000 Consumer Reports subscribers.
- Test out your mattress.
If possible, lie on any mattress that you’re considering. Wear loose clothes and shoes you can slip off. Make yourself comfortable, and shoo away the salesperson if you’re feeling pressured. Salespeople should expect you to take your time. Spend at least five or ten minutes on each side and on your back (your stomach, too, if that’s a preferred sleeping position). Panelists who took beds home for a month-long trial rarely changed the opinion they formed after the first night.Shopping online or at a warehouse club? Tryouts aren’t usually an option, so checking return policies before you buy is extra important.
- Check Return Policies.
Make sure the store offers a full refund or credit toward another mattress. Return periods, often called “comfort guarantees,” range from a couple of weeks to 120 days. Some retailers, including Macy’s and Sears, charge a 15-percent restocking fee.Costco and some online sellers provide free pickup if you want a refund or exchange, but otherwise, you’ll have to pay for it—or cart the mattress to the store. And you’ll be responsible for any damage.
- Understand the Warranty
It can range from 10 to 25 years and covers only manufacturing defects such as sagging and loose or broken coil wires. Coverage is frequently prorated, meaning that it decreases over time.
- Try to Haggle
Once you’ve settled on a model, try to bring the price down. Many businesses, such as warehouse clubs, have fixed prices and won’t budge. But for retailers that do negotiate—particularly specialty chains—huge markups allow them to lower prices by 50 percent or more during their frequent sales.
- One recommendation:
Any time of year, insist on a sale price you’ve seen for the mattress you know you want, and don’t be afraid to walk out if you feel you’re getting a raw deal.
- Don’t Be Bullied Into Buying a Box Spring
You might not need it. For an innerspring mattress, the box spring (also called a “foundation”) is a wood frame enclosing stiff wire and covered with fabric to match the mattress. For foam or adjustable-air mattresses, it’s a box several inches high.
If you’re switching to a foam or adjustable-air bed from an innerspring, you’ll need a boxy foundation that lacks springs and wire. Otherwise, if your box spring isn’t broken and is still structurally sound, consider keeping it and saving money (roughly $150 to $300 for a queen-size).
- One caveat:
Some brands require you to buy their box spring to receive full warranty coverage.
- Forget About Comparison Shopping
If you like a mattress at one store and ask elsewhere for something similar, you’re likely to be steered toward a same-brand mattress claimed to have the same construction, components, and firmness. But they’re probably not the same. Mattress makers offer some lines nationally, but when those brands are sold through major chains such as Macy’s, Sears, and Sleepy’s, they’re for lines exclusive to those chains. And manufacturers don’t publish a directory of comparable mattresses.
- On Delivery Day
Never accept delivery without inspecting the mattress (and the box spring, if you buy one) for stains and other damage. Also be sure that the mattress has a label that states “all-new material” before you send the driver on his way. If it’s not there, refuse delivery. And keep it on afterward in case you do have to file a warranty claim in the future.
Clean It Up
Not in the market for a new mattress? Maybe it’s time to clean up the old one!

Tackling this five-step chore a couple times a year can help keep things fresh in the bedroom. From Consumer Reports, here’s a nice how-to:
You spend about a third of your life on your mattress. When was the last time you gave it a good, deep clean? The seldom-used living room sofa probably feels the bristle of a vacuum brush more often than your trusty mattress. It’s time to change that. Besides promoting a more pleasant and productive night’s sleep, a clean, cared for mattress can last longer—and it might even help prevent nasty, not to mention costly, pest infestations.
Back when most mattresses could be flipped over, the conventional wisdom was that you should turn it twice a year, and take that opportunity to clean it as well. These days, a lot of mattresses, including the pillow-top variety, can’t be turned because they have a proper top and bottom. But cleaning your mattress two times a year remains a good rule of thumb. (Check the mattress label for instructions since the manufacturer might recommend rotating the mattress head to foot to ensure even wear.)
- Step 1
Start the cleaning process by stripping the mattress of all sheets and bedding and tossing the items in the wash. To remove tough stains, always use a good laundry detergent and the hottest water setting on your washing machine; dry on high heat as well to zap any surviving critters.
- Step 2
Next, vacuum the entire mattress surface with the upholstery attachment on your vacuum cleaner. Pay attention to seams and crevices, where dirt, dust, dead skin, and other icky stuff collect; switching to your vacuum’s crevice attachment can help get in deep.
- Step 3
Once you’re finished vacuuming, check for stains and spot treat them with an appropriate cleaner. An upholstery cleaner or enzyme-based pet-odor remover can do the job on many bodily fluids. You can also try a simple solution of 1 teaspoon mild dish detergent and 1 cup of warm water.
Here’s a simple recipe for a mattress cleaner:
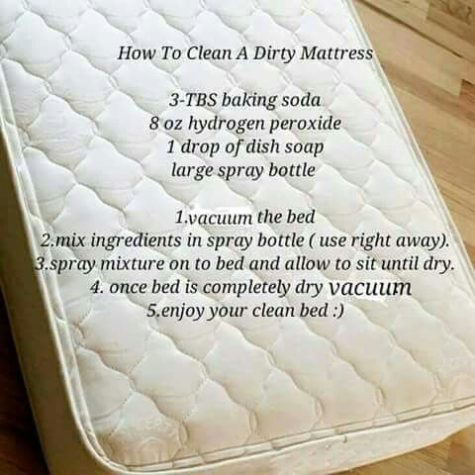
- Step 4
Next, deodorize the mattress by sprinkling baking soda over the entire surface. Especially if this is your first cleaning, don’t be afraid to empty an entire 1-pound box onto the mattress.
For best results, leave the baking soda there for 24 hours. That means you might need to plan the project around an overnight trip—or be willing to sleep elsewhere in your home. If you can place the mattress near a window, the sunlight will add its sanitizing power.
- Note:
In my own experience, I have found that Listerine (the original formula- not the mint) makes for a great deodorizer when it comes to urine (animal or human). Pour it, undiluted onto the area, really saturate it, and then allow it to dry completely.
- Step 5
After the baking soda has had a chance to tackle odors, go back over the mattress with your vacuum’s upholstery attachment. If you don’t already own a mattress cover, we recommend buying one. And adding a mattress pad between the cover and bottom sheet will help absorb moisture.
Along with the periodic deep cleaning described here, these extra layers of protection will help prevent mites, fleas, and other pests from sharing your bed. That should really help you sleep tight.
Recipe for a Mattress Spray with Essential Oils
A nice little refresher made with essential oils can also be spritzed onto the mattress.

Mix together the following:
- 3 drops Eucalyptus Oil
- 3 drops Lemon Oil
- 3 drops Lavender Oil
- 3 drops Tea Tree Oil
- 3 drops Peppermint Oil
- 1/2 bottle Witch Hazel
- 1/2 bottle Water
Pour into a spray bottle and apply to the mattress.
Another nice essential oil blend for your linens and mattress is Lemon Grass and Rosemary. You might also want to try a mix of cheap vodka, lemon, grapefruit, and bergamot essential oils for a citrus delight.
Sleeping In The Dark
One of the most important conditions needed for sound sleep is darkness.
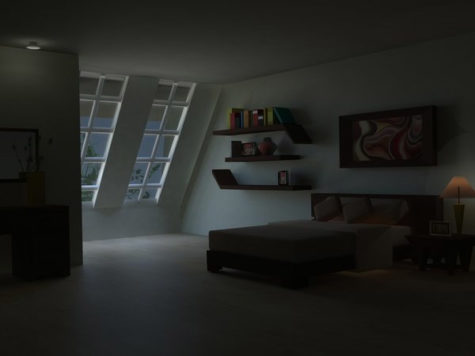
According to Brandon Peters, M.D., who is trained in clinical sleep medicine and neurology at the University of Minnesota Medical Center in Minneapolis, our mind and body’s natural circadian rhythm lean towards following dark-light cycle.Therefore, the amount of light in your bedroom will affect your sleep.
Our modern lifestyles can disrupt us from dark, calm environments that our bodies need for sleep. These modern devices are digital clocks, televisions, phones, and computers, which can light up your bedroom and interrupt your REM (Rapid Eye Movement) sleep.
Some solutions you can use in your bedroom are armoires to hide televisions or computers, and vintage open-faced alarm clocks versus bright digital alarm clocks. Remove phones from your bedroom; if it’s important to have a phone in your bedroom, hide it away in a side table drawer.
If you work at night and sleep during the day, black out shades are a must! We saw some cool ones in yesterday’s post.
Hot or Cold?
Air temperature can affect your sleep.
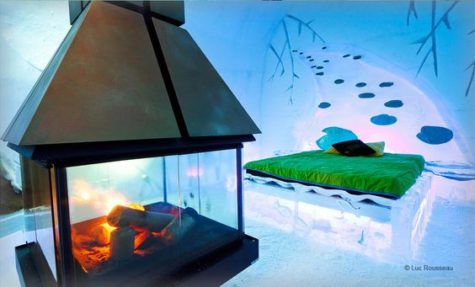
If the room is too cold or warm, it too can affect how you sleep at night, according to Ralph Downey III, PhD, Chief of Sleep Medicine at Loma Linda University. A simple solution, which can be tested if you believe this is your issue, is altering your thermostat.
Other options you can incorporate in your bedroom to help with room temperature is a ceiling fan, portable heater, or heavy blinds and window treatments, which will help keep the room dark and prevent outside weather conditions from entering your bedroom.
Color and Sound
Soothing colors and soothing sounds make for a good night’s sleep.
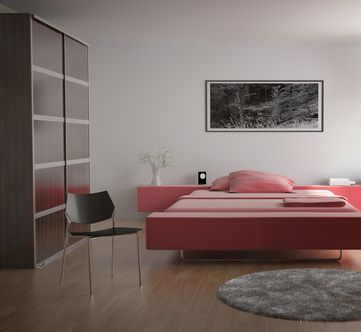
Bright, vibrant colors can be fun, but sometimes it’s best not to use them within a bedroom, especially if you have trouble sleeping. Instead, use calm, soothing colors like muted blues, greens, and pastels, which are more peaceful and calm. If you still would like to incorporate bright colors in your bedroom, use them as accents on your pillows or within artwork.
Besides color, soothing sounds can promote sleep too, such as a babbling brook, soft wind chimes, or crickets’ chirping. You can incorporate these sounds in your room with a CD player or any other electronic device hidden away; if you prefer the real thing, then place a small fountain in your bedroom or hang some wind chimes outside your window.
Clutter Is A No-No
Too much clutter can cause anxiety and lack of sleep.
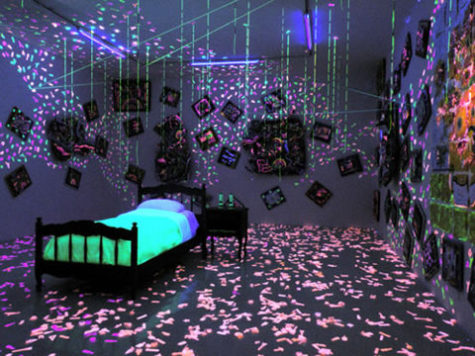
This is a feng shui no-no and good advice to bear, since too much clutter can cause anxiety and uneasiness in any room. Try to keep your bedroom in order so you’re not worried about tripping over stuff when you get up in the middle of the night or toss-and-turn about cleaning up before you go to sleep. There are several storage options you can use in your bedroom or closet that will tackle the clutter, which are appealing and affordable, too.
One or more of these design tips will help you maintain a sanctuary of sleep and rest in your bedroom. Next step to designing you bedroom is to determine your style, color scheme, and furniture.
Sleeping Under The Stars
How fun is this?
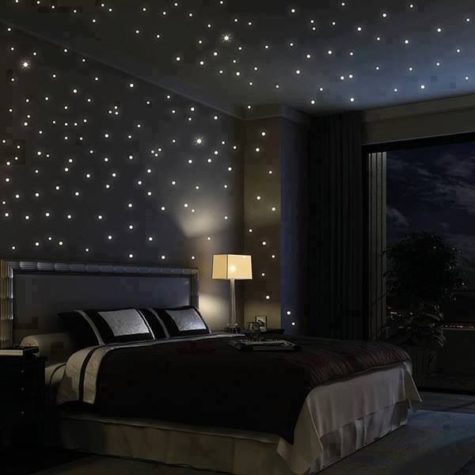
There are a number of different ways to get this effect. The simplest one is to use glow in the dark paint. For this project you would need the following:
- Flat black paint – for the background / ceiling
- Glow in the dark paint
- A jar of fine sparkly glitter – optional, but worth it because you’ll get the fun of the glitter all day long as well.
Paint the ceiling and/or walls. Mix the glow in the dark paint in small batches, adding enough glitter to thicken it. Paint on your stars. A template can be used, or the stars can be dabbed on with a paint brush. For larger stars, you may want to apply 2 coats of glitter and glow in the dark paint.
A simpler, less time consuming method is to buy glow in the dark stars decals and stickers. I found some cool ones at Etsy, and a wide variety of them on Amazon.


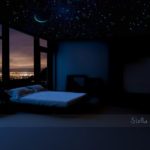
If you have skills… and money… you can invest in a super cool LED fiber optic ceiling.
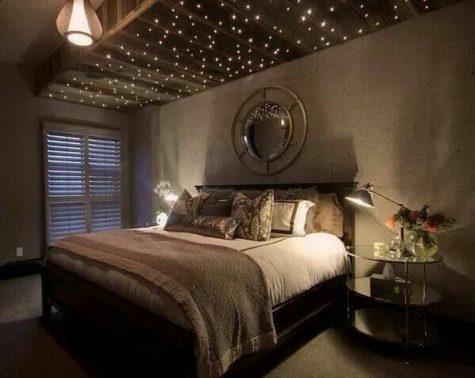
It looked pretty complicated, so I’m just going to leave you with this collection of images that give an idea of what is involved:

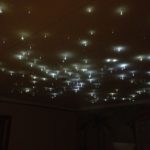

Or you can just buy pre-made panels in a variety of starfield patterns and colors.
Great for a baby’s room! Really adds some nice soft lighting.
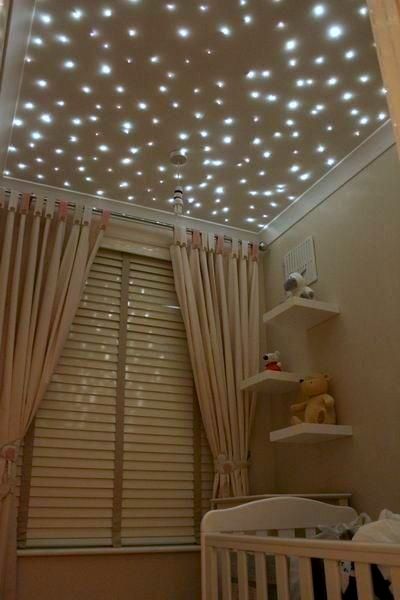
Sleep Like A Baby
Sound slumber results in increased energy and productivity, improved heart and immune system health, a better mood, even a longer life. And hey, you just feel so much better after a satisfying 8 hours of rest.
Sleep is a basic biological necessity—just like eating—and it has an impact on every aspect of your health and your life.
A good night’s rest starts with the right setting for your body and mind to relax and recharge. With a few simple changes to your bedroom, you can get a better night of sleep. Start the makeover from lighting to bedding today so you can sleep better tonight.

Here is a collection of tips and suggestions on how to get a good night’s sleep.
- Make Your Bed
This simple morning chore pays off. A clean, well-kept bed can have a psychological effect on the way you sleep. A National Sleep Foundation poll found that people who made their beds in the morning were 19% more likely to sleep well every night.
- Banish Chaos
Your super-long day is finally over, and then you walk into your bedroom. What’s your gut reaction: “Ah, at last!” or “Oh no!”
A messy bedroom makes some people feel stressed. So try to keep your bedroom orderly and neat so you can relax more at night.
Likewise, your bedroom isn’t the place to multitask. You want a calm atmosphere in your bedroom that makes rest irresistible. Work, read, pay bills, and do other tasks in another room. Remove distractions, such as a TV, so you’re not tempted.
- Hey, That’s My Blanket!
You might want to rethink the way you and your partner make the bed. If you each have your own blanket and top sheet, you can each make yourself comfy and avoid fights over the covers. You’ll both be free to move around and stay as warm (or cool) as you like.
- Build Your Bedding
Sheets, comforters, and your mattress can all affect the way you sleep. Be choosy when you shop.
A breathable fabric like cotton for sheets can help you stay cool through the night. Other fabrics can wick away sweat during warmer seasons. You may also want to have a thinner comforter when the seasons heat up and a thick and toasty one for winter.
Your mattress should support you and feel good. The same is true for pillows. Replace them when they become lumpy or lose their original shape.
- Seal Your Mattress
Sneezes, sniffles, and itchiness from allergies can lead to lousy shut-eye. Your mattress may hold the cause. Over time, it can fill with mold, dust mite droppings, and other allergy triggers. Seal your mattress, box springs, and pillows to avoid them. Air-tight, plastic, dust-proof covers work best.
- Power Down
Dim those lights! And not just the lamp on your bedside table. “Light is a powerful signal to your brain to be awake,” explains Dr. Shives. Even the glow from your laptop, iPad, smart phone, or any other electronics on your nightstand may pass through your closed eyelids and retinas into your hypothalamus—the part of your brain that controls sleep. This delays your brain’s release of the sleep-promoting hormone melatonin. Thus, the darker your room is, the more soundly you’ll sleep.
Power your devices down when you turn in. Or if you just can’t switch off your phone, put it in a drawer so its glow won’t keep you up. Turn off TVs, computers, and other blue-light sources an hour before you go to bed. Cover any displays you can’t shut off.
- Hush Noise
Faucet drips, nearby traffic, or a loud dog can chip away at your sleep. And if you’re a parent, you might be all too aware of noises at night long after your children have outgrown their cribs. Use a fan, an air conditioner, or a white noise app or machine. You can also try ear plugs.
- Set Your Body Clock
Go to sleep and wake up at roughly the same time every day, even on weekends. This routine will get your brain and body used to being on a healthy snooze-wake schedule. In time, you’ll be able to nod off quickly and rest soundly through the night.
A regular sleep routine keeps your biological clock steady so you rest better. Exposure to a regular pattern of light and dark helps, so stay in sync by opening the blinds or going outside right after you wake up. Get out in bright light for 5 to 30 minutes as soon as you get out of bed. Light tells your body to get going!
Melatonin is a supplement that helps to set your body clock. Take the recommended amount about a half an hour before your preferred bedtime, and continue with this practice for a week or two, or until your body rhythms are in sync.
- Nix Naps
You’ll rest better at night. But if you have to snooze while the sun’s up, keep it to 20 minutes or less. Nap in the early part of the day. You can overcome an afternoon energy slump with a short walk, a glass of ice water, or a phone call with a friend.
- Cut caffeine after noon
Coffee in the morning is fine for most people. But as soon as the clock strikes noon, avoid caffeine in foods and drinks. That means coffee, tea, and cola. Caffeine is a stimulant that stays in your system for about 8 hours, so if you have a cappuccino after dinner, come bedtime, it’ll either prevent your brain from entering deep sleep or stop you from falling asleep altogether.
Even small amounts found in chocolate can affect your ZZZs later that night. Read labels. Some pain relievers and weight loss pills contain caffeine.
- Review your medications
Beta-blockers (prescribed for high blood pressure) may cause insomnia; so can SSRIs (a class of antidepressants that includes Prozac and Zoloft). And that’s just the beginning. Write down every drug and supplement you take, and have your doctor evaluate how they may be affecting your sleep.
- Eat Right at Night
Don’t eat heavy foods and big meals too late. They overload your digestive system, which affects how well you sleep. Have a light evening snack of cereal with milk or crackers and cheese instead. Finish eating at least an hour before bed.
Good snack choices
- 1 piece of whole grain toast with a slice of low-fat cheese or turkey
- Banana with 1 teaspoon of peanut butter
- Whole grain cereal and fat-free milk
- Fruit and low-fat yogurt
The ideal nighttime nosh combines carbohydrates and either calcium or a protein that contains the amino acid tryptophan—studies show that both of these combos boost serotonin, a naturally occurring brain chemical that helps you feel calm. Enjoy your snack about an hour before bedtime so that the amino acids have time to reach your brain.
Avoid sugar as it is stimulating and can exacerbate acid reflux and heartburn issues.
- Rethink Your Drink
Alcohol can make you sleepy at bedtime, but beware. A few hours after drinking, alcohol levels in your blood start to drop, which signals your body to wake up. It takes an average person about an hour to metabolize one drink, so if you have two glasses of wine with dinner, finish your last sip at least 2 hours before bed.
After its initial effects wear off, it will make you wake up more often overnight. Warm milk and chamomile tea are better choices.
- Stop Smoking
Nicotine is a stimulant, just like caffeine. Tobacco can keep you from falling asleep and make insomnia worse. Plus, many smokers experience withdrawal pangs at night. Smokers are 4 times more likely not to feel as well rested after a night’s sleep than nonsmokers, studies show, and smoking exacerbates sleep apnea and other breathing disorders, which can also stop you from getting a good night’s rest.
Don’t worry that quitting will keep you up nights too: That effect passes in about 3 nights, says Lisa Shives, MD, sleep expert and founder of Northshore Sleep Medicine.
- Watch What Time You Sip
Want to lower your odds of needing nighttime trips to the bathroom? Don’t drink anything in the last 2 hours before bed. If you have to get up at night, it can be hard to get back to sleep quickly. Keep a nightlight in the bathroom to minimize bright light.
- Work Out Wisely
Working out—especially cardio—improves the length and quality of your sleep. That said, 30 minutes of vigorous aerobic exercise keeps your body temperature elevated for about 4 hours, inhibiting sleep. A post-workout burst of energy can keep you awake. Aim to finish any vigorous exercise 3 to 4 hours before you head to bed.
Gentle mind-body exercises, like yoga or tai chi, are fine to do just before you hit the sack.
When your body begins to cool down, it signals your brain to release sleep-inducing melatonin, so then you’ll get drowsy.
Take time to wind down
“Sleep is not an on-off switch,” says Dr. Breus. “It’s more like slowly easing your foot off the gas.” Give your body time to transition from your active day to bedtime drowsiness by setting a timer for an hour before bed and divvying up the time as follows:
- First 20 minutes: Prep for tomorrow (pack your bag, set out your clothes).
- Next 20: Take care of personal hygiene (brush your teeth, moisturize your face).
- Last 20: Relax in bed, reading with a small, low-wattage book light or practicing deep breathing.
- Lower the Lights
Dim them around your home 2 to 3 hours before bedtime. Lower light levels signal your brain to make melatonin, the hormone that brings on sleep. Use a 15-watt bulb if you read in the last hour before bed.
- Free Your Mind
Put aside any work, touchy discussions, or complicated decisions 2 to 3 hours before bed. It takes time to turn off the “noise” of the day. If you’ve still got a lot on your mind, jot it down and let go for the night. Then, about an hour before you hit the sack, read something calming, meditate, listen to quiet music, or take a warm bath.
- Write down your woes
“The number one sleep complaint I hear? ‘I can’t turn off my mind,’ ” says Dr. Breus. To quiet that wakeful worrying, every night jot down your top concerns—say, I have to call my insurer to dispute that denied claim, which will take forever, and how can I spend all that time on the phone when work is so busy? Then write down the steps you can take to solve the problem—I’m going to look up the numbers before breakfast, refuse to stay on hold for more than three minutes, and send e-mails tomorrow night if I can’t get through—or even I can’t do anything about this tonight, so I’ll worry about it tomorrow. Once your concerns are converted into some kind of action plan, you’ll rest easier.
- Listen to a bedtime story
Load a familiar audiobook on your iPod—one that you know well, so it doesn’t engage you but distracts your attention until you drift off to sleep. Relaxing music works well, too.
- Stay cool…
Experts usually recommend setting your bedroom thermostat between 65° and 75°F—a good guideline, but pay attention to how you actually feel under the covers. Slipping between cool sheets helps trigger a drop in your body temperature. That shift signals the body to produce melatonin, which induces sleep.
That’s why it’s also a good idea to take a warm bath or hot shower before going to bed: Both temporarily raise your body temperature, after which it gradually lowers in the cooler air, cueing your body to feel sleepy. But for optimal rest, once you’ve settled in to bed, you shouldn’t feel cold or hot—but just right.
Try to keep your bedroom around 65 F. Everyone has their own ideal climate, so there is no right or wrong temperature. But avoid extremes in hot or cold because that might interfere with your rest.
Before you leave home, close the blinds or curtains in your bedroom to block the sun and keep the space cool. A couple of hours before you turn in, open a window to allow cool air to cycle through. Or use fans to push the warm air out.
- Spray a sleep-inducing scent
Certain smells, such as lavender, chamomile, and ylang-ylang, activate the alpha wave activity in the back of your brain, which leads to relaxation and helps you sleep more soundly. Mix a few drops of essential oil and water in a spray bottle and give your pillowcase a spritz.
- Breathe deeply
This technique helps reduce your heart rate and blood pressure, releases endorphins, and relaxes your body, priming you for sleep. Inhale for 5 seconds, pause for 3, then exhale to a count of 5. Start with 8 repetitions; gradually increase to 15.
To see if you’re doing it right, buy a bottle of children’s bubbles, breathe in through your belly, and blow through the wand. The smooth and steady breath that you use to blow a bubble successfully should be what you strive for when you’re trying to get to sleep.
- Put Your Neck in ‘Neutral’
Blame your pillow if you wake up tired with a stiff neck. It should be just the right size — not too fat and not too flat — to support the natural curve of your neck when you’re resting on your back. Do you sleep on your side? Line your nose up with the center of your body. Don’t snooze on your stomach. It twists your neck.
Use good posture before bed, too. Don’t crane your neck to watch TV.
- Check your pillow position
The perfect prop for your head will keep your spine and neck in a straight line to avoid tension or cramps that can prevent you from falling asleep. Ask your spouse to check the alignment of your head and neck when you’re in your starting sleep position.
If your neck is flexed back or raised, get a pillow that lets you sleep in a better-aligned position. And if you’re a stomach sleeper, consider using either no pillow or a very flat one to help keep your neck and spine straight.
- Try a Leg Pillow for Back Pain
Your lower back may not hurt enough to wake you up, but mild pain can disturb the deep, restful stages of sleep. Put a pillow between your legs to align your hips better and stress your lower back less.
Do you sleep on your back? Tuck a pillow under your knees to ease pain.
- Block Your Clock
Do you glance at it several times a night? That can make your mind race with thoughts about the day to come, which can keep you awake. Put your alarm clock in a drawer, under your bed, or turn it away from view.
- Stay put if you wake up
“The textbook advice is that if you can’t fall back asleep in fifteen minutes, get out of bed,” says Dr. Shives. “But I ask my patients, ‘How do you feel in bed?’ If they’re not fretting or anxious, I tell them to stay there, in the dark, and do some deep breathing or visualization.”
But if lying in bed pushes your stress buttons, get up and do something quiet and relaxing (in dim light), such as gentle yoga or massaging your feet until you feel sleepy again.
- Keep a sleep diary
To help you understand how your habits affect your rest, track your sleep every day for at least 2 weeks. Write down not only what’s obviously sleep related—what time you go to bed, how long it takes you to fall asleep, how many times you wake up during the night, how you feel in the morning—but also factors like what you ate close to bedtime and what exercise you got. Comparing your daily activities with your nightly sleep patterns can show you where you need to make changes.

Sources:
Letting The Outside In
 The Ultimate Guide to Window Treatments
Whatever style of home you have, windows are one of the first things you notice and the way you treat your windows creates an ambiance which enhances your particular style. Window treatments are simply swaths of material, arranged or draped or pleated over an opening to the outside, a space waiting for you to unwrap!
- Creative Window Treatment Ideas
The sky is the limit with how creative you can get with your window coverings. Literally put any design you want on a shade—a photograph, a logo, or your art. A print-on –demand program provides you this outlet for a totally personalized shade that creates a memorable picture from your own photograph gallery, or design a menu or logo or capture any moment in time to view everyday.
Here are some ideas using ribbons and scarves:


If you’re the DIY type, you can get cracking at your own stitched or no-sew drapes or roman shades. Add ribbons, cloth tapes, iron on hems, bows, ruffles, contrasting fabric with trim or sew together vintage scarves, tablecloths, napkins or stencil away with your favorite shapes. Your imagination is only a shade away.
- Elegant Window Treatment Ideas
To achieve a graceful look on windows usually starts with your fabric choice. Roman shades and drapery are a no-brainer here. Softness, layers and deep, decadent folds are the key.

Oversize drapes that hang floor to ceiling are particularly elegant since they make your room appear to have higher ceilings. You can also easily add a shade behind the drapes to give the layered effect. Bonus points: use different textures and colors on the layers and your elegance factor shoots up.
- Unique Window Treatment Ideas
It’s time to get out of the boring blind and shade funk of thinking you can only do a neutral, blah window covering. Get unique and think top down bottom up shades that let you decide when and how much light to let in from above and below the shade.
Check these out:

For unique drapery ideas, I suggest holdbacks, jabot corners, drapery swags or dual material drapes either in color-blocking or wide stripes. Or, if you want off the beaten path blinds, think mirrored, etched glass, leather (yes, really) bulletproof (yes, also, really), or have any design your heart desires printed on a shade.
You can also use blinds and shades in other places besides the window. Think room dividers, inside awnings in alcoves, canopies around beds and focal points behind headboards.
- Inexpensive Window Treatment Ideas
Window treatments don’t need to leave your pockets empty with no change for your morning latte. Lots of inexpensive choices can perk up any room with a little knowledge and ingenuity. Mini blinds are a popular and reasonably priced option. Mini blinds are easy to install and are available in endless colors and textures and are often the first choice for many of us who want a “no nonsense “ window treatment, simple, plain and goes with everything.
Vertical blinds are another economical choice, but offer a bit more variety. For a traditional, clean look, roller shades fit the bill. They are usually made from vinyl or polyester fabric, come in various patterns and colors. I call these, “rollers”, as they are simple window treatment and you don’t have to be “rolling in money” to afford them. If you are looking for a more modern look for your home, try cellular shades.
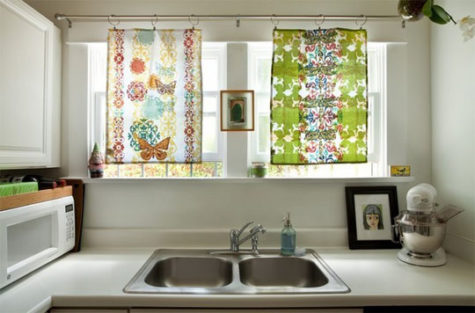
For those with a do-it-yourself attitude, get your sewing machine, staple gun, and fabric ready. Make easy, inexpensive curtains with your favorite fabric (a sheet, YES, I did say that, or a tablecloth offers more whimsy). Just measure and hem one end big enough for a drapery rod.
Decorative window film looks especially hip on paneled windows and doors and is perfect for renters or those who like to redecorate their space often, since the film can easily peel off if needed. Voila! You now have custom and inexpensive window treatments that are uniquely you.
Your window treatments do not need to have a cookie cutter look. Add your own style and be creative with curtain rods, tie backs, and valances. These little finishing touches can make your windows quirky or quiet.
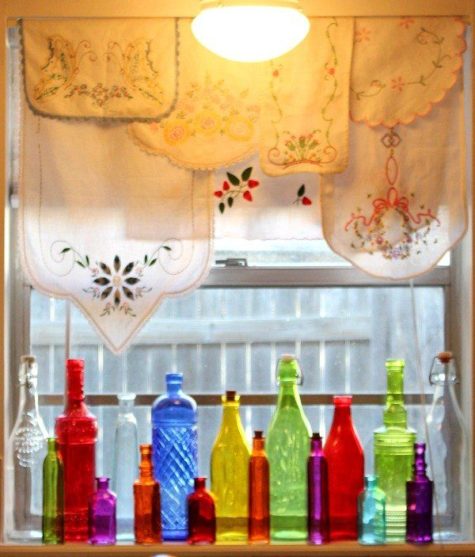
A Look At Window Treatments:
Window treatments are divided in 3 categories:
- Hard window treatments are made of hard materials like wood or vinyl. Such as: shades, blinds and shutters.
- Soft window treatments: anything made of soft materials such as: sheers, curtains, drapes, swags, valances, roman shades – from flat to hobbled styles.
- A combination of both is called a layered window treatment.
Treatments applied to directly to the glass include:
- Frosted glass
- Smart glass
- Stained glass
When looking at the different types of window treatments, remember that child-safe features including cordless and motorized operation are available for all categories.
Before you make a choice about which window treatment to use, consider what you will be doing in each given room. Whether you are sleeping, playing or cooking, you can customize your shade to match your style and provide all of the functions you need.
- Austrian shades
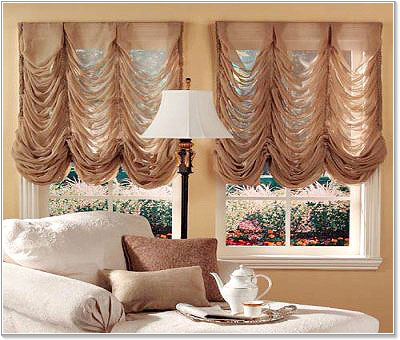
Fabric shade that is gathered in scallops when down and pulls into tighter scallops when raised. It has a touch of luxury. Can be made out of different materials including sheer fabric.
- Beaded Curtains
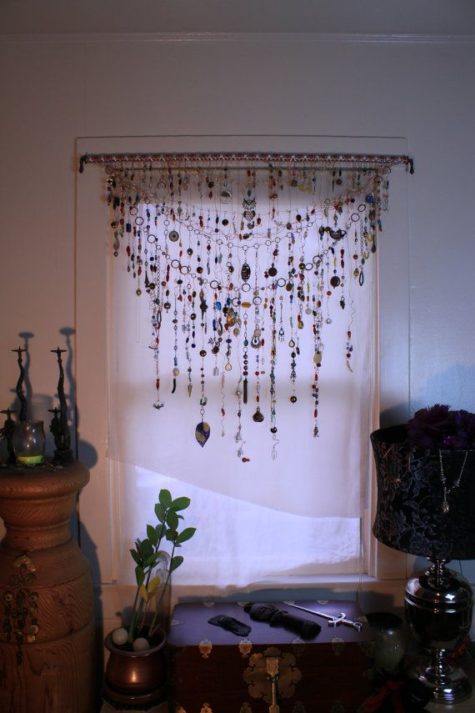
For a colorful hippie style look, beaded curtains are a great way to dress up a small window. Made from beads of all shapes, sizes, and materials, beaded curtains are simple to make and will add artistry to your room. They can get pretty expensive to buy, however. Luckily, they are fairly easy to make. Best of all, you can customize your curtains by choosing what color, size, and shape the beads are. You can even choose what material they are made out of!
How to make a beaded curtain:
Here is a nice little tutorial from WikiHow. It starts with a how to on making your own curtain rod. I’m going to assume that we can figure that part out.
You will need:
- Fishing line, or something to thread your beads onto. Fishing line is nice because it is clear, sturdy, and easy to use.
- Scissors
- Measuring tape
- Beads – lots and lots of beads
- Rings to hang the strands of beading on.
- Curtain rod and related hardware
Alternatively, you could drill holes in a yardstick size piece of wood. Either way, you’ll need something to hang your strands of beads on. In which case, you will not need the rings. Here’s a visual on how that works:
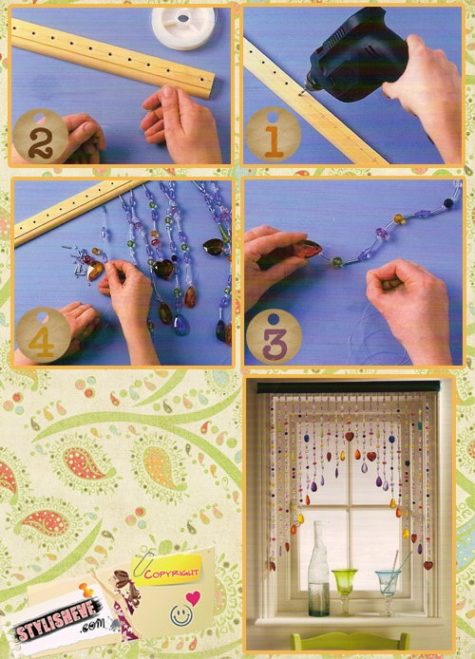
If you are using a curtain rod, hang the curtain rod first. Hanging the rod before you bead will allow you to determine how long your curtains will be. It will also keep the strands from getting tangled while you work on them.
Measure and cut your fishing line.
Measure how long you want your curtains to be, starting from the top of the curtain rod. Double your measurement and add 12 inches to it. Cut your fishing line accordingly. You are cutting your fishing line twice as long because you will be folding it in half and inserting two strands inside each bead. The extra 12 inches will allow you to finish off the curtains.
Cut and work on one strand at a time. If you cut too many strands at once, the fishing line may turn into a tangled mess.
If you don’t have any fishing line, you can also try using strong, sturdy thread, colored string, or even wire. Whatever you decide to use, make sure that it is thin enough to go through your beads.
Tie the fishing line to a ring.
Find the center of your fishing line, then slip it through the ring. Tie 2 to 3 knots beneath the ring to keep the fishing line secure; you can also use a slipknot instead. Make sure that the fishing line is centered, and that both strands are the same length.
Work on one ring at a time. Hang each ring onto the rod as soon as you finish it.
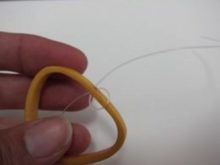 Note: If you are opting for the alternative method, the strand of beads will be attached to the wood hangar last instead of first.
String on one bead at one end. This will be the last bead of your first strand. Make multiple loops through the hole of the bead and tie a knot to secure it. Start your first strand.
In case you’re wondering, this is the finished beaded curtain in the alternative method. She uses large wooden beads of various shapes and colors, with rings at the end.
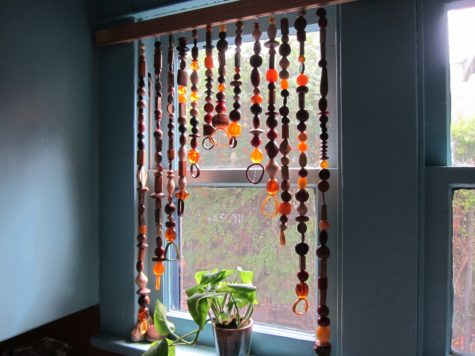
Get some beads.
You will needs lots of beads, more than you think you’d need. They don’t all have to be fancy glass beads; they can be plastic, wood, or even homemade. You could even take apart costume jewelry, and use the beads from that. The funkier the beads are, the better!
Colored glass beads are wonderful for this project because they are translucent and catch the light well. If you are using colored string, consider using clear beads for a cool effect.
Consider getting some 2-hole beads for the end of your curtain strands. You will one 2-hole bead for each strand.
Start stringing your beads.
Take your first bead, and thread it onto the fishing line. Make sure that you are putting the bead through both strands of fishing line. Pull the bead all the way down to the split ring, and add the next. Keep doing this until you have about 12 inches of string left.
Your beads don’t all have to be the same size. Play around with different patterns. For example, you could use mostly small beads on your curtain, and use a large, chunky bead every couple of inches/centimeters.
Add a 2-hole bead at the end.
This time, put one strand of fishing line through each hole, and tie them together. Tie about 3 knots under the bead, then bring the ends of the fishing line back through the holes. Thread the strands back through the first couple of beads, then trim them off.
If you do not have any 2-hole beads, use a larger bead instead. Turn the bead so that the holes are pointing to the side instead of up-and-down. Take one strand of fishing line, and pull it through the left hole. Take the other strand of fishing line, and pull it through the right hole. Tie the knots above the bead.
If you are using the alternative method, tie the beads to the wood, loop the excess open end of the fishing line around the wood four or five times. Make a knot between the wood and the first bead. If you used precut holes in your wooden hangar, run the fishing line up through the holes, like you would with the last bead, one through one side, and one through the other, and then tie them off.
Tying the knots.
Consider placing a drop of superglue over the knot. This will make it stronger and less-likely to slip. Now run your excess fishing wire back through 4 or 5 beads and snip to make it disappear.
The knots are the trickiest part, especially when they are at the bottom of your strand. Here are a couple of pics to help visualize how to tie them:
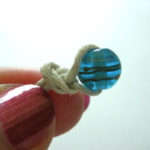


Hang the beaded strands.
Hang the strand on the curtain, and start on the next one. It may sound like a lot of work, constantly getting up and sliding the ring onto your curtain rod, but it will help keep your work from getting tangled.
If you are using the alternative method of tying the strands to a wooden hangar, you will need to be careful and organized to ensure that the strands do not get into a tangled mess. Working on a table with a thick fabric (like a towel) underneath will help.
Design elements
Play with symmetry and figure out your pattern. If you plan on making a ∧ or a ∨ shape, making 2 strands at a time in the same length is more time efficient, and can be very helpful if you want to make sure the lengths match.
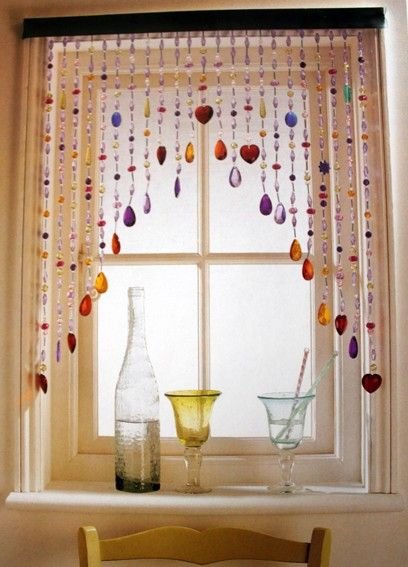
Finishing it up
Continue cutting and beading your strands until you have as many as you like on your curtain rod. They do not all have to be the same length, but remember to add 12 inches to each strand so that you can finish it off properly. A great idea would be to make your curtains a angle upwards in ^ shape.
Hang the curtain rod in place. Make adjustments as needed to ensure that the curtain is hanging evenly. If you used glass beads, the light behind the curtain will catch the colors of the beads and make them glow—just like a suncatcher.
 If you used the alternative method: After moving your strands to the desired spacing, hot glue another piece of wood exactly on top of the panel. The final width for this project was 16 inches wide so the 13 strands were all a little over an inch apart.
Once you get the hang of it, you could add beaded curtains to just about any door or window in your home!
Tips and Tricks
You will need a lot of beads for this project, but keep in mind, the bigger the beads and longer the strands, the heavier the curtain will be.
Take apart jewelry you are not wearing for some fun nostalgic pops, find strands of beads at thrift stores, or look through your grandmother’s jewelry chest.
I really loved this idea, and found a bunch of images and ideas… here they are:


And even better… we are not limited to beads. I also found this cool idea for using old CD’s:
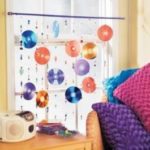

And also some ideas featuring pom poms, wine corks, ribbons, and more:


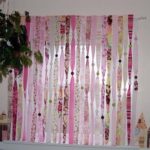


But wait, there’s more! Here’s a nifty tutorial for making beads out of paper for a really inexpensive, albeit time consuming beaded curtain:

Ok, that’s enough of that!
- Café curtains
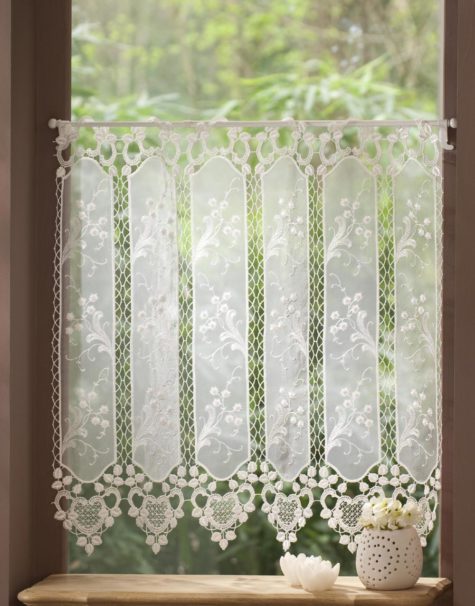
These are straight curtains hung from rings that slide along a rod. May cover the lower portion of the window or the entire window. It is great when you need to allow lots of sight into the room while keeping lower part of the room (above dining table, or in the bedroom) private.
They are very easy to make. Here’s a short tutorial for cafe curtains:
Time: 15 Minutes
Cost: $5.00
Difficulty: Easy

Since I was going to Ikea anyway, I picked up 6 extra of my favorite dishtowels, and had my mom whip up 2 panels using 3 tea towels for each panel. Add to the top a one inch rod pocket and I had some rustic, casual cafe curtains!
- Cellular shades
Cellular shades are the best insulators of all energy-efficient window treatments. They get their name and insulating properties from their fabric honeycomb cells that trap air between the window and the room. This unique design maximizes energy efficiency and insulates your home .This results in heat gain in the winter and heat loss in the summer.
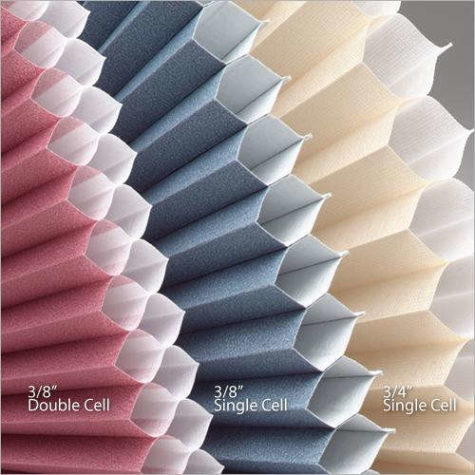
Cellular shades come in single cell, double cell, and triple cell. They also offer different levels of light control from light filtering to blackout. Unlike window blinds which are made of hard materials, they are made of a soft paper- or cloth-like materials. Typically spun lace and bonded polyester are used, but other fabrics can be used during the manufacturing process.
For insulation and energy efficiency, cellular (honeycomb) shades, with their little pockets of cells (think beehive and honey) keep your temperature serene. All of those little pockets trap air and help keep the heat out in the summer and the warmth in during the winter. Those bees are smart little hummers!
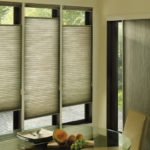
Available in every possible color, they’re an ideal fit for most rooms and the cordless options make them great for families with kids or pets. Top down bottom up features are a must have option for maintaining privacy while still letting light stream in.
- Drapery
Drapery adds style and elegance to your home while also providing functional light control and privacy. Panels hang vertically from hardware at the top to your desired window treatment length.
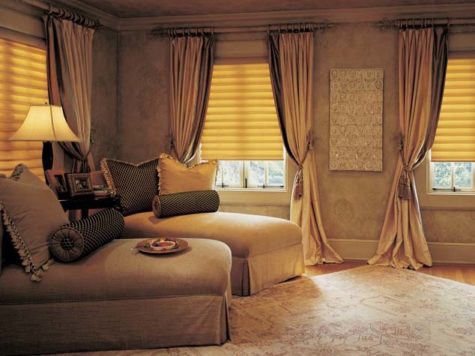
Also referred to as curtains, can be used to create an elegant, casual or a sophisticated look. May draw across the rod or remain stationary on either or both sides of the window. Curtains come in a variety of shapes, materials, sizes, colors and patterns, and they often have their own sections within department stores, while some shops are completely dedicated to selling curtains.
Curtains vary according to clean-ability, ultraviolet light deterioration, oil and dust retention, noise absorption, fire resistance, and life span. Curtains may be moved by hand, with cords, by press-button pads or remote-controlled computers. Measuring curtain sizes needed for each window varies greatly according to the type of curtain needed, window size, and type and weight of curtain.
Available in many different styles, fabrics, colors and patterns, you can easily coordinate drapery to layer with any existing window treatments or simply use panels only


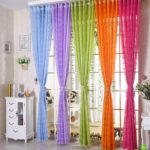


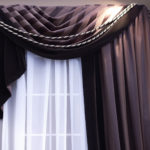

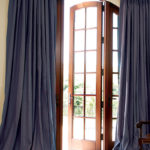
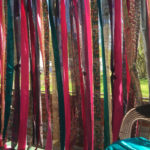
Drapes and curtains are the most decorative window treatment and the terms are often used interchangeably as full length panels of material. Drapes add extreme personality to a space, transforming a room in the form of breezy sheers or lush velvet. While decorative, they also filter or block light and may be lined for thermal insulation.
Hung high near the ceiling and draped near the outer edges of a window, drapes can make both the room and the window feel larger.
Drapes become a perfect companion when paired with another window treatment such as a timeless wood blind, an insulating cellular shade, or a rustic woven wood shade. Drapes are the dessert of window treatments!
- Mini Blinds
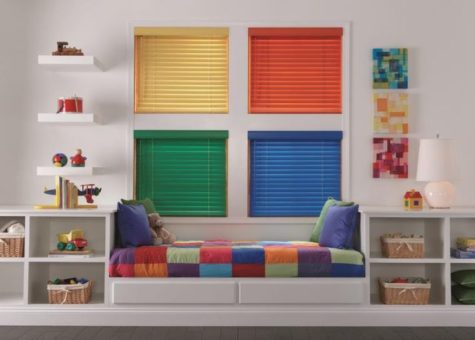
If you’re looking for the lowest cost option in window treatments, mini blinds are your answer! They are a basic blind that does the trick of providing privacy and controlling the light with a simple twist of the wand.
Mini blinds are available in an array of colors, different materials (aluminum and vinyl) as well as different thicknesses to solve all your light issues. Mini blinds offer minimal treatment. They can also be painted. These rainbow mini blinds are pretty cool.
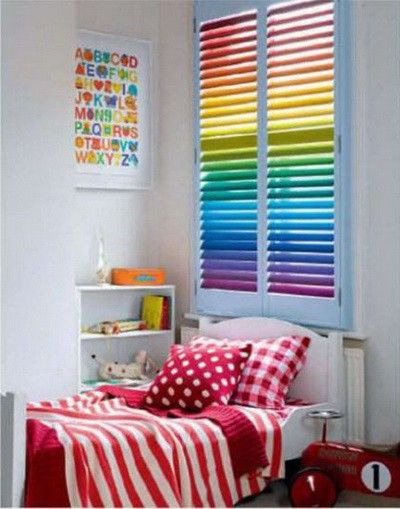
The DIY is very simple. Take down the blind and clean it really well. When it is thoroughly dry, spray with a primer and then when that’s dry, spray paint it with the color of your choice. If you opt for the rainbow blinds, each slat will have to be painted individually. I’d recommend a foam brush and a good quality paint.
- Outdoor shades
Outdoor shades are innovative, lightweight and just shout easy living. Made from a solar screen material, outdoor shades block the heat, glare and damaging rays. The airy fabric lets the wind move through for a cool breeze, yet protects and offers privacy.
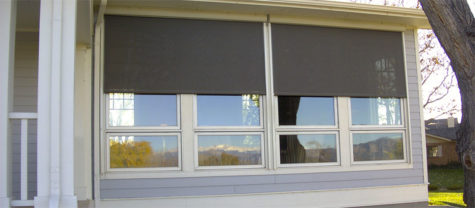
If you live in a climate with extreme sun, outdoor shades can be mounted to the outside of the house to prevent the sun from even reaching your windows and heating the place up like an oven. Outdoor shades are de rigueur (means you gotta have them) for patios, porches, and other outdoor spaces for ultimate outdoor living and entertaining.
- Panel track blinds
Panel track blinds are made out of a series of fabric panels that slide back and forth to give you optimal light control and privacy. Sometimes called sliding window panels. Offer a simple, versatile and stylish solution for sliding doors or picture windows.
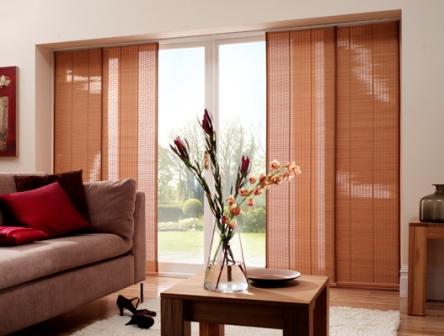
These blinds are a modern alternative to vertical blinds for covering large windows or sliding glass doors.
Panel track blinds are the best thing to happen to sliding glass doors and large picture windows since vinyl vertical blinds! You can’t beat these when covering a large space. A cross between drapery and vertical blinds, a series of panels slide open and closed on a track system. So cool.
When mounted to the ceiling, panel track blinds can also be used as a room divider. The variety of materials offered range from basic vinyl to solar screens to natural woven woods. Once your sliding glass doors are outfitted with smashing fabric panels, you will become a panel fan.
- Pleated shades
Pleated shades are made from a single piece of fabric with pleats that collapse and stack neatly as you raise the shade. This slat-like effect gives your home a casual, semi-sheer look that allows a considerable amount of light to filter through the window.
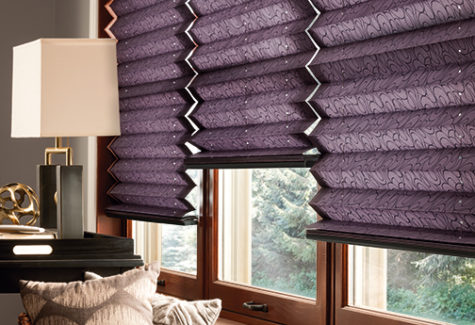
A more affordable alternative to cellular shades are pleated shades which are actually constructed with crisp pleats cascading down your window. The insulation benefits don’t match a cellular shade but the look is quite similar. Many people object to the light that comes through the holes made by the cords as the shade is lowered. However, an option is now available to decrease those unsightly slivers of light, the “no holes pleated shade.” You don’t need an iron to keep those pleats sharp!
- Roller shades
Roller shades are one of the most affordable options when it comes to covering your windows. These shades roll up neatly onto a tube, making them appear minimal and discreet when raised. With blackout and light-filtering options, you can choose the amount of light control that you wish for any given room.

Roller shades, also called roll up shades or roller blinds, are an easy and economical way to add color, style and texture to any decor. Constructed with modern fabrics and offer simple functionality for ease of use.
The idea of a roller shade is pretty simple. When lowered, the shade hangs flat near the window pane and when raised, it rolls up onto a cylindrical rod. Lots of fabrics are a plus here: blackout material, sheer fabric, and linen and a palette of patterns. Technology today even allows you to print your own images, photos, art or design on a roller shade.
A cordless lift option creates an additional clean look. Roller shades are a straightforward, budget friendly window treatment option.
- Roman shades
Roman shades consist of one continuous piece of fabric, featuring horizontal folds down the length of the shade. These folds lay flat against the window when down but fold up nicely when raised, combining the soft look of fabric drapery with the functionality of a shade.
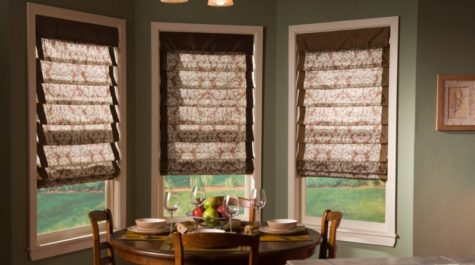
Provide privacy, light control, and offers insulating qualities; can be made in any fabric. Roman shades are usually opened with a cord mechanism, allowing the user to adjust the height of the covered area. Many different kinds of materials, from wood to fabric, can be used to create Roman shades, as well as natural materials such as bamboo.
Roman shades give the rich impression of drapery with the functionality of a shade that opens and closes easily. When closed, they hang like a panel, like a good solider and when raised, they fold up and look similar to a valance, like a cloud.
Roman Shades are available in so many fabrics, creating a burst of color or texture in your room. Different styles fit seamlessly into décor styles such as traditional, family-friendly, and even contemporary. And don’t think form wins over function. With roman shades, there are options galore to choose from like top down, bottom up or cordless or thermal liners. Romans are happy to roam on all of your windows.
- Sheer Curtains (Net Curtains)
A sheer or net curtain is one that is made from translucent (sheer) fabric. The sheerness of a fabric is expressed in 3 main characteristics (extremely rare, very thin, barely visible). The materials which can be made translucent include gossamer, silk, rayon or nylon.
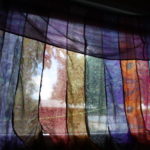
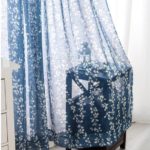
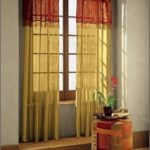
Sheer fabric comes in a wide variety of colors, but for curtains white and shades of white, such as cream, winter white, eggshell, and ivory are popular. They are sometimes referred to as privacy curtains; during the day they allow you to see from the inside out whilst preventing people outside from seeing directly into the space.
- Sheer shades
Sheer shades are an elegant window covering. These popular window treatments feature two sheer fabric facings over soft fabric vanes.
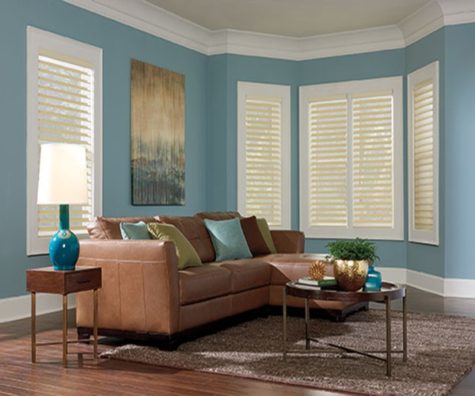
When vanes are open, diffused light is let inside, and your view to the outside is preserved. When closed, however, room-darkening styles of sheer shades will completely block out light.
Sheer shades are the best 2 for 1 window treatment on the market. You get the look of a fabric shade with the functionality of a blind. They are light and airy and elegant. When the shades are closed, the vanes can be tilted open for a filtered view or completely closed for privacy.
Of course, sheer shades can be raised for a full view of your beautiful garden or kid’s playground or rambunctious pets. Beautiful in living and dining rooms, your bedroom is just as important, as sheer shades in a room-darkening fabric guarantee you the sleep you deserve.
- Shoji Panels
Used in Japanese decorating. Can be used as room dividers, doors and window coverings. These screens are made of wood or bamboo with a translucent rice paper, which is porous and easily allows light into the room.
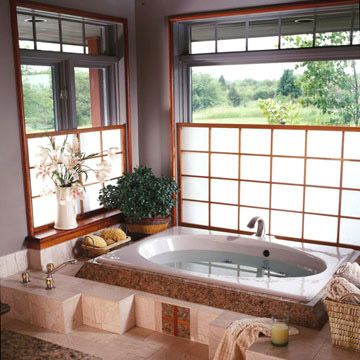
It can be also used as folding screen (free- standing furniture). It consists of several frames or panels, which are often connected by hinges or by other means. It can be made in a variety of designs and with different kinds of materials.
- Shutters
Shutters are a classic window treatment choice, adding architectural design directly to your windows. Shutters are a great value when you consider they actually add value to your home.

Louvered or fixed slats. Attached with hinges so they can be opened and shut. Made of wood or plastic. Shutters may be employed for a variety of reasons, including controlling the amount of sunlight that enters a room, to provide privacy, security, to protect against weather or unwanted intrusion or damage and to enhance the aesthetics of a building. The term window shutter includes both interior shutters, used on the inside of a house or building, and exterior shutters, used on the outside of a structure.

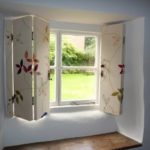
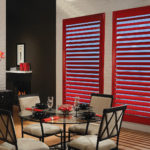

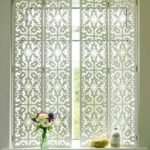
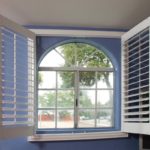
The elegant design of shutters looks attractive from both the inside and the outside.
Shutters are dynamic as an architectural statement and are not only functional and beautiful window treatments, but they can also add value to your home.
I don’t think a simple shutter would be too difficult to make, so I found a bare bones visual tutorial in case anyone wants to try it:
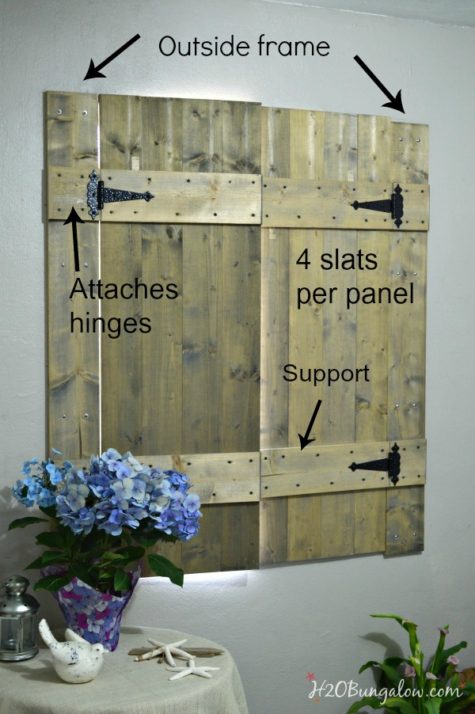
Shutters help to control incoming light, offer privacy when closed and help to insulate against heat, cold, and sound. Shutters add timeless, traditional sophistication to any room. Shutters are so impressive; they make me feel like the Queen of England in my country manor or a totally hopeless romantic in my beach cottage.
- Solar shades
Solar shades are also known as “window sunglasses” for their opaque design that allows you to preserve your outside view while also providing considerable light control. Available in openness factors ranging from 3- to 14-percent, you will want to choose a higher openness to let in more light and preserve your view.
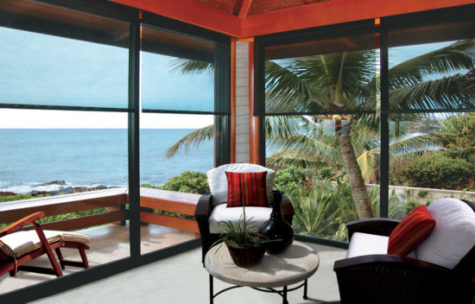
Solar shades are really just a roller shade made with a screen material. If you have a stellar view or just want to bring the outdoors and light into your house, but you need to cut the glare and control the UV rays that stream in from your windows, solar shades do the trick. They do a fine job of filtering the sun, yet your view to the outside is preserved.
Of course, the huge plus is the energy efficiency as we all want to save the resources of our planet while lowering our personal energy bills. Solar shades are another “on trend” window treatment in our light obsessed world.
- Wood blinds
Wood blinds are a classic choice for windows and outlast trends or styles. Made of real wood, using various grains and stains, wood blinds remain durable through the years. The warm look of wood blinds pairs well with other wood furniture, flooring and trim.
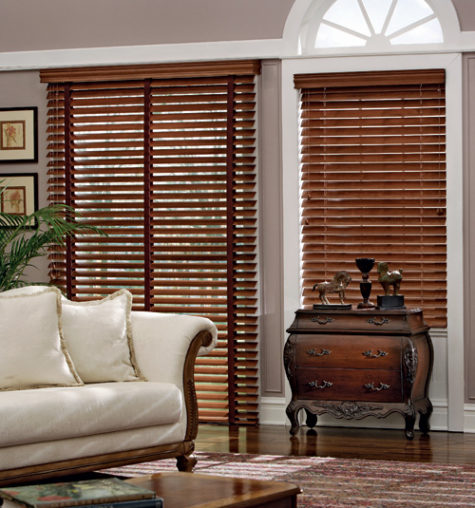
I initially think of wood blinds in a den or library, but really, they’re at home in most rooms. Wood blinds are simply natural wood slats that are either painted or stained. They are a classic treatment, complementing many decorative styles and their simple construction makes them easy to operate. Many finishes are available ranging from light pine to bamboo to richly stained ebony. Different slat sizes are offered depending on the degree of control you’d like with regards to privacy and light control. For a stylish look, layer wood blinds with drapery or top with a valance.
- Faux wood blinds
 Faux wood blinds have the same look as real wood, but are more affordable window treatments because they’re made out of PVC, vinyl or composite wood material. Faux wood blinds are also moisture resistant, making them a great choice for kitchens and bathrooms where real wood would otherwise warp and crack.
For the best value and for an uncomplicated look, faux wood blinds are a good first choice. Why? Here are some of my favorite words: affordable, efficient, attractive, and easy maintenance. That means no fading, or fraying and just a quick swipe now and then.
Faux wood blinds look and feel like wood blinds, but are less expensive and more durable. Since these blinds won’t warp or fade, they are the best option for humid climates or high moisture rooms such as bathrooms and kitchens.
- Venetian Blinds
Made of wood, metal or plastic. They are suspended by strips of cloth called tapes, or by cords, by which all slats in unison can be rotated through nearly 180 degrees. The slats can be rotated such way that they overlap with one side facing inward and then in the opposite direction such way that they overlap with the other side facing inward.
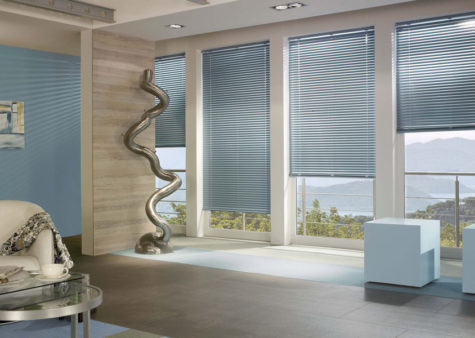
Between those extremes, various degrees of separation may be effected between the slats by varying the rotation. Slat width can be between 16 and 120 mm, with 25 mm being a common width.
- Vertical Blinds
Unlike horizontal blinds, vertical blinds are less likely to collect dust because they stand vertically. Since they draw to the side rather than lifting and lowering, they operate better on doors and windows that also slide from side to side. Generally they require less muscle strength, and are faster to operate. Are an excellent solution for covering windows that are extremely wide and for patio doors as well.
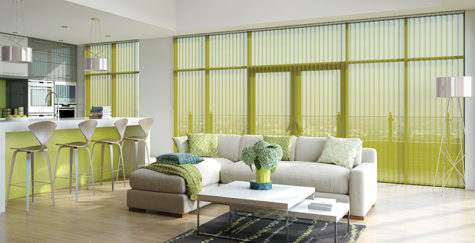
Fabric blinds are noise reducing and will insulate from the heat of the sun and the chill of the wind. Vertical blinds are available in flat plastic (PVC), fabric, embossed PVC, faux wood materials, metal, wood and also S-curved slats. Vertical blinds are also used for door ways in public spaces in order to keep the warmth inside the room and/or in warmer climates in order to discourage flies and some other insects from entering the building
- Woven wood shades
Woven wood shades, often called bamboo shades or matchstick shades, offer an exotic, natural look and are a great way to add textured, casual good look to almost any decor. Woven wood shades offer complex textures, exotic reeds, grasses, woods, and sophisticated natural colors.
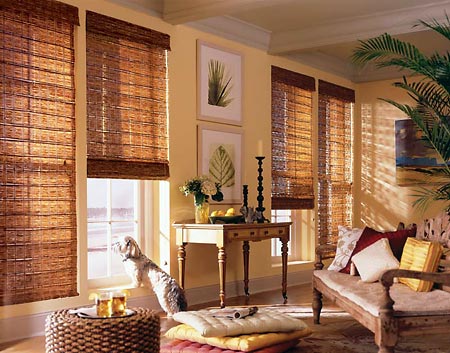
Window treatment manufacturers make woven wood shades out of a variety of materials, including grasses, reeds and bamboo. You may add liners to increase privacy or include fabric trim to further customize the woven wood shade to your room.
Woven wood shades run the gamut from casual and rustic to tailored and elegant. Made out of renewable materials such as bamboo, reeds, or grasses, they are an environmentally responsible selection. Woven wood shades bring wonderful texture into a room and are effortlessly chic.
Other considerations:
- Kitchen window ideas:
The kitchen is your hub, your ground zero. We all have to eat, and let’s face it, as much as you may plan for guests and kids to gather in another part of your home, they come find you in the kitchen, because that’s where all the fun happens. It’s also the room where the temperature is up and down and experiments happen more often than not (I think of mine as more of a lab).
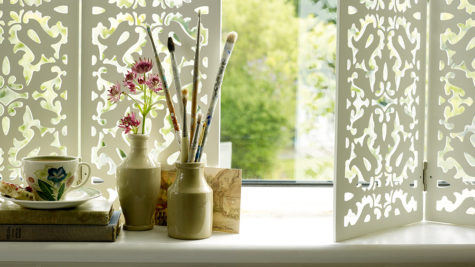
Since there is high moisture and potential spillage in the kitchen, faux wood blinds are a great choice since they will not warp or fade. They are natural ventilators and are durable even for the rowdiest of chefs. They also clean easily, to boot.
If you’ll be covering windows above sinks and stoves, consider a cordless shade in the kitchen. Long winding cords getting stuck in the disposal or singed off into your soup are no bueno. If your kitchen faces out on the street, you might like shutters since they give great curb appeal. Shutters are naturally cordless, too.
- Dining Room Window Ideas
This is where you celebrate the best things, either your nightly family ritual, or your big feast that comes a few times a year. If you’re going formal, think about tall drapes because you can do a floor-to-ceiling effect where you’ll bring a feeling of height and importance. It’s dramatic but still inviting.
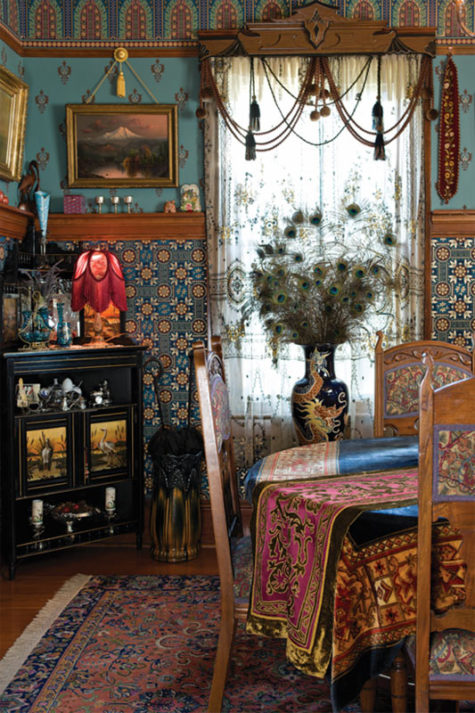
If you’re going more laid-back, roman or roller shades will keep the space warm and private with a soft, homey feel. Cellular or pleated shades are a great pick for anyone in between who uses the dining room for all celebrations, big or small.
- Living Room Window Ideas
In here, you’ll be making a statement about your home, entertaining, and protecting large furniture that you don’t want to fade. Solar or cellular shades are the great protectors from direct sunlight, and you can pick how much light you want coming in while still preserving your view outside.
On stark bay windows, roman shades are soft and elegant. On tall windows, or ones you want to seem tall, pick any shade and then overlay long drapes to really give reach and a finished look. Add a valance and you’ll really have a wow window.

Think outside the box in this room—make it a signature room with color, bold patterns and mix and match fabrics. It’s your living room—make it feel like you want to actually live in it!
- Bedroom Window Ideas
Your bedroom is your sanctuary where you wake up and wind down every day. Bar none, your first thought should be privacy, and how much of it you want.
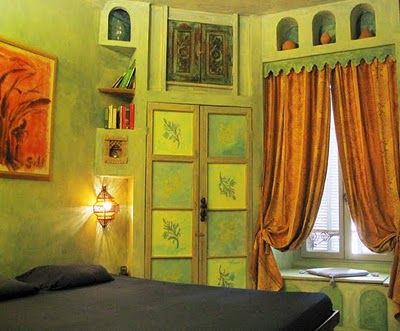
Blackout shades are great for pure darkness, especially if you don’t rise and set with the sun. If you are not a vampire and would like a little light, go with day/night shades that give you the best of both worlds—room darkening on one end and light-filtering on the other. These shades are way amazing and some of us think this is a secret blind, for the underworld.
Cellular shades are naturally calming with their soft diffusion of light and their fabric touch. They insulate during any season, and they come in patterns stimulating enough to wake up to, but still serene enough to fall asleep to. To keep it serene in this room, add motorization—your shades will practically operate on their own. In the end, a blind or shade that makes the ambiance feel warm to you is your best bet in the bedroom.
Wow! Check out these City Scape Black Out Blinds!
These are the perforated cityscape roll-up window blinds created by Ukraine based HoleRoll. They look like nighttime cityscapes when rolled down, look like whatever is outside your window when rolled up.
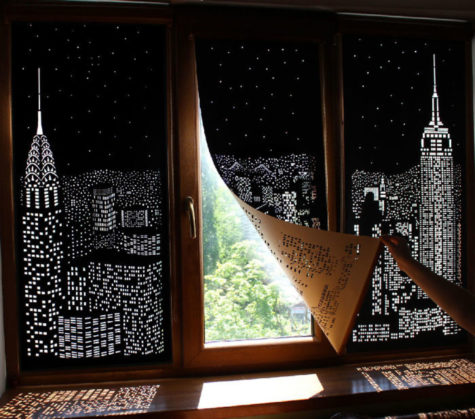
Their prices start at around $152 per shade, which is way out of my league, but I thought it might be fun and interesting to try to make them. I went on an exhaustive search for a DIY and came up with nothing. So…
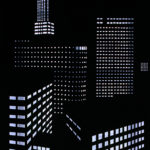
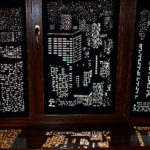


How hard can it be? Start with some great roll up shades. Cover the front with black fabric, paper, or paint. Alternatively, buy some black out shades that are already black. And then cut them yourself. A night sky looks fairly simple and might be a good place to start. And then, be brave and get creative! Here’s a city scape image to get started with. Don’t forget to add stars… and maybe a crescent moon!

And if you need even more ideas. Black out shades are not the only things that can be super cool when painted black, back lit, with tiny holes punched in.


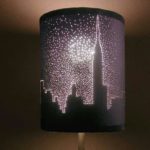
So, there you have it! Everything you ever wanted to know about window treatments and a little bit more!
Sources:
Let’s Go Outside!
Time spent outdoors is always time well spent, but when its a well designed space, it’s even better.

What is an outdoor living area? It isn’t just a patio and table anymore. Not just some plants on a deck. Today, the exterior of a home is literally turned inside out in order to create the feel of an indoor area. But how can you make the outside feel more cozy and inviting?
Creating an Outdoor Room
Whether you have a big backyard or a tiny patio, the key to designing for outdoor living is implementing your plan in steps, says Elyse Santoro, a Miami-based interior designer/decorator. “It doesn’t have to happen all at once, and it doesn’t have to be overwhelming or cost a fortune.”
- Where to Put Your Outdoor Room
First, go inside your house and check out the views looking out. Placing the room in a good relationship to the house helps give the feeling that your outdoor room is “an extension of your home,” Santoro says. “Make sure… you have easy access to get there,” she says, whether or not it’s physically connected to the house.

An outdoor room can include anything from an attached, screened-in porch to a gazebo to a landscaped area with a bench. If it’s an independent area, such as a gazebo, create a passageway with foliage or hardscaping to visually connect it to the house. “You want to erase the fact that you’ve gone outside,” says Atlanta-based landscape designer Patricia Thernell. She advises using the same flooring material outside as inside, or using plants to frame the doorway to your outdoor room.
- Defining Your Outdoor Space
“The best way to define an outdoor room is by the activity that will take place in it,” says Mary Donovan, an interior and landscape designer in Atlanta. Donovan interviews homeowners on what they plan to do in their outdoor spaces. Often the answer includes several purposes such as entertaining, family dining, playing games and reading. Figure out if you need one large space or several smaller rooms, each with its own purpose.
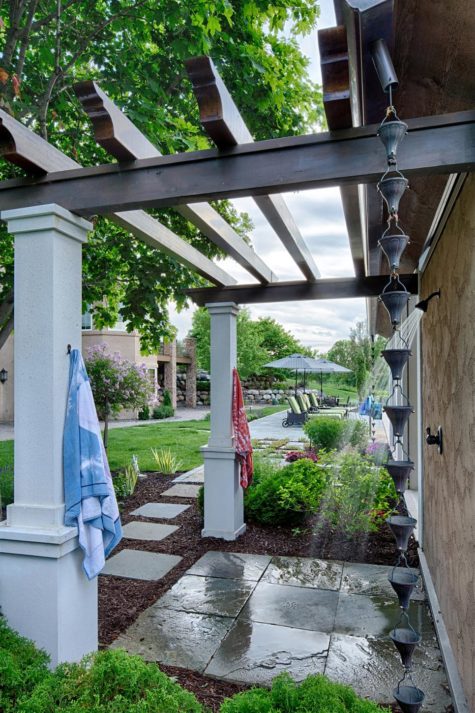
Multiple outdoor rooms don’t necessarily require acres of land, Donovan says. Postage-stamp sized front lawns and narrow side yards can be landscaped to be rooms in themselves and not just passageways. “It can be a shady quiet, meandering space with hydrangeas, hostas, moss and a dripping wall fountain, and other plants trained to grow vertically up against the house or on a lattice,” Donovan says.
An outdoor room has to be functional, but it also has to be engaging or you’ll never use it. Santoro asks clients to think about places they’ve traveled to that they absolutely love. “If they say they love Tuscany or the vineyards in northern California, I ask them to remember what it felt like there and to create their outdoor space with elements of that place.”
So, it all begins with the initial design. Do you want a pleasant patio, a quaint courtyard, a stylish gazebo, or a country-style porch? Next, try to harmonize with the backyard. Most of the time, you’ll want every area of the exterior to be a room unto itself, each with its own function and purpose while still creating a cohesive style.

The Floor Plan
You want to think of your backyard as a part of the house, which means it should come with its own logical layout. First off, if you don’t have them already, patios and decks are the most common exterior installations for homeowners because you have to have some kind of focal point to work around. But even when you have a central location, you need to organize and compartmentalize the space.
Here are some basic “rooms” to consider when planning your outdoor space:
- Kitchen
Cooking outside is a summer tradition, buy why limit it to grilling. Outdoor kitchens have become a popular renovation for any chef who wants to go beyond hot dogs and hamburgers.
If you have the a nice big budget, you could add some counter space and cabinets. Install an oven, a range, a wet-bar, or a sink. Of course, make sure these items are made out of the appropriate weather-resistant materials, such as sealed concrete and stainless steel.

Even on a smaller budget, a cozy cooking area is possible. Here are some creative ideas using brick, repurposed tables and cabinets, and what’s that? A volkswagon bug?


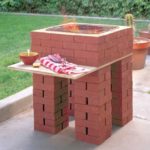


- Dining Room
After cooking outside, you’ll probably want to eat out there as well. This delightful patio in England designed by Cool Gardens Landscaping Ltd. is the perfect spot for afternoon tea. It features a towering hedge that serves as an organic art gallery wall complete with an outdoor TV screen and audio system.
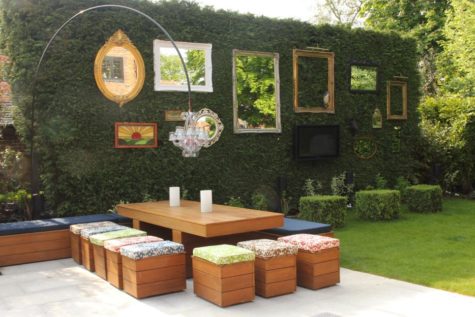
Super cool huh?
I found a bunch of other equally cool ideas for dining areas outside. They range from the super simple to the elaborately luxurious. Here’s a gallery of pics to drool over and get ideas from:


Patio furniture is crucial. Tables, chairs, and umbrellas are important, but you may also want to think about other decorative touches such as gliders, porch swings, or a screened-in porch that keeps out the bugs.
- Family Room
Once you’ve eaten, it may be time to adjourn to a common room. Therefore it’s a good idea to have a relaxing retreat, a place to entertain.

Add a cozy outdoor fireplace for those chilly nights. Or, if you have the budget, a hot tub and a pool is a great addition: they’re fun, they’re attractive, and they add value to the home.
More cool ideas:


Oh, and here is something fun!

A trampoline isn’t just for kids in this backyard. A cushioned bumper and collection of throw pillows create a great space for lounging.
- Water Features
Landscape designers, interior decorators and architects all agree: Water is one of the most important elements in an outdoor room. The sound of water really creates a serene setting.

Even if you’re creating a room for entertaining and dining rather than meditating, it’s still nice to hear the splash when you’re sitting around the table. But you don’t have to spring for a pond or waterfall. A container water garden or a tabletop fountain works perfectly.

I found this great little tutorial for how to create a bubble fountain. It looks pretty easy, the biggest expense is the pump. I didn’t price them, so I don’t know how expensive they are.
How to Make a Bubble Fountain
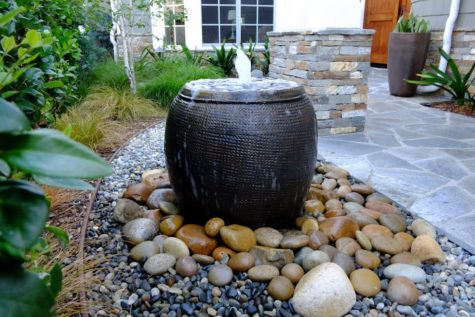
Tools and materials needed:
- spade
- level
- bubble fountain kit
- decorative garden pot
- silicone sealant
- small pump with flow adjuster
- gravel
STEP 1 – Prepare the Site
First, hire a qualified electrician to install an electricity supply and an outdoor outlet to an easily concealed location close to the fountain. Then dig a hole larger than the reservoir.


Remove any sharp stones from the hole and pack damp sand around the edges, sides and base. Place the reservoir in the hole, and use a spirit level to check that it is level in all directions.
Pack more sand around the reservoir, as necessary, and check that it is level again. It is essential that your fountain is horizontal to prevent water from draining out, and to ensure that the pot on top will be stable.
STEP 2 – Place the Pump

When level, place the pump in the reservoir. You may need to fit an extension pipe onto the pump to reach through the hole in the base of the decorative pot. Put the lid on the reservoir, and over the pipe from the pump.

Place the decorative pot on the reservoir lid, making sure that the pump pipe passes through the drainage hole in the bottom. Seal the pump pipe in place with silicone sealant, and leave to dry and harden for 24 hours.
STEP 4 – Attach Flow Adjuster and Fill Fountain
Attach a long section of pipe to the water flow adjuster. Then attach this to the pump pipe in the base of the pot. Trim the water delivery pipe so it reaches just below the rim of the decorative pot.


Use a watering can or hose to fill the reservoir through the holes in the lid, and fill up the decorative pot to just below the delivery pipe.
STEP 5 – Protect the Cord

The electrical cord must be protected by special tubing, which an electrician can advise you about. Make sure that all electrical connections in the garden are fitted with a ground fault circuit interrupter (GFCI).
STEP 6 – Disguise Reservoir and Soften With Plants
Plug in the pump and check that it pushes the water over the top of the pot, and adjust the flow as necessary. Disguise the reservoir with pebbles and gravel, leaving a gap to allow you to fill it up; you need to do this once a week in summer.

Plant up around your pool, leaving a margin between your planting and the reservoir, to avoid dislodging it. Plants from the Mediterranean, such as euphorbias, lavender and rock roses make great companions for an urn. If you prefer a more traditional look, try roses, honeysuckle and daisies.
Here is a great collection of bubbling fountains to get your creative juices flowing. As you can see, the fountain does not have to be buried in the soil to be super cool and beautiful.


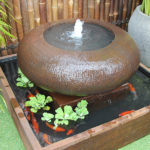
- Fireplaces
A cozy fire or fireplace is becoming a staple for outdoor rooms, because a hearth can extend the season of your outdoor room by several months.

Fire pits come in many shapes and sizes. They can be a permanent structure or a simple barrel that can be moved around the patio. Find the design that’s right for your backyard.
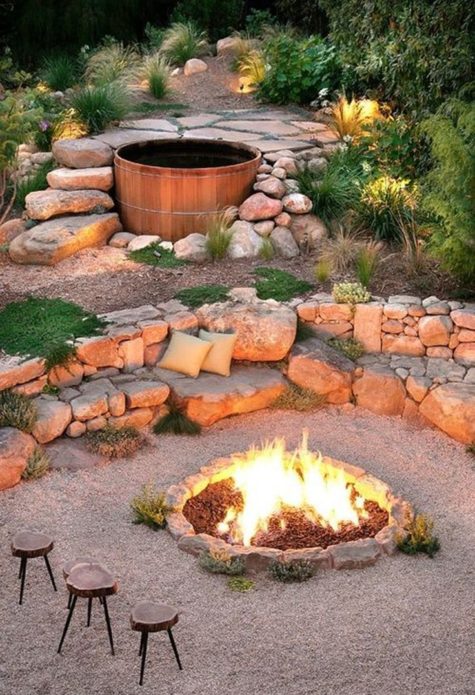
Fire pits are not hard to build. They do, however, require a bit of elbow grease and hard work. They can be created with concrete culvert spacers — aka doughnuts — intended to fill culvert gaps in city sewer systems, fire brick, metal containers buried in the soil or surrounded by brick or stone.
I found a couple of simple visual tutorials. Here they are:
Firepits can also be created from a variety of materials:


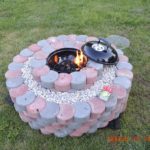


But wait, those look expensive and/or difficult. I want something super easy and inexpensive. So I went on another search and found these two visual tutorials. One uses sterno, the other is a variation of an oil lamp. Easy peasy.


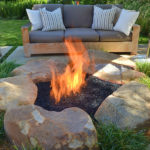


- Plants
Plants soften hard edges (such as concrete flooring) and add a sense of life, warmth and comfort. Santoro, who’s also an expert in feng shui, likes jade plants, miniature orange trees and potted philodendron in sheltered areas, and pines and bamboo to define outdoor areas. Or, choose plants based on the feelings you want to evoke in the space.

For example, a meditative outdoor room works best in shade, surrounded with ferns and hosta with ligustrum to define borders. Left to grow naturally, a ligustrum hedge looks woodsy and informal, or you can trim it to define a more formal outdoor room.

There’s no need to spend big bucks on planters and flower pots. Look around the house or scour thrift stores and flea markets for unique vessels to hold plants, herbs and vegetables.


Shade and Shelter
One of the best ways to ensure that you have a luxuriously comfortable outdoor room is to ensure that you have shade, privacy, and a feeling of shelter and safety.

Curtains made from outdoor fabrics were used to create instant privacy on this charming porch. There are so many different ways to create privacy and shade with walls, screens, curtains and plants. Here are some great ideas:


Whichever your relaxation method of choice, an important consideration in any outdoor room is protection from the elements. In addition to shade from the sun or even a light rain, consider erecting screens or other wind breaks on wall-less structures.
- Backyard Tents or Teepees
If you’re worried about the kids spending too much time in the sun, put one of these in the backyard for a great place to cool off. A tent can be a luxuriously wonderful place to spend time in the back yard for the grown ups as well.


Tie It All Together with Flooring
Since flooring defines a space, put down some kind of hardscaping, whether it’s a deck or a stone floor or a concrete slab. If your outdoor room has a floor of grass, “you’ll never go out there,” says Santoro. “If there’s no floor it doesn’t feel like a room.
- Walkways and paths
Garden paths come in many styles, and it is up to you to determine not only which style fits your garden best, but which you can commit yourself to creating and maintaining.
Some take much more time, effort, and expense than others. For example, gravel and mulch paths are inexpensive, but stone and brick are more durable. Stepping stones add charm, while mosaics add elegance and beauty but are incredibly time-consuming.


Pea gravel is fairly inexpensive, and in my area there is an abundance of limestone rock that can be scavenged and scrounged. Also you might check with companies that make grave stones to see if they have a supply of broken or unusable gravestones. Other possibilities include beer bottles embedded in sand, bottoms up.

Outdoor Flooring Buyer’s Guide
What’s the best material to build your driveway, deck or patio? Here’s a look at five outdoor flooring choices and the cost, pros and cons, and ideal locations for each.
From brick to cedar decking to concrete pavers, outdoor flooring options can quickly get complicated, but when you consider the pros and cons of each, it’s simple to choose a type of flooring and style that fits your space and your budget.
The following info is from design experts Jeff Wilson, a home improvement expert who has hosted several shows for HGTV and DIY Network, and Morgan Grimball, ASLA, a landscape architect in Columbia, SC.
Natural stone

Pros and cons: Stone can be expensive to truck in and installation is labor-intensive. Local stone from your region (for example, fieldstone in the south or slate in the northeast) costs less and is more eco-friendly. Once installed, natural stone is extremely durable and almost maintenance-free.
- Cost: Varies by type of stone and region, but around $25-35 per square foot.
- Ideal location: Patios, pool decks, front porches, walkways, driveway accents
Design ideas: Use stones with an irregular shape to create a meandering mosaic pathway; for a more uniform appearance, select cut modular stones. Natural stones have beautiful color variations from gray to red to blue, which can form part of the pattern and overall design of your outdoor space.
Concrete

Pros and cons: A basic slab of concrete is inexpensive, low-maintenance and a good long-term option, though cracking is difficult to repair. Concrete pavers are easier to repair; simply pull up the damaged section and replace.
- Cost: $4-6 per square foot for basic concrete; $7-8 per square foot for pavers; $12 per square foot for stamped or acid-etched concrete
- Ideal location: Patios, driveways, pool area, garden paths, front porches
Design ideas: Coloring and stamping options make concrete resemble stone, bricks, or other higher-end materials. Concrete pavers are durable, low-maintenance, and come in a wide variety of designs from brick to flagstone.
Wood

Pros and cons: Wood decking is one of the simplest DIY projects, which lowers the cost substantially, but wood requires cleaning and sealing every one to two years.
- Cost: Around $8-10 per square foot for the least-expensive treated lumber; $18-20 per square foot for higher-end wood; $20-25 per square foot for inexpensive treated lumber, supports and railings. Composite decking runs about $35 per square foot.
- Ideal location: Ground level or raised decks, pool decks
Design ideas: Using local hardwood in deck building is greener and can be less expensive, since the wood doesn’t have to be trucked in. If your ground is sloped, consider building the deck in levels to follow the slope.
Brick
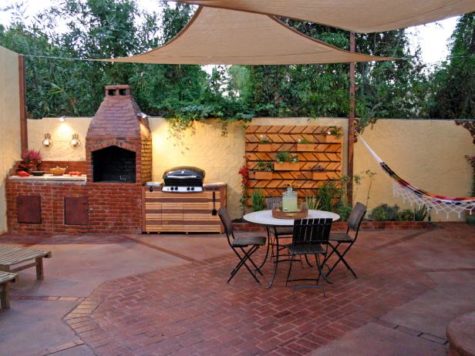
Pros and cons: Brick gives off a beautiful old-world look and is low-maintenance and relatively slip-resistant, but ground shifts over time can make a brick pathway or patio difficult to shovel snow because of the irregular surface.
- Cost: Approximately $15 per square foot, including the base
- Ideal location: Patios, garden paths or walkways, pool decks or fountains, front porches, driveways
Design ideas: Brick can be installed in a number of patterns, such as basketweave, herringbone and circular. Encouraging moss to grow between brick pavers fills in the cracks and helps prevent weeds, but can be slippery when wet.
Tile

Pros and cons: Ceramic tile installed outdoors must be highly slip-resistant and able to withstand freeze-thaw cycles. Look for tile specifically formulated for the outdoors, which is dense with low absorption ratings. Tile usually requires a sealant to protect the grout from cracking.
- Cost: $12-20 per square foot
- Ideal location: Front porches, patios, garden stepping stones, pool decks
Design ideas: Use accent tiles to create a border; lay contrasting tiles in a diamond pattern; create a pathway within a large patio by laying a contrasting color in a walkway formation; use smaller tiles in a mosaic pattern as a focal point.

- Note:
All costs for all materials are estimates that include labor and installation. Prices may vary by region, and installing materials yourself will cost substantially less in most cases.
But Wait There’s More!
And if you don’t want to go for something permanent, here is a wonderful and luxuriously cool temporary outdoor room:
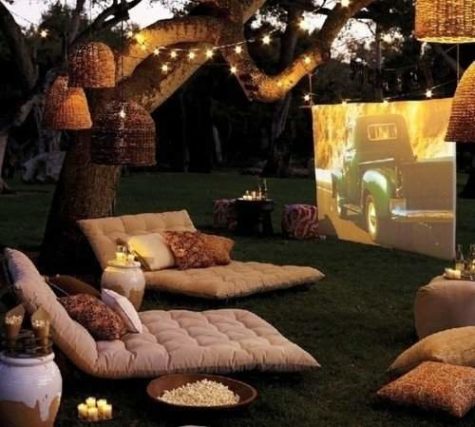
Sources:
Dining Room Feng Shui
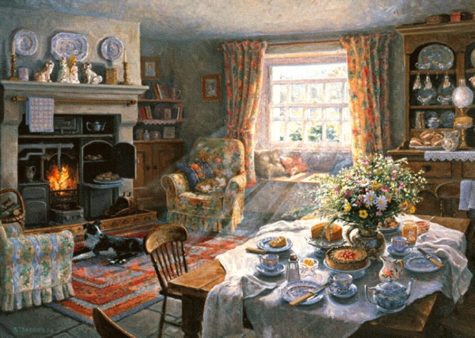
A feng shui dining room is one that arouses hunger, brings harmony, strengthens the bond among family members, attracts prosperity, enhances wealth and a whole lot more.
In feng shui, dining rooms are given a very high degree of importance and that’s because it’s “The Room” where a family is “supposed to” dine and spend a real quality time together.
I said “supposed to” because in most houses dining rooms are seldom used (for dining) and they – tend to – become “dumping rooms” for all sorts of things that can’t find a place elsewhere in the home; here’s a list of few – really few – items that are usually dumped in dining rooms:
- kid’s toys
- old cabinets
- seldom used travel bags
- laundry clothes
and the list goes on and on…
However, you must understand that piling all these items – that don’t actually belong – to the dining room has a very negative effect on feng shui of the dining room. In fact, piling clutter in any area of a home or office is bound to deteriorate feng shui for that area because they restrict the free flow of Qi energy in the house.
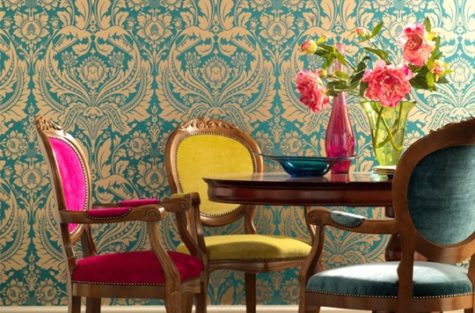
For good feng shui in the dining room:
- Make sure that the dining room is inviting, comfortable, hunger arousing and calm.
- Maintain balance of colors in dining room; don’t make it too bright or overly dull.
- Dining room must be well ventilated and it should receive plenty of sunlight.
- Hang a mirror in dining area such that it reflects the dining table; this’ll bring in more prosperity.
- You can provide a wash basin in North or East of dining area.
- Keep the dining room as near as possible to kitchen.
- Have kitchen and dining on the same floor.
- If your kitchen is really huge then utilize an area of the kitchen as dining area.
- If the dining room in your home is a part of living room (a common case nowadays) then put curtains or potted plants as a line of demarcation.
- Go for a square/rectangular or oval/circular dining table.
- Make sure that the dining table is of high quality wood.
- The dining table must be big enough to provide space for everyone.
- Keep the number of chairs even.
- Keep sitting arrangement such that no one’s back is towards a door or window as it causes a sense of insecurity.
- East facing is good for head of the family; other members can face North, East or West while dining.
- Be polite and gentle to family member while dining; be gentle and polite always.
- Be relaxed, calm, happy and stress-free while dining; in fact be this way always.
- Always keep something on the dining table; you can keep fruits on it; apples help develop friendship, pears are good to attract positive energy, peaches aid in good health and oranges symbolize richness and prosperity.
- If fruits aren’t your choice then you can keep flowers on dining table. Just make sure not to use dried flowers, they imply deterioration.
- Make sure to have meals with your family daily; however, if that’s not possible then at least have a meal together once a week.
- Images of mouthwatering and lip smacking dishes in dining room arouses hunger.
- Always thank God before you start eating.
Here’s What to Avoid:
- No toilet doors in front of dining table or dining room.
- Make sure that dining room door and house entrance doesn’t face each other.
- Make sure that the dining room doesn’t become a room of dining etiquette for anyone; else they’ll lose interest in eating.
- Never sit under a beam while eating.
- Please avoid TV and other electrical instruments in the dining room; this’ll make the family to spend some quality time together.
- Avoid low ceiling in dining room.
- Avoid negative paintings such as weeping girl, war, crime etc. in dining room; in fact avoid them everywhere.
- Avoid hanging clocks in dining room; they tend to create haste while eating.
- Never eat in dark.
- Avoid eating alone; that increases loneliness. Put on some soothing music if you’re alone.
- Avoid irregular shaped dining tables such as, diamond or hexagonal shaped ones.
- Avoid glass top dining tables as they’ll bring in nervous energy.
- Avoid dining tables that have cushions on top; go for hard top dining tables as they represent solid foundation.
- Never place the dining table touching a wall; it must be away from any wall so that everyone can sit comfortably.
- Avoid rocking chairs in dining room.
- Avoid facing south while eating.
- Don’t allow kids to sit in the South-West corner of dining table.
- Never use or even keep broken or chipped utensils or glass wares.

The Dining Room Table – Shapes and Sizes
There are two criteria to look at when choosing the best shape for your dining table.
- Best visual choice. What is your dining room asking for? What table shape will look and work there the best?
- Best bagua area match. If most shapes would work, then decide based on the feng shui bagua area of your dining room.
From a general feng shui perspective, a round or oval table is considered better than a square or a rectangle one. The reason for it being the flowing shape that contributes to a more even distribution of energy, so to speak. In simple terms, sitting at a round or oval table will make everyone feel more welcome, at ease and equal in their relating to each other.
However, the first criteria to look at is your dining room size and shape. If your space is asking for a square or rectangular shape and you insist on having a round table, you will not be creating a good feng shui dining room.
Good feng shui always starts by listening to your home, and then applying the best feng shui guidelines to it.
So, if you feel that a square or rectangle table would work better for the of your dining room, go for it because it is also good feng shui, just be sure to buy one that has rounded corners. Sharp corners are always best avoided as they create bad feng shui energy called Sha Chi.
Here are the best shapes for each bagua area of a dining room:
- East – Rectangular or Square
- Southeast – Rectangular or Square
- South – Rectangular
- Southwest – Square
- West – Square or Round
- Northwest – Square or Round
- North – Round
- Northeast – Square
- Center – Square
This selection is based on the play of the five feng shui elements and how they either support the energy in a specific bagua area or weaken it.
A couple more details to look at while selecting a good dining room table are as follows:
- The table should be in proportion to the room
- It is considered best to have an even number of chairs (unless you go for a round table).
- Best feng shui chairs are the ones with a solid back.
As the dining table is one of the most versatile and functional furniture pieces in your home, I would suggest taking your time and doing some good research. Ask where the table is made and who made it.
Buying locally, whenever possible; this is always a good idea and excellent feng shui, too. Invest in good quality wood and try to avoid a glass top dining table.

Dining Room Size for Chi Flow
The best feng shui dining room is spacious. There should be enough empty space to allow the chi energy to move about the room freely. Avoid blocking doorways, windows and the natural flow of traffic in and out of the room.
This free flowing chi energy will usher in abundance both in the health and wealth areas of your life. A minimum of 2.5 feet should be given around the table to allow guests to move their chair away from the table. If you can afford more space, all the better.
In traditional Chinese feng shui a dining room relates to wealth. In Chinese culture there is a straight correlation between the size of the dining room and wealth: the more people we can feed the wealthier we are!

Location and Feng Shui Design Aspects
The best location for the dining room is near the kitchen. This is a practical location as well as a feng shui one to maximize the benefit of chi energy.
Ideally, the dining room should be in the corner of your home. This location, like high-pitched ceilings, allows for the chi energy to collect and circulate in this space.
The most auspicious location of a dining room within a house is considered to be southeast and south. Not surprisingly these two directions relate to wealth and fame.
Dining Rooms Close to Front Doors
If your dining room is located too close the front door, try to separate it as much as possible. Keep the dining room door closed or use a decorative screen to block the front door from view. In feng shui, a dining room too close to the front door means chi energy can leave too easily and won’t fully enter the room.
Choosing and positioning the table
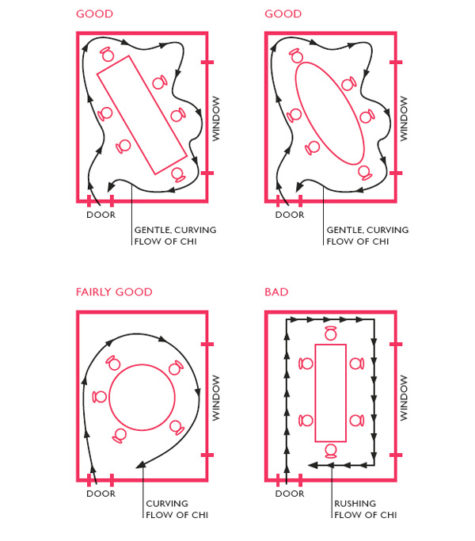 Your dining table should be large but fit comfortably in the room. Oval or round shapes are best, but if your table is rectangular, you can balance it with rounded shapes such as rugs in the rest of the room. It’s best to place the table at the center of the dining room and turn it at a slight angle in relation to the walls, so the chi will flow in a gentle, curving path around the room. If you put the table straight and parallel with the walls, the chi will be channeled in a straight line through the room or around the edges, and may get trapped in the corners.
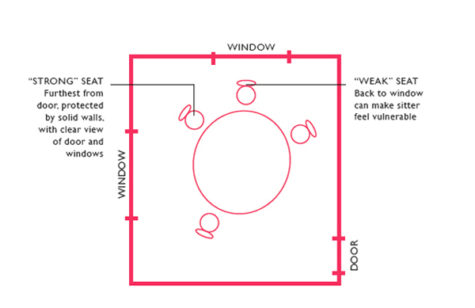
Seating arrangements
In feng shui, it’s good practice to seat the oldest family member or an important guest in the “honoured guest” position at the table. This is the seat furthest from the door, with solid walls behind it and offering a good view of the door and windows. If possible, place all the seats so that no one has his or her back to a door or large window, because this “weak” position may leave that person feeling insecure. This problem is especially likely with round tables.
Setting your table
In general, plain colours and simple shapes are best to promote the calming energy you need around the table. If you prefer a pattern, opt for one based on just one or two main colours. Vertical stripes are ideal because they symbolize uplifting energy. However, busy patterns splinter the chi. To get the most benefit from your tableware, keep items in good condition and discard any chipped plates, bowls or glasses.

Table displays
A rounded bowl filled with rounded fruit, in the centre of the table, is excellent feng shui; the more food you show, the more “richness of life” you possess. Many fruits have special significance: you could choose apples to boost friendship, pears for energy, peaches for health and oranges for richness. You can include other favourite fruits as well. Flowers are also a lovely decoration. Yellow ones are ideal to enhance communication. Silk, paper or plastic flowers are also fine. However, don’t use dried flowers because they represent decay and stagnation.
Lucky energy
The table and the area around it need to be “loaded with luck” (chuang ho hsing yun). Healthy, beautiful plants are a must in the dining room! They bring vitality, freshness and color., and nurture goodness in the chi. I especially like using larger plants with rounded leaves and flowers. Cut flower arrangements are fun to make and are also great in the dining room.
Keep electrical items, including TVs and stereos, out of the dining room; their energy is too yang. In addition, remove any clocks, because they are unwelcome reminders of the passing of time. A dining room should be “eternal” (yung yuan te).
The best material for a dining room table is wood. I do not recommend metal or glass tables since they are cold and do not hold energy.
Here’s an example of a beautiful but very cold dining room:
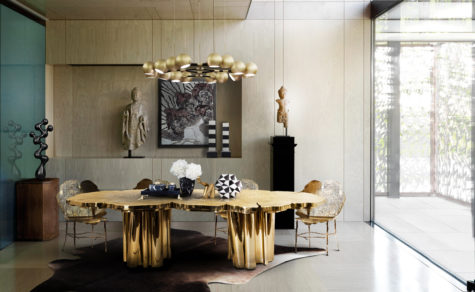
Lighting
Lighting needs to be soft and calming. Wall-mounted lights equipped with dimmer switches are a good idea, because you can alter the lighting levels to suit your mood or a special occasion.
- Use Lighting to Attract Yang Energy
In feng shui, the chi energy is comprised of the negative and positive energies of yin and yang respectively. The yin (female) chi energy is passive/restive while the yang (male) chi is active/energetic. Lights attract yang energy and you want to activate this dynamic energy for this room.


Recessed lighting is subtle and can also be used as direct lighting for wall art and paintings or simply placed on a dimmer switch for ambient lighting options. Torchiere floor and table lamps are great for uplighting to attract chi energy toward the ceiling and allow more energy to flow into the dining room.
A chandelier above the dining room table is the ideal choice of lighting. A crystal chandelier will activate the energy in the room and create an uplifting sparkling feeling. I love to dim the overhead light and use a lot of candles during family and guests gatherings. It always seems to slow down the time and have a magical, relaxing and mood enhancing effect.
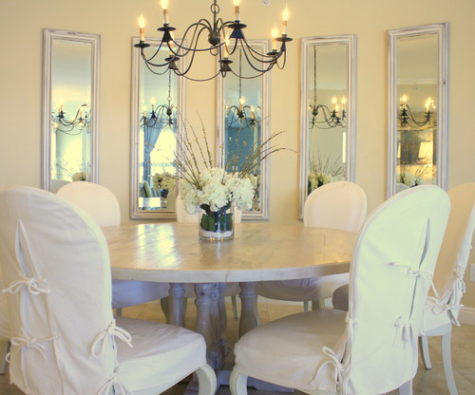
Generate Abundance with Mirrors
One of the best kept secrets of a feng shui dining room is the use of mirrors. The mirror should be placed to reflect the dining room table top. This placement doubles the food (abundance, health and wealth) and is considered one of the most auspicious element in a dining room design. However, a mirror should never reflect a kitchen or bathroom or it will double bad energy from these areas.
A mirror will also soften the light. Choose one with a suitable frame for that sector, or with beveled edges.
Mirrors are also great to use in the dining room if they can be hung in a way that reflects the outside. Try to position a mirror to reflect a garden, tree, or anything special to you from outside. You can also use the mirror to reflect a beautiful piece of art or a flower arrangement from the center piece on a dining room table.
- Mirror Height
Be careful not to hang the mirror so that it cuts off the heads of dinner guests’ reflections. This placement is considered inauspicious and brings ill health.
- Floor Mirrors
A floor mirror that extends well beyond chair height is a good choice. Just be sure that it isn’t placed opposite the dining room door or reflects the front door, kitchen or bathroom.
If you’re brave and want to add walls of mirrors, don’t use mirror tiles. Instead opt for full length large mirrors.
- Mirror Placements to Avoid
A mirror opposite a front door will bounce all chi entering your home right out the door, never allowing it to enter your home. In feng shui, if the mirror is opposite the door leading into the dining room, chi energy will never reach inside the room and can mean inauspicious results for family health and wealth.
The water of life
Clean, flowing water symbolizes luck, energy, health and “richness of life”. A small water feature or aquarium will benefit most locations. Alternatively, you could have one or two water symbols, such as shells, or a picture of flowing water.
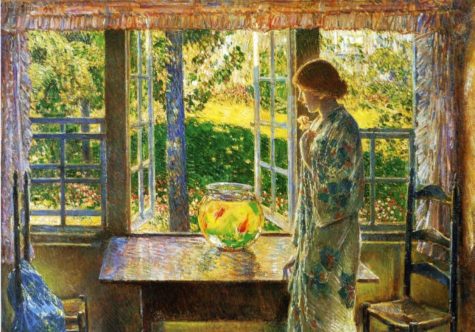
If you have a southeastern wall in your dining room you can use water to enhance your wealth by placing a wall fountain or a fish tank. However, don’t use water items in the northeast, south or southwest; they clash with the chi of these sectors.
Goldfish signify luck, and are ideal for an aquarium. Three or nine are the most beneficial numbers; include one black fish to represent protection. If you like tropical fish, have golden platys and a black mollie.
Good Feng Shui colors for dining room
Dining room wall colors should be warm, earthy and have a nourishing vibe. For example, yellow stimulates conversation and digestion, red stimulates appetite, and sage green brings freshness and vitality. A cold blue color would is the least appropriate for the dining room walls and décor.
- Here is a collection of colorful dining room ideas:
You can add colors to jazz up your dining room decorating with fabrics, bright tableware, crystal glasses and accessories. Napkins and table cloth designs and colors should be selected in accordance with the dining room table position. Feng Shui room decorating guide suggests blue color for the table in the northern zone of the dining room. Greens are Feng Shui colors for the eastern parts of the room and the house.
For large areas such as walls, single colors are best. You can always use ornaments and pictures, or a display area with items that suit the location, to add splashes of brighter colors. Try to avoid having highly patterned wallpaper, which can splinter the chi. If you already have this problem, remedy it by putting up abstract pictures in strong, plain colors appropriate for the location.
If you prefer neutral colors or like stylish dark or elegant white table cloth, try to add more Feng Shui colors with napkins, flowers, candles, napkin rings, tableware and vases to spice up your dining room decorating design.
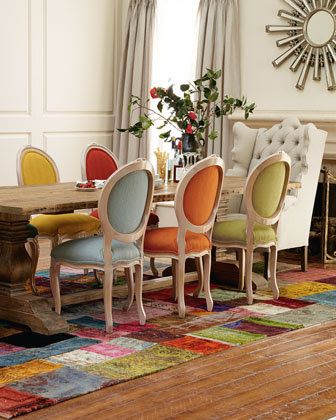
I love the way the chairs and the rug in the above photo provide a nice burst of color while the rest of the dining area is pleasantly neutral.
There is another important Feng Shui room decorating detail, – coasters should correspond to the shape of the table in Feng Shui home. If you have a round dining room table, use round coasters and get oval for the oval dining room table, and so on.
One of the most important and easy to follow Feng Shui tips for dining room decorating: never use cracked or chipped plates and glasses. Ancient Feng-Shui teachers say that it brings troubles into the house. Also they suggest to serve glasses with transparent liquids for dinner. Shiny glasses make attractive table decoration and can play the role of individual Feng Shui crystals that stimulate the positive energy flow and attract wealth.
Dining room usage:
Ideally, the dining room should be used often and free of clutter. You may want to say goodbye to those projects and piles of papers that have been residing on a dining room table for several months.. If you don’t use the room and it’s cluttered, the energy stagnates which can cause stagnation in your finances.
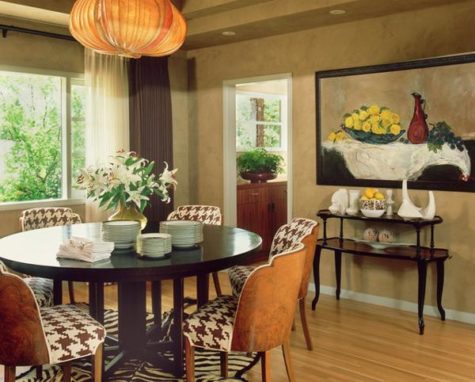
Art in the dining room:
Choose art for your dining room that gives you a feeling of wealth and abundance. It’s personal but some examples that work for me are landscapes, seascapes, fruit or flowers. Your choice of art should also reflect the elements needed to enhance wealth in the particular space.
Pictures that give you feelings of pleasure and abundance will also help; good subjects include bright flowers, rounded fruit and sunny landscapes.
Sources:
- Radical Self Care Project Overview by shirleytwofeathers - No Comment
- Radical Self Care Image Gallery by shirleytwofeathers - No Comment
- It’s A Wrap by shirleytwofeathers - 3 Comments
- Something To Consider by shirleytwofeathers - 1 Comment
- Nurturing Your Precious Self by shirleytwofeathers - 3 Comments
Liana: A Prosperity Prayer
B. Joy Barrett: beautiful-turquoise-upholstered-accent-chair-for-living-room-with-within-colorful-accent-chairs-colorful-accent-chairs-transforms-the-look-of-a-room
Claudette Losier: Why Does It Work?
me: Make Your Own Violet Fire
Abdulrahman: Money Chant – Very Fast
Our current project began on July 4. We are exploring the concept and practice of Radical Self Care . Feel free to join in at any time!

Interested? You can visit our current project page, or you can take a look at the About The Project page if you are curious about the concept.
.
Please feel free to join in at any time! No experience necessary.

- Money Chant - Fast
- Money Chant - Slow
- Prosperity Plan
- Amazing Creator
- Cause and Effect
- I Am That I Am
- Spirit Rap
- Lakshmi Spirit Rap
- PowWow Spirit Rap
 Enter your question and receive the wisdom of the Occulatum. You may pose your question in any way that feels appropriate. The answer will come in the form of a small pop up. Try it - your life just might change for the better!


I think it's time to go shopping... maybe even buy some really cool stuff at my online shops!!