Let’s Go Outside!
Time spent outdoors is always time well spent, but when its a well designed space, it’s even better.
What is an outdoor living area? It isn’t just a patio and table anymore. Not just some plants on a deck. Today, the exterior of a home is literally turned inside out in order to create the feel of an indoor area. But how can you make the outside feel more cozy and inviting?
Creating an Outdoor Room
Whether you have a big backyard or a tiny patio, the key to designing for outdoor living is implementing your plan in steps, says Elyse Santoro, a Miami-based interior designer/decorator. “It doesn’t have to happen all at once, and it doesn’t have to be overwhelming or cost a fortune.”
- Where to Put Your Outdoor Room
First, go inside your house and check out the views looking out. Placing the room in a good relationship to the house helps give the feeling that your outdoor room is “an extension of your home,” Santoro says. “Make sure… you have easy access to get there,” she says, whether or not it’s physically connected to the house.
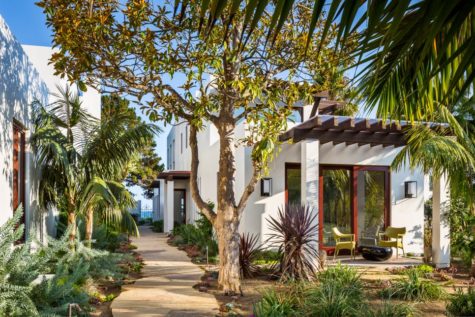
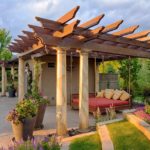
An outdoor room can include anything from an attached, screened-in porch to a gazebo to a landscaped area with a bench. If it’s an independent area, such as a gazebo, create a passageway with foliage or hardscaping to visually connect it to the house. “You want to erase the fact that you’ve gone outside,” says Atlanta-based landscape designer Patricia Thernell. She advises using the same flooring material outside as inside, or using plants to frame the doorway to your outdoor room.
- Defining Your Outdoor Space
“The best way to define an outdoor room is by the activity that will take place in it,” says Mary Donovan, an interior and landscape designer in Atlanta. Donovan interviews homeowners on what they plan to do in their outdoor spaces. Often the answer includes several purposes such as entertaining, family dining, playing games and reading. Figure out if you need one large space or several smaller rooms, each with its own purpose.
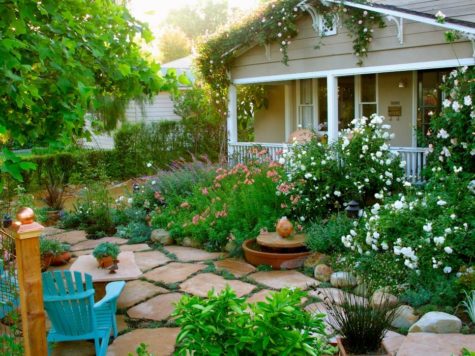
Multiple outdoor rooms don’t necessarily require acres of land, Donovan says. Postage-stamp sized front lawns and narrow side yards can be landscaped to be rooms in themselves and not just passageways. “It can be a shady quiet, meandering space with hydrangeas, hostas, moss and a dripping wall fountain, and other plants trained to grow vertically up against the house or on a lattice,” Donovan says.
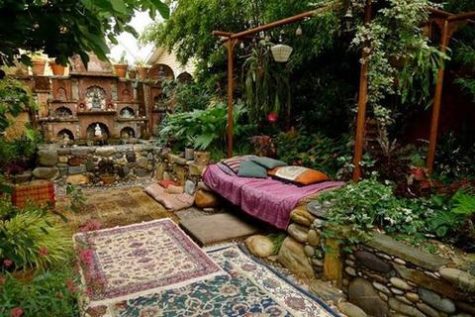
An outdoor room has to be functional, but it also has to be engaging or you’ll never use it. Santoro asks clients to think about places they’ve traveled to that they absolutely love. “If they say they love Tuscany or the vineyards in northern California, I ask them to remember what it felt like there and to create their outdoor space with elements of that place.”
So, it all begins with the initial design. Do you want a pleasant patio, a quaint courtyard, a stylish gazebo, or a country-style porch? Next, try to harmonize with the backyard. Most of the time, you’ll want every area of the exterior to be a room unto itself, each with its own function and purpose while still creating a cohesive style.
The Floor Plan
You want to think of your backyard as a part of the house, which means it should come with its own logical layout. First off, if you don’t have them already, patios and decks are the most common exterior installations for homeowners because you have to have some kind of focal point to work around. But even when you have a central location, you need to organize and compartmentalize the space.
Here are some basic “rooms” to consider when planning your outdoor space:
- Kitchen
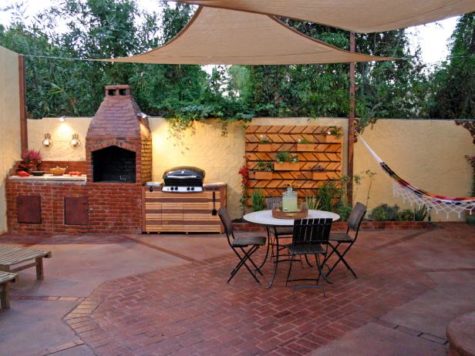
Cooking outside is a summer tradition, buy why limit it to grilling. Outdoor kitchens have become a popular renovation for any chef who wants to go beyond hot dogs and hamburgers.

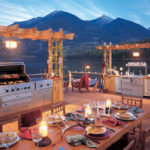


If you have the a nice big budget, you could add some counter space and cabinets. Install an oven, a range, a wet-bar, or a sink. Of course, make sure these items are made out of the appropriate weather-resistant materials, such as sealed concrete and stainless steel.
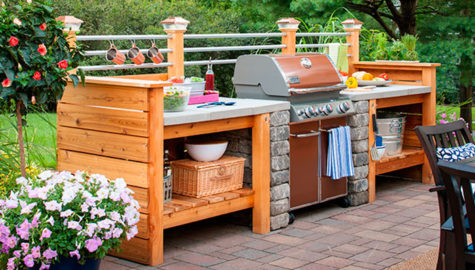
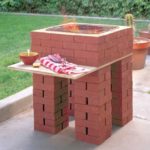
Even on a smaller budget, a cozy cooking area is possible. Here are some creative ideas using brick, repurposed tables and cabinets, and what’s that? A volkswagon bug?


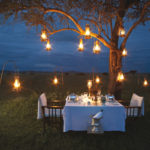
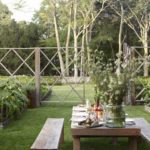
- Dining Room
After cooking outside, you’ll probably want to eat out there as well. This delightful patio in England designed by Cool Gardens Landscaping Ltd. is the perfect spot for afternoon tea. It features a towering hedge that serves as an organic art gallery wall complete with an outdoor TV screen and audio system.
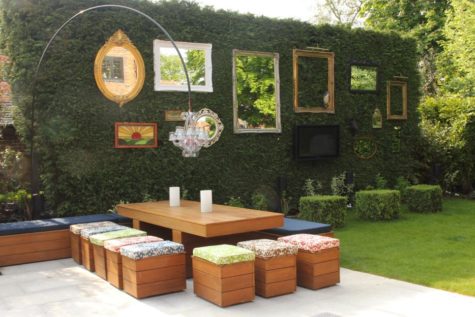
Super cool huh?
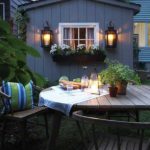
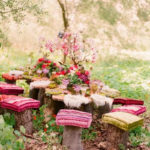
I found a bunch of other equally cool ideas for dining areas outside. They range from the super simple to the elaborately luxurious. Here’s a gallery of pics to drool over and get ideas from:


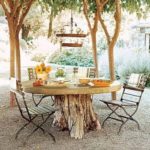


Patio furniture is crucial. Tables, chairs, and umbrellas are important, but you may also want to think about other decorative touches such as gliders, porch swings, or a screened-in porch that keeps out the bugs.
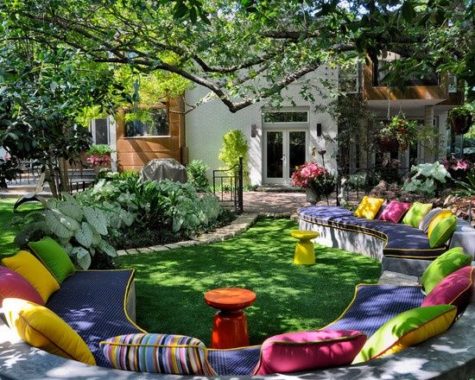
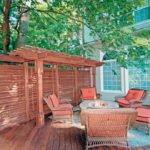
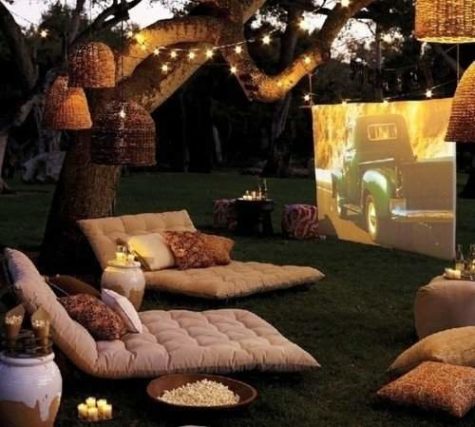
- Family Room
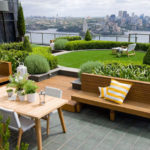
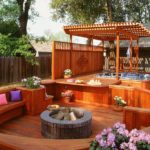
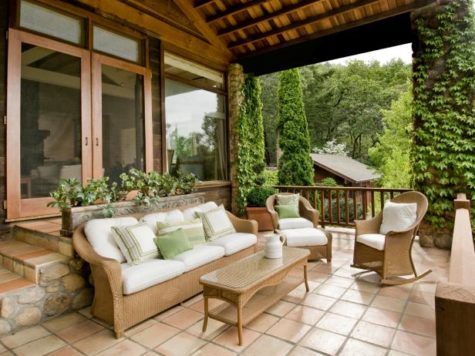
Once you’ve eaten, it may be time to adjourn to a common room. Therefore it’s a good idea to have a relaxing retreat, a place to entertain.
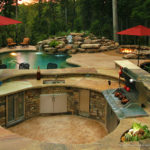
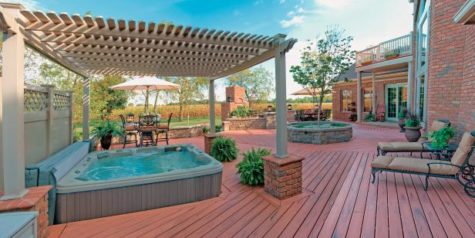
Add a cozy outdoor fireplace for those chilly nights. Or, if you have the budget, a hot tub and a pool is a great addition: they’re fun, they’re attractive, and they add value to the home.
More cool ideas:


Oh, and here is something fun!
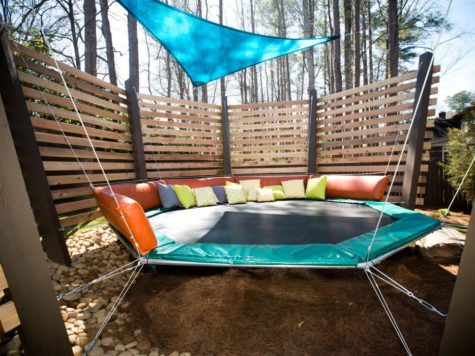
A trampoline isn’t just for kids in this backyard. A cushioned bumper and collection of throw pillows create a great space for lounging.
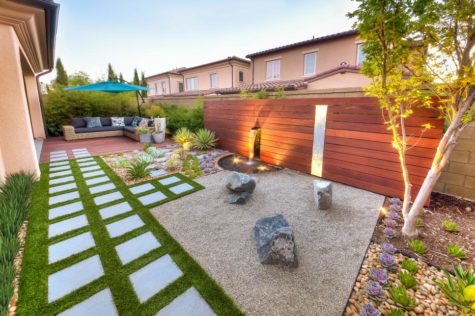
- Water Features
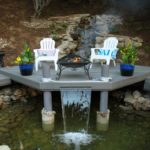
Landscape designers, interior decorators and architects all agree: Water is one of the most important elements in an outdoor room. The sound of water really creates a serene setting.
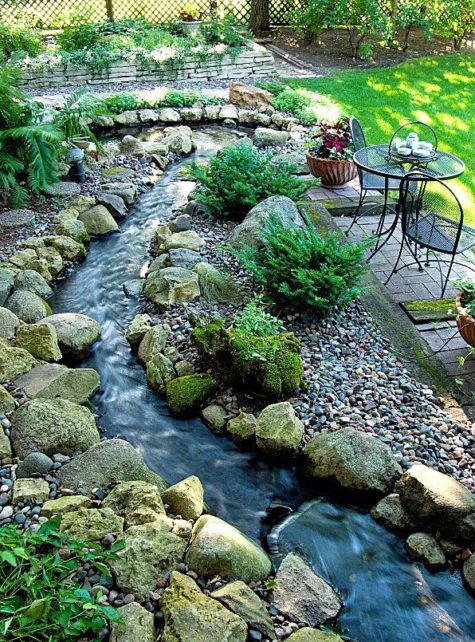
Even if you’re creating a room for entertaining and dining rather than meditating, it’s still nice to hear the splash when you’re sitting around the table. But you don’t have to spring for a pond or waterfall. A container water garden or a tabletop fountain works perfectly.
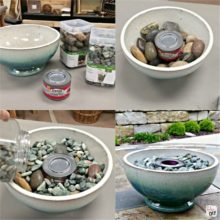
I found this great little tutorial for how to create a bubble fountain. It looks pretty easy, the biggest expense is the pump. I didn’t price them, so I don’t know how expensive they are.
How to Make a Bubble Fountain
Tools and materials needed:
- spade
- level
- bubble fountain kit
- decorative garden pot
- silicone sealant
- small pump with flow adjuster
- gravel
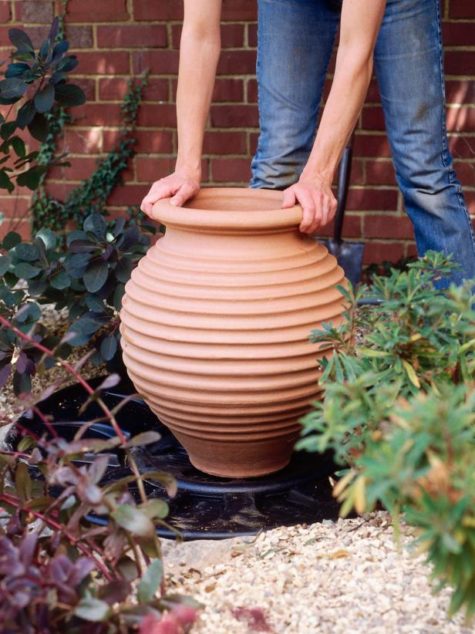
STEP 1 – Prepare the Site
First, hire a qualified electrician to install an electricity supply and an outdoor outlet to an easily concealed location close to the fountain. Then dig a hole larger than the reservoir.


Remove any sharp stones from the hole and pack damp sand around the edges, sides and base. Place the reservoir in the hole, and use a spirit level to check that it is level in all directions.
Pack more sand around the reservoir, as necessary, and check that it is level again. It is essential that your fountain is horizontal to prevent water from draining out, and to ensure that the pot on top will be stable.
STEP 2 – Place the Pump
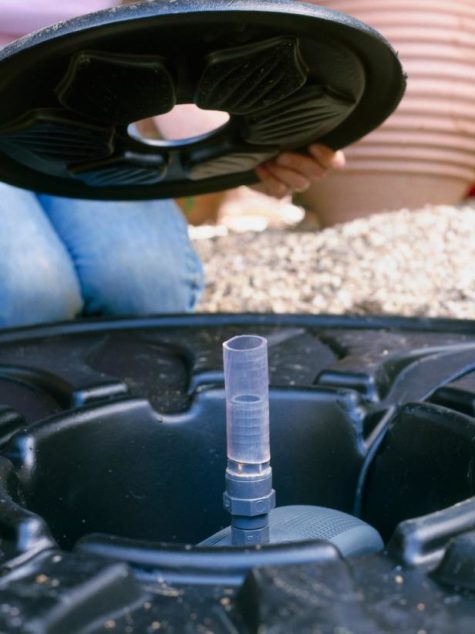
When level, place the pump in the reservoir. You may need to fit an extension pipe onto the pump to reach through the hole in the base of the decorative pot. Put the lid on the reservoir, and over the pipe from the pump.
Place the decorative pot on the reservoir lid, making sure that the pump pipe passes through the drainage hole in the bottom. Seal the pump pipe in place with silicone sealant, and leave to dry and harden for 24 hours.
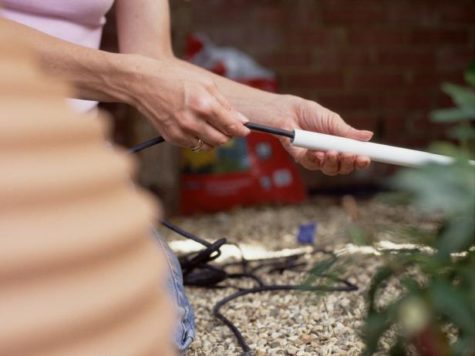
STEP 4 – Attach Flow Adjuster and Fill Fountain
Attach a long section of pipe to the water flow adjuster. Then attach this to the pump pipe in the base of the pot. Trim the water delivery pipe so it reaches just below the rim of the decorative pot.


Use a watering can or hose to fill the reservoir through the holes in the lid, and fill up the decorative pot to just below the delivery pipe.
STEP 5 – Protect the Cord
The electrical cord must be protected by special tubing, which an electrician can advise you about. Make sure that all electrical connections in the garden are fitted with a ground fault circuit interrupter (GFCI).
STEP 6 – Disguise Reservoir and Soften With Plants
Plug in the pump and check that it pushes the water over the top of the pot, and adjust the flow as necessary. Disguise the reservoir with pebbles and gravel, leaving a gap to allow you to fill it up; you need to do this once a week in summer.
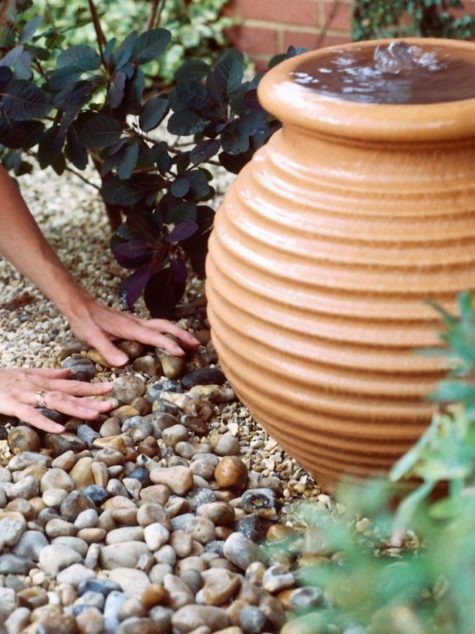
Plant up around your pool, leaving a margin between your planting and the reservoir, to avoid dislodging it. Plants from the Mediterranean, such as euphorbias, lavender and rock roses make great companions for an urn. If you prefer a more traditional look, try roses, honeysuckle and daisies.
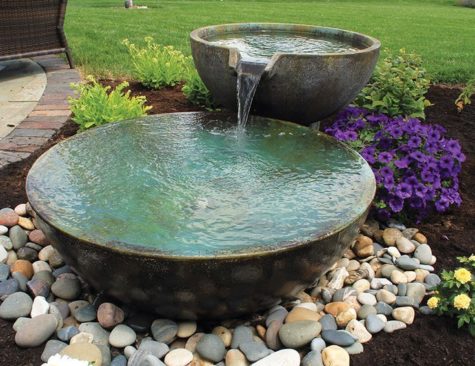
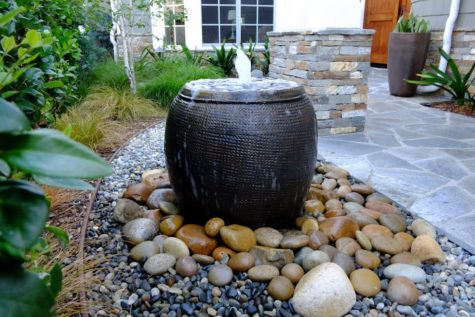
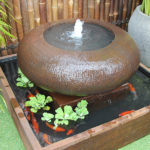
Here is a great collection of bubbling fountains to get your creative juices flowing. As you can see, the fountain does not have to be buried in the soil to be super cool and beautiful.


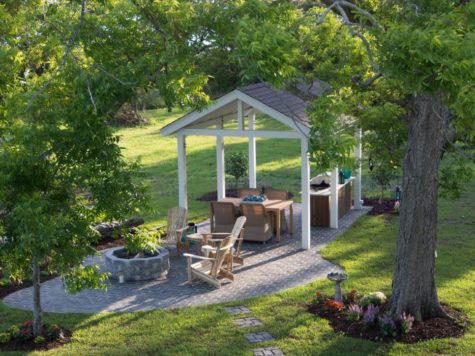
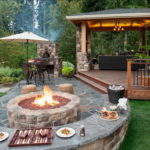
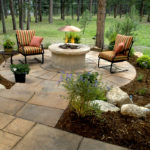
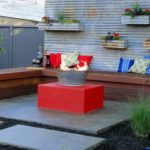
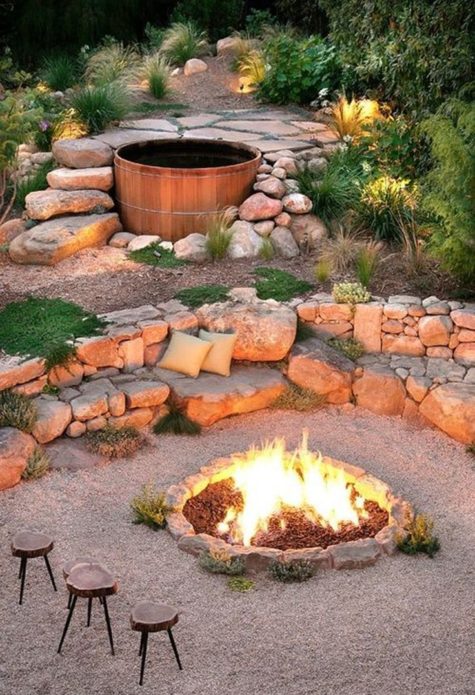
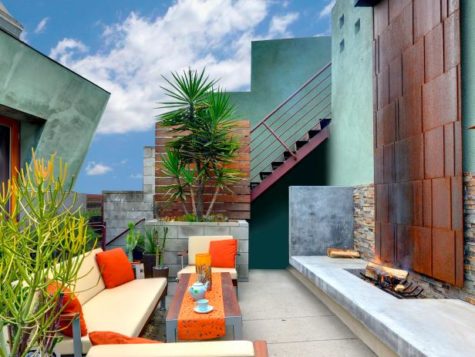
- Fireplaces
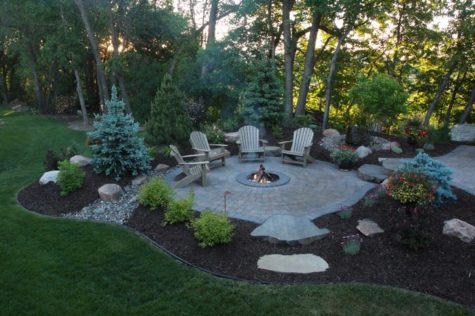
A cozy fire or fireplace is becoming a staple for outdoor rooms, because a hearth can extend the season of your outdoor room by several months.
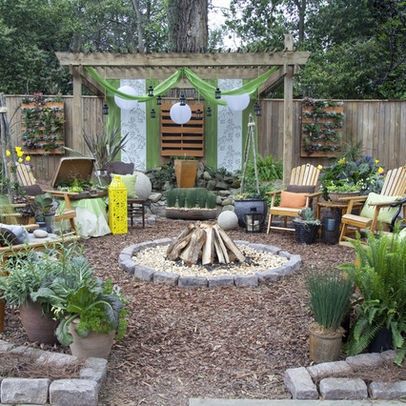
Fire pits come in many shapes and sizes. They can be a permanent structure or a simple barrel that can be moved around the patio. Find the design that’s right for your backyard.
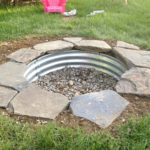
Fire pits are not hard to build. They do, however, require a bit of elbow grease and hard work. They can be created with concrete culvert spacers — aka doughnuts — intended to fill culvert gaps in city sewer systems, fire brick, metal containers buried in the soil or surrounded by brick or stone.
I found a couple of simple visual tutorials. Here they are:

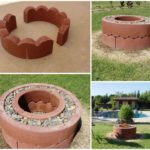

Firepits can also be created from a variety of materials:


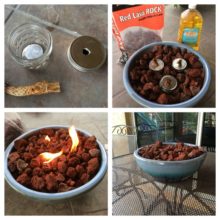
But wait, those look expensive and/or difficult. I want something super easy and inexpensive. So I went on another search and found these two visual tutorials. One uses sterno, the other is a variation of an oil lamp. Easy peasy.


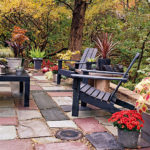
- Plants
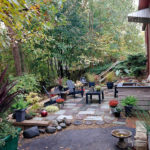
Plants soften hard edges (such as concrete flooring) and add a sense of life, warmth and comfort. Santoro, who’s also an expert in feng shui, likes jade plants, miniature orange trees and potted philodendron in sheltered areas, and pines and bamboo to define outdoor areas. Or, choose plants based on the feelings you want to evoke in the space.
For example, a meditative outdoor room works best in shade, surrounded with ferns and hosta with ligustrum to define borders. Left to grow naturally, a ligustrum hedge looks woodsy and informal, or you can trim it to define a more formal outdoor room.

There’s no need to spend big bucks on planters and flower pots. Look around the house or scour thrift stores and flea markets for unique vessels to hold plants, herbs and vegetables.


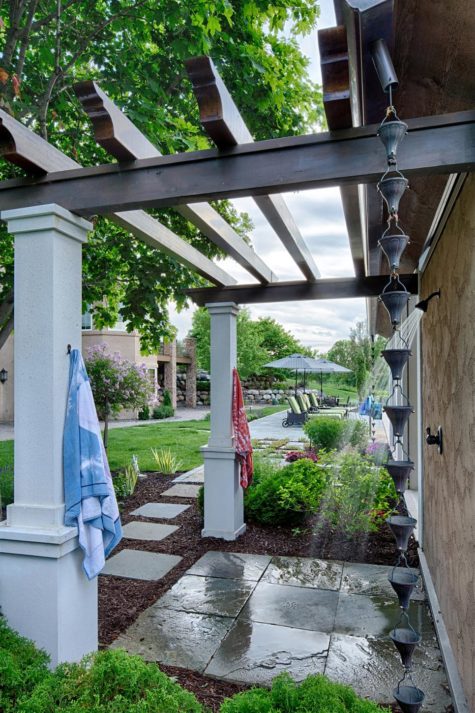
Shade and Shelter
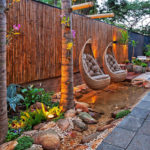
One of the best ways to ensure that you have a luxuriously comfortable outdoor room is to ensure that you have shade, privacy, and a feeling of shelter and safety.

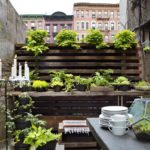
Curtains made from outdoor fabrics were used to create instant privacy on this charming porch. There are so many different ways to create privacy and shade with walls, screens, curtains and plants. Here are some great ideas:


Whichever your relaxation method of choice, an important consideration in any outdoor room is protection from the elements. In addition to shade from the sun or even a light rain, consider erecting screens or other wind breaks on wall-less structures.
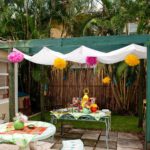
- Backyard Tents or Teepees
If you’re worried about the kids spending too much time in the sun, put one of these in the backyard for a great place to cool off. A tent can be a luxuriously wonderful place to spend time in the back yard for the grown ups as well.


Tie It All Together with Flooring
Since flooring defines a space, put down some kind of hardscaping, whether it’s a deck or a stone floor or a concrete slab. If your outdoor room has a floor of grass, “you’ll never go out there,” says Santoro. “If there’s no floor it doesn’t feel like a room.
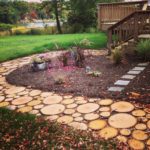
- Walkways and paths
Garden paths come in many styles, and it is up to you to determine not only which style fits your garden best, but which you can commit yourself to creating and maintaining.
Some take much more time, effort, and expense than others. For example, gravel and mulch paths are inexpensive, but stone and brick are more durable. Stepping stones add charm, while mosaics add elegance and beauty but are incredibly time-consuming.


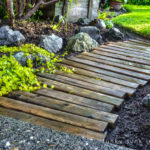


Pea gravel is fairly inexpensive, and in my area there is an abundance of limestone rock that can be scavenged and scrounged. Also you might check with companies that make grave stones to see if they have a supply of broken or unusable gravestones. Other possibilities include beer bottles embedded in sand, bottoms up.
Outdoor Flooring Buyer’s Guide
What’s the best material to build your driveway, deck or patio? Here’s a look at five outdoor flooring choices and the cost, pros and cons, and ideal locations for each.
From brick to cedar decking to concrete pavers, outdoor flooring options can quickly get complicated, but when you consider the pros and cons of each, it’s simple to choose a type of flooring and style that fits your space and your budget.
The following info is from design experts Jeff Wilson, a home improvement expert who has hosted several shows for HGTV and DIY Network, and Morgan Grimball, ASLA, a landscape architect in Columbia, SC.
Natural stone

Pros and cons: Stone can be expensive to truck in and installation is labor-intensive. Local stone from your region (for example, fieldstone in the south or slate in the northeast) costs less and is more eco-friendly. Once installed, natural stone is extremely durable and almost maintenance-free.
- Cost: Varies by type of stone and region, but around $25-35 per square foot.
- Ideal location: Patios, pool decks, front porches, walkways, driveway accents
Design ideas: Use stones with an irregular shape to create a meandering mosaic pathway; for a more uniform appearance, select cut modular stones. Natural stones have beautiful color variations from gray to red to blue, which can form part of the pattern and overall design of your outdoor space.
Concrete
Pros and cons: A basic slab of concrete is inexpensive, low-maintenance and a good long-term option, though cracking is difficult to repair. Concrete pavers are easier to repair; simply pull up the damaged section and replace.
- Cost: $4-6 per square foot for basic concrete; $7-8 per square foot for pavers; $12 per square foot for stamped or acid-etched concrete
- Ideal location: Patios, driveways, pool area, garden paths, front porches
Design ideas: Coloring and stamping options make concrete resemble stone, bricks, or other higher-end materials. Concrete pavers are durable, low-maintenance, and come in a wide variety of designs from brick to flagstone.
Wood
Pros and cons: Wood decking is one of the simplest DIY projects, which lowers the cost substantially, but wood requires cleaning and sealing every one to two years.
- Cost: Around $8-10 per square foot for the least-expensive treated lumber; $18-20 per square foot for higher-end wood; $20-25 per square foot for inexpensive treated lumber, supports and railings. Composite decking runs about $35 per square foot.
- Ideal location: Ground level or raised decks, pool decks
Design ideas: Using local hardwood in deck building is greener and can be less expensive, since the wood doesn’t have to be trucked in. If your ground is sloped, consider building the deck in levels to follow the slope.
Brick
Pros and cons: Brick gives off a beautiful old-world look and is low-maintenance and relatively slip-resistant, but ground shifts over time can make a brick pathway or patio difficult to shovel snow because of the irregular surface.
- Cost: Approximately $15 per square foot, including the base
- Ideal location: Patios, garden paths or walkways, pool decks or fountains, front porches, driveways
Design ideas: Brick can be installed in a number of patterns, such as basketweave, herringbone and circular. Encouraging moss to grow between brick pavers fills in the cracks and helps prevent weeds, but can be slippery when wet.
Tile
Pros and cons: Ceramic tile installed outdoors must be highly slip-resistant and able to withstand freeze-thaw cycles. Look for tile specifically formulated for the outdoors, which is dense with low absorption ratings. Tile usually requires a sealant to protect the grout from cracking.
- Cost: $12-20 per square foot
- Ideal location: Front porches, patios, garden stepping stones, pool decks
Design ideas: Use accent tiles to create a border; lay contrasting tiles in a diamond pattern; create a pathway within a large patio by laying a contrasting color in a walkway formation; use smaller tiles in a mosaic pattern as a focal point.
- Note:
All costs for all materials are estimates that include labor and installation. Prices may vary by region, and installing materials yourself will cost substantially less in most cases.
But Wait There’s More!
And if you don’t want to go for something permanent, here is a wonderful and luxuriously cool temporary outdoor room:
Sources:
- Radical Self Care Project Overview by shirleytwofeathers - No Comment
- Radical Self Care Image Gallery by shirleytwofeathers - No Comment
- It’s A Wrap by shirleytwofeathers - 3 Comments
- Something To Consider by shirleytwofeathers - 1 Comment
- Nurturing Your Precious Self by shirleytwofeathers - 3 Comments
Liana: A Prosperity Prayer
B. Joy Barrett: beautiful-turquoise-upholstered-accent-chair-for-living-room-with-within-colorful-accent-chairs-colorful-accent-chairs-transforms-the-look-of-a-room
Claudette Losier: Why Does It Work?
me: Make Your Own Violet Fire
Abdulrahman: Money Chant – Very Fast
Our current project began on July 4. We are exploring the concept and practice of Radical Self Care . Feel free to join in at any time!

Interested? You can visit our current project page, or you can take a look at the About The Project page if you are curious about the concept.
.
Please feel free to join in at any time! No experience necessary.

- Money Chant - Fast
- Money Chant - Slow
- Prosperity Plan
- Amazing Creator
- Cause and Effect
- I Am That I Am
- Spirit Rap
- Lakshmi Spirit Rap
- PowWow Spirit Rap
 Enter your question and receive the wisdom of the Occulatum. You may pose your question in any way that feels appropriate. The answer will come in the form of a small pop up. Try it - your life just might change for the better!


I think it's time to go shopping... maybe even buy some really cool stuff at my online shops!!

Leave a Reply