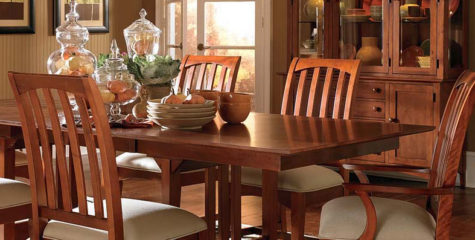
Refurbishing The Dining Room

Make your dining room a comfortable dining and conversation space for the family. Whether your style is formal or family friendly, here are some great ideas to update your dining room.
Clean It Up
First up, I think it’s a good idea to make sure that the wooden surfaces sparkle and shine. Here’s an easy recipe for a good wood cleaning product:
Apply this formula to clean and restore luster to wood furniture. It also may be used to help remove superficial water rings on wood tables.
You will need:
- Funnel
- Measuring cup and spoons
- Lidded 8-oz. plastic squirt bottle
- Microfiber cloth (or clean, soft rag)
Ingredients:
- 2 Tbsp. olive oil
- ¼ cup distilled white vinegar
- ¼ tsp. lemon oil (or fresh lemon juice)
Instructions:
Using funnel, pour olive oil, vinegar and lemon oil into bottle. Shake well to emulsify. Squirt polish onto microfiber cloth and rub onto finished-wood furniture. Always go with the grain and evenly distribute polish. Remove any excess polish with a clean cloth.
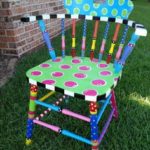
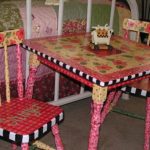
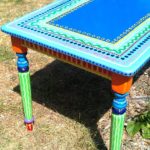
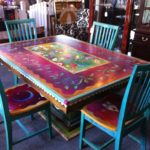
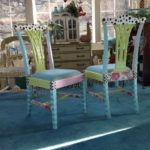
Colorizing Your Dining Room Furniture
Maybe instead of a good cleaning, your dining room furniture needs a spot of color! Here is a collection of super colorful and interestingly wonderful painted tables and chairs:


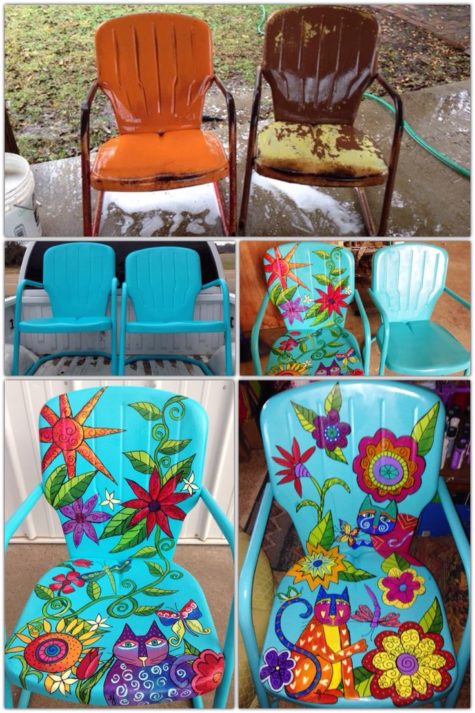
And if you have metal chairs, they can be cleaned up and painted too! Check these out:
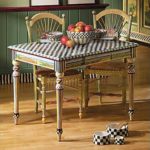
If your taste and your style is more conservative, give them a new makeover with paint and fabric. A bold graphic pattern can bring a pop of color and life into a room. And the best part: It doesn’t cost a lot of money.
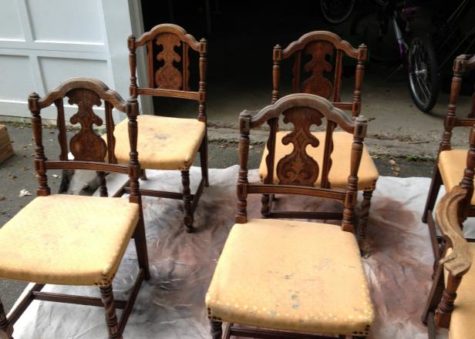
How to Re-Cushion Old Dining Chairs
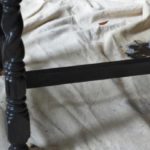
These are the chairs we’re starting with:
Here’s a list of the tools and materials that will be needed for this project.
Tools:
- Staple gun and staples
- Hot glue gun
- Measuring tape
- Flathead screwdriver
- Scissors
- Small pliers
- Hammer
Materials:
- Fabric for chairs
- Black upholstery tacks
- Carpet padding
- Quilter’s batting
- Cotton batting
- Paint
Step by Step Instructions with pics:
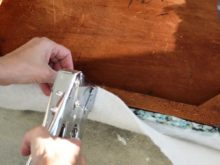
- Remove Old Fabric
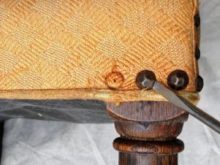
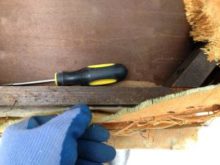
Use a flathead screwdriver and pliers to remove upholstery tacks and the staples underneath. Do not throw away fabric or cushioning, you can use them for templates. If seats are different, number the bottom of the seat as well as fabric that was removed.
- Clean Chairs
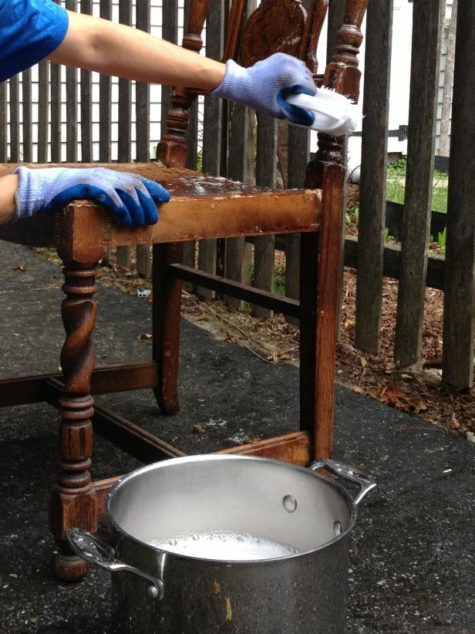
When fabric is removed, clean chair to remove dirt and greasy build up.
- Prime and Paint
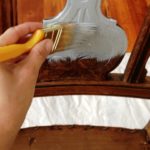

When chairs are completely dry, apply a coat of primer to entire surface. A coat of primer will help paint better adhere to chairs. When the primer is dry, add your first coat of paint. Let chairs dry completely and then apply a second coat.
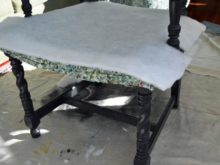
- Measure and Cut Padding
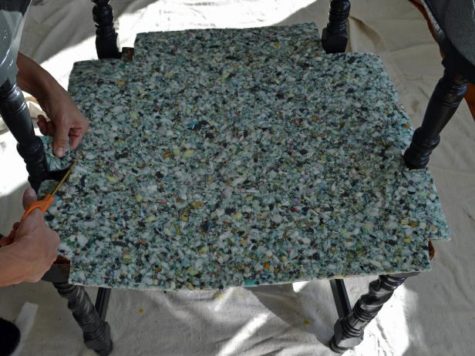
Use old fabric as a guide to cut a piece of carpet padding for the chair. Place padding on the chair and then cut in details you may have missed. Make sure there is enough overhang to go over the side of the chair, you can always cut excess off later.
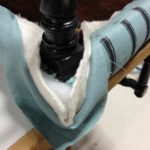
- Attach Cushioning
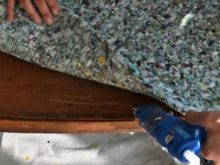
Use a hot-glue gun to adhere padding onto seat and down the sides. Hold in place while the glue dries. To make it extra cushy, glue a second piece of carpet padding on top of the first one.
Cut a piece of quilting batting bigger than the carpet padding and lay it on top. Use a hot-glue gun again to adhere the batting to the padding.
- Attach Cotton Batting

Use cotton batting for the final layer. Cut this layer long so it hangs down past the bottom of the seat. Glue cotton batting onto the quilting batting on top and around the sides of the seat. After the glue has dried (usually just a few minutes), flip the chair over and staple the overhanging batting to the bottom of the chair seat.
- Cut and Prep Fabric
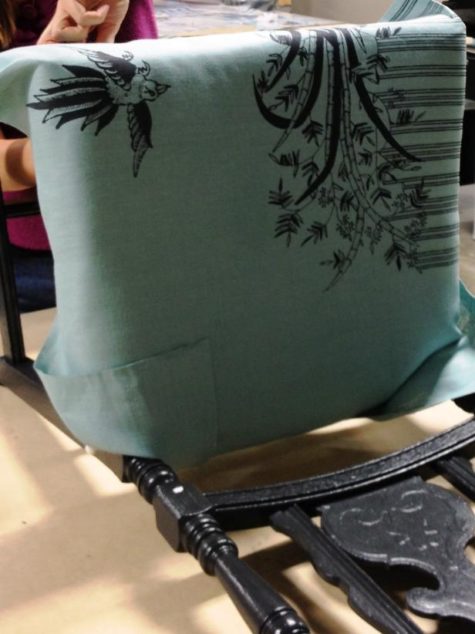
Again, use the old fabric as the template to cut the new fabric. Place the new fabric on the seat and make sure it is centered and smooth. You may want to stick a few straight pins in the top to hold the fabric in place. Place one staple in each side, in the middle. Turn the chair upside down. Pull the fabric a little taunt and continue stapling each side from the middle out to the corners. If needed, use a hammer to push the staples all the way down.
- Finishing Touches
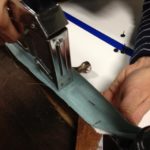

Leave plenty of room around the corners and legs for folding in. You will probably need to cut some of the batting off to get the fabric to fold properly before hammering in the upholstery tacks. We used three tacks for the side of each leg.
- The Finished Chairs
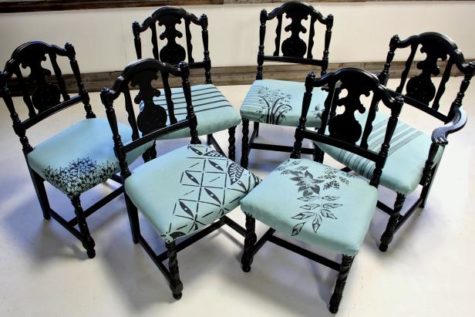
I love how each one is slightly different, and I wonder if the fabric was painted or stenciled. Super cool, huh?
Not interested in recovering your dining room chairs? You can easily clean them up with this simple recipe:
Top It Off
Add texture and formality up above by applying tin tiles or embossed wallpaper to the ceiling. Having a little architectural interest on the ceiling will draw the eye up and make the room seem bigger. Get the look of 1920’s glamour on your ceiling with unbelievably real-looking fake tin tiles.
How to Install Tin Ceiling Tiles
People often think to decorate their walls with art and new paint colors, or their floors with fabulous rugs, but a famous designer secret to making a space special is to dress the ceiling. It isn’t called the fifth wall for nothing. We started this project with a bare, square ceiling over a Spanish-style dining room. With some simple calculating and installing, this faux tin ceiling makes a dramatic impact, and it keeps with the 1920’s style of the space. This plastic tile is made to look just like the real tin version. In addition to being easier to cut and work with, it’s cheaper, too.
Here’s a list of the tools and materials that will be needed for this project.
Tools:
- Measuring tape
- Chalk snap line
- Duct tape
- Scissors
- Paint roller
Materials:
- Faux tin ceiling tiles
- concrete sealer
Step by Step Instructions with Pics:
- Get Started: Plan, Purchase and Install

Find the square footage of the area you’d like to tile. Measure the length and width of the space. Next multiply those numbers together to find the square footage. This will be important for ordering enough of the product you select. If you’re working on a ceiling, have a friend help you measure if needed to get the correct dimensions.
- Order or Create Your Tiles
When picking faux tiles, think about the style of your home first. Look for a style that naturally blends with your space. Faux tin ceiling tiles come in several colors, and several faux metal finishes – it comes down to taste and color scheme. They also come in 6″ patterns up to 24″ patterns. We chose a larger pattern that had a Spanish-style vibe and ordered it in a dark, bronzed finish.
Purchase 15% more tile than you need, for any cutting mistakes and pattern matching. I also suggest ordering 1″ decorative strips in the matching material of your tile to cover seams.
To determine your installation needs, check the ceiling’s material. Many people prefer a glue-up install, so you can reposition tiles as needed while the glue sets up. Plaster, paneling and plywood work with glue, but check your manufacturer’s instructions for best practices.
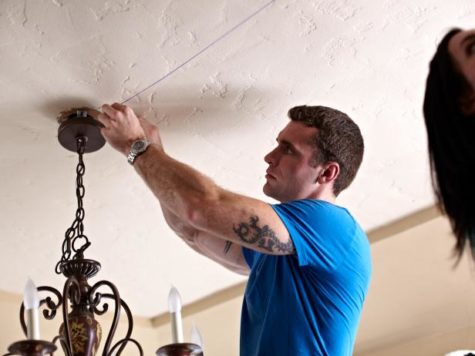
- With a friends help, snap chalk line.

Two people should hold it taut in place, and one person should pull down and release the chalk-covered string to snap a chalky line on the ceiling.
Two people should hold it taut in place, and one person should pull down and release the chalk-covered string to snap a chalky line on the ceiling.
- Mark the Control Lines
For most spaces, the control line should be a straight line cutting your tiled area in half. Measure to find a halfway point on either side of your space. Use a snapping chalk line to connect the two points by stretching it from one side to the other at your halfway mark. Two people should hold it in place, and one person should pull down and release the chalk-covered string to snap a chalky line on the ceiling. This will serve as a reference line that you can use to ensure straight tile placement.
Once you’ve completed a line going one direction, rotate 90 degrees and create another control line to create a cross and form straight lines bisecting your middle point. Plan for your first tile to be placed in the corner created by the intersection of the two chalk lines. For this project, that intersection fell behind a light fixture in the center of the room.
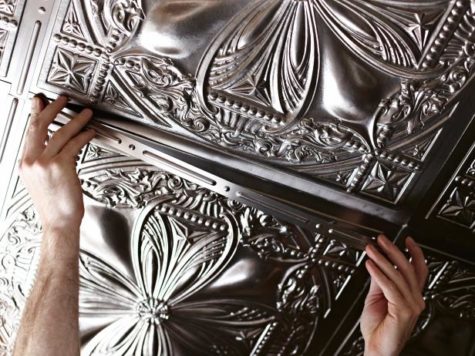
- Dry Fit Tiles Before Installing
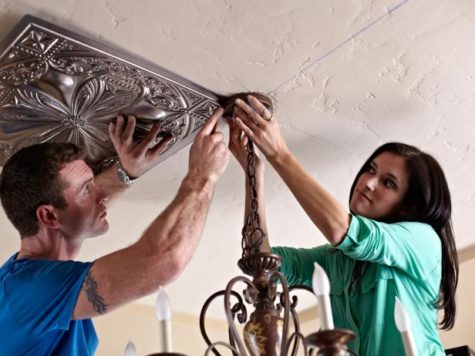
It’s always best to dry fit your tiles before gluing up. Before you apply adhesive, place your tiles on the ceiling and trace any fixtures you may have to cut around.
Duct tape on the back of your tiles will help hold it up while you trace and dry fit each tile.
- Make Cuts
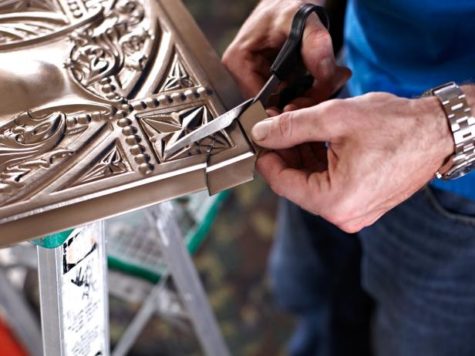
Use scissors to cut tiles to fit your ceiling. We cut out rounded shapes, to leave room for the light fixture in the center of the room. Faux tin tiles are very easy to cut, but it is recommended to have a strong set of household scissors to do the job.
- Roll On Cement and Install
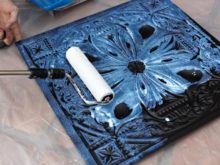
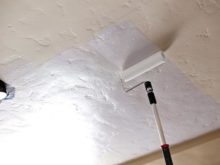
Apply an even coat to the back of your tiles. Apply an even coat of contact cement to your ceiling as well
The cement is applied using your paint roller. Apply an even coat to the back of your tiles. Contact cement has an open time of approximately 15 minutes. That means that once applied, you should let it sit for a few minutes to become tacky and the begin applying the tiles to the ceiling.
While they are setting up, apply an even coat of contact cement to your ceiling as well. The cement on both surfaces will bond with itself, creating a seal.
Apply the tiles on your reference line first and work out toward the edges of your ceiling. Measure and cut pieces of tile to fit any areas where a full tile cannot go. Stick to the pattern repeat for best results.
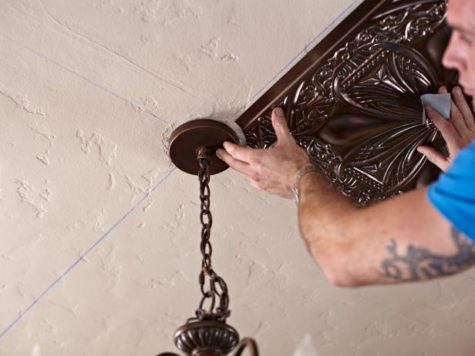
- Clean and Cover Gaps
Sometimes ceilings are not square, so you may find yourself having to adjust a tile here and there. The decorative strips that match the tile are very helpful for covering any gaps. Clean the tiles with a dry cloth and make sure any cement has been wiped off the surface before you apply the strips. They are not repositionable, so try to get it lined up perfectly the first time.
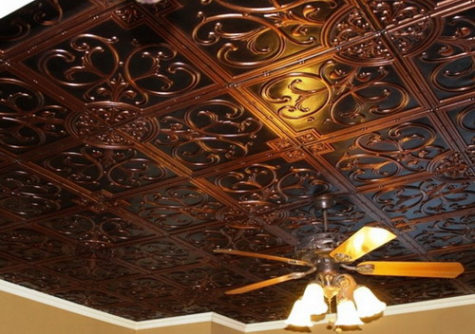
- The finished Ceiling:
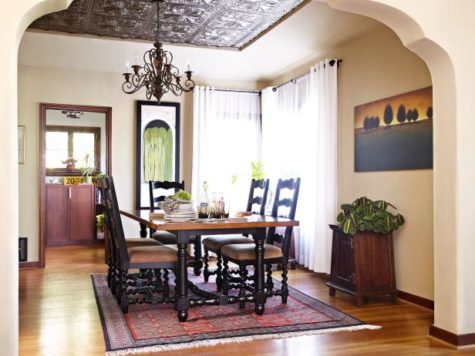
I think it looks pretty cool, and if you have nice sturdy tile to use, it’s probably not that difficult to do. I did, however, think that the cost of the faux tiles was kind of high, so I went on a search and came up with a super cool and not very expensive faux tile project that looked really fun. Best of all, the tiles could be thumb tacked onto cork board and installed as a back splash.
Susy’s Artsy Craftsy Sitcom is the only place I could find with a tutorial to these tiles. I love how pretty they are. Recycled crafts are one of her specialties. Embossing disposable cookie sheets is an easy technique and creates amazing art. Beautiful faux tin tiles!
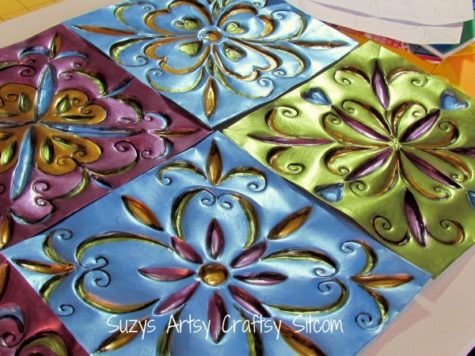
Make Beautiful Faux Tin Tiles With A Cookie Sheet
I’m always on the look out for interesting things to make out of the unexpected. Disposable aluminum cookie sheets can be found at your local party supply store. This simple embossing and paint technique turns a disposable pan into a work of art, and this project comes with free downloadable patterns!
For this project I used:
- 2 disposable aluminum cookie sheets
- Patterns ~ Faux-Tin-Tile-Patterns and More Faux Tin Tile Patterns
- A knitting needle
- Paintbrush
- Various metallic acrylic paints
- Spray primer
- A cork bulletin board
- Thumb tacks
Begin by measuring out and cutting (3 ea.) 7″ squares from each cookie sheet.
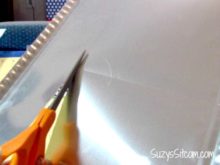
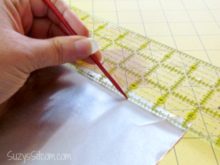
Use a ruler to measure them and mark the cookie sheet by pressing a knitting needle along the ruler, then simply cut them out with scissors. Take the ruler and score 1/4″ from all four sides of your square using the knitting needle.
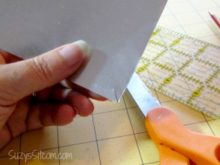

Use the scissors to clip a notch in each corner. Fold the metal over carefully along your scored seam. This will create a smooth finished edge for each tile.
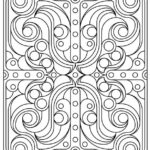
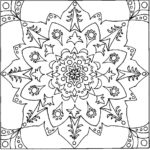
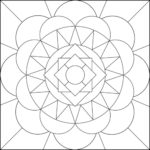
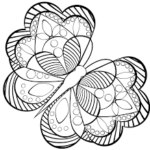
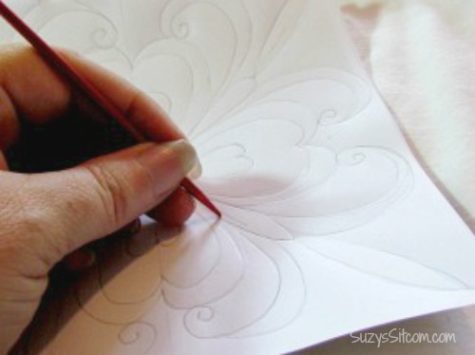
- Print out the patterns.
You can either use the ones that come with the tutorial, or surf the internet for ideas of your own. Here are a few that I found in a google search for “simple geometric patterns to color” :


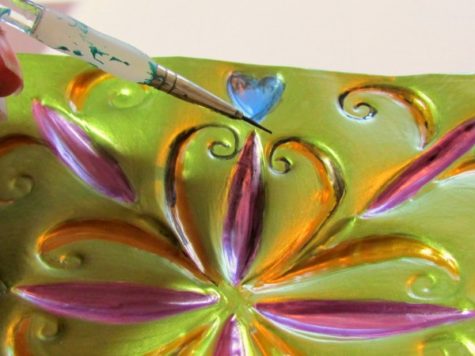
Lay the metal tile on top of a folded towel and use a knitting needle to press the design into the metal. For your convenience.
Here the metal tile is shown with the pattern scored into it.
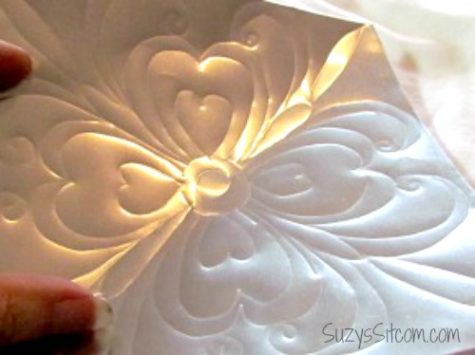
Keeping the tile on the folded towel, then use the end of a paintbrush handle to gently rub indentations into the metal where you want them. The more you rub, the deeper they can be, just be careful not to use a ton of force as the aluminum is very thin metal.
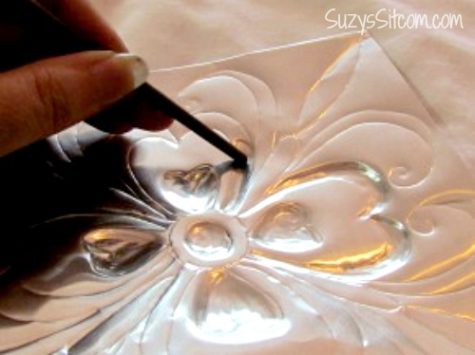
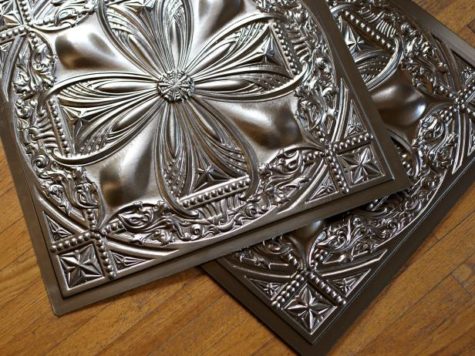
Once the piece is indented to your satisfaction, it is time to paint it. You could certainly leave it unpainted at this stage, but I’m all about color. Lightly spray each piece with a layer of primer. Once it is dry, begin painting the indented areas using metallic acrylic paint.
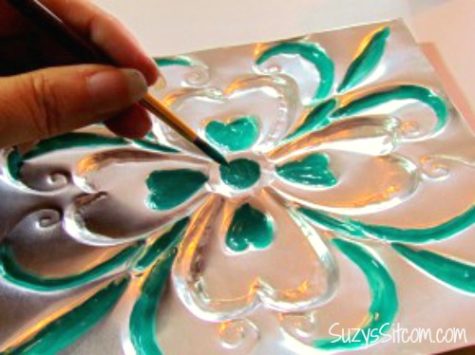
Once all the indentations are painted, add a base color to the raised areas. Add details by watering down some metallic acrylic black paint and adding it to lines and edges of the indentations, giving it an antiqued look.
I used the same color scheme for each tile, so that they all worked together.
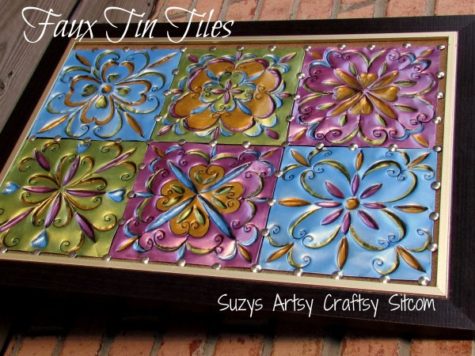
There are many ways to display your finished tiles. I chose to use a cork bulletin board and lined them up carefully, pinning them down with thumbtacks. This resulted in a great piece of wall art that will definitely surprise anyone when you tell them it started out life as a couple disposable cookie sheets.
Note:
I love this project. It does look time consuming, and the finished tiles are probably a bit flimsy. The idea of using thumbtacks to attach them seems easy and I like the way it looks. I bet this could be thumb tacked and also glued (just to be safe) to Styrofoam panels and attached to the ceiling.. That would be super cool and also add some great insulation.
Sources:
2 Responses to Refurbishing The Dining Room
Leave a Reply
- Radical Self Care Project Overview by shirleytwofeathers - No Comment
- Radical Self Care Image Gallery by shirleytwofeathers - No Comment
- It’s A Wrap by shirleytwofeathers - 3 Comments
- Something To Consider by shirleytwofeathers - 1 Comment
- Nurturing Your Precious Self by shirleytwofeathers - 3 Comments
Liana: A Prosperity Prayer
B. Joy Barrett: beautiful-turquoise-upholstered-accent-chair-for-living-room-with-within-colorful-accent-chairs-colorful-accent-chairs-transforms-the-look-of-a-room
Claudette Losier: Why Does It Work?
me: Make Your Own Violet Fire
Abdulrahman: Money Chant – Very Fast
Our current project began on July 4. We are exploring the concept and practice of Radical Self Care . Feel free to join in at any time!

Interested? You can visit our current project page, or you can take a look at the About The Project page if you are curious about the concept.
.
Please feel free to join in at any time! No experience necessary.

- Money Chant - Fast
- Money Chant - Slow
- Prosperity Plan
- Amazing Creator
- Cause and Effect
- I Am That I Am
- Spirit Rap
- Lakshmi Spirit Rap
- PowWow Spirit Rap
 Enter your question and receive the wisdom of the Occulatum. You may pose your question in any way that feels appropriate. The answer will come in the form of a small pop up. Try it - your life just might change for the better!


I think it's time to go shopping... maybe even buy some really cool stuff at my online shops!!

I am totally in love with the ceiling tiles… and am thinking of putting them on the ceiling in my hallway… If only I could just wiggle my nose and it’s all done!!
I liked the colourful ones. Good luck with that nose wiggling thing. 😁