Herbs
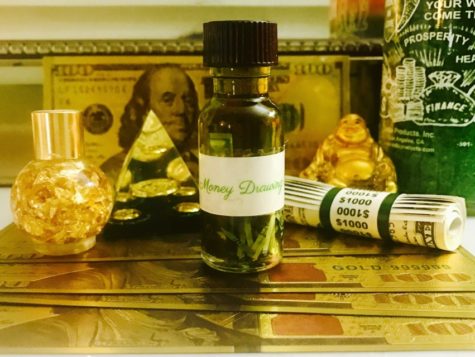
Aromatherapy for Prosperity
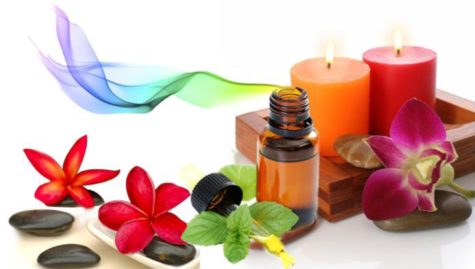
Pure Essential Oils have used in aromatherapy for thousands of years to attract riches and wealth for body, mind, spirit and emotions. The traditional use of aromatic oils to attract prosperity into one’s life has been practiced for thousands of years by some of the world’s most renowned cultures.
Aromatic wealth attraction formulas have often been inherited through one’s family lineage as a practice for passing on a wealthy family’s prosperity consciousness and to ensure the family’s continued attraction of riches.
Many of these Prosperity Oils are considered “holy” oils and have been used traditionally in sacred healing rituals, as well as ceremonial rites of passage and purification, to prevent and cure disease and for wealth attraction.
Prosperity oils are mood enhancers and aphrodisiacs which promote good feelings and an aura of attraction. As you know when you feel good, good things seem to naturally come your way. Like a magnet the Prosperity Oils work to help you attract wealth and abundance into all areas of your life.
Prosperity oils work on all four levels of being: physical, emotional, mental and spiritual. Their application either alone or in a synergy blend amplifies your electro-magnetic energy field and aligns you with the ‘sattva’ higher frequency energies of prosperity consciousness for wealth attraction.
Many of the Prosperity Oils are Spice Oils known for their strong curative properties. Throughout history health has been considered the most valuable commodity one could have. So any means to ensure continued “good” health was always highly valued and vigorously sought out.
Additionally for centuries Spice oils from the orient were traded as valuable commodities on the world market and considered more valuable than gold.
The Prosperity Oils are known for their powerful resonance with the frequency of wealth and reputed to attract wealth and abundance to those who use them.
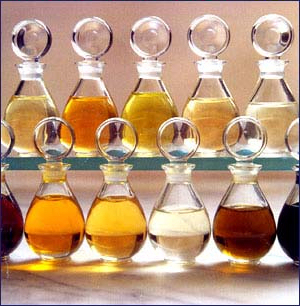
You can use the recommended pure essential oil alone or in a synergy blend with other prosperity oils to enhance their results and increase your prosperity consciousness for wealth attraction.

Key Prosperity Oils
- Cinnamon (Cinnamomum Zeylanicum)
It has a long tradition of use, having been produced in Sri Lanka for more than 2,000 years. Historically cinnamon oil was used in the Middle East and Orient for combating viruses and infectious disease. Cinnamon Oil dates back to the Egyptians! The essential oil promotes a healthy immune response, and may help maintain a healthy lifestyle regimen. Brings feelings of joy.
Caution: Cinnamon oil is suitable for skin application in weak dilutions of less than 1%.
Note: Cinnamon oil is made two ways, one with the bark and the other with the leaves. For the purposes of prosperity, I don’t think it matters which you choose. If you are using it medicinally, it might be good to do some research.
Cinnamon is said to attract wealth by transforming our core beliefs of limitation into abundance. It will release anger, frustration and abuse that we have buried that deal with our dependence and addictions.
It is good for those of us who really want to look at and change their belief systems or their old patterns. This will help those who need to release memories of physical abuse (including slavery) whether it is this life or a past life.
- Myrrh (Commiphora myrrha)
Myrrh is a very powerful antioxidant making it supportive for healthy skin. It opens our mind to receiving gifts. The benefits of Myrrh include the spiritual and emotional as well. Myrrh is very spiritual oil and has been used in religious ceremonies and rituals for over 5000 years!
Traditionally myrrh oil has been used for enhancing spiritual and emotional well-being. It is an excellent aid to the healthy functioning of the limbic (emotional center) of your brain.
In the Christian tradition, Myrrh was given to Baby Jesus along with Frankincense and Gold. So, Myrrh and Frankincense were considered luxury items used by the wealthy and highly regarded next to gold.
Myrrh releases fears, difficult experiences as it relates to us or the world. It asks us to be more accepting, trusting and non-judgmental of ourselves.
When we can love and trust ourselves more, than we don’t attract situations that are as painful and we learn to integrate our physical with our spiritual being.
Because this oil opens the heart chakra and is uplifting to the mind, it can relieve stress and relax the body. Place on the heart to release this patterning and embrace relationships (self and others).
- Spikenard (Nardostachys Jatamansi)
A valued oil since ancient times spikenard has often been used in anointing rituals and religious ceremonies. It was the foot balm Mary Magdalene used to anoint her master’s feet in the New Testament of the Bible. For centuries, Spikenard has been used traditionally in Ayurvedic health practices native to India, and was historically used to anoint those of high honor.
One of the greatest benefits of Spikenard oil is its uplifting aroma that can help promote feelings of relaxation and calmness. Throughout history, Spikenard has commonly been used to manage and uplift mood, or to help promote relaxation. Today, Spikenard oil can be helpful for promoting calm, relaxing, or uplifting feelings when used topically or aromatically.
Not only is Spikenard oil known for its uplifting properties, but it is also a very grounding oil. The grounding properties of Spikenard essential oil make it a popular choice for aromatherapy and meditation. The woody, musty scent of Spikenard oil makes it a useful oil for aromatherapy and massage, while the grounding properties make it useful for promoting relaxation during meditation.
Spikenard oil can be applied topically to help promote calm or relaxing feelings. When you want to experience the calming benefits of Spikenard essential oil, apply one or two drops to the temples or back of the neck. Before applying Spikenard to the skin, consider diluting the oil with Coconut Oil to help minimize skin sensitivity.
- Sandalwood (Santalum Album)
A known aphrodisiac sandalwood oil is used extensively in Indian temples, as well as in churches around the world in religious ceremonies for worshiping the divine.
Used for centuries in Hindu, Buddhist, and ancient Egyptian ceremonies, burning sandalwood was thought to relieve depression and restlessness, promoting spirituality and inner peace. The fragrance is still used today in funeral rites to instill comfort and acceptance among mourners.
Paradoxically, sandalwood oil has also been shown to be both soothing and stimulating. When used topically, sandalwood oil was found to have relaxant properties without causing drowsiness, according to research published in 2004.
- Ginger (Zingiber Officinale)
In the first century AD, ginger was exported to Europe via India as part of the lucrative spice trade. Ginger was used extensively by the Romans.
Ginger is one of those herbs that has a long history in East Asia for bringing luck. The oil can be rubbed on money, helping you to remember not to “burn” through it – the heat of the oil is thought to counter the ‘fire’ you feel to spend!
Supportive of the digestive system, ginger is commonly used to soothe, comfort, and balance digestive discomfort. Emotionally it gives us courage.
Did you know that the West African women in Senegal weave belts of ginger to arouse sexual interest in their partners? Wow, that’s interesting!
Its spicy and sweet aroma makes one physically energized.
The benefits of ginger are not lacking in the spiritual side of things either.
As a matter of fact, Ginger addresses “lack” and therefore would assist those who need self-confidence and motivation to put plans and ideas into the physical realm. In other words, it allows us to “digest” parts of ourselves that need to be changed so we can better serve ourselves.
We know that ginger has an aphrodisiac effect on the body as well. Therefore, it opens the root and sacral chakras and will release suppressed sexual energy.
- Spruce (Picea mariana)
Spruce oil is physically grounding and relaxing. Has a sweet and earthy scent that is fresh and fruity. It is also said to release blocks to prosperity and wealth.
Native Americans used Spruce for its purifying and cleansing effect as well as for medicinal, spiritual and practical reasons. They used it for protection and capturing the universal energy here on earth the earth plane.
Spruce essential oil will ground and balance the body and release emotional blocks.
By the way, any of the oils that are from trees (Western Red Cedar, Palo Santo, Cedarwood, Frankincense, etc) will provide stabilization, grounding and security to our being, physically and emotionally.
- Cedarwood (Cedrus atlantica)
This intense, deeply sensual scent goes hand in hand with attracting power to your life. It’s also a scent commonly associated with beauty and prosperity, likely due to the sensual and grounding notes in the aroma.
It’s also often considered a protective essential oil, so not only could it attract prosperity to you, but it can also protect you from misery and misfortune.
Wear just one drop in a diffuser around your neck, or anoint a single drop over your heart to help bring out your inner beauty and strength. You don’t want to overdo this powerful scent, and a single drop is plenty to help you attract the prosperity you desire into your life!
If you are feeling in any way tense, stressed or depressed try inhaling cedarwood essential oil from the bottle or put a few drops on a handkerchief and breathe it in whenever you feel the need. You can also get all the benefits of its aromatic properties by diffusing cedarwood essential oil in a diffuser machine.
- Patchouli (Pogostemon Cablin)
This oil has been used to relax the mind and clarify thoughts for hundreds of years. Originating in southeast Asia patchouli has been used for thousands of years. The early European traders were reported to have exchanged one pound of patchouli for a pound of gold.
An earthy, intense oil that helps inspire happiness and optimism. It can help sharpen your wits. It reestablishes mental and emotional equilibrium and energizes the mind.
Patchouli Essential Oil is primarily used to align the heart chakra with the root and sacral chakras. It does this by releasing obsessions, insecurities and jealousies and enhancing our desire to live a fuller life.
It also grounds the body and asks us to stay in the present moment rather than stressing about things that are beyond our control.
Much like bergamot, patchouli essential oil often has connections with attracting money. Supposedly, it’s also an oil that has the ability to attract love into your life… so you may want to mix up a little into your own custom perfume blend before you go out for the night!
- Bergamot ( Citrus bergamia )
Bergamot’s effects are uplifting as well as relaxing. It opens up the heart chakra, and allows you to release your need to be in complete control of a given situation. Does it really bring you success and money? Maybe – although it’s probably more related to your own confidence and uplifted state of mind!
Diffuse bergamot oil to bring yourself success and money – or add a drop to your wallet, while envisioning your wallet filling up with cash!
Another way is to anoint yourself with it to bring success and money – meaning add a drop to your finger tip, then rub it on each wrist, and a little bit on your forehead.
- Sweet Orange (Citrus Sinensis)
Orange Essential Oil is rich in the powerful antioxidant d-limonene and aids in maintaining normal cellular regeneration. Also has calming effects and may be used for feelings of peace.
Mentioned in Chinese literature in 314 BC oranges make a wonderful nerve tonic. A happy oil with the scent of sweet oranges promotes relief of physical and emotional tension.
Caution: May cause photosensitivity. Avoid exposure to direct sunlight after skin application for up to 12 hours.
Its fresh and citrus aroma is very uplifting to the body and mind.
Orange Essential Oil uses include the spiritual and emotional realm as well. Orange releases self judgment, obsessions and fears so the emotional body can be restored and balanced. When we release these negative and highly charged emotions we can see clearly again and make better choices for our life.
It will lend support by uplifting and promoting a positive attitude while calming our spirit. This oil will help those who tend to overwork, strive for perfection, but get aggravated quickly by intolerances or mistakes.
- Galbanum (Ferula Galbaniflua)
Traditionally galbanum has been used for making incense and is mentioned in the Book of Exodus 30:34 for this purpose. The ancient Egyptians highly favored galbanum as a holy plant aromatic and the reputed “green” incense of ancient Egypt is thought to be galbanum.
This magickal essential oil empowers positive sacrifice in the sense of giving up in order to change for the better. It also assists in one’s exploration of the self, but what it reveals can be shocking. This scent has traditionally been used for acquiring magickal skills such as divination, contact with angels, and communicating with the dead.
- Frankincense (Boswellia Frereana)
One of the ‘Holy’ oils from ancient times when it was considered more valuable than gold, frankincense oil has a powerful and enticing sweet, balsamic and warm wood aroma that sweetly sparkles with freshness and a hint of spice and incense-like overtones. It is uplifting and centering.
This precious oil was found in King Tut’s tomb in Ancient Egypt.
Frankincense Essential Oil helps to uplift mood and brings feelings of relaxation. It may help smooth the appearance of healthy-looking skin, and is useful in combination with massage after exercise.
Frankincense oil has been used to awaken our spiritual awareness and connect with spirit for 5000 years or more. It will help us release parts of our ego which hold us back from connecting with our soul, as well as feelings of unworthiness and insecurity.
Once we are able to connect with our spiritual side, we can embrace our true purpose in the world and become more spiritually driven rather than ego driven.
Use Frankincense during meditation to connect with spirit and stay centered in meditation.
- Clove (Eugenia Caryophyllata)
Clove bud oil shares similar antiseptic and anti-microbial qualities as cinnamon leaf oil. Use clove oil to help restore the loss of your inner drive and motivation. Its hot and spicy aroma brings clarity!
Caution: Clove oil is known to irritate the skin and mucous membranes and generally not for use in skin except in extremely weak dilutions of less than 1%. Please respect the power inherent in clove oil and use with extreme care.
Promotes a healthy immune response, and may support overall wellness. An important ingredient in Young Living’s Thieves blend, its principal constituent is eugenol.
Clove oil uses includes the spiritual realm as well. Clove is said to provide insight into our emotional discomfort.
How many times have something has happened only to find out later there actually was a hidden meaning behind it?
For me, all the time! But it was about eight years ago that I realized that every time I really just didn’t want to go to work that day, I would manifest something that would self sabotage!
We all have days like that, but that was how I learned to “take a day off”. I wasn’t honoring that I needed a day off and needed to just take it on my own! That taught me how to be nourishing to myself.
So, clove can help us in this respect. It helps us reflect on the causes of our sabotage; and assists us in releasing them because they no longer serve us!
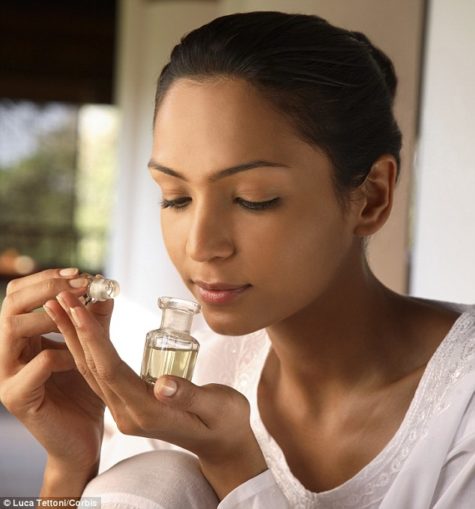
Using These Essential Oils
Plant aromatics have been used for thousands of year to enhance one’s prosperity consciousness for wealth attraction. The ways to use the different essential oils for drawing in money, abundance, wealth, prosperity, etc. is limited only by your imagination!
- Place a drop of your desired oil inside your wallet to draw in more money while visualizing your wallet filling with crisp $20, $50 or $100 bills!
- Wear your desired essential oil(s) daily to attract money. Put a drop on your skin or clothing or create a spritzer to wear like a body spray.
- Before going to a Casino, write the name of the casino on a piece of paper or print out a picture of it and use your desired essential oil on and around the name or picture with the intention of winning large sums of money!
- Anoint your paycheck to provide increases it bring about promotions.
- Anoint a green candle and burn it, with the intention of bringing more money into your home.
- Anoint your lottery tickets and visualize yourself willing unlimited amounts of money.
- Anoint crystals, amulets, talisman and other charms that you use in your manifestations for money.
- Anoint your cash, debit cards, credit cards, store cards, etc… as you use them to spend to ensure the money will return to you.
- Anoint your purse and/or wallet with your desired oil daily so you will never be without money!
- Mass Anoint your coins to reproduce rapidly with a spritzer or even pure drops of your desired oil.
An Abundance Affirmation:
Dispense 1-3 drops of your prosperity oil or blend onto a cotton ball. Close your eyes and begin to inhale the scent of your oil. Breathe deeply and allow yourself to relax. As you continue to breathe and inhale the scent of you oil your cellular respiration will deepen and your brainwaves will begin to slow down to a relaxed alpha state. When in an alpha state your subconscious mind I more open, and receptive to your suggestions.
Speak your affirmations aloud, with confidence and clear intention. Feel the spark of the divine flow of abundance, the embodiment and “consciousness of abundance” within you. And so it is!
I give thanks that I am rich and prosperous in every way.
Money flows abundantly in my life for which I am very grateful.
My abundance makes everyone better off.
I embrace abundance and abundance embraces me.
Money is my friend and ally.
I am aligned with the energy of money.
I relax into wealth consciousness.
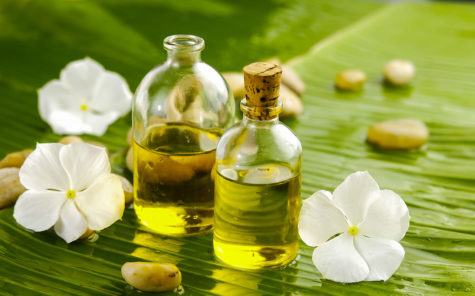
More Ideas for Improving Finances With Essential Oils
Here are some oils that can help – patchouli oil, lemon oil, rosemary oil, orange oil, cinnamon oil. When applied to the bottom of the feet helps root the body to earth and strengthen the basic energy center.
When applied to wallet or purse helps disintegrate poverty thought forms, and negative thought about money, and increase the prosperity energy of wallet or purse. Use blessed oils on wallet, check book, and credit cards to help disintegrate negative thought forms like poverty thoughts, excessive spending, and also to help neutralize contamination from paper money and coins that may have rubbed off onto you wallet or purse.
Use lemon and orange in office in either a diffuser or spray bottle. In morning or at night when no one is around add 50 drops lemon oil, and 50 drops orange oil into 4 ounces of water or alcohol and spray on carpets, in bathrooms and in showrooms or sales offices.
The smell will help neutralize any negative smells and the smell left behind will excite people, and they should buy more. Use lemon oil in offices to help increase blood flow to the brains of workers by using lemon oil in the daytime, will also help reduce computer operator errors.
Peppermint oil in the afternoon also helps to help nourish the mental capabilities, and help give energy for the rest of the day.
Use lemon, tea tree, eucalyptus to help neutralize airborne viruses and bacteria in the air to help reduce worker absences due to illness from colds and flu.
Use rosemary or patchouli on the hands and feet to help root the body to the earth, thus expanding the basic energy center. Use small drop of cinnamon oil on the bottom of the feet.
A Magickal Prosperity Oil
Way back when we were doing our Gypsy Magick project, we made Prosperity Oil. Here’s a link to that post:
Over at the Magickal Apothecary, there are a couple of recipes using essential oils for prosperity. First we have this one: Pumpkin Seed Prosperity Oil.
And secondly, there is this one, Earth Bath:
Sources:
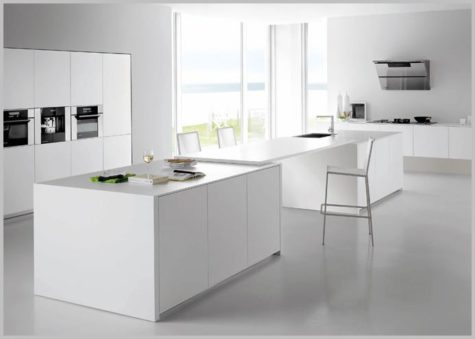
Kitchen Feng Shui
Your kitchen is the feng shui part of the home that nourishes and sustains life. Feng shui-wise, it is the most important part of your home. The kitchen is also a feng shui symbol of wealth and prosperity. This is why one of the first rules for good kitchen feng shui is to avoid having your kitchen close to the front door or to the back door, where the chi (good energy) can easily escape.
- We all know that the food we eat gives us energy.
For this energy to be of high and healing quality, the food needs to be prepared in a harmonious and well-organized kitchen; a kitchen that has a balanced flow of Sheng Chi, or good feng shui energy.
Good nutrition is good feng shui, so add healthy, organic foods to your diet, especially fresh fruits and vegetables. Besides the high nutritional value, organic fruits and vegetables carry strong healing vibrations from the earth; a quality of energy that your body dearly needs.
As we constantly exchange energy with our surroundings, a good feng shui kitchen leads to a good spirited chef, which, in turn, leads to good energy meals for a happy family!

Here are a few more basic good feng shui kitchen guidelines:
- The kitchen should have several levels of proper lighting, be airy and spacious, clean, bright and welcoming.
- For good feng shui, keep the kitchen simple and do not overload it with gadgets.
- Keep clutter at bay.
- Fresh flowers bring beautiful uplifting energy to your kitchen. Place a bowl with fruits, a vase of flowers, or a living plant on your kitchen table, windowsill, or wherever the layout of your kitchen allows.
Choose colors that blend well and feel good together. Feng shui-wise, the color yellow is a good choice for the kitchen, as it is good for your digestion. You can choose this color as light as “butter yellow” or as vibrant and strong as “squash yellow.”
The kitchen was considered to be the heart of the home since ancient times; use feng shui to make it a happy and healthy heart! Follow these simple feng shui tips and create a home where family and friends continue to share many beautiful moments together.
Even if your current kitchen is in a challenging feng shui location, you can still do your best by applying basic feng shui tips, as well as constantly creating good, fresh and vibrant energy full of love and care.
This good energy you create in your kitchen will come back to you tenfold, so it is an excellent investment in your health and well-being!
The location, design and feng shui basics of your kitchen are all considered very important in a good feng shui floor plan. In fact, your kitchen is part of the so-called “feng shui trinity” – the bedroom, the bathroom and the kitchen – because of its utmost importance for your health and well-being.
Location.. Location… Location…
So, what is the best feng shui positioning of a kitchen in a good floor plan and what is the worst one?

The worst feng shui positioning of a kitchen is the one where the kitchen is close to the front door and is the first view you see as you come in. Please note this does not apply to a kitchen further away from the door that you can partially see from the front entrance; this only applies to a floor plan where you literally come home through a kitchen.
Even in this case, there are better and worse scenarios. An oven that you can see from the front door, or aligned with the front door, is considered very bad feng shui. It is a bit better if you see a nice view of your kitchen, let’s say a kitchen island with some flowers on in, or a little herb garden for good feng shui.
Another bad feng shui floor plan kitchen location is a kitchen either under the bathroom or facing the bathroom door (a bathroom door in proximity to the oven or kitchen island is the worst).
The reasons here are plain common sense – the two energies should be kept apart and never mixed.
The last bad feng shui kitchen location is a kitchen very close to the staircase – these two energies are opposite each other and are best kept at a distance.
Moderately challenging kitchen locations are a kitchen very close to the laundry room or the garage, but these scenarios are much easier to work with and improve.
There are several elements that are important in the actual design of the kitchen. The designer triangle principle – where the oven, the fridge, and the sink form a triangle – is good feng shui and well-known to many. Less known, but very important feng shui factor is to avoid having your oven positioned in the way where you cook with your back to the door.
- How important is the stove or oven mouth direction for feng shui?
An important feng shui point regarding the stove location and positioning is to have the stove placed in a way that allows you to have a good view of your kitchen. Cooking with your back to the incoming flow of energy is not good feng shui.

Unless you can actually change the location of your stove, let’s say if you plan to use feng shui in renovating your kitchen soon, I would suggest not worrying about the direction of the oven mouth.
The first and most important aspect in feng shui regarding the stove is its location in the bagua map of your home.
As the stove represents the fire feng shui element, it is best to have it in a location that is compatible with or is not damaged by its fire energy. Usually, South and Southwest are considered ideal feng shui spots for the oven.
- When a kitchen door faces the bathroom door:
Having the kitchen and the bathroom doors face each other is considered very bad feng shui, indeed. One does not need to know much about feng shui to intuitively understand that this is not a good set-up for a healthy home.
When two doors are opposite each other, the feng shui energies flow very fast in and out of the spaces that are guarded by the doors. This is why another direct door alignment – the front door aligned with the back door – is also considered bad feng shui.
What you have in the case of a bathroom door facing the kitchen door is the energies of the bathroom (release, purification, letting go, etc) mingling with the precious energies of the kitchen (nourishment, cooking, warmth, love & support).
In practical terms, you have the undesirable odors from the bathroom affecting the energy of the kitchen, which is the heart of the home. In more complex terms, you also have the energies of the water feng shui element of the bathroom going against the fire feng shui element of the kitchen.
It will be harder to maintain optimum health and loving communication levels in a house with this set-up, but it does not mean you cannot do your best to even slightly improve the situation.
Your goal is to create as much division as possible between the kitchen and the bathroom, and here are 5 simple feng shui tips to consider if you cannot move out or plan a renovation.
- Always keep the bathroom door closed. This will help keep its energies from spreading into the whole home, and especially into the kitchen.
- Be sure your bathroom is always clean and a pleasure to be in, meaning it has really good feng shui energy.
- Find a creative way to define the boundary between the bathroom and the kitchen. For example, you can experiment with a divider screen, a tall plant or a bamboo curtain (if your kitchen has an open entryway) or have doors with no glass (if the kitchen doors have glass inserts).
- Choose different wall paint color on the two opposing walls — the kitchen door wall and the bathroom door wall. This can work well to define and energetically separate the two areas.
- Creating a focal point in between the two areas will draw the energies away from mingling and bring a sense of beauty. Work with big scale art and choose colors and images according to the feng shui bagua requirements for each specific area.
Once you understand what needs to be done and experiment with various solutions, you might find many more ways to improve your current situation.
If you own a home, look into the possibility of at least a minor renovation to remedy this situation. And, if you rent, you will sure be wise to avoid this set-up again! Understanding what makes a good feng shui floor plan and what is the best placement of all rooms in the house can help you make good decisions in the future.
If your kitchen is very small
The kitchen is considered the heart of the home not only in feng shui, but in many, if not all, old cultures. Feng shui wisdom adds the element of the state of your kitchen reflecting the state of your health; as well as attracting the flow of wealth and abundance into your life.

The kitchen is also a part of the very important feng shui triangle – the bedroom, the bathroom and the kitchen – which is directly connected to the state of your health and well-being.
What do you do, though, when your kitchen is very small and it seems like you can never keep it clean or find enough space for all your kitchen supplies?
If you have a difficult time with people putting things away and keeping it clutter free, it may mean that you have more items than your kitchen can accommodate.
Decide on the very minimum you can get away with and have “a place for everything and everything in its place”. I know this is much easier said than done, but see if you can pack some items away to improve the feng shui energy of your kitchen.
One feng shui decor element that usually works for a small kitchen is, strangely enough, to have some open display shelving. This little feng shui trick opens up a small, confined space and lightens the energy by creating a better flow.
Of course, with this comes the added issue of keeping the open shelves clutter free. It is good to know, though, that for good feng shui your whole space has to be clutter-free, be it visible or not.
You can also consider repainting the wood cupboards in a lighter color, such as white or pale butter yellow , whichever color works best with all the other elements in your kitchen (the countertops, the floors, etc.)
With a small kitchen smart lighting becomes crucial, so be sure to not limit yourself to one boring, energy draining typical ceiling fixture. Experiment with different levels of lighting and sense the change in energy each one of them brings. For a space to have a better quality of energy, at least 2-3 layers of lighting are recommended; this is especially important for a small kitchen.
Mirrors, of course, are one of the best feng shui solutions for small spaces and are sure called the aspirin of feng shui for a good reason! Find a way to place a mirror in your kitchen so that it brings more light and visually expands the space.
Be sure to also have some fresh energy in your small kitchen, be it a small container garden with aromatic herbs, or just some fresh fruits on display.
Most of all, keep it clean and keep it simple, and find many ways to fall in love with your very small kitchen. It is definitely possible.
Feng Shui of Kitchen Plates Shapes and Colors
Round is the feng shui shape with the most flow, or harmonious movement. This is not to say that square shaped plates are bad feng shui, not at all, just different energy, slower, more grounding.
- What colors and shapes of plates should I use in my kitchen for good feng shui?
- What plates should I use in my kitchen for good feng shui?
- Are round dishes better feng shui than the square ones?
- What color is best feng shui for plates, or does it depend on the kitchen location?
This is an interesting kitchen feng shui question, but I have to start with this: there are really no shoulds in good and successful feng shui applications.
It is always best to go with what you love and are drawn to.
This especially applies to your kitchen and your bedroom, as both places, feng shui-wise, are directly connected to your well-being; and only you know what makes you feel happy and nourished. Start with your own preferences, then see how they compare with the general feng shui guidelines.
In the course of understanding deeper levels of feng shui, you may feel drawn to make subtle (or not so subtle!) adjustments to your feng shui choices, but first always be guided by your feelings.
So, to answer your question with another question I would ask: “What plates do you like the most in your kitchen? What colors are you drawn to the most while dining?”
Personally, I use white plates, mostly round ones. I think white color it is the best energy foundation for the beauty and nourishment of the food that is served on these plates. You will also notice that good restaurants always use white plates.
To me, a clean white plate is like a fresh canvas waiting for the next masterpiece.
Round is the shape that has the most flow or harmonious movement, thus a fresh energy most suited to maintain, present and enjoy food. This is not to say that square shaped plates are bad feng shui, just a different energy that is slower and more grounding.
I guess one could say that square shaped plates make you slow down more.
Color-wise, I would say the best choice would be based on your personal preference, unless you have a big collection of dishes on display. In this case, you would like to have colors appropriate for your kitchen decor scheme, as well as for the bagua area the kitchen is located in.

Generally, blue is a good color for dishes when one is trying to lose weight; while red, orange and yellow will stimulate the appetite.
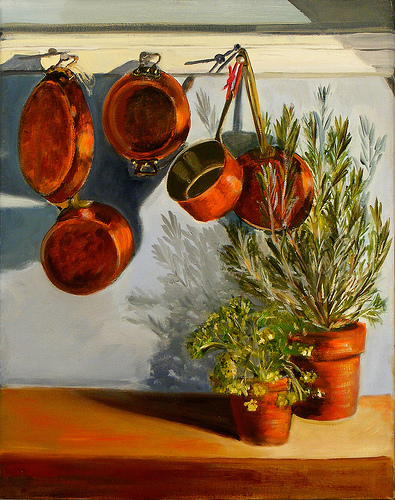
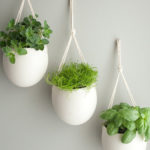
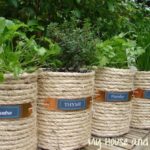
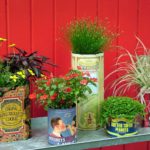
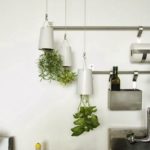
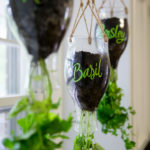
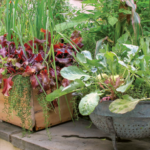
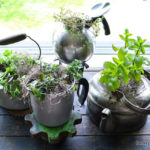
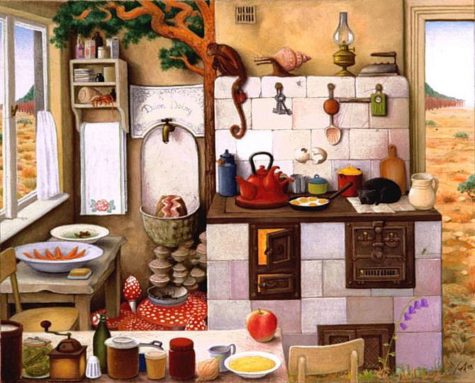
Herb Garden Tips for Feng Shui Kitchens
If you love your fresh herbs, I know you will find the best feng shui spot for the little herb garden in your kitchen. Best containers are of the earth feng shui element – try to avoid metal or plastic containers.
One of my most favorite ways to create great energy in my kitchen is with aromatic herbs.
Creating your own little herb gardens can be a really enjoyable process with numerous benefits. I enjoy cooking, so the smell of fresh herbs in the kitchen is heaven for me (great feng shui!)

I love the energy that fresh herbs bring into the kitchen.
Basil, rosemary, thyme, mint and lavender are my all-time favorites, but I also try to include something new every year. Check the 5 best herbs for a cook’s container garden for some great tips.
The vibrant, alive energy of herbs connects you to what matters the most – the simple, the good things in life. It’s a reminder of the nourishing power of the earth in all its beauty.
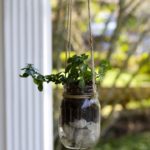
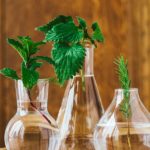
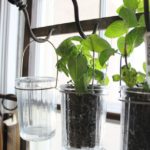
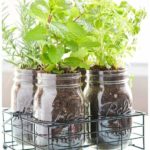
Growing Herbs in the Kitchen
If you want to enjoy a continuous supply of garden-fresh herbs in your own kitchen, keep these tips in mind.
- Choose plants carefully.
Opt for small-leaved herb varieties when possible, as they do the best indoors. In basil, for instance, you’ll find Fino verde, which has half-inch leaves. Some herbs naturally have small foliage, like oregano.
- Where to get the plants?
Buy established herb plants in the nursery or via mail-order, or grow your own from seeds or cuttings. You can grow basil year-round by periodically letting older plants go to seed and then scattering the seeds in the pot. To grow mint, use root cuttings.
Start herbs from seed in a soil-less potting mix in a warm location. Hasten germination and get the plants off to a good start by growing them on a seedling heat mat. Once the herbs reach two inches high, take them off the heat and repot them in regular potting soil.
- Provide plenty of light.
Most herbs grow best in a bright location, such as near an unobstructed southern window. Eastern and northern windows can also work, if you provide supplemental light from full-spectrum lighting. Western windows receive afternoon sun, but get warm and may burn foliage, especially in the summer months.
If your kitchen is windowless, grow herbs in a hydroponic growing system that comes with its own special lighting.
- Ensure air-circulation and cool conditions.
Herbs grown in stuffy, warm rooms attract pests like scale insects and mealybugs, and they grow weak and spindly.
“Herbs don’t like it warm in winter, even if you do, so place them in cool areas, such as on windowsills,” says Denise Schreiber, greenhouse manager for Allegheny County Parks in Pittsburgh and author of Eat Your Roses. “Air circulation is also necessary,” she says. “Locate the herbs near an overhead fan or in an area of the kitchen that receives air movement from another room.” Cracking windows open occasionally also helps.
- Watch watering.
Avoid overwatering your indoor herb garden or letting pots sit in trays of water, as soggy soil will quickly lead to root rot. Water when the first inch of soil dries out.
- Rotate often.
Leggy, weak growth is a common problem with indoor herbs. Help ensure they grow straight and strong by rotating the plants once a week so that all sides receive adequate light.
- Fertilize monthly.
Keep your herbs growing healthy and strong by feeding them on a regular basis with a half-strength solution of a well-balanced, liquid fertilizer, such as a 15-15-15.
- Prune regularly.
Fortunately for your cooking, herbs require frequent pinching for the plants to stay bushy and healthy, so make sure to prune often. The more you pinch, the more the herbs will grow, and the tastier your cooking will be.
- A Few Helpful Growing Tips
When buying herbs for indoor growth, it’s best to purchase plants that haven’t already been growing outside. The shock of bringing them indoors can cause trauma and affect growth and production. Remember that winter is a natural resting phase for plants, so it’s unrealistic to expect abundant growth. Try minimal watering and let them do their thing. Clipping them regularly will promote further growth so clip away—remember, you’re growing them to use!
A common mistake is to plant all herbs in one container. This inhibits growth and in the case of an invasive herb, you’ll likely witness an herbal blitzkrieg in your container, so plant each herb in its own container. Containers should have ample drainage holes in the bottom and since herbs can be susceptible to fungus, allow them to breathe by using terracotta pots, no smaller than six inches in diameter. To allow further ventilation, place pots in a container of small pebbles.
Always use a high-quality organic potting soil that contains vermiculite or perlite for adequate drainage. Avoid using soil from the outside, as it contains organisms that are controlled by the outdoor environment. Rosemary, thyme, and basil prefer soil with more lime, so adding a spoonful of crushed eggshells to the soil is beneficial. Though herbs are hearty, they do like to be fed once in a while—especially when growing in limited pot space. Herbs are grown for their leaves not for their flowers, so any fertilizer you give them should promote leaf growth, not blooms. One of the easiest ways to feed your herbs is to add one tablespoon of fish emulsion to a gallon of water and use this every time you water.
Water the herbs at the base, where the stem meets the soil—don’t water the leaves. Water once and let the water drain completely through, then repeat. How often your herbs need to be watered is a matter of watching and learning to read each individual plant. A good rule of thumb is to let the soil dry between waterings. Remember, one of the biggest mistakes in watering herbs is over-watering them; herbs don’t require as much water as a typical houseplant. If you see leaves turning yellow, this is the first sign of over-watering.
If your herbs require supplemental light, clamp-on reflector lights with fluorescent bulbs work best. Clamp the lights to the pot, four to six inches away from the plant. If you see brown spots on the plant, this is a sign of burning and the lights either could be too close or may have been used for too long.
With winter approaching, there’s no need to go without fresh ingredients for warm stews, soups, and herbed crusts and breads. And now is the right time to start growing herbs for any Thanksgiving cooking you may have in store. With minimal space and perhaps some artificial light, a winter garden could provide plenty of fresh winter fare.
The Easiest Herbs to Grow Indoors
If you love your fresh herbs, I know you will find the best feng shui spot for the little herb garden in your kitchen. Be mindful of the containers you use – the best containers are made of earthenware and bring the earth feng shui element; try to avoid metal or plastic containers.
Good luck in creating an aromatic herb garden in your very own kitchen!
- Lemongrass
Technically, you don’t even grow lemongrass, in that it’s not planted in soil, making this one incredibly easy herb to keep in the house. When buying a stalk at your local market, look for plenty of stem and make sure the base is intact. Trim the top and place the stalk in a couple inches of water. The stalk will produce roots and dozens of new shoots.
- Chives
These are one of the easiest herbs to grow indoors, as they do not require much light and are prolific in their production. Chives are easiest to start from an already-established plant. Just pull up a bunch from the established plant (including the roots), place it in a small pot half-full of potting soil, then cover the roots up to the crowns with more potting soil. Cut about one-third of growth off the top to stimulate new growth.
- Mint
Both spearmint and peppermint literally grow like weeds. They’re both very hearty and very invasive, meaning that they can quickly choke out other herbs. Keep in mind that a lot of spearmint is required to produce the same minty effect as peppermint, so if you’re growing it indoors, where space is limited and harvesting is frequent, peppermint is the better option. Start your peppermint plant with seeds—not root or leaf cuttings—in a small pot full of potting soil. Peppermint will thrive in shade, but make sure it’s in a spot where it gets at least a little bit of light each day.
- Parsley
Parsley is one of the most commonly used herbs and is very easy to grow, though the seeds can be difficult to germinate and may take up to two weeks to see results. The good news is it doesn’t require much light or maintenance once you get it started. Keep in mind, though, that this plant is a fairly slow grower, so initial clippings will not harvest a lot.
- Vietnamese Coriander
Coriander is the seed of the cilantro herb. This particular version of coriander is easier to grow than regular coriander, as it’s very hearty and very reliable.
- Oregano
The Greek variety of oregano is easiest to grow; however all oregano requires six to eight hours of sunlight per day, so a well-lit window—particularly one with southwestern sun exposure—is best.
- Thyme
This is another herb that requires six to eight hours of sunlight per day, and it may even need supplemental light. My favorite is lemon thyme, which can be used in place of regular thyme and has a unique citrus-like flavor and isn’t nearly as easy to find as other varieties in stores.
- Rosemary
This herb is very easily over-watered. It prefers to remain on the dry side and does not need particularly rich soil. Several varieties are available; some are bush-like and some are more of a creeping plant. Choose an upright variety like Tuscan Blue or Blue Spire. These will remain more compact, making them a better choice for indoor growing.
- Basil
This is a favorite to use when cooking. However, this herb is one of the most difficult to grow, especially indoors during the winter months. The best varieties for indoor growth are the Spicy Globe or African Blue. The African blue won’t have the wide, bright-green leaves you may be used to seeing in grocery stores; it’s similar to Thai basil with its narrower leaves and bluish-purple stalks.
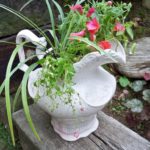
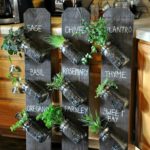
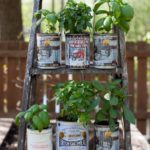
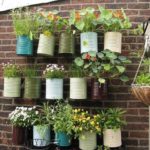
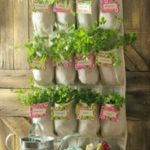
A gallery of ideas:
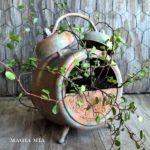
Here are a bunch of ideas for nifty kitchen garden containers:


How Can I Feel the Feng Shui Energy?
Good feng shui energy is all around you, it comes in all forms, shapes, and sizes. Basically, you can test the quality of any given energy by the way it feels. You know the feng shui energy is good when you test it with the basic question: does it feel good?
A room does not necessarily have to look perfect in order to have good feng shui energy. No amount of wind chimes, fountains or lucky bamboo plants will bring good energy if the overall good feel of the room is missing.
Creating Good Energy In The Kitchen
Now let’s focus on your kitchen, as this is an ultra important space for your home, as well as for your own well-being, of course! A house with a happy kitchen is a happy house indeed! The kitchen was always considered the heart of the home in all ancient cultures, and feng shui, being an ancient art, is no exception to this rule!
Good feng shui in the kitchen is as important as good feng shui in your bedroom, and for the same obvious reasons – your body is deeply connected to the energy of your kitchen.
There are many ways you can improve the quality of feng shui vibes in your kitchen. It starts with the basics of a clean kitchen with a good flow of air and lots of natural light. Then you can go deeper and find out which bagua area your kitchen is located in so that you can strengthen its feng shui.
Feng shui-wise, the best bagua areas for the wood element of the herbs are East, Southeast and South, but the very first criteria would be the energy flow in your kitchen, including the natural light.
Feng Shui Tips for A Soulful Kitchen
Feng shui in the kitchen is a fascinating topic with almost never-ending options and possibilities in creating good energy in this special area of your home. Of course, in feng shui-ing your kitchen you always start with the basics – clean, clutter clear, follow the logical flow – and then move on to a bit more advanced feng shui levels.
However, what I keep noticing in my feng shui practice is many kitchens with a predominant energy of coldness.
Kitchens that visually look absolutely gorgeous and shine with the latest appliances, but have a very distinct feng shui energy of coldness.
It is very sad if you think about it, as your kitchen is the last place in your home where you would want cold energy.
Actually, no place in your home wants cold energy. Not really, (other than your fridge, of course!) Fire and nourishment are the keywords for a good feng shui kitchen, and soulfulness and warmth are the absolute components to make it work.
Ancient people considered kitchen to be the heart of the home and the keeper of the soul of the space. In many areas, images of special gods/deities are placed in the kitchen and asked to look over the well-being of the family. In feng shui, there is even a deity called the Kitchen God that is much feared amd respected (in traditional feng shui applications).
Now, we kind of think the same about the kitchen.
But mostly in terms of “must-have” latest appliances, gadgets and a seamless look – one might wonder from looking at many home decor magazines if this is a kitchen or a clinical room. We have lost the feeling of the soul of the home and the magic that is created in the kitchen.
If we are to get in touch with it again, to invite it back into our homes and our lives – feng shui wisdom suggest you spend some time re-creating your kitchen.
Ask yourself:
- How does your kitchen feel?
- How does your kitchen smell?
- What is it telling you in the morning?
- And at night?
Experiment with many easy feng shui ways to shift the energy in your kitchen – be it with better lighting, warmer colors or mouth-watering kitchen art. Bring some fresh herbs into your kitchen, display fresh fruits, water bottles, etc, make your kitchen alive with energy.
Use feng shui kitchen tips to invite the energy of soulful nourishment and joy back into your home. Explore the use of colors, shapes, scents, etc, explore and play with them in a creative way. It is your kitchen and it is deeply connected to the quality of your health and your overall well-being.
After all, a home without a soul is not a home, really. Just a structure waiting for more, waiting for a bigger purpose to be revealed. Help your home find that soulful purpose. You will be the one to greatly benefit from it.
Sources:
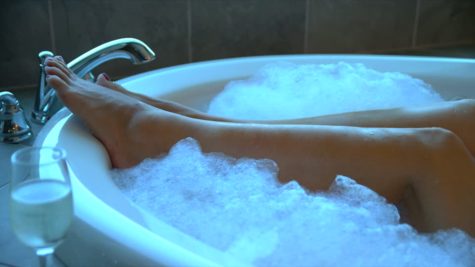
Luxuriously Delicious Ideas For The Bath
In yesterday’s post, we learned that Flower cleansing baths purify and uplift. So, I thought it might be luxuriously fun and interesting to explore the world of do it yourself bath products.
Some of the oldest beauty treatments in the world incorporate flower petals and oils. Flowers not only enhance the fragrance of DIY recipes and can be used for aroma therapy, but they also have chemical properties that can be used to benefit your skin and hair. On this page, you’ll find different ways to add some flower power to your DIY beauty routine.
Some of these recipes use oils, fresh petals and dried flowers. Regardless of whether you’re picking your own flowers or buying them, it’s important to avoid blooms that have been treated with pesticides. Look for organic ingredients whenever possible, because commercial flowers can be subjected to particularly heavy pesticide treatment.
A Floral Facial
Facial steams can help improve circulation to the face and open pores, while this blend can help soothe skin. Plus, treating yourself to a facial steam can be incredibly relaxing. The petals of the calendula flower, also commonly called marigold or pot marigold, are anti-inflammatory. The chamomile has been shown to have calming properties.
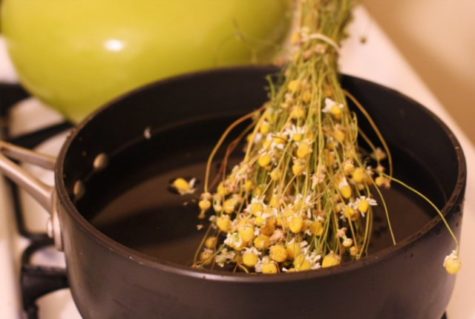
Ingredients:
- 1/4 cup dried calendula petals
- 1/4 cup dried chamomile flowers
Instructions:
Boil 2 quarts of water and remove from heat. Add the flowers and let them steep for two minutes. Then, place your face at least 12 inches over the pot (getting too close can burn), and drape a towel over your head to create a tent over the pot.
For an even more relaxing experience, you can add a few drops of lavender or peppermint essential oil. Allow the steam to bathe your skin for a minute and then come out for a few breaths of fresh air. You can repeat this process about five times.
After the steam, you can rinse your face with cool (not cold) water or a mild cleanser, and follow with a moisturizer.
Oatmeal Almond Facial Scrub
“If you wouldn’t eat it, then don’t put it on your face.” Skin is porous, and everything that goes onto it eventually makes its way inside. Since all conventional facial cleansers, scrubs, and moisturizers are full of toxic chemicals, it’s best to avoid them completely. By sticking with edible ingredients – items that you already have in your kitchen, or can buy easily – you’ll rest assured knowing that you are not harming your body over the long term.
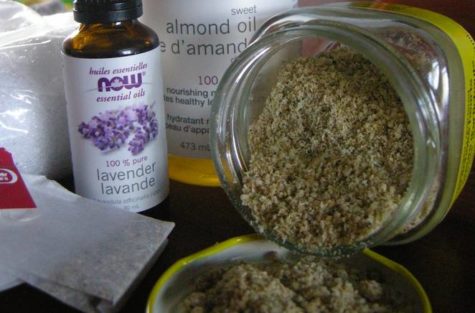
Best of all, there are no nasty plastic microbeads to contaminate the local water supply.
This homemade facial scrub leaves your skin feeling refreshed and silky smooth. The oatmeal exfoliates, the almonds moisturize, and the lavender-chamomile combination is soothing.
Homemade Oatmeal Scrub with Almonds, Lavender, and Chamomile
- 1/4 cup raw almonds (or 2 tbsp almond flour)
- 4 tbsp oatmeal
- 1 tbsp cornstarch
- 1 tbsp chamomile flowers (I used the contents of chamomile tea packets)
- 2 tsp sweet almond oil + 5 drops lavender extract — OR — 2 tsp lavender oil
Chop raw almonds in a spice grinder or food processor until they are a fine meal. Skip this step if using almond flour. Add remaining ingredients and blend well until mixture is a soft granular powder. To use each morning, put half a tablespoon of this mixture in your palm and add just a couple of drops of water. Rub hands together to make a paste. Gently rub and massage it onto damp skin in circular motions to exfoliate. Wash off with warm water and a warm, damp washcloth; end with a splash of cold. Keep the scrub in a well-sealed glass jar and it will stay fresh for months.
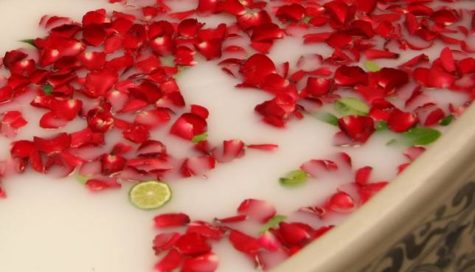
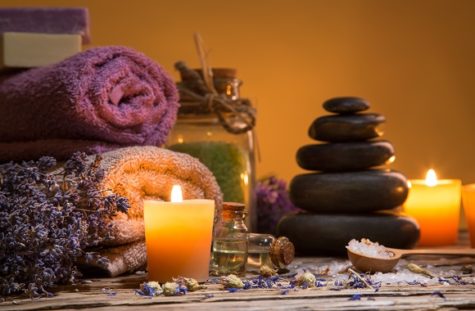
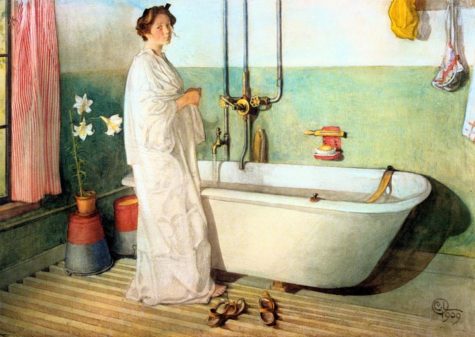
Luxurious Baths
People have been bathing in various things for years; Cleopatra bathed in asses’ milk while Mary queen of Scots preferred to soak in a tub of hot wine.
Even today most of us won’t even contemplate getting in the tub without adding a little something to it! Unfortunately, most of us end up adding a few cheap bubbles that have absolutely no value to our skin what so ever, and why when we can transform our bath into a heavenly therapeutic experience.
A Delicious Milk Bath
A milk bath is a bath taken in milk instead of water. Often other scents such as lavender, honey, and essential oils are added. Cleopatra, Elizabeth I of England, Elisabeth of Bavaria, and others have historically acclaimed the beautifying benefits of these baths.
Cleopatra was definitely onto something when she indulged in daily beauty treatment milk baths. It turns out the natural lactic acid found in milk is a form of alpha-hydroxy-acid (an ingredient which can be found in some of the most expensive exfoliating products). This type of acid gently dissolves proteins to exfoliate dead skin cells, which reveal fresh, younger looking skin underneath.
The lactic acid found in milk is extremely mild, so don’t worry, it won’t strip or irritate the skin. In fact, milk is quite soothing on dry skin.
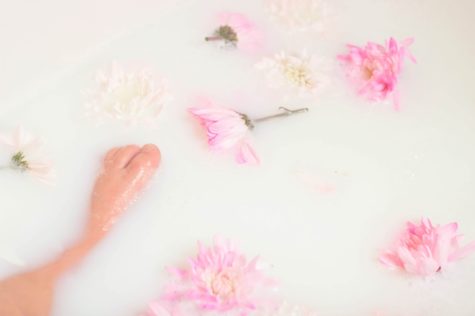
Milk is also rich in vitamins and minerals — most notably Vitamin E and zinc — which help slow the process of aging and retain skin’s natural elasticity.
Milk baths seem to be making a comeback in modern times as well. Many upscale spas in major cities offer a number of milk treatments such as hot milk and almond pedicures! That sounds divine!
But you don’t have to spend a lot of money at a fancy spa (or travel back in time) to reap the benefits of milk in your beauty routine. Milk bath recipes are some of the quickest, easiest homemade bath products you can make.
A Simple Scented Milk Bath
Here is a simple recipe that you can mix up in minutes and add your own scent to as well.
Ingredients
- 2 cups whole powdered milk
- 1/2 cup cornstarch (soothes and relieves dry, itchy skin)
- 1/2 cup baking soda (skin softener)
- Essential oil of your choice (I put in about 10 drops of lavender)
Directions
Combine the powdered milk, cornstarch and baking soda in a large glass container. Put the lid on and shake the jar until the powders are completely mixed.
Remove the cap and add the essential oil. Re-cap the jar and shake to combine. Let sit for 24 hours before using, to let the ingredients and the essential oil completely combine. Store in a cool, dark place.
To use, pour 1 to 2 cups of your milk bath under hot running water. Lie back and relax!
A couple of tips:
- This is one time when lowfat is NOT your best bet. The higher the fat content of the milk, the more nourishing it is for you skin.
- Goat’s milk and cow’s milk have higher amounts of fat which provides more conditioning, but you can also use rice, soy or coconut milk (great alternatives for vegans.)
- Also, lactose intolerant folks don’t have to worry about bathing in milk. The milk isn’t being drunk, so there won’t be any digestion problems.
Make up your own recipe:
It’s very simple to experiment with your own recipe, all you need is powdered or fresh milk. You could even experiment with a can or two of goats milk. From this base, you can branch out and add one or more of the following:
- Honey
- Oatmeal
- Essential Oils
- Herbs – fresh or dried
- Spices – nutmeg, allspice, etc
- Flowers – fresh or dried
- Seaweed
- Sea salt
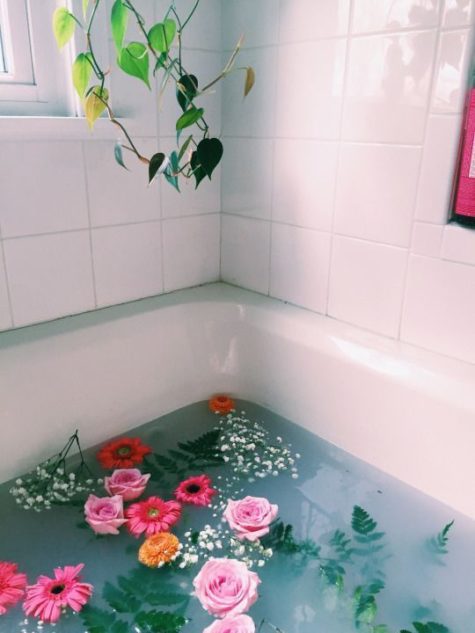
A Floral Feng Shui Bath
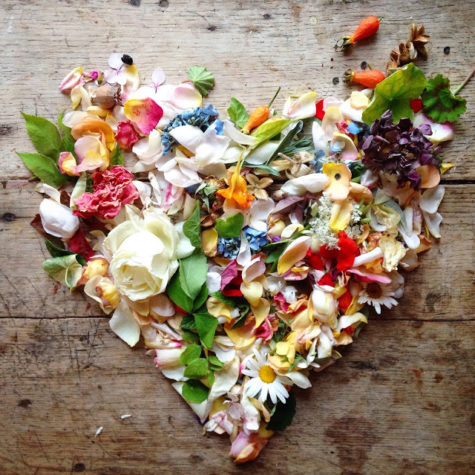
To create essential yang chi and clear your mind and rejuvenate your body, simply bathe in a bathtub that has been sprinkled with the petals of at least five different flowers in the five colors of the five elements. There should be pink, yellow, white, blue, and green petals from flowers or herbs, like rosemary, in your bath. You may also wish to include Bach flower essential oils in your bathe to help create a beautiful aroma as well, or use fragrant flowers such as lavender, jasmine or gardenia to perfume your water. This uplifting ritual will help to infuse your body with beautiful yang energy and soothe your mind.
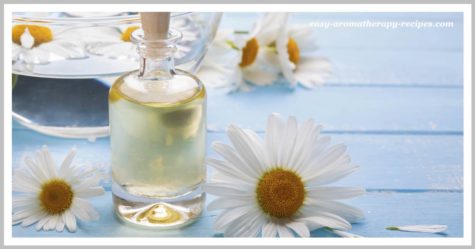
Luxuriously Aromatic Bath Oils
Adding essential oils to your bath water is one of the best aromatherapy treatments there is, more aroma molecules are released from the oils whilst in the bath than during a massage. As you soak in the bath the hot water softens the skin which in turn speeds up oil absorption, this allows the essential oils to become more effective and potent on both the mind and body.
They are not just a simple and easy way to add a touch of luxury to your bath; they will moisten and nourish your skin, along with treating the everyday ailments that you may be suffering with.
You will also notice the aroma of the oils is so much stronger in the warm water; it’s almost like sniffing a bunch of flowers. So the next time your thinking of having a bath add a few drops of your homemade bath oil, lie back, close your eyes and enjoy.
The basic principle in making bath oils is to select essential oils for their properties and fragrance, then add them to 4 tablespoons of base carrier oil.
The easiest base oils to use in your homemade bath oils are the light base oils such as Castor Oil, Almond Oil, Jojoba Oil or even simple Sunflower Oil.
Pour your base oil into a dark or clear glass bottle or jar. If using a clear glass jar you will need to protect the oils from waning by storing the finished oils in a dark place, a bathroom cupboard is perfect for this.
Add about 20 drops of your chosen essential oils cover and shake well.
Leave the homemade bath oil to blend and mature for about 2 weeks before using.
How To Use Your Bath Oils
- Simply add 1 tablespoon of scented oil to the bath and swish around to disburse. Once in the bath use a sponge to massage the oil into the skin.
- For an extra beauty treatment whilst soaking in the bath, mixing a few elderflowers with some live yogurt will make a great little face pack that can clear the skin and help prevent wrinkles.
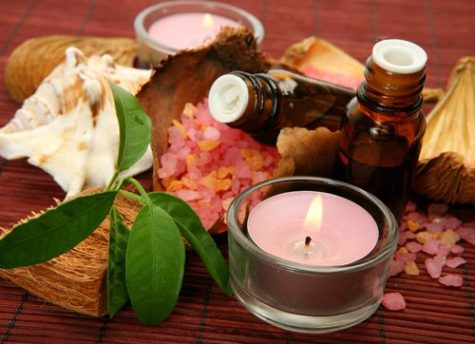
Bath Oil Recipes
Happiness Bath Oil
This homemade bath oil leaves you feeling warm and happy inside!
- 4 tablespoons of base carrier oil combined with:
- 10 drops Sandalwood
- 5 drops Jasmine
- 5 drops Rose
- 5 drops Bergamot
This bath oil has a wonderfully rich and floral fragrance. A simple combination that will leave you feeling very calm and relaxed.
- 4 tablespoons of base carrier oil combined with:
- 20 drops Jasmine
- 8 drops Orange
Revitalising Oil
All of the essential oils in this recipe have been chosen to help relieve stress and depression. This uplifting oil will defiantly to put a spring back in your step.
- 4 tablespoons of base carrier oil combined with:
- 12 drops Geranium
- 6 drops Sandalwood
- 6 drops Lemon
- 2 drops Clary Sage
Relaxing Oil
Very Sweet, very fresh and very relaxing, what more can I say!
- 4 tablespoons of base carrier oil combined with:
- 12 drops Sandalwood
- 8 drops Orange
- 4 drops Rose
- 2 drops Pine
- 2 drops Lemon
Alcohol Based Bath Oil
Adding a small amount of spirits will help to distribute the oil in the bath more evenly. You will need to combine;
- 3 fl oz (100ml) Castor Oil
- 4 tablespoons vodka or brandy
- 10 drops essential oil(s) of your choice.
As with the other bath oil recipes, pour into a dark or clear glass jar or bottle (protecting the oils from daylight if using clear glass) shake well and leave to mature for 2 weeks.
Add 2 tablespoons to each bath and swish it about.
Shampoo Based Bath Oil
Baby shampoo is another very efficient carrier of oils, again helping the oils to disburse quickly and evenly in water.
- 4 fl oz (125ml) base oil (Almond Oil or Sunflower Oil
- 4 tablespoons mild baby shampoo
- 10 drops essential oil(s) of your choice
Pour the base oil into a glass bottle or jar, add the shampoo and give it a good shake.
Add the essential oil, shake again then leave to mature for 2 weeks, not forgetting to protect the oils from daylight. Add 2 tablespoons to each bath and swish it about.
Singular Bath Oils
Adding oils to a bath really doesn’t need to be completed, you can start by adding a single essential oil to your bath water. Essential oils normally last about 2 years if kept in a cool dark place and you literally only need a few drops so they are very cost effective.
I’ve listed below those that I would recommend as the best singular all rounders that can be used and enjoyed at any time of the year.
Tips
- Before adding any oils to the bath make sure you close the bathroom door so that you can keep as much of the scent in the room as possible.
- Add the oils drop by drop and don’t be tempted to add more, working on the theory that adding twice as much will get rid of a headache quicker doesn’t work and may just end up irritating the skin.
- On average you will need about 10 drops per bath, but with some of the stronger smelling oils you will only need 5 drops. Stronger smelling oils include; eucalyptus, peppermint, bay, basil, lime, lemon, thyme, rosemary.
10 Best Essential Oils for the Bath
- Bergamot for depression – 5 drops
- Chamomile for insomnia or itchy skin – 7 drops
- Frankincense for sedative, calming and mood sweetening – 8 drops
- Geranium for relaxing yet uplifting and energizing – 10 drops
- Jasmine for apathy, stress or fatigue – 8 drops
- Lavender positive, soothing and relaxing – 10 drops
- Neroli for hypnotic with antidepressant properties – 8 drops
- Patchouli for energizing and invigorating – 5 drops
- Rose for happiness and pleasure very romantic – 10 drops
- Sandalwood for sensual and mellowing a good aphrodisiac – 8 drops
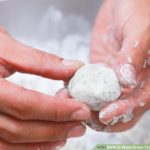
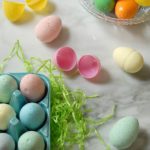
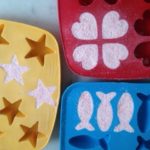
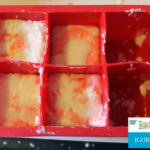
How to Make Bath Oil Beads
Bath oil beads are easy to make at home using a few specialty ingredients that you can find at natural health stores and drug stores. They can be used to promote relaxation, and healing essential oils can be used for various skin types and conditions. This recipe for bath oil beads yields approximately 10-20 beads, depending on their size.
- Step 1
Grind 2 teaspoons Epsom salts and 1 teaspoon sea salt in a clean coffee grinder or spice mill until a fine consistency is reached.
- Step 2
Combine 3 teaspoons baking soda, 1 teaspoon citric acid, 2 teaspoons corn starch, 1 ½ teaspoons goat milk powder, and the ground-up salts in a small mixing bowl. Mix thoroughly.
- Step 3
Combine 1 ½ tablespoons cocoa butter with ½ tablespoons virgin coconut oil in a small saucepan. Heat the mixture over low heat until completely melted, stirring occasionally.
- Step 4
Add 6 tablespoons of the dry ingredient mixture to a small mixing bowl, and stir in the melted cocoa butter mixture slowly. Add 20-25 drops of essential oil of your choice, or a combination of essential oils, and then mix thoroughly.
- Step 5
Form the resulting mixture into several small, round bath oil beads with your hands. These can be any size you like, but the smaller you make them, the more you’ll have to use per bath.
- Step 6
Add a handful of bath oil beads directly to your warm or hot bathwater, and soak in the tub to enjoy. Store the bath oil beads in a glass jar with a tightly-fitting lid and keep it in a cool, dry place.
Bath Salts Basics
Bath salts are easily prepared, and are much preferable to the commercial mixtures, which tend to be irritating to the skin. They are also an easy alternative to using herbs in the bath, as this tends to be messy. The basic ingredients are table salt, baking soda (sodium bicarbonate) and Epsom salts (magnesium sulfate). Some herbalists also use borax. Add the ingredients to a large bowl or plastic bag in these proportions:
Basic Recipe For Bath Salts
- 3 parts Epsom salts*
- 2 parts baking soda
- 1 part table salt (or Borax)
Mix thoroughly. From this base, you can create any fragrance bath salts you desire. You can make up a large quantity of your favorite bath salt, or two or three fragrances, if you prefer. Simply divide the above mixture and set aside those portions to be separately mixed with the fragrance and colors of your choice.
It’s wise to add the power of colors to bath salts. Use plain food coloring for this purpose, letting it fall drop by drop onto the salt base. If two or more colors are required to mix an exotic hue (such as purple), mix these in a spoon first and then add to the salts to avoid creating a two-toned product.
Recommended colors for bath salt mixtures are included in many of the recipes. For those who read “Color: White,” you can simply leave them untinted. Add many drops for a darker colored bath salts; fewer for a lightly hued bath salts. Mix the color into the salts with a spoon until it is evenly distributed. Or, if you are using a plastic bag, you can shake and work the bag until you are satisfied with the color.
Now add the essential oils drop by drop, one ingredient at a time, until the scent seems right. Mix with a spoon (or shake) until all salt particles are moistened. Be prepared to spend some time doing this, perhaps a half hour or so. Here is where the plastic bag comes in handy!
If the Bath Salts are mixed for a ritual purpose, visualize the energies within the oils merging with each other and with the salt as you mix. Keep the salt’s goal in mind while you stir. Use or store until needed.
You can make your own bath salts blends using essential oils and oil blends for specific purposes, or you can follow this tag for specific bath salts recipes: Bath Salts

Golden Buddha Bath Salts
Lightly mix the ingredients together and place them in a jar for storage. A great prosperity blend.
- 1 cup salt
- 8 drops lotus oil
- 2 drops cinnamon oil
- 8 drops sandalwood oil
- 3 drops myrrh oil
- 2 drops allspice oil
Prosperity Dragon Smoke Bath Salts
Lightly mix the ingredients together and place them in a jar for storage.
- 1 cup salt
- 5 drops cherry oil
- 2 drops anise oil
Lavender Mineral Bath
Mix all ingredients well (adding the essential oil last) store in a glass jar or tin and use ¼ cup per bath.
- ½ cup solar dried sea salts
- ¼ cup Epsom salts
- ¼ cup dead sea mineral salts
- 40 drops lavender essential oil
Magickal Uses: clairvoyance, cleansing, consecration, happiness, healing, love, passion, peace, peace of mind, protection, psychic protection, purification, tranquility.
NOTE: Epsom Salts should not be used by diabetics or any other person with circulatory problems.
Bubble Baths
Bubble baths are simple to make. All you need is a bottle of clear organic shampoo, essential oils, and a handful of fresh or dried herbs (optional). Here’s an easy recipe:
Lavender Bubble Bath
- 1 bunch Lavender
- 1 large bottle clear organic shampoo
- 5 drops Lavender essential oil
- Clean wide-neck jar with screw top
Place Lavender head down in the jar. Cut down to fit. Add shampoo and Lavender oil. Close and place in sunny window. Strain and re-bottle. Use 1 tbsp. in a bath.
Magickal Uses: clairvoyance, cleansing, consecration, happiness, healing, peace, peace of mind, protection, psychic protection, purification, tranquility.
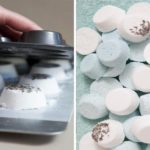
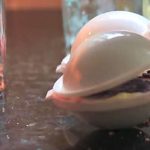
Bath Bombs
When I was younger, I loved bath bombs, but avoided them as I’ve gotten older because store bought versions typically contain artificial ingredients such as dyes and fragrances.
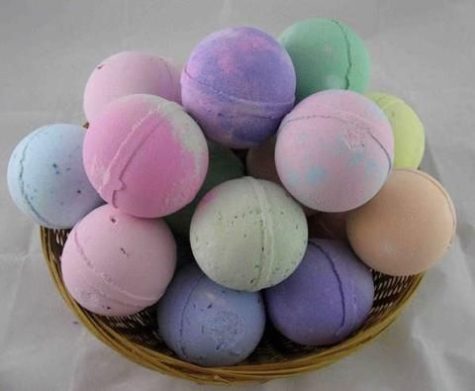
These homemade bath fizzies are a great solution! Made from nourishing sea salt or epsom salts, alkalizing baking soda and fizzing citric acid with a nourishing oil and vanilla base.
These can be packaged for a great gift or made countless ways for relaxing baths anytime! They are simple to make with kid-safe ingredients and are completely versatile. Let the kids think of ways to mix up the scents, colors, and other customizations.
Bath bombs only take seconds to make, so it is important to have the ingredients on hand and measured before you start. Most of the ingredients are pantry staples in many homes, but make sure you have these on hand:
- Baking Soda
The backbone of this recipe is alkalizing baking soda. It is a necessary complement to the acidic citric acid and part of the fizzing reaction. Food-grade aluminum free baking soda is best.
- Citric Acid
The more obscure ingredient in this recipe that a lot of people don’t have on hand is citric acid. It is necessary for the fizzing reaction that makes bath bombs feel like bathing in champagne. You can find citric acid on amazon, here’s a link: Citric Acid
- Corn Starch or Arrowroot
Corn starch provides the silky feel that we all love from bath bombs. I usually use organic corn starch powder in this recipe. Arrowroot also works but doesn’t provide quite as silky of a finished product.
- Salt, Oil and Liquid
These are all very versatile and you can pick any combination that you have on hand. You’ll need some kind of:
Oil: Pick a simple oil like olive oil, almond oil or coconut oil or get more fancy with sea buckthorn oil, argan oil or apricot oil.
Salt: Stick to basic salt or take it up a notch with epsom salt or another favorite salt option.
Liquid: Basic water works, but I also love using organic witch hazel for some extra skin soothing.
- Scents and Colors
This is where the options get endless. Use your favorite essential oils, add dried herbs or make them scent free. You can even add some natural dyes to change the color.
- Other Equipment
These are easy to make with measuring cups and your hands, but for a fancier and more uniform product, it helps to also have a digital scale to get the proportions exactly right.
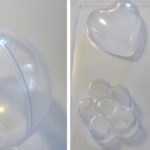
- Molds
For the easiest version, just form these into balls with your hands, but if you are making as gifts or just want fancier shapes, molds are the way to go. You can buy actual bath bomb molds at amazon if you’d like. But you could also use those plastic holiday ornaments that come apart or Easter eggs for the molds if you already have either of those on hand. Some tutorials recommend greased muffin tins. I think those silicone ice cube and candy molds would also work just fine.
Here are a bunch of different ideas for molding your bath bombs:


- Added bonus
It seriously makes your whole room smell amazing while you make these!
Bath Bomb Basic Recipes
I found two basic recipes and am including them both here:
Bath Bomb Recipe 1
- 8 ounces Baking Soda (about 1 cup)
- 4 ounces Citric Acid (1/2 cup)
- 1/2 cup (4 ounces) Sea Salt or Epsom Salt
- 4 ounces Cornstarch (about 3/4 cup)
- 2 tablespoons oil of choice (this is my personal favorite but any liquid oil will work)
- 2 teaspoons witch hazel (or water) plus a little more if needed
- 1 teaspoon vanilla extract (or more water)
- 30-40 drops of Essential oils or powdered dried herbs (ginger is great)
Bath Bomb Recipe 2
- 4 oz. baking soda
- 2 oz. corn starch
- 2 oz. citric acid
- 2 oz. Epsom salt
- 1 to 1 1/2 teaspoons water
- 1 teaspoon essential oil
- 1 1/4 teaspoon oil (I like coconut or olive oil here)
- 1-2 drops food coloring (optional)
Makes two bombs (you can easily double or triple this recipe).
Instructions:
In a bowl combine the dry ingredients. Whisk to remove any clumps, corn starch tends to be clumpy. In a small glass jar stir together the wet ingredients. If you’re using coconut oil, give it a quick melt in the microwave or stove top first so it will more easily combine with the other ingredients.
Slowly pour the liquid mixture in with the dry mixture, whisking as you go. If you see the mixture fizz or foam, you may be adding the liquid too quickly. Once all the wet ingredients are combined with the dry, take a small amount in your hand and squeeze it together.
Mixture should hold together when squeezed without crumbling. It should stick together fairly well in one or two big chunks.
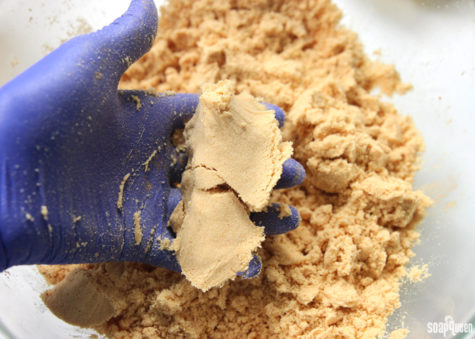
If it’s still too powdery to hold together, just add a tiny bit more water (or witch hazel) and mix until it does hold together.
If you are using a mold that makes a ball, fill each half of your bath bomb mold with the mixture until it’s just overflowing a little. Press together, then gently remove one side of the mold. Place the bath bomb on a tray and allow to dry out just a little (10-12 minutes) before removing the other side. Once you are ready to remove the other side, gently invert the bath bomb so the uncovered side is facing down, then gently remove the other half of the mold from the top. The key word, if you haven’t noticed, is gently. These can fall apart on you very easily if you’re not careful. If a bath bomb does crack in half while you’re removing it, you can gently press it back on top of the other half, or remove all the mixture back to the mixing bowl and start the molding process again. I had this happen to a few, so don’t fret, it’s easy to fix.
If you are using tins or trays, quickly push mixture into the greased muffin tins or any other greased container. Press in firmly and leave at least 24 hours (48 is better) or until hardened. It will expand some and this is normal. You can push it down into the mold several times while it is drying to keep it from expanding to much. Using the metal molds will create a stronger and more effective final bath bomb.
Note: I have seen some reports of the bath bomb sticking to these type of molds and refusing to come out., so be sure it is well greased.
Once they are completely out of the mold, allow them to dry out for 8 hours or overnight. Once very dry, you can wrap them in plastic wrap and store in a dry place until you’re ready to use them, or you can gift them to friends.
Tips and Variations:
You can add dried flower buds, like lavender buds, to these pretty easily. Just remember to use food grade dried flowers to avoid flowers that might have been grown with pesticides as you don’t want to soak in a bath with that. No thanks! Do keep in mind that after using a bath bomb with dried petals, you will have to remove these from your tub. So if that bothers you, then leave the buds out.
If you want to create two tone bath bombs, just mix up your batter in two separate bowls and only add the food coloring to one. Easy!
Here’s a YouTube tutorial:
Bath bombs are a great way to relax in the tub after a long day of dealing with kids, cooking, and all the other activities that motherhood entails. If you’ve never tried them, I highly encourage it, as it’s one of my favorite things to do at the end of the day.
Fool proof homemade bath bombs These turned out to be a lot of fun to make, and they are even more fun to use! I highly recommend giving them a try, or you could make a batch to give away to friends or family. Enjoy!
Sugar Scrubs
Those expensive sugar scrubs you see in department stores and spas… they cost pennies to make! Sugar scrubs are a simple beauty recipe with countless variations, and they can be incredibly moisturizing and exfoliating to the skin.

They can be used on face, body, and (especially) feet, for silky skin. You can add endless ingredients for your desired outcome, and they take under ten minutes to make.
Ingredients
- 1/2 cup sugar (white or brown sugar- preferably organic)
- 1/2 cup oil (olive oil and coconut oil work great)
- Optional: essential oils of your preference
Instructions
- Mix all ingredients and store in an air tight jar.
- Use 1 tablespoon as needed in the shower. Scrub skin with the mixture and rinse will. it will leave your skin feeling like silk.
Sound simple? It is!
Variations
- Pumpkin Pie Scrub: 1 cup of brown sugar, 1/2 cup coconut oil, 1/2 tsp vitamin E oil and 1/2 tsp pumpkin pie spices (or just 1/2 tsp cinnamon)
- Vanilla Brown Sugar Scrub: 1 cup brown sugar, 1/2 cup almond oil, 1/2 tsp Vitamin E oil and 1 tsp real vanilla extract
- Lemon Hand Scrub (for after washing dishes): 1 cup white sugar, 1/2 cup olive oil, 1/2 tsp vitamin E oil, 15-20 drops (or more) of lemon or orange essential oil
- Vanilla Lavender Relaxing Facial Scrub: 1 cup white sugar, 1/2 cup almond oil, 1/2 tsp Vitamin E oil, 1/2 tsp real vanilla extract and 15 drops lavender essential oil
These last on the counter for up to 2 months (or more) and smell good enough to eat… Actually, they are good enough to eat, but don’t… sugar is bad for your intestines!
Salt Scrub
As an alternative to the sugar scrub, here’s a recipe for a salt scrub:
Pink Himalayan Salt Scrub
- 1 cup of Salt (your choice)
- ¼ to ⅔ cup of Oil (again, your choice, for this scrub I used equal parts of jojoba, avocado and coconut)
- 1 T Glycerin
- ½ t Vitamin E
- Approx 20 drops of essential oils (or more depending on oil and strength desired)
Instructions:
- Add ingredients to the bowl and mix well.
- Scoop into your jars and enjoy!
Variations:
For a grapefruit and ginger scrub, add the following ingredients to the basic recipe:
- 1 tsp grated fresh ginger,
- 1 tsp ground Frankincense
- zest of grapefruit
For a citrus and poppyseed scrub, add the following ingredients to the basic recipe:
- 1 tbsp poppyseeds
- zest of citrus fruit
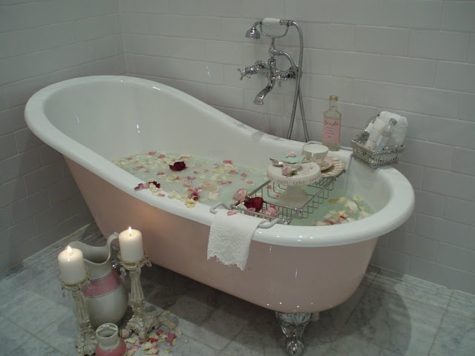
10 Steps to Your Most Heavenly Bath Ever
- Find the Quiet
The most essential factor for total decompression? Silence. Leave your phone in the other room. Tune out the noisiness of the world. Breathe.
- Dim the Lighting
Turn down the lights for a soothing ambiance, then burn a candle (or three). The warm, flickering light and aromatic scent will make your bathroom feel much more spa-like.
- Set the Temperature
Run the water hot, but not too hot. Select your preference to the touch, but bare in mind that water temp should be no more than 95 to 101°F. Any hotter will actually irritate your nervous system and make it harder to relax.
- Add Some Salt
Sprinkle Epsom salts into your tub as it begins to fill. These small miracles dissolve in water to soothe aching muscles, ease cramping, relieve stress, increase circulation and even detoxify your skin. Trust us, you’ll feel the difference.
- Add Some Suds
Next, pour some grown-up bubble bath in right where the faucet stream meets bath water. Not only will this pamper your skin, the scent and comforting bubbles will help you reach a deeper state of relaxation.
- Sip and Soak
This is a time to sit back and fully indulge. Our indulgences of choice? A crisp glass of white wine or soothing herbal tea to drink at leisure, depending on the mood.
- Lather Up
Clean skin is healthy skin. Work a rich, moisturizing bar soap into a foamy lather and cleanse from head to toe.
- Exfoliate Well
Before bath time is over, use a soft bristle body brush or loofah to gently buff, rid dead cells and reveal your softest skin.
- Dry Off
Getting out of the bath is never easy. But it will be light years better if you’re wrapping up in a plush, cozy robe afterward.
- Seal the Deal
Once you’ve properly dried, treat your skin to one last layer of pampering: A restorative body oil to lock in moisture…then promptly crawl into bed silky smooth and squeaky clean.
My Sources:
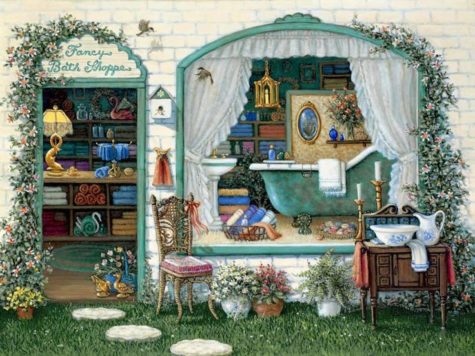
I pretty much looted the internet for all this cool info. Here’s a list of links to all the places I found cool stuff. If I missed a few, well… I’m sorry!
Sources:
Lets Burn Some Bay Leaves
Bay leaves are a common staple on most people’s herb and spice racks. It isn’t readily associated with anything past the kitchen. This is a shame, as leaves from the bay laurel have numerous benefits and properties beyond its ability to enrich the palate. As it is rich in minerals, vitamins and antioxidants, it is added to many health tonics and elixirs.
In addition to its historical and culinary uses, the bay leaf has also been held as a sacred tool for cleansing one’s space and alleviating stress, anxiety, and unpleasant energy. Ancient temples routinely burned bay leaves to clear the space and heighten one’s intuitive powers, and today the practice of burning bay leaves in one’s home is resurfacing in practice.
Here’s how:
Take a dry bay leaf (or a few) and light it the same way you would incense. Let it burn out and fill the air with the smoke. Hang out in the room and breathe There is more than one active ingredient in this herb. The leaves’s oils have pinene, cineol, and elemicin compounds. Burning this combination of chemicals causes a stimulating, yet calm slightly psychedelic effect.
Benefits:
Relieves discomforts and fatigue. You may also be surprised at the practice of burning bay leaves for wishes, and the proper method of safely burning the leaves indoors.
There are numerous burning bay leaves benefits, with many people burning bay leaves for stress/anxiety as a safer, more pleasant alternative to over the counter and prescribed remedies. Here is a comprehensive guide to burning bay leaves for stress/anxiety, as well respiratory issues.
In every account, the consumer was relaxed, and alert. The calming effects go so far to relieve arthritis and improve circulation. The combined effect of the oils culminates into a sedative. So it won’t treat any conditions but can provide momentary relief.
The effects will vary greatly. It all comes down to how well the plant was grown, and dried. If you have respiratory issues or don’t want to be in a smoky room you can achieve the same effect by brewing a tea with copious amount of the herb.
Burning Bay Leaves For Fatigue and Tension
Bay leaves contain powerful compounds such as pinene, cineol, and elemicin that, when burned, produce a nerve-soothing effect, as well as a pleasant energy boost. Burning bay leaves releases those medicinal properties into the air, and when inhaled can put you in a relaxed state of mind that in turn alleviates feelings of fatigue.
Burning Bay Leaves For Anxiety
In addition to its physical properties, the fumes from a burned bay leaf are a potent remedy for fatigue and tension, as well as psychological anxiety and stress. With no toxic components or fragrances, bay leaves are a safe and natural way to relieve all manner of conditions.
Bay leaves contain a significant amount of linalool, a naturally occurring terpene found in various flowers and spices that is widely known for its stress-relieving qualities. A recent study conducted through the American Association of Nurse Anesthetists found linalool to greatly reduce anxiety and likewise enhance social interactions between those under the influence of it.
In as little as 10 minutes of smelling a burning bay leaf, linalool begins working. Some have even described the effect as mildly psychedelic.
Burning Bay Leaves For Respiratory Relief
Bay leaves are a natural remedy that can help treat clogged, backed up respiratory passages and lungs. It acts naturally to help break up and remove the nasty mucus and phlegm that’s causing all the problems. Instead of burning the leaves, soak fresh ones in clean water or pick up a small vial of bay leaf oil and use it in a humidifier to create a steamy vapor which you then breathe in. You can also simply boil the treated water on the stove top or rub the oil on your chest area to alleviate respiratory problems, allergies, and asthma.

Burning Bay Leaves For Wishes
In the ancient Greek myth of Apollo and Daphne, the god fell in love with the nymph and tirelessly pursued her. Seeking help from her father, Daphne was transformed into a bay laurel tree, and thereafter bay leaves were believed to provide one with protection and goodwill when used as spiritual implements.
Bay leaves were routinely burned in temples and sacred spaces to assist in acts of prayer and meditation, as well as wish-making. Write your wish on a freshly dried bay leaf and meditate on your sincerest desires while watching it burn. Inhale the pleasantly healing aroma then release the bay leaf ashes to the wind, which will carry your wishes off to be materialized.
Burning bay leaves for wishes is a wonderful way to welcome in the new year, as many have done for centuries.
Burning Bay Leaves For Pest Control
Bay leaves are a safe and effective way to rid your household of annoying pests such as cockroaches and pantry moths. The fumes of burning bay leaves are highly unpleasant to many insects, and routine practice will drive them out of infested spaces for good.
Instructions For Safely Burning Bay Leaves
Properly burned bay leaves will release their healing benefits quickly. Place one dried bay leaf in an ashtray or appropriate holder, then set the leaf on fire and leave the room while it burns, closing the door to allow the aroma to fill the space.
When you return, gently blow on the embers and inhale deeply. A few precautions to keep in mind when burning bay leaves:
- Never leave burning leaves or even the embers unattended.
- Make sure you completely extinguish and dispose of the ashes once the leaves have fully burned down.
- Keep an eye on pets and small children when burning bay leaves.
- There’s a chance that burning bay leaves will set off a household’s smoke detector, so be mindful of which room you choose to use and its proximity.
- Try to burn freshly dried bay leaves, as these will produce more beneficial results.
Collected from various sources
- Radical Self Care Project Overview by shirleytwofeathers - No Comment
- Radical Self Care Image Gallery by shirleytwofeathers - No Comment
- It’s A Wrap by shirleytwofeathers - 3 Comments
- Something To Consider by shirleytwofeathers - 1 Comment
- Nurturing Your Precious Self by shirleytwofeathers - 3 Comments
Liana: A Prosperity Prayer
B. Joy Barrett: beautiful-turquoise-upholstered-accent-chair-for-living-room-with-within-colorful-accent-chairs-colorful-accent-chairs-transforms-the-look-of-a-room
Claudette Losier: Why Does It Work?
me: Make Your Own Violet Fire
Abdulrahman: Money Chant – Very Fast
Our current project began on July 4. We are exploring the concept and practice of Radical Self Care . Feel free to join in at any time!

Interested? You can visit our current project page, or you can take a look at the About The Project page if you are curious about the concept.
.
Please feel free to join in at any time! No experience necessary.

- Money Chant - Fast
- Money Chant - Slow
- Prosperity Plan
- Amazing Creator
- Cause and Effect
- I Am That I Am
- Spirit Rap
- Lakshmi Spirit Rap
- PowWow Spirit Rap
 Enter your question and receive the wisdom of the Occulatum. You may pose your question in any way that feels appropriate. The answer will come in the form of a small pop up. Try it - your life just might change for the better!


I think it's time to go shopping... maybe even buy some really cool stuff at my online shops!!