Luxuriously Delicious Ideas For The Bath
In yesterday’s post, we learned that Flower cleansing baths purify and uplift. So, I thought it might be luxuriously fun and interesting to explore the world of do it yourself bath products.
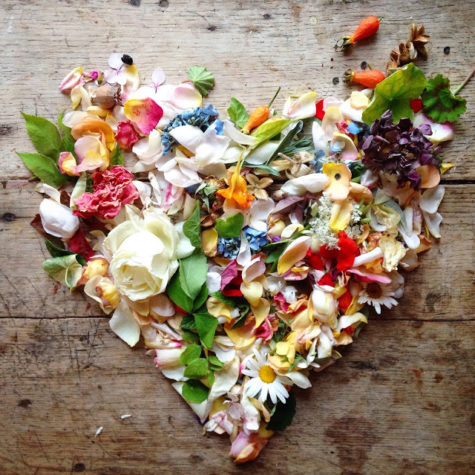
Some of the oldest beauty treatments in the world incorporate flower petals and oils. Flowers not only enhance the fragrance of DIY recipes and can be used for aroma therapy, but they also have chemical properties that can be used to benefit your skin and hair. On this page, you’ll find different ways to add some flower power to your DIY beauty routine.
Some of these recipes use oils, fresh petals and dried flowers. Regardless of whether you’re picking your own flowers or buying them, it’s important to avoid blooms that have been treated with pesticides. Look for organic ingredients whenever possible, because commercial flowers can be subjected to particularly heavy pesticide treatment.
A Floral Facial
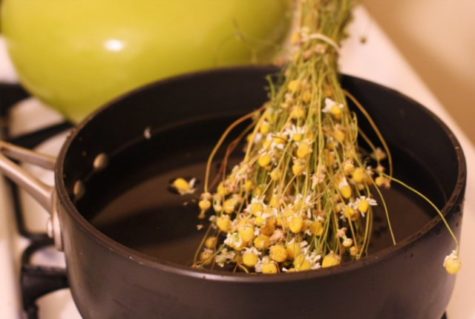
Facial steams can help improve circulation to the face and open pores, while this blend can help soothe skin. Plus, treating yourself to a facial steam can be incredibly relaxing. The petals of the calendula flower, also commonly called marigold or pot marigold, are anti-inflammatory. The chamomile has been shown to have calming properties.
Ingredients:
- 1/4 cup dried calendula petals
- 1/4 cup dried chamomile flowers
Instructions:
Boil 2 quarts of water and remove from heat. Add the flowers and let them steep for two minutes. Then, place your face at least 12 inches over the pot (getting too close can burn), and drape a towel over your head to create a tent over the pot.
For an even more relaxing experience, you can add a few drops of lavender or peppermint essential oil. Allow the steam to bathe your skin for a minute and then come out for a few breaths of fresh air. You can repeat this process about five times.
After the steam, you can rinse your face with cool (not cold) water or a mild cleanser, and follow with a moisturizer.
Oatmeal Almond Facial Scrub
“If you wouldn’t eat it, then don’t put it on your face.” Skin is porous, and everything that goes onto it eventually makes its way inside. Since all conventional facial cleansers, scrubs, and moisturizers are full of toxic chemicals, it’s best to avoid them completely. By sticking with edible ingredients – items that you already have in your kitchen, or can buy easily – you’ll rest assured knowing that you are not harming your body over the long term.
Best of all, there are no nasty plastic microbeads to contaminate the local water supply.
This homemade facial scrub leaves your skin feeling refreshed and silky smooth. The oatmeal exfoliates, the almonds moisturize, and the lavender-chamomile combination is soothing.
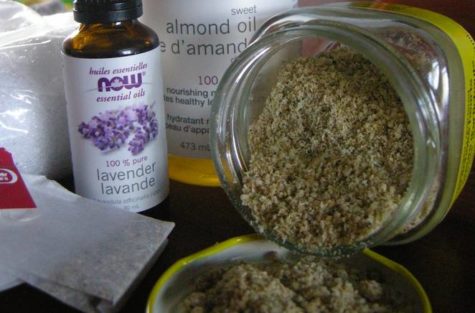
Homemade Oatmeal Scrub with Almonds, Lavender, and Chamomile
- 1/4 cup raw almonds (or 2 tbsp almond flour)
- 4 tbsp oatmeal
- 1 tbsp cornstarch
- 1 tbsp chamomile flowers (I used the contents of chamomile tea packets)
- 2 tsp sweet almond oil + 5 drops lavender extract — OR — 2 tsp lavender oil
Chop raw almonds in a spice grinder or food processor until they are a fine meal. Skip this step if using almond flour. Add remaining ingredients and blend well until mixture is a soft granular powder. To use each morning, put half a tablespoon of this mixture in your palm and add just a couple of drops of water. Rub hands together to make a paste. Gently rub and massage it onto damp skin in circular motions to exfoliate. Wash off with warm water and a warm, damp washcloth; end with a splash of cold. Keep the scrub in a well-sealed glass jar and it will stay fresh for months.
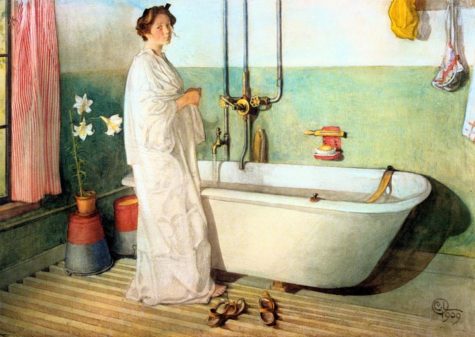
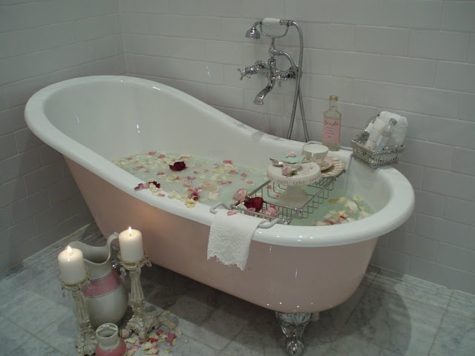
Luxurious Baths
People have been bathing in various things for years; Cleopatra bathed in asses’ milk while Mary queen of Scots preferred to soak in a tub of hot wine.
Even today most of us won’t even contemplate getting in the tub without adding a little something to it! Unfortunately, most of us end up adding a few cheap bubbles that have absolutely no value to our skin what so ever, and why when we can transform our bath into a heavenly therapeutic experience.
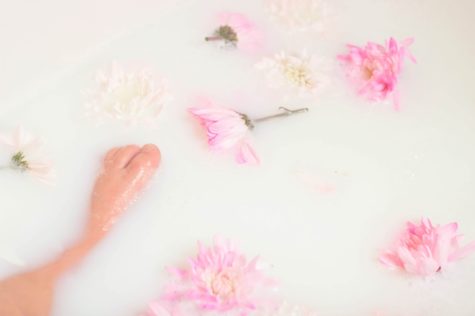
A Delicious Milk Bath
A milk bath is a bath taken in milk instead of water. Often other scents such as lavender, honey, and essential oils are added. Cleopatra, Elizabeth I of England, Elisabeth of Bavaria, and others have historically acclaimed the beautifying benefits of these baths.
Cleopatra was definitely onto something when she indulged in daily beauty treatment milk baths. It turns out the natural lactic acid found in milk is a form of alpha-hydroxy-acid (an ingredient which can be found in some of the most expensive exfoliating products). This type of acid gently dissolves proteins to exfoliate dead skin cells, which reveal fresh, younger looking skin underneath.
The lactic acid found in milk is extremely mild, so don’t worry, it won’t strip or irritate the skin. In fact, milk is quite soothing on dry skin.
Milk is also rich in vitamins and minerals — most notably Vitamin E and zinc — which help slow the process of aging and retain skin’s natural elasticity.
Milk baths seem to be making a comeback in modern times as well. Many upscale spas in major cities offer a number of milk treatments such as hot milk and almond pedicures! That sounds divine!
But you don’t have to spend a lot of money at a fancy spa (or travel back in time) to reap the benefits of milk in your beauty routine. Milk bath recipes are some of the quickest, easiest homemade bath products you can make.
A Simple Scented Milk Bath
Here is a simple recipe that you can mix up in minutes and add your own scent to as well.
Ingredients
- 2 cups whole powdered milk
- 1/2 cup cornstarch (soothes and relieves dry, itchy skin)
- 1/2 cup baking soda (skin softener)
- Essential oil of your choice (I put in about 10 drops of lavender)
Directions
Combine the powdered milk, cornstarch and baking soda in a large glass container. Put the lid on and shake the jar until the powders are completely mixed.
Remove the cap and add the essential oil. Re-cap the jar and shake to combine. Let sit for 24 hours before using, to let the ingredients and the essential oil completely combine. Store in a cool, dark place.
To use, pour 1 to 2 cups of your milk bath under hot running water. Lie back and relax!
A couple of tips:
- This is one time when lowfat is NOT your best bet. The higher the fat content of the milk, the more nourishing it is for you skin.
- Goat’s milk and cow’s milk have higher amounts of fat which provides more conditioning, but you can also use rice, soy or coconut milk (great alternatives for vegans.)
- Also, lactose intolerant folks don’t have to worry about bathing in milk. The milk isn’t being drunk, so there won’t be any digestion problems.
Make up your own recipe:
It’s very simple to experiment with your own recipe, all you need is powdered or fresh milk. You could even experiment with a can or two of goats milk. From this base, you can branch out and add one or more of the following:
- Honey
- Oatmeal
- Essential Oils
- Herbs – fresh or dried
- Spices – nutmeg, allspice, etc
- Flowers – fresh or dried
- Seaweed
- Sea salt
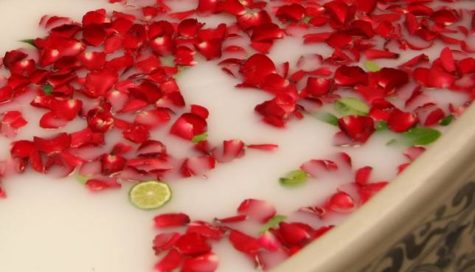
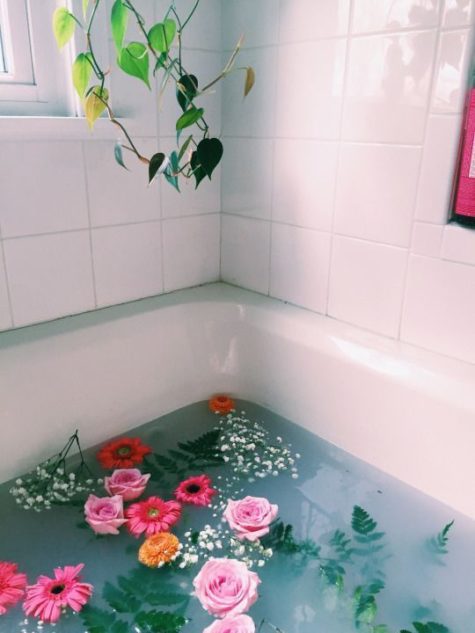
A Floral Feng Shui Bath
To create essential yang chi and clear your mind and rejuvenate your body, simply bathe in a bathtub that has been sprinkled with the petals of at least five different flowers in the five colors of the five elements. There should be pink, yellow, white, blue, and green petals from flowers or herbs, like rosemary, in your bath. You may also wish to include Bach flower essential oils in your bathe to help create a beautiful aroma as well, or use fragrant flowers such as lavender, jasmine or gardenia to perfume your water. This uplifting ritual will help to infuse your body with beautiful yang energy and soothe your mind.
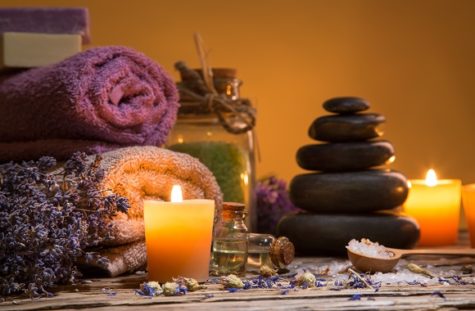
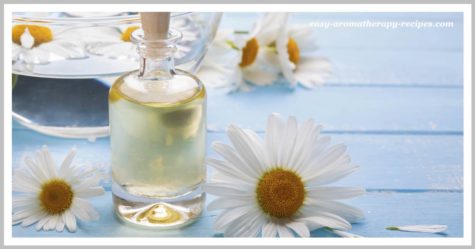
Luxuriously Aromatic Bath Oils
Adding essential oils to your bath water is one of the best aromatherapy treatments there is, more aroma molecules are released from the oils whilst in the bath than during a massage. As you soak in the bath the hot water softens the skin which in turn speeds up oil absorption, this allows the essential oils to become more effective and potent on both the mind and body.
They are not just a simple and easy way to add a touch of luxury to your bath; they will moisten and nourish your skin, along with treating the everyday ailments that you may be suffering with.
You will also notice the aroma of the oils is so much stronger in the warm water; it’s almost like sniffing a bunch of flowers. So the next time your thinking of having a bath add a few drops of your homemade bath oil, lie back, close your eyes and enjoy.
The basic principle in making bath oils is to select essential oils for their properties and fragrance, then add them to 4 tablespoons of base carrier oil.
The easiest base oils to use in your homemade bath oils are the light base oils such as Castor Oil, Almond Oil, Jojoba Oil or even simple Sunflower Oil.
Pour your base oil into a dark or clear glass bottle or jar. If using a clear glass jar you will need to protect the oils from waning by storing the finished oils in a dark place, a bathroom cupboard is perfect for this.
Add about 20 drops of your chosen essential oils cover and shake well.
Leave the homemade bath oil to blend and mature for about 2 weeks before using.
How To Use Your Bath Oils
- Simply add 1 tablespoon of scented oil to the bath and swish around to disburse. Once in the bath use a sponge to massage the oil into the skin.
- For an extra beauty treatment whilst soaking in the bath, mixing a few elderflowers with some live yogurt will make a great little face pack that can clear the skin and help prevent wrinkles.
Bath Oil Recipes
Happiness Bath Oil
This homemade bath oil leaves you feeling warm and happy inside!
- 4 tablespoons of base carrier oil combined with:
- 10 drops Sandalwood
- 5 drops Jasmine
- 5 drops Rose
- 5 drops Bergamot
This bath oil has a wonderfully rich and floral fragrance. A simple combination that will leave you feeling very calm and relaxed.
- 4 tablespoons of base carrier oil combined with:
- 20 drops Jasmine
- 8 drops Orange
Revitalising Oil
All of the essential oils in this recipe have been chosen to help relieve stress and depression. This uplifting oil will defiantly to put a spring back in your step.
- 4 tablespoons of base carrier oil combined with:
- 12 drops Geranium
- 6 drops Sandalwood
- 6 drops Lemon
- 2 drops Clary Sage
Relaxing Oil
Very Sweet, very fresh and very relaxing, what more can I say!
- 4 tablespoons of base carrier oil combined with:
- 12 drops Sandalwood
- 8 drops Orange
- 4 drops Rose
- 2 drops Pine
- 2 drops Lemon
Alcohol Based Bath Oil
Adding a small amount of spirits will help to distribute the oil in the bath more evenly. You will need to combine;
- 3 fl oz (100ml) Castor Oil
- 4 tablespoons vodka or brandy
- 10 drops essential oil(s) of your choice.
As with the other bath oil recipes, pour into a dark or clear glass jar or bottle (protecting the oils from daylight if using clear glass) shake well and leave to mature for 2 weeks.
Add 2 tablespoons to each bath and swish it about.
Shampoo Based Bath Oil
Baby shampoo is another very efficient carrier of oils, again helping the oils to disburse quickly and evenly in water.
- 4 fl oz (125ml) base oil (Almond Oil or Sunflower Oil
- 4 tablespoons mild baby shampoo
- 10 drops essential oil(s) of your choice
Pour the base oil into a glass bottle or jar, add the shampoo and give it a good shake.
Add the essential oil, shake again then leave to mature for 2 weeks, not forgetting to protect the oils from daylight. Add 2 tablespoons to each bath and swish it about.
Singular Bath Oils
Adding oils to a bath really doesn’t need to be completed, you can start by adding a single essential oil to your bath water. Essential oils normally last about 2 years if kept in a cool dark place and you literally only need a few drops so they are very cost effective.
I’ve listed below those that I would recommend as the best singular all rounders that can be used and enjoyed at any time of the year.
Tips
- Before adding any oils to the bath make sure you close the bathroom door so that you can keep as much of the scent in the room as possible.
- Add the oils drop by drop and don’t be tempted to add more, working on the theory that adding twice as much will get rid of a headache quicker doesn’t work and may just end up irritating the skin.
- On average you will need about 10 drops per bath, but with some of the stronger smelling oils you will only need 5 drops. Stronger smelling oils include; eucalyptus, peppermint, bay, basil, lime, lemon, thyme, rosemary.
10 Best Essential Oils for the Bath
- Bergamot for depression – 5 drops
- Chamomile for insomnia or itchy skin – 7 drops
- Frankincense for sedative, calming and mood sweetening – 8 drops
- Geranium for relaxing yet uplifting and energizing – 10 drops
- Jasmine for apathy, stress or fatigue – 8 drops
- Lavender positive, soothing and relaxing – 10 drops
- Neroli for hypnotic with antidepressant properties – 8 drops
- Patchouli for energizing and invigorating – 5 drops
- Rose for happiness and pleasure very romantic – 10 drops
- Sandalwood for sensual and mellowing a good aphrodisiac – 8 drops
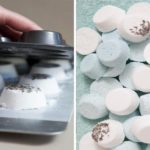
How to Make Bath Oil Beads
Bath oil beads are easy to make at home using a few specialty ingredients that you can find at natural health stores and drug stores. They can be used to promote relaxation, and healing essential oils can be used for various skin types and conditions. This recipe for bath oil beads yields approximately 10-20 beads, depending on their size.
- Step 1
Grind 2 teaspoons Epsom salts and 1 teaspoon sea salt in a clean coffee grinder or spice mill until a fine consistency is reached.
- Step 2
Combine 3 teaspoons baking soda, 1 teaspoon citric acid, 2 teaspoons corn starch, 1 ½ teaspoons goat milk powder, and the ground-up salts in a small mixing bowl. Mix thoroughly.
- Step 3
Combine 1 ½ tablespoons cocoa butter with ½ tablespoons virgin coconut oil in a small saucepan. Heat the mixture over low heat until completely melted, stirring occasionally.
- Step 4
Add 6 tablespoons of the dry ingredient mixture to a small mixing bowl, and stir in the melted cocoa butter mixture slowly. Add 20-25 drops of essential oil of your choice, or a combination of essential oils, and then mix thoroughly.
- Step 5
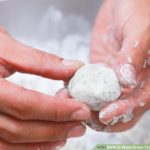
Form the resulting mixture into several small, round bath oil beads with your hands. These can be any size you like, but the smaller you make them, the more you’ll have to use per bath.
- Step 6
Add a handful of bath oil beads directly to your warm or hot bathwater, and soak in the tub to enjoy. Store the bath oil beads in a glass jar with a tightly-fitting lid and keep it in a cool, dry place.
Bath Salts Basics
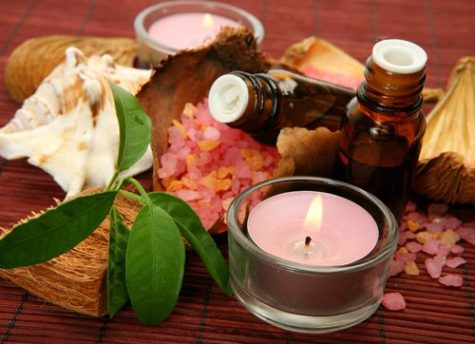
Bath salts are easily prepared, and are much preferable to the commercial mixtures, which tend to be irritating to the skin. They are also an easy alternative to using herbs in the bath, as this tends to be messy. The basic ingredients are table salt, baking soda (sodium bicarbonate) and Epsom salts (magnesium sulfate). Some herbalists also use borax. Add the ingredients to a large bowl or plastic bag in these proportions:
Basic Recipe For Bath Salts
- 3 parts Epsom salts*
- 2 parts baking soda
- 1 part table salt (or Borax)
Mix thoroughly. From this base, you can create any fragrance bath salts you desire. You can make up a large quantity of your favorite bath salt, or two or three fragrances, if you prefer. Simply divide the above mixture and set aside those portions to be separately mixed with the fragrance and colors of your choice.
It’s wise to add the power of colors to bath salts. Use plain food coloring for this purpose, letting it fall drop by drop onto the salt base. If two or more colors are required to mix an exotic hue (such as purple), mix these in a spoon first and then add to the salts to avoid creating a two-toned product.
Recommended colors for bath salt mixtures are included in many of the recipes. For those who read “Color: White,” you can simply leave them untinted. Add many drops for a darker colored bath salts; fewer for a lightly hued bath salts. Mix the color into the salts with a spoon until it is evenly distributed. Or, if you are using a plastic bag, you can shake and work the bag until you are satisfied with the color.
Now add the essential oils drop by drop, one ingredient at a time, until the scent seems right. Mix with a spoon (or shake) until all salt particles are moistened. Be prepared to spend some time doing this, perhaps a half hour or so. Here is where the plastic bag comes in handy!
If the Bath Salts are mixed for a ritual purpose, visualize the energies within the oils merging with each other and with the salt as you mix. Keep the salt’s goal in mind while you stir. Use or store until needed.
You can make your own bath salts blends using essential oils and oil blends for specific purposes, or you can follow this tag for specific bath salts recipes: Bath Salts

Golden Buddha Bath Salts
Lightly mix the ingredients together and place them in a jar for storage. A great prosperity blend.
- 1 cup salt
- 8 drops lotus oil
- 2 drops cinnamon oil
- 8 drops sandalwood oil
- 3 drops myrrh oil
- 2 drops allspice oil
Prosperity Dragon Smoke Bath Salts
Lightly mix the ingredients together and place them in a jar for storage.
- 1 cup salt
- 5 drops cherry oil
- 2 drops anise oil
Lavender Mineral Bath
Mix all ingredients well (adding the essential oil last) store in a glass jar or tin and use ¼ cup per bath.
- ½ cup solar dried sea salts
- ¼ cup Epsom salts
- ¼ cup dead sea mineral salts
- 40 drops lavender essential oil
Magickal Uses: clairvoyance, cleansing, consecration, happiness, healing, love, passion, peace, peace of mind, protection, psychic protection, purification, tranquility.
NOTE: Epsom Salts should not be used by diabetics or any other person with circulatory problems.
Bubble Baths
Bubble baths are simple to make. All you need is a bottle of clear organic shampoo, essential oils, and a handful of fresh or dried herbs (optional). Here’s an easy recipe:
Lavender Bubble Bath
- 1 bunch Lavender
- 1 large bottle clear organic shampoo
- 5 drops Lavender essential oil
- Clean wide-neck jar with screw top
Place Lavender head down in the jar. Cut down to fit. Add shampoo and Lavender oil. Close and place in sunny window. Strain and re-bottle. Use 1 tbsp. in a bath.
Magickal Uses: clairvoyance, cleansing, consecration, happiness, healing, peace, peace of mind, protection, psychic protection, purification, tranquility.
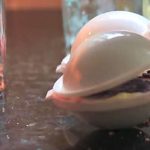
Bath Bombs
When I was younger, I loved bath bombs, but avoided them as I’ve gotten older because store bought versions typically contain artificial ingredients such as dyes and fragrances.
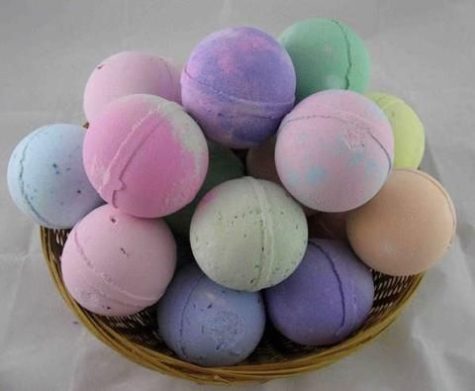
These homemade bath fizzies are a great solution! Made from nourishing sea salt or epsom salts, alkalizing baking soda and fizzing citric acid with a nourishing oil and vanilla base.
These can be packaged for a great gift or made countless ways for relaxing baths anytime! They are simple to make with kid-safe ingredients and are completely versatile. Let the kids think of ways to mix up the scents, colors, and other customizations.
Bath bombs only take seconds to make, so it is important to have the ingredients on hand and measured before you start. Most of the ingredients are pantry staples in many homes, but make sure you have these on hand:
- Baking Soda
The backbone of this recipe is alkalizing baking soda. It is a necessary complement to the acidic citric acid and part of the fizzing reaction. Food-grade aluminum free baking soda is best.
- Citric Acid
The more obscure ingredient in this recipe that a lot of people don’t have on hand is citric acid. It is necessary for the fizzing reaction that makes bath bombs feel like bathing in champagne. You can find citric acid on amazon, here’s a link: Citric Acid
- Corn Starch or Arrowroot
Corn starch provides the silky feel that we all love from bath bombs. I usually use organic corn starch powder in this recipe. Arrowroot also works but doesn’t provide quite as silky of a finished product.
- Salt, Oil and Liquid
These are all very versatile and you can pick any combination that you have on hand. You’ll need some kind of:
Oil: Pick a simple oil like olive oil, almond oil or coconut oil or get more fancy with sea buckthorn oil, argan oil or apricot oil.
Salt: Stick to basic salt or take it up a notch with epsom salt or another favorite salt option.
Liquid: Basic water works, but I also love using organic witch hazel for some extra skin soothing.
- Scents and Colors
This is where the options get endless. Use your favorite essential oils, add dried herbs or make them scent free. You can even add some natural dyes to change the color.
- Other Equipment
These are easy to make with measuring cups and your hands, but for a fancier and more uniform product, it helps to also have a digital scale to get the proportions exactly right.
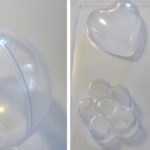
- Molds
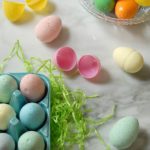
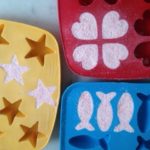
For the easiest version, just form these into balls with your hands, but if you are making as gifts or just want fancier shapes, molds are the way to go. You can buy actual bath bomb molds at amazon if you’d like. But you could also use those plastic holiday ornaments that come apart or Easter eggs for the molds if you already have either of those on hand. Some tutorials recommend greased muffin tins. I think those silicone ice cube and candy molds would also work just fine.
Here are a bunch of different ideas for molding your bath bombs:


- Added bonus
It seriously makes your whole room smell amazing while you make these!
Bath Bomb Basic Recipes
I found two basic recipes and am including them both here:
Bath Bomb Recipe 1
- 8 ounces Baking Soda (about 1 cup)
- 4 ounces Citric Acid (1/2 cup)
- 1/2 cup (4 ounces) Sea Salt or Epsom Salt
- 4 ounces Cornstarch (about 3/4 cup)
- 2 tablespoons oil of choice (this is my personal favorite but any liquid oil will work)
- 2 teaspoons witch hazel (or water) plus a little more if needed
- 1 teaspoon vanilla extract (or more water)
- 30-40 drops of Essential oils or powdered dried herbs (ginger is great)
Bath Bomb Recipe 2
- 4 oz. baking soda
- 2 oz. corn starch
- 2 oz. citric acid
- 2 oz. Epsom salt
- 1 to 1 1/2 teaspoons water
- 1 teaspoon essential oil
- 1 1/4 teaspoon oil (I like coconut or olive oil here)
- 1-2 drops food coloring (optional)
Makes two bombs (you can easily double or triple this recipe).
Instructions:
In a bowl combine the dry ingredients. Whisk to remove any clumps, corn starch tends to be clumpy. In a small glass jar stir together the wet ingredients. If you’re using coconut oil, give it a quick melt in the microwave or stove top first so it will more easily combine with the other ingredients.
Slowly pour the liquid mixture in with the dry mixture, whisking as you go. If you see the mixture fizz or foam, you may be adding the liquid too quickly. Once all the wet ingredients are combined with the dry, take a small amount in your hand and squeeze it together.
Mixture should hold together when squeezed without crumbling. It should stick together fairly well in one or two big chunks.
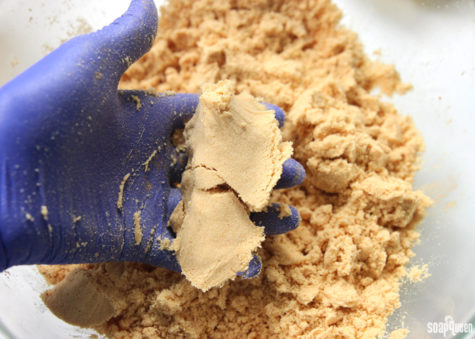
If it’s still too powdery to hold together, just add a tiny bit more water (or witch hazel) and mix until it does hold together.
If you are using a mold that makes a ball, fill each half of your bath bomb mold with the mixture until it’s just overflowing a little. Press together, then gently remove one side of the mold. Place the bath bomb on a tray and allow to dry out just a little (10-12 minutes) before removing the other side. Once you are ready to remove the other side, gently invert the bath bomb so the uncovered side is facing down, then gently remove the other half of the mold from the top. The key word, if you haven’t noticed, is gently. These can fall apart on you very easily if you’re not careful. If a bath bomb does crack in half while you’re removing it, you can gently press it back on top of the other half, or remove all the mixture back to the mixing bowl and start the molding process again. I had this happen to a few, so don’t fret, it’s easy to fix.
If you are using tins or trays, quickly push mixture into the greased muffin tins or any other greased container. Press in firmly and leave at least 24 hours (48 is better) or until hardened. It will expand some and this is normal. You can push it down into the mold several times while it is drying to keep it from expanding to much. Using the metal molds will create a stronger and more effective final bath bomb.
Note: I have seen some reports of the bath bomb sticking to these type of molds and refusing to come out., so be sure it is well greased.
Once they are completely out of the mold, allow them to dry out for 8 hours or overnight. Once very dry, you can wrap them in plastic wrap and store in a dry place until you’re ready to use them, or you can gift them to friends.
Tips and Variations:
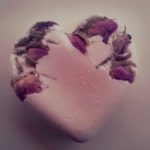
You can add dried flower buds, like lavender buds, to these pretty easily. Just remember to use food grade dried flowers to avoid flowers that might have been grown with pesticides as you don’t want to soak in a bath with that. No thanks! Do keep in mind that after using a bath bomb with dried petals, you will have to remove these from your tub. So if that bothers you, then leave the buds out.
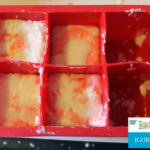
If you want to create two tone bath bombs, just mix up your batter in two separate bowls and only add the food coloring to one. Easy!
Here’s a YouTube tutorial:
Bath bombs are a great way to relax in the tub after a long day of dealing with kids, cooking, and all the other activities that motherhood entails. If you’ve never tried them, I highly encourage it, as it’s one of my favorite things to do at the end of the day.
Fool proof homemade bath bombs These turned out to be a lot of fun to make, and they are even more fun to use! I highly recommend giving them a try, or you could make a batch to give away to friends or family. Enjoy!
Sugar Scrubs
Those expensive sugar scrubs you see in department stores and spas… they cost pennies to make! Sugar scrubs are a simple beauty recipe with countless variations, and they can be incredibly moisturizing and exfoliating to the skin.

They can be used on face, body, and (especially) feet, for silky skin. You can add endless ingredients for your desired outcome, and they take under ten minutes to make.
Ingredients
- 1/2 cup sugar (white or brown sugar- preferably organic)
- 1/2 cup oil (olive oil and coconut oil work great)
- Optional: essential oils of your preference
Instructions
- Mix all ingredients and store in an air tight jar.
- Use 1 tablespoon as needed in the shower. Scrub skin with the mixture and rinse will. it will leave your skin feeling like silk.
Sound simple? It is!
Variations
- Pumpkin Pie Scrub: 1 cup of brown sugar, 1/2 cup coconut oil, 1/2 tsp vitamin E oil and 1/2 tsp pumpkin pie spices (or just 1/2 tsp cinnamon)
- Vanilla Brown Sugar Scrub: 1 cup brown sugar, 1/2 cup almond oil, 1/2 tsp Vitamin E oil and 1 tsp real vanilla extract
- Lemon Hand Scrub (for after washing dishes): 1 cup white sugar, 1/2 cup olive oil, 1/2 tsp vitamin E oil, 15-20 drops (or more) of lemon or orange essential oil
- Vanilla Lavender Relaxing Facial Scrub: 1 cup white sugar, 1/2 cup almond oil, 1/2 tsp Vitamin E oil, 1/2 tsp real vanilla extract and 15 drops lavender essential oil
These last on the counter for up to 2 months (or more) and smell good enough to eat… Actually, they are good enough to eat, but don’t… sugar is bad for your intestines!
Salt Scrub
As an alternative to the sugar scrub, here’s a recipe for a salt scrub:
Pink Himalayan Salt Scrub
- 1 cup of Salt (your choice)
- ¼ to ⅔ cup of Oil (again, your choice, for this scrub I used equal parts of jojoba, avocado and coconut)
- 1 T Glycerin
- ½ t Vitamin E
- Approx 20 drops of essential oils (or more depending on oil and strength desired)
Instructions:
- Add ingredients to the bowl and mix well.
- Scoop into your jars and enjoy!
Variations:
For a grapefruit and ginger scrub, add the following ingredients to the basic recipe:
- 1 tsp grated fresh ginger,
- 1 tsp ground Frankincense
- zest of grapefruit
For a citrus and poppyseed scrub, add the following ingredients to the basic recipe:
- 1 tbsp poppyseeds
- zest of citrus fruit
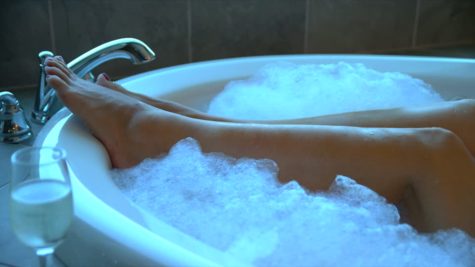
10 Steps to Your Most Heavenly Bath Ever
- Find the Quiet
The most essential factor for total decompression? Silence. Leave your phone in the other room. Tune out the noisiness of the world. Breathe.
- Dim the Lighting
Turn down the lights for a soothing ambiance, then burn a candle (or three). The warm, flickering light and aromatic scent will make your bathroom feel much more spa-like.
- Set the Temperature
Run the water hot, but not too hot. Select your preference to the touch, but bare in mind that water temp should be no more than 95 to 101°F. Any hotter will actually irritate your nervous system and make it harder to relax.
- Add Some Salt
Sprinkle Epsom salts into your tub as it begins to fill. These small miracles dissolve in water to soothe aching muscles, ease cramping, relieve stress, increase circulation and even detoxify your skin. Trust us, you’ll feel the difference.
- Add Some Suds
Next, pour some grown-up bubble bath in right where the faucet stream meets bath water. Not only will this pamper your skin, the scent and comforting bubbles will help you reach a deeper state of relaxation.
- Sip and Soak
This is a time to sit back and fully indulge. Our indulgences of choice? A crisp glass of white wine or soothing herbal tea to drink at leisure, depending on the mood.
- Lather Up
Clean skin is healthy skin. Work a rich, moisturizing bar soap into a foamy lather and cleanse from head to toe.
- Exfoliate Well
Before bath time is over, use a soft bristle body brush or loofah to gently buff, rid dead cells and reveal your softest skin.
- Dry Off
Getting out of the bath is never easy. But it will be light years better if you’re wrapping up in a plush, cozy robe afterward.
- Seal the Deal
Once you’ve properly dried, treat your skin to one last layer of pampering: A restorative body oil to lock in moisture…then promptly crawl into bed silky smooth and squeaky clean.
My Sources:
I pretty much looted the internet for all this cool info. Here’s a list of links to all the places I found cool stuff. If I missed a few, well… I’m sorry!
Sources:
2 Responses to Luxuriously Delicious Ideas For The Bath
Leave a Reply to Dawnofarabia Cancel reply
- Radical Self Care Project Overview by shirleytwofeathers - No Comment
- Radical Self Care Image Gallery by shirleytwofeathers - No Comment
- It’s A Wrap by shirleytwofeathers - 3 Comments
- Something To Consider by shirleytwofeathers - 1 Comment
- Nurturing Your Precious Self by shirleytwofeathers - 3 Comments
Liana: A Prosperity Prayer
B. Joy Barrett: beautiful-turquoise-upholstered-accent-chair-for-living-room-with-within-colorful-accent-chairs-colorful-accent-chairs-transforms-the-look-of-a-room
Claudette Losier: Why Does It Work?
me: Make Your Own Violet Fire
Abdulrahman: Money Chant – Very Fast
Our current project began on July 4. We are exploring the concept and practice of Radical Self Care . Feel free to join in at any time!

Interested? You can visit our current project page, or you can take a look at the About The Project page if you are curious about the concept.
.
Please feel free to join in at any time! No experience necessary.
- Money Chant - Fast
- Money Chant - Slow
- Prosperity Plan
- Amazing Creator
- Cause and Effect
- I Am That I Am
- Spirit Rap
- Lakshmi Spirit Rap
- PowWow Spirit Rap
 Enter your question and receive the wisdom of the Occulatum. You may pose your question in any way that feels appropriate. The answer will come in the form of a small pop up. Try it - your life just might change for the better!


I think it's time to go shopping... maybe even buy some really cool stuff at my online shops!!

Good Grief! That’s a long post! Wowsers! Well, I can’t wait to get started making cool stuff for … no wait… I need a bathtub first!! LOL…. sigh… maybe this will get me motivated to figure out the plumbing!
OMG! This is an awesome post! I can’t wait to try so many of these out! I don’t do baths but I have friends who will love these! Just found my Christmas gift ideas! Thanks, Shirley! ❤️