Creativity
What About Child Care?

All this talk about going corporate, being our best boss, having board meetings and such… I started to wonder what about child care? All work and no play makes Shirley a dull girl… no… actually that’s not true. All work and no play turns Shirley into a rebellious destructive temper tantrum throwing brat!
What happens to you when you lock your inner child down for too long? How does that look for you? Does that childish, fun loving, freedom seeking, curiously bright little flame inside of you shut down or go into hiding? Are there rebellions and tantrums? Or does that beautiful precious part of you pack up and run away?

So, how about this… let’s commit to doing something childish and silly. It doesn’t HAVE to be today, but let’s at least make a play date with our inner child. Set a date, make a plan, and then actually follow through with it. No excuses, no rain checks…
Here are some ideas:
- Grab some crayons and color outside the lines.
- Finger painting is always messy and fun!
- Blow bubbles and try to catch them.
- Make a fort under the table and read stories to yourself.
- Surf kids crafts on YouTube and find something fun to do.
- Make chocolate chip cookies and eat the dough off of your sticky fingers.
- Dress up like a princess or a dinosaur… or something fun… and just be silly all day long.
- Play hide and seek with your dog… or a friend… or an imaginary friend.
- Have a tea party ~ real or imaginary.
What are your ideas? What did you enjoy playing at when you were a child? What were your favorite games? Did you play outside? Or were you more of an inside and under the covers kind of a kid? What do you think your inner child would most enjoy?

It’s perfectly OK to invite friends to your play date, but only if you make it clear that NO ONE is going to behave like a grown up until after the party is over and it’s time to clean up. Because of course, this is real life, and rooms eventually have to be cleaned, baths have to be taken, and toys have to be put away.
Drawing Your Angels
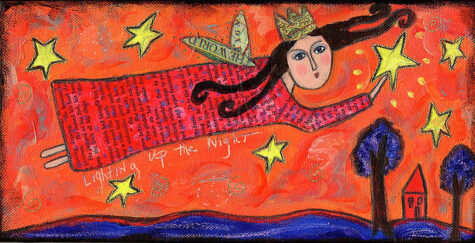
I did a fun exercise with someone I love very much, and we drew what we thought our guardian angels might look like. It was really fun, and way more informative than I expected. Here’s what I came up with. Apparently I’m a blond, who knew?

The biggest surprise for me is that my personal Guardian Angel is pretty sure his name is Bob. How fun is that? I also discovered that I carry a very mischievous little angel in my pocket, and together we manage to get ourselves into all kinds of situations.
These insights would have totally escaped me if I hadn’t started drawing them. They just sort of popped up. Here is what Layla sketched out…

So, I have a pretty good idea that right about now you might be saying, but I can’t draw.
Well, I can’t either, not really. I just stopped being scared to sketch something out, and somehow, if I work on it long enough without trying too hard, and give my drawing permission to look dumb and ridiculous, it often turns out kinda cute. I’m pretty sure this is only because I get lucky and probably because I do a lot of drawing, so I’ve had lots of practice. I also have a computer program that I used to digitally color it, which helps a lot.
HOWEVER!
You don’t have to actually draw an angel with a pencil. You could draw it with words. The best way to do this is to just imagine what you think your guardian angel might look like and then just start writing down the details.
I have always been pretty sure that my guardian angel is tall and slender, with wings, probably gray ones, and a laid back “be cool” vibe… He’s always got my back… The pocket angel just popped into my head randomly… which was fun because it was so unexpected.
Don’t edit anything that seems silly or ridiculous. Jot it all down. You can do a list, illustrate with a really rough sketch or a stick figure… whatever feels easiest. Try to include as many details as possible, you might be surprised by what you come up with!
Feeling Brave?
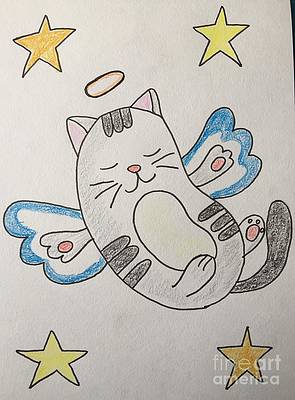
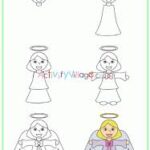
If you are feeling brave and adventurous, and decide that you want to give drawing a go, here is a small gallery of drawings and paintings by children… at least most of these are done by children. As you can see, it’s actually pretty simple… all you need is a basic shape like a triangle or a rectangle, then you add wings and a head, after that, it’s just a matter of adding a few small details.
The hardest part is shutting down your inner critic and just letting your inner child play.


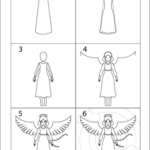
I did find some drawing tutorials, in case that helps. Sometimes if I look at them, I feel less afraid to just try it. Other times, it complicates things for me… Here’s what I found:

What do Angels really look like?
For those of us who are wondering what real angels actually look like, here’s a bit from Angel Focus.
Angels are neither male nor female, but they are often referred to as he or she. They do not have a human form because they are made up of energy, love and light. But Angels will project themselves to us in a manner we are most comfortable with which means we often see them as human.
If they have a message to give us, they may even come to us in the form of a departed loved one, so as not to scare us. Other ways Angels appear to us is through lights, colors, sounds, feelings, and scents.
Repairing Perfection
“There is a crack in everything. That’s how the light gets in.”
~Leonard Cohen
Stuff breaks. Today, broken things are often discarded. This was also true in the past. However, both today and in the past, some things—special things—are repaired. Their specialness may come from their economic, symbolic, or political value; their beauty; or their connections to personal or family history.
All of the objects in the Repairing Perfection section of the Less Than Perfect Art Exhibition have been repaired. Many of the repairs were purely practical: to allow objects to continue to serve their intended function. Some repairs were concealed to make the objects appear new. Others are visible, when menders chose not to hide their work.
While all repairs fix broken objects, some are meant to be seen and admired in their own right. They add to an object’s beauty and celebrate its history, including the harms it has suffered. The gold-lacquer kintsugi repaired vessels provide striking examples of this approach.
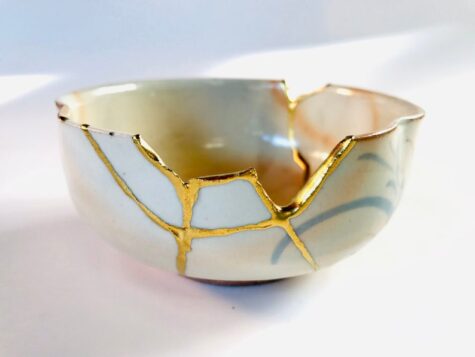
Most people don’t purposefully shatter their cherished pieces of pottery, but that isn’t always the case in Japanese culture. Adorning broken ceramics with a lacquer mixed with powdered gold is part of a more than 500-year-old Japanese tradition that highlights imperfections rather than hiding them. This not only teaches calm when a cherished piece of pottery breaks; it is a reminder of the beauty of human fragility as well.
Rather than concealing imperfections, the joins of these repaired vessels are defined by bright gold lacquer in a technique known as kintsugi or “golden joinery.” Multiple layers of lacquer are applied to bond fragments of a broken vessel together. Gold dust is mixed into the final layer to highlight the joins. The elegant repairs celebrate the age and history of the vessel, enhancing its beauty and marking it as a valued heirloom.
This centuries-old art is more than an aesthetic. For the Japanese, it’s part of a broader philosophy of embracing the beauty of human flaws.
In a world that so often prizes youth, perfection and excess, embracing the old and battered may seem strange. But the 15th-Century practice of kintsugi is a reminder to stay optimistic when things fall apart and to celebrate the flaws and missteps of life.
In an age of mass production and quick disposal, learning to accept and celebrate scars and flaws is a powerful lesson in humanity and sustainability.
Sources:
Deliberate Imperfection

“Nothing we see or hear is perfect.
But right there in the imperfection is perfect reality.”
~Shunryu Suzuki
Some people are perfectionists, going great lengths and through punishing routines to achieve the perfect figure, the perfect score, the inimitable performance. But there are cultures around the world that have learned to abandon this rigid and obsessive behavior, and embrace the concept of imperfection. Artists and craftsmen of such cultures would deliberately introduce flaws into their works to remind themselves that flaws are an integral part of being human.
In Navajo culture, rug weavers would leave little imperfections along the borders in the shape of a line called ch’ihónít’i, which is translated into English as “spirit line” or “spirit pathway. The Navajos believe that when weaving a rug, the weaver entwines part of her being into the cloth. The spirit line allows this trapped part of the weaver’s spirit to safely exit the rug.
The Navajos also believe that only God is perfect and that humans cannot achieve the same perfect level. So they make sure to leave little imperfection in anything they create. Usually, one has to look very close to find the imperfection, so it does not detract from the beauty of the item. It might be a loose piece of yarn, or a different colored bead.
That God is perfect and humans are not is also one of the main principles of Islamic architecture. The beautifully decorated vaulted ceilings of many mosques in the Arab world appear symmetric, but often have minor irregularities imperceptible to most visitors.
Even the National Cathedral in Washington, D.C., the capital of the United States, has several small architectural flaws that has been attributed to an apocryphal medieval custom that sought to illustrate that only God can be perfect. The ceiling that arches over the main aisle of the cathedral do not meet at the center, but is slightly off its axis. The choir-stalls along the nave of the church are also not aligned.
In the Punjab region of India and Pakistan, an embroidery technique called Phulkari, which literally means flower work, is highly popular. Intricate patterns using brightly colored threads are woven into shawls and head scarfs and other garments by women for their own use or for their family.
Most Phulkari patterns are highly regular, but sometimes women introduce small color or pattern changes into their work. Some are added to protect the shawl’s wearer from the evil eye. Others are stitched to mark important events that occurred during a textile’s creation, such as the joy of a baby’s birth or grief over a relative’s death.
In Japan, incorporating deliberate imperfections is a necessary ingredient of art. This aesthetic concept is known as “Wabi sabi” and has been practiced since at least the 16th century. Characteristics of the wabi-sabi aesthetic include asymmetry, roughness, and simplicity, and appreciation of the ingenuous integrity of natural objects and processes.
The wabi sabi concept is also seen in the robes worn by Buddhist monks. Known as “kesa”, these robes draped diagonally across the body feature a small patchwork construction as a reminder of the humble patched garment worn by the Buddha.
These concepts, aside from paying homage to God, reinforce the idea that there is beauty in imperfections, and beauty itself is imperfect, impermanent, and incomplete.
Sources:
Failed Perfection

“Ever tried. Ever failed.
No matter. Try again. Fail again. Fail better.”
What can we learn from failure? A great deal. The objects in this section (of the Less Than Perfect Exhibition) are, mainly, failures. Most failed at the time of production. They were victims of inadequate preparation, random gusts of wind, or a careless slip of the hand.
For many, production flaws rendered them unusable and they were discarded. For others, the flaws mattered far less. Coins could still be exchanged even if their main image was off center. Warped ushabti figures could still accompany the dead.
- Did ancient artisans see beauty in failure?
- Or—more likely—did they grumble when they realized their hard work had not yielded its desired results?
Whichever the case, failures led artists and craftspeople to make new discoveries, improve production techniques, and gain better control over raw materials, tools, and facilities.
Archaeologists also learn from studying imperfect objects. Failed objects capture a moment when things did not go as planned. They allow us to witness ancient experiments, track technological innovations, and understand acceptable loss in early mass production. They let us see the products of learners and skilled and less skilled laborers. And, sometimes, their failed perfection yields charm, humor, and great beauty.
Less Than Perfect Art

While researching our current theme of imperfection, I stumbled into an online exhibition called “Less Than Perfect.” I’ve decided to share their thoughts in three separate posts. I’d love to hear your thoughts and ideas!
- How do you define perfection?
- How can we learn from failures?
Less Than Perfect explores these questions and asks how people in diverse times, places, and cultures have answered them.
The objects exhibited here span four continents and more than 2000 years. They come from three University of Michigan museums: the Kelsey Museum, the Museum of Art, and the Museum of Anthropological Archaeology. Each has the potential to tell many stories: of how, where, and when it was made; how it was used, discarded, repaired, or valued; and how it came to a particular university museum in Ann Arbor.
Drawing from among these stories, the exhibition is organized around three themes:
- Failed Perfection presents objects that failed in production and explores how researchers use them to study ancient economy and technologies.
- Deliberate Imperfection features beautiful and finely crafted objects whose makers purposely introduced asymmetries or other unexpected elements into their products—and considers why artists may choose to make imperfect things.
- Repairing Perfection highlights artifacts that were repaired in antiquity and asks why and how individuals worked to restore usefulness and beauty to certain broken, worn out, or damaged objects.
Taken together, these themes invite us to ponder our own perspectives and encounters with perfection, imperfection, and failure and consider how people in other times and places have responded to these shared human experiences.
Ideas To Lighten The Mood
When we explored Altschmerz, it occurred to me that I might really benefit from a specific time limit, or regularly scheduled space in my daily routine for either dealing with, or reliving the thoughts and feelings that put me in a funk, or ruin what might possibly have been a really nice day.
What I came up with is a number of fun little arts and crafts ideas that can be as basic and simple or as elaborate and complicated as you’d like them to be. It seems smart to start with simple and then embellish as time goes by, but I know myself pretty well, and I fully expect I’ll go full out elaborately complicated.
- Happy Memories
Ok, so here’s what I was thinking. Instead of torturing myself with the sad, bad, or otherwise unhappy moments in the past, I thought it might be fun and useful to spend a few minutes each day thinking about the best days, fun times, happy memories or experiences. And then, taking it one step further and writing it down.
Sylvia Hartman suggests a Star Memories journal, where you have a simple journal, and then just jot down your best memories, the date, your age, and anything else about that experience that you’d want to share. I like this idea.

It might also be fun to have a box. It doesn’t have to be an awesome and amazing box. Something as simple as a shoe box would work just fine. And then just jot down memories that cheer you up or make you smile and toss them in. Maybe pictures, mementos, little stuff could also go in. If you are cleaning house, or decluttering your car, and find a little something that makes you smile, it could go in the box too.
On the days when nothing is happy or fun, you could open the box and spend a little time reliving those little moments. And, on days when you feel up to it, you could spend some time adding to your memory box.. or decorating it.
What I really like about this idea is that at some point, when your time is up, and you have left this life – there will be a box of happy memories that your family and friends might find comfort in.
- Write About It
Some days, I need (or want) to just wallow in my “stuff.” And I am pretty sure that those are the days that the “Happy Memories” box will stay on the shelf, unopened.
For those days, I thought it might be helpful to simply acknowledge whatever it is that I’m in a funk about. I thought it might look like this:
I am ______ (pinpoint the feeling)
And I must really like feeling this way
Because if I didn’t, I would __________ (write the first thing that comes to mind)
And/or _________ (write the next thing that comes to mind)
So, it must be useful to me in some way
And I might as well spend the next ______ minutes enjoying it.
For me, today, it went like this:
I am feeling really tired and overwhelmed. I must really like feeling this way because if I didn’t, I would do something about it, and maybe get more sleep, go outside and get some fresh air, or even begin to implement a plan to cope with it. So, it must be useful to me in some way and I might as well spend the next 10 minutes enjoying it.
And I did spend about 10 minutes wallowing in the feeling, and then I actually got up and went outside and got some fresh air. Amazingly, it felt really good and helped a lot.
I didn’t want to forget this little exercise, and I thought it might be helpful if I had some little booklets all made up in advance. This video shows how to make little emoji booklets out of one sheet of paper with no glue… I’m going to make several when I finish with this post.
You will end up with 8 little pages. Some of the pages are doubled or even tripled, which bothered me a little bit, and I solved it by cutting the bottom edges of the bulkiest ones and then using scotch tape to bind up the middle parts where the booklet kind of separated.
My method gave me enough pages to do it like this:
- I am feeling:
- (leave blank to write on)
- I must really like
- Feeling like this
- Because
- If I didn’t
- I would:
- (leave blank to write on)
- and/or:
- (leave blank to write on)
- So it must be useful to me
- And I might as well
- Spend ______ minutes
- Enjoying it.
If you love your little booklets and want them to be really cute, you could use washi tape to secure the middles and around the sides. The double sided ones could even be left open at the top or on the side to give you a little pocket for… I dunno what… but something fun?
This has the added bonus of being wonderfully distracting! I love arts and crafts solutions to emotional issues. Plus you can take one or two of them with you in case you need to use it at work… when waiting for an appointment… or while visiting relatives.
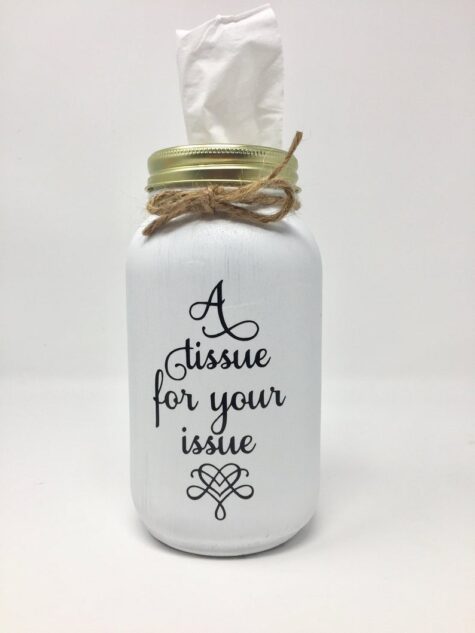
- Blow It Off
Here’s another fun idea. It looks really really easy, and doesn’t require a lot of materials. Plus you have the added bonus of simply using a regular box of tissues and decorating it (if you want to). My vision for this is to pull out a tissue and blow your angst, anxiety, issues… whatever it is that’s bothering you… into it. Really get it all blown out of your head and into the tissue.
And then flush the tissue with a wave good-by and a squirt of room sanitizer, a spritzer of aromatherapy fragrance… whatever you have that you think will clear the room. Some days it might take several tissues to get it all out. Other days, you might not even need it.
There are a lot of tutorials online about how to make these. You can also buy them ready made on Etsy. Or you can keep it simple and just decorate a box of tissues.
If you want to make one out of a jar, it’s pretty easy:
Start with a mason jar, take the lid off and decorate the jar with paint, fabric, or whatever you like. The round middle part of the lid can be replaced with either felt or cardboard. Or even the top of the tissue box if the opening is small enough. Simply use the middle lid to cut the right size circle from the felt or cardboard. Make an opening to pull the tissues through. Decorate the top of the lid however you want, and voila!
Most of the tutorials call for a mason jar because the lid is easy to alter. You can use any wide mouth jar, even a plastic peanut butter jar, the only draw back is that the plastic lid will have to be cut for the tissues to pull through.
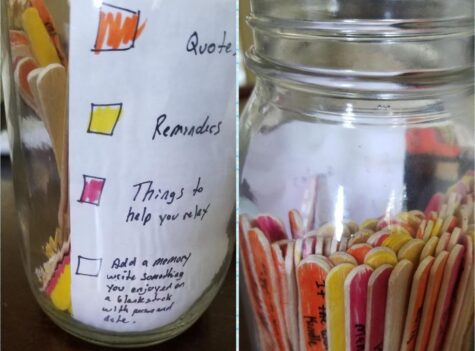
- Put It On A Stick
This is a cute and fun little all purpose idea that requires either popsicle sticks or strips of colored cardstock. When I was a kid, my parents had a little set of bible verses on strips of cardstock that they kept in a container on the dining room table. Every morning we would pick one and read it aloud, and that would be our spiritual theme for the day.
This idea is similar. What you would do is spend some time making the different bits for it. It can be approached as a work in progress. When you find yourself spiraling down the rabbit hole, you could pull this out and add to it. If you’re already too far gone, you can pull something out of your jar and maybe it will help.
This would also make for a great group project. Get everyone in the family involved on a lazy Sunday afternoon, or get together with friends and help each other think of stuff to write down.
I find that the simple process of making something like this acts as a huge mood booster. It’s wonderfully distracting, feels productive and useful, and if you give it something cute to live in, you can keep it out and have it ready for those times when you really might need it.
- Count Your Blessings
This can take any form. You can think about and list your good qualities and loveable attributes. You can list all the things that you have that make your life easier and more comfortable. You can use it as a gratitude journal, box, jar…
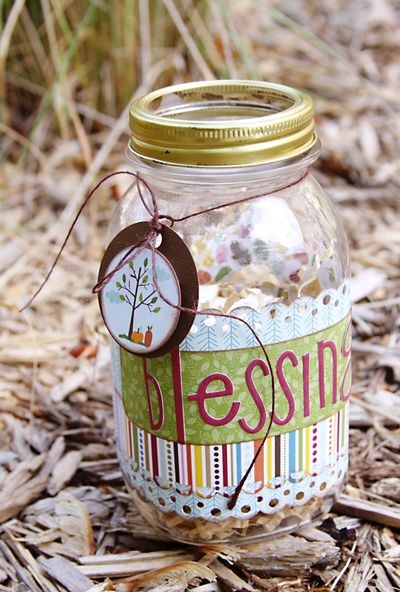
Alternatively, if this sort of thing works for you, you can fill your container or your book with affirmations, uplifting thoughts, and positive images.
I like the idea of using a bottle or a box over a journal simply because I have so many unfinished journals. However, I have been exploring Junk Journal making. It’s a really ambitious and complicated idea, but maybe i will make more than one. If I do, it might be fun to create a blessing / gratitude / positive thoughts journal. I’m really intrigued with the idea of a tiny one. Here’s a link to one of the tutorials that got me inspired.
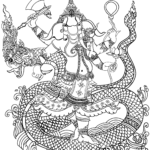
Coloring Ganesh
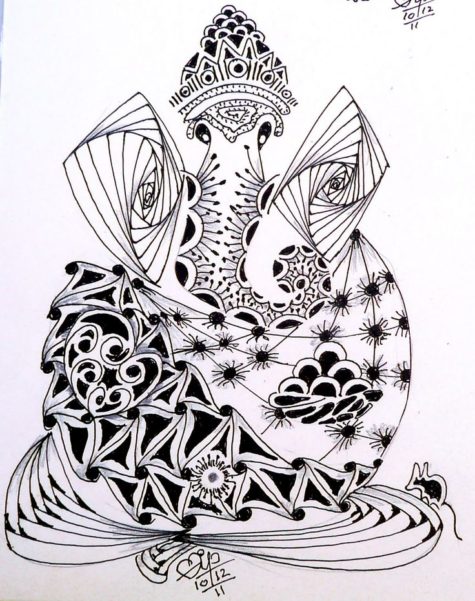
If you enjoyed the dot-to-dot Ganesh, this will be even more fun. I found a bunch of different Ganesh coloring pages, and have uploaded them into a photo gallery. I think they are large enough to print and color, and if you have an app on your phone that allows such a thing, that’s fun too!


Give Yourself Permission
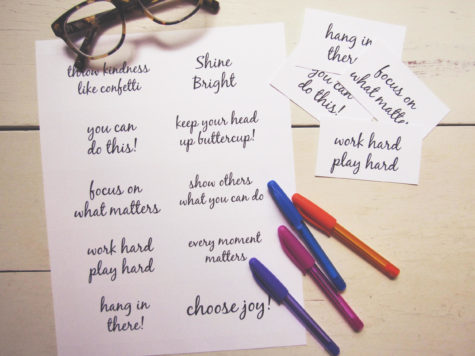
Here is a nifty little creative project that I think would make a great addition to any morning routine. I found it in the book Living Out Loud, and it looks pretty easy. The premise is to live your life on purpose daily. Here’s what she has to say about it: “Permission Cards take the frenzy out of your hectic existence and give you permission to do what you REALLY want.”
The book has a tear out page with lots of little “permission slips,” but I thought it would be really fun to make our own. You can use 3 x 5 cards and cut them into quarters, thirds, or whatever shape you like. On one side write an activity that appeals to you.
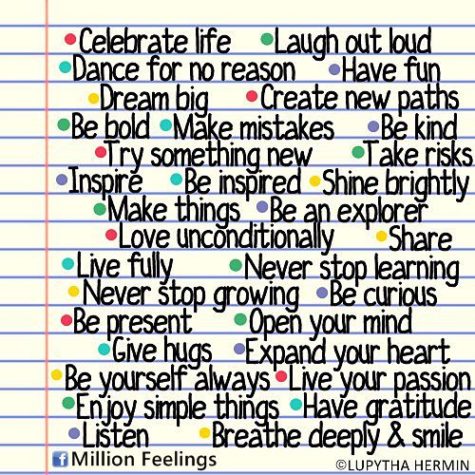
Here is a list of the permission slips from the book. Feel free to make up a bunch more of your own:
Meditate * Nap * Heal * Vent * Forgive * Play * Change * Try * Recharge * Inspire * Begin * Embrace * Simplify * Create * Receive * Trust * Dream * Invent * Smile * Wish * Bloom * Grow * Love * Transform * Dance * Choose * Express * Empower * Contribute * Investigate * Let Go * Accept * Laugh
You don’t have to stick to one word permissions. Here are some other ideas:
Hurry slowly * Make mistakes * Go back to bed * Be outrageous
Make a mess * Whine and Complain * Say what I think * Play all day
Leave them plain and simple, or decorate each one with markers or stickers. If you enjoy creative projects, you can go all out with these, but if you just want something and utilitarian, it doesn’t have to be fancy at all.
Directions:
- Make the cards
- Place the cards in a bowl
- Close your eyes and pick one. (The one that you need will stick to your fingers.)
- Say out loud, “I now have permission to _____________.”
Easy peasy… be a fun way to start the day, don’t you think?
Refurbishing The Dining Room
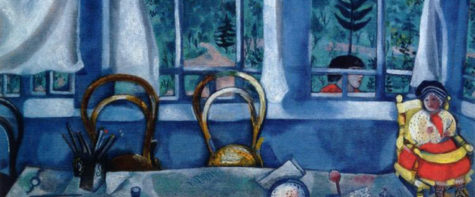
Make your dining room a comfortable dining and conversation space for the family. Whether your style is formal or family friendly, here are some great ideas to update your dining room.
Clean It Up
First up, I think it’s a good idea to make sure that the wooden surfaces sparkle and shine. Here’s an easy recipe for a good wood cleaning product:

Apply this formula to clean and restore luster to wood furniture. It also may be used to help remove superficial water rings on wood tables.
You will need:
- Funnel
- Measuring cup and spoons
- Lidded 8-oz. plastic squirt bottle
- Microfiber cloth (or clean, soft rag)
Ingredients:
- 2 Tbsp. olive oil
- ¼ cup distilled white vinegar
- ¼ tsp. lemon oil (or fresh lemon juice)
Instructions:
Using funnel, pour olive oil, vinegar and lemon oil into bottle. Shake well to emulsify. Squirt polish onto microfiber cloth and rub onto finished-wood furniture. Always go with the grain and evenly distribute polish. Remove any excess polish with a clean cloth.
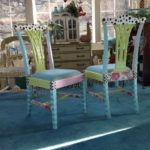
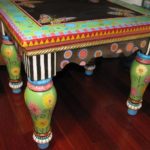
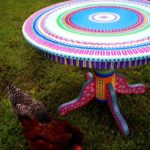
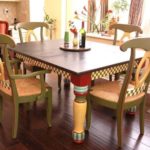
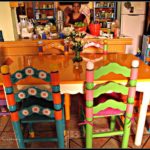
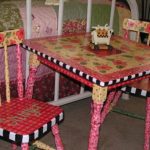
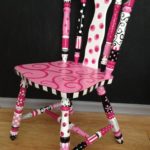
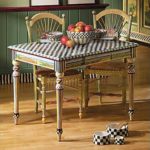
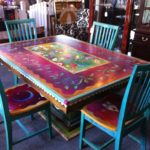
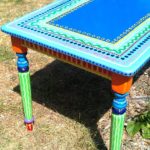
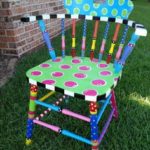
Colorizing Your Dining Room Furniture
Maybe instead of a good cleaning, your dining room furniture needs a spot of color! Here is a collection of super colorful and interestingly wonderful painted tables and chairs:


And if you have metal chairs, they can be cleaned up and painted too! Check these out:
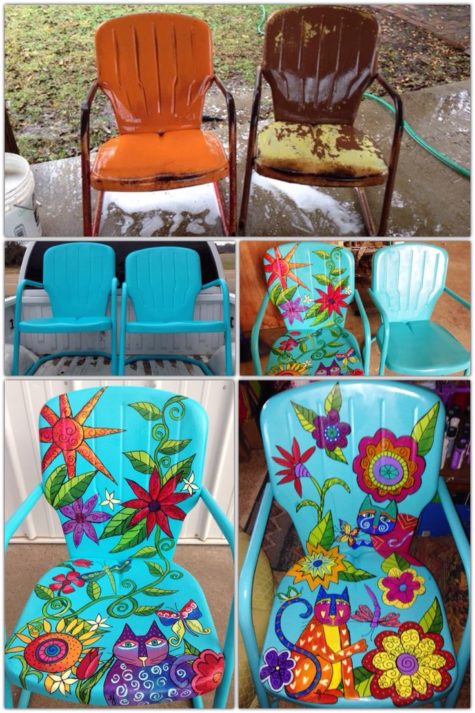
If your taste and your style is more conservative, give them a new makeover with paint and fabric. A bold graphic pattern can bring a pop of color and life into a room. And the best part: It doesn’t cost a lot of money.
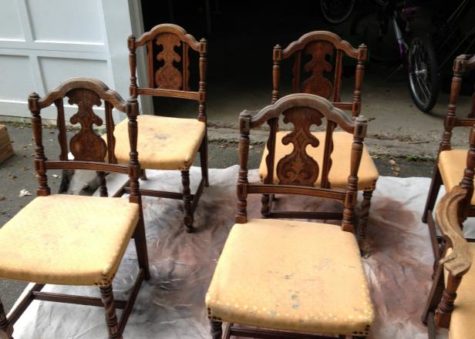
How to Re-Cushion Old Dining Chairs
These are the chairs we’re starting with:
Here’s a list of the tools and materials that will be needed for this project.
Tools:
- Staple gun and staples
- Hot glue gun
- Measuring tape
- Flathead screwdriver
- Scissors
- Small pliers
- Hammer
Materials:
- Fabric for chairs
- Black upholstery tacks
- Carpet padding
- Quilter’s batting
- Cotton batting
- Paint
Step by Step Instructions with pics:
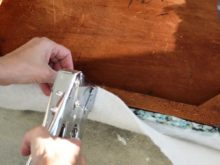
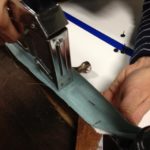
- Remove Old Fabric
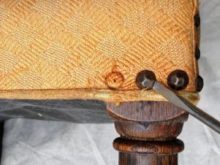
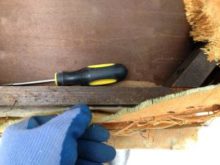
Use a flathead screwdriver and pliers to remove upholstery tacks and the staples underneath. Do not throw away fabric or cushioning, you can use them for templates. If seats are different, number the bottom of the seat as well as fabric that was removed.
- Clean Chairs
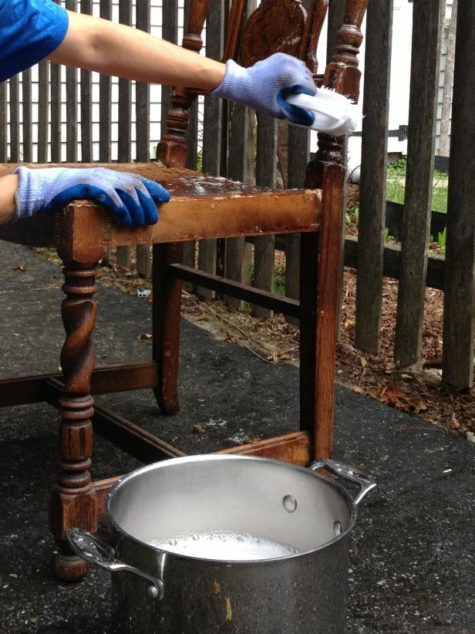
When fabric is removed, clean chair to remove dirt and greasy build up.
- Prime and Paint
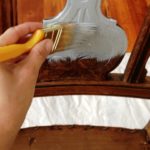

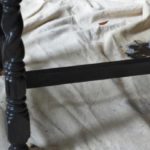
When chairs are completely dry, apply a coat of primer to entire surface. A coat of primer will help paint better adhere to chairs. When the primer is dry, add your first coat of paint. Let chairs dry completely and then apply a second coat.
- Measure and Cut Padding
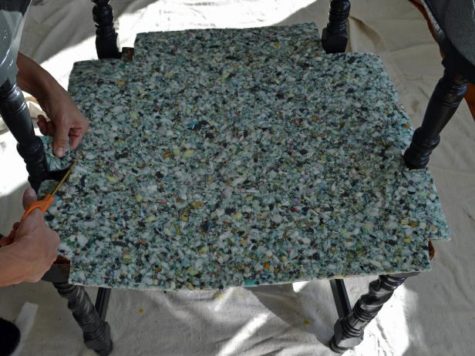
Use old fabric as a guide to cut a piece of carpet padding for the chair. Place padding on the chair and then cut in details you may have missed. Make sure there is enough overhang to go over the side of the chair, you can always cut excess off later.
- Attach Cushioning
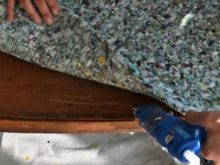
Use a hot-glue gun to adhere padding onto seat and down the sides. Hold in place while the glue dries. To make it extra cushy, glue a second piece of carpet padding on top of the first one.
Cut a piece of quilting batting bigger than the carpet padding and lay it on top. Use a hot-glue gun again to adhere the batting to the padding.
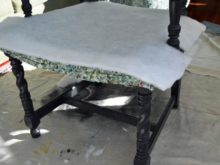
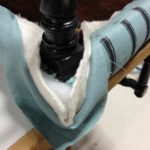
- Attach Cotton Batting

Use cotton batting for the final layer. Cut this layer long so it hangs down past the bottom of the seat. Glue cotton batting onto the quilting batting on top and around the sides of the seat. After the glue has dried (usually just a few minutes), flip the chair over and staple the overhanging batting to the bottom of the chair seat.
- Cut and Prep Fabric
Again, use the old fabric as the template to cut the new fabric. Place the new fabric on the seat and make sure it is centered and smooth. You may want to stick a few straight pins in the top to hold the fabric in place. Place one staple in each side, in the middle. Turn the chair upside down. Pull the fabric a little taunt and continue stapling each side from the middle out to the corners. If needed, use a hammer to push the staples all the way down.
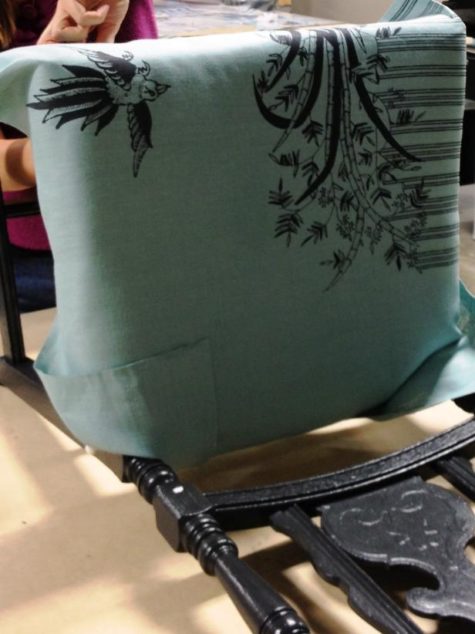
- Finishing Touches

Leave plenty of room around the corners and legs for folding in. You will probably need to cut some of the batting off to get the fabric to fold properly before hammering in the upholstery tacks. We used three tacks for the side of each leg.
- The Finished Chairs
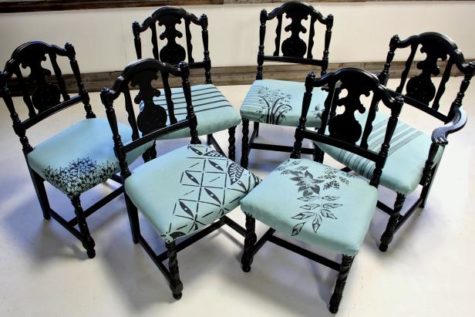
I love how each one is slightly different, and I wonder if the fabric was painted or stenciled. Super cool, huh?
Not interested in recovering your dining room chairs? You can easily clean them up with this simple recipe:
Top It Off
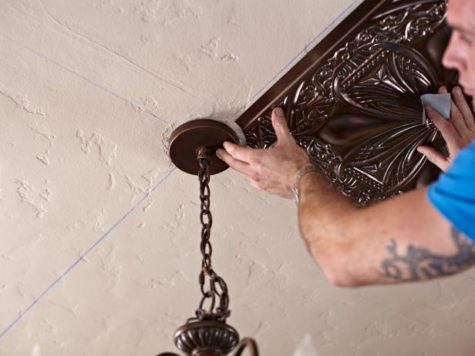
Add texture and formality up above by applying tin tiles or embossed wallpaper to the ceiling. Having a little architectural interest on the ceiling will draw the eye up and make the room seem bigger. Get the look of 1920’s glamour on your ceiling with unbelievably real-looking fake tin tiles.
How to Install Tin Ceiling Tiles
People often think to decorate their walls with art and new paint colors, or their floors with fabulous rugs, but a famous designer secret to making a space special is to dress the ceiling. It isn’t called the fifth wall for nothing. We started this project with a bare, square ceiling over a Spanish-style dining room. With some simple calculating and installing, this faux tin ceiling makes a dramatic impact, and it keeps with the 1920’s style of the space. This plastic tile is made to look just like the real tin version. In addition to being easier to cut and work with, it’s cheaper, too.
Here’s a list of the tools and materials that will be needed for this project.
Tools:
- Measuring tape
- Chalk snap line
- Duct tape
- Scissors
- Paint roller
Materials:
- Faux tin ceiling tiles
- concrete sealer
Step by Step Instructions with Pics:
- Get Started: Plan, Purchase and Install

Find the square footage of the area you’d like to tile. Measure the length and width of the space. Next multiply those numbers together to find the square footage. This will be important for ordering enough of the product you select. If you’re working on a ceiling, have a friend help you measure if needed to get the correct dimensions.
- Order or Create Your Tiles
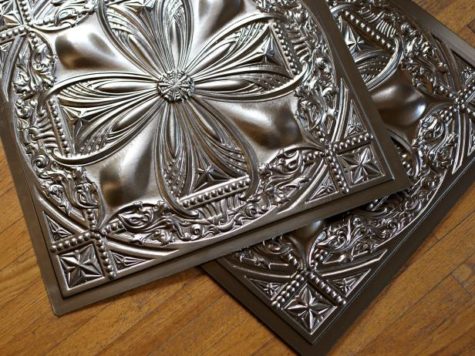
When picking faux tiles, think about the style of your home first. Look for a style that naturally blends with your space. Faux tin ceiling tiles come in several colors, and several faux metal finishes – it comes down to taste and color scheme. They also come in 6″ patterns up to 24″ patterns. We chose a larger pattern that had a Spanish-style vibe and ordered it in a dark, bronzed finish.
Purchase 15% more tile than you need, for any cutting mistakes and pattern matching. I also suggest ordering 1″ decorative strips in the matching material of your tile to cover seams.
To determine your installation needs, check the ceiling’s material. Many people prefer a glue-up install, so you can reposition tiles as needed while the glue sets up. Plaster, paneling and plywood work with glue, but check your manufacturer’s instructions for best practices.
- With a friends help, snap chalk line.

Two people should hold it taut in place, and one person should pull down and release the chalk-covered string to snap a chalky line on the ceiling.
Two people should hold it taut in place, and one person should pull down and release the chalk-covered string to snap a chalky line on the ceiling.
- Mark the Control Lines
For most spaces, the control line should be a straight line cutting your tiled area in half. Measure to find a halfway point on either side of your space. Use a snapping chalk line to connect the two points by stretching it from one side to the other at your halfway mark. Two people should hold it in place, and one person should pull down and release the chalk-covered string to snap a chalky line on the ceiling. This will serve as a reference line that you can use to ensure straight tile placement.
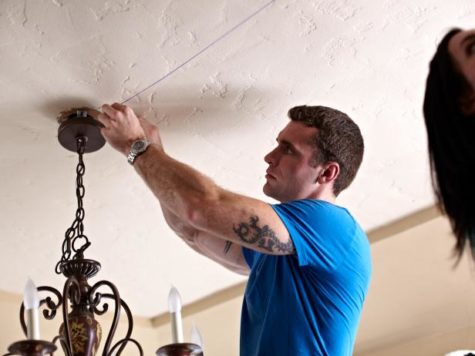
Once you’ve completed a line going one direction, rotate 90 degrees and create another control line to create a cross and form straight lines bisecting your middle point. Plan for your first tile to be placed in the corner created by the intersection of the two chalk lines. For this project, that intersection fell behind a light fixture in the center of the room.
- Dry Fit Tiles Before Installing

It’s always best to dry fit your tiles before gluing up. Before you apply adhesive, place your tiles on the ceiling and trace any fixtures you may have to cut around.
Duct tape on the back of your tiles will help hold it up while you trace and dry fit each tile.
- Make Cuts
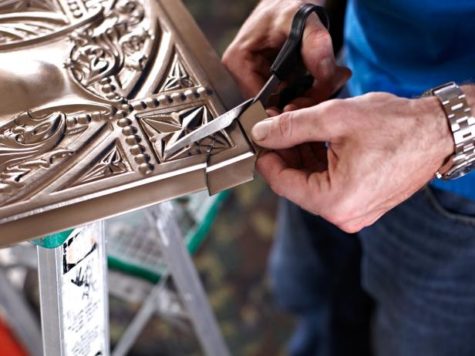
Use scissors to cut tiles to fit your ceiling. We cut out rounded shapes, to leave room for the light fixture in the center of the room. Faux tin tiles are very easy to cut, but it is recommended to have a strong set of household scissors to do the job.
- Roll On Cement and Install
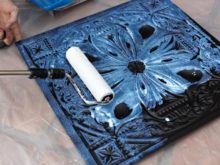

Apply an even coat to the back of your tiles. Apply an even coat of contact cement to your ceiling as well
The cement is applied using your paint roller. Apply an even coat to the back of your tiles. Contact cement has an open time of approximately 15 minutes. That means that once applied, you should let it sit for a few minutes to become tacky and the begin applying the tiles to the ceiling.
While they are setting up, apply an even coat of contact cement to your ceiling as well. The cement on both surfaces will bond with itself, creating a seal.
Apply the tiles on your reference line first and work out toward the edges of your ceiling. Measure and cut pieces of tile to fit any areas where a full tile cannot go. Stick to the pattern repeat for best results.
- Clean and Cover Gaps
Sometimes ceilings are not square, so you may find yourself having to adjust a tile here and there. The decorative strips that match the tile are very helpful for covering any gaps. Clean the tiles with a dry cloth and make sure any cement has been wiped off the surface before you apply the strips. They are not repositionable, so try to get it lined up perfectly the first time.
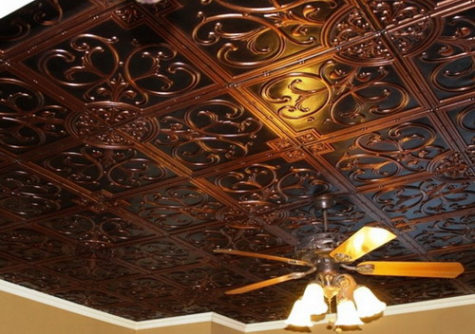
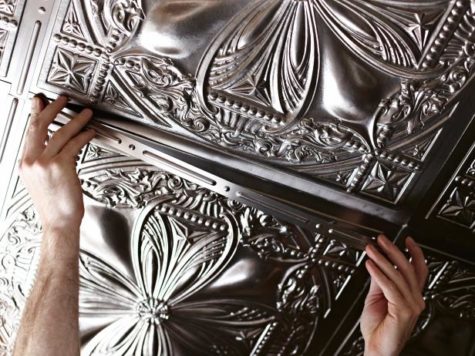
- The finished Ceiling:

I think it looks pretty cool, and if you have nice sturdy tile to use, it’s probably not that difficult to do. I did, however, think that the cost of the faux tiles was kind of high, so I went on a search and came up with a super cool and not very expensive faux tile project that looked really fun. Best of all, the tiles could be thumb tacked onto cork board and installed as a back splash.
Susy’s Artsy Craftsy Sitcom is the only place I could find with a tutorial to these tiles. I love how pretty they are. Recycled crafts are one of her specialties. Embossing disposable cookie sheets is an easy technique and creates amazing art. Beautiful faux tin tiles!
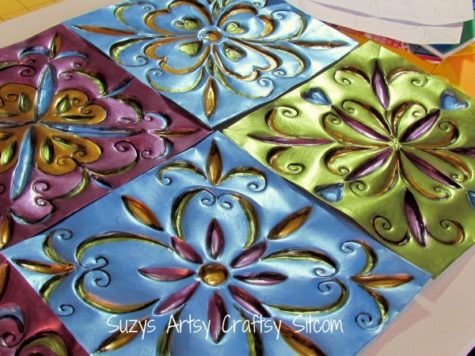
Make Beautiful Faux Tin Tiles With A Cookie Sheet
I’m always on the look out for interesting things to make out of the unexpected. Disposable aluminum cookie sheets can be found at your local party supply store. This simple embossing and paint technique turns a disposable pan into a work of art, and this project comes with free downloadable patterns!
For this project I used:
- 2 disposable aluminum cookie sheets
- Patterns ~ Faux-Tin-Tile-Patterns and More Faux Tin Tile Patterns
- A knitting needle
- Paintbrush
- Various metallic acrylic paints
- Spray primer
- A cork bulletin board
- Thumb tacks
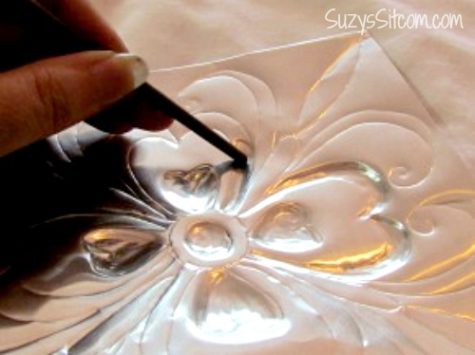
Begin by measuring out and cutting (3 ea.) 7″ squares from each cookie sheet.
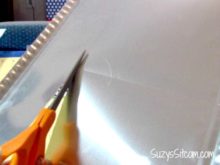
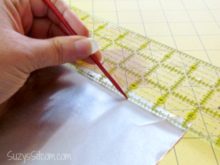
Use a ruler to measure them and mark the cookie sheet by pressing a knitting needle along the ruler, then simply cut them out with scissors. Take the ruler and score 1/4″ from all four sides of your square using the knitting needle.
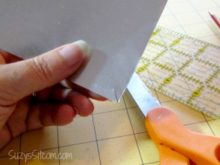

Use the scissors to clip a notch in each corner. Fold the metal over carefully along your scored seam. This will create a smooth finished edge for each tile.
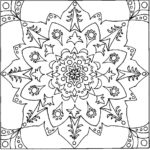
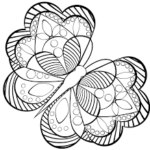
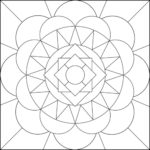
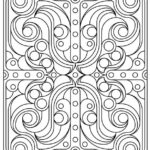
- Print out the patterns.
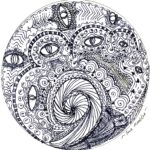
You can either use the ones that come with the tutorial, or surf the internet for ideas of your own. Here are a few that I found in a google search for “simple geometric patterns to color” :


Lay the metal tile on top of a folded towel and use a knitting needle to press the design into the metal. For your convenience.
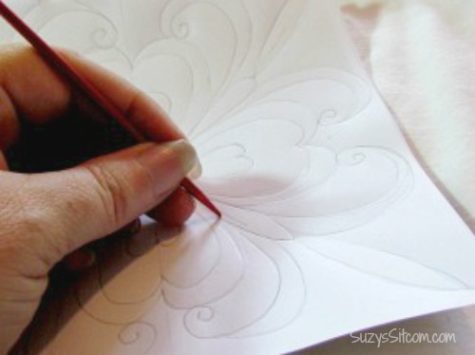
Here the metal tile is shown with the pattern scored into it.
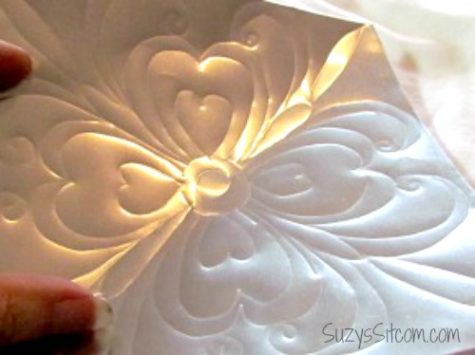
Keeping the tile on the folded towel, then use the end of a paintbrush handle to gently rub indentations into the metal where you want them. The more you rub, the deeper they can be, just be careful not to use a ton of force as the aluminum is very thin metal.
Once the piece is indented to your satisfaction, it is time to paint it. You could certainly leave it unpainted at this stage, but I’m all about color. Lightly spray each piece with a layer of primer. Once it is dry, begin painting the indented areas using metallic acrylic paint.
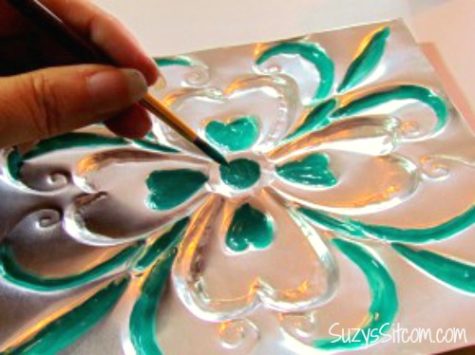
Once all the indentations are painted, add a base color to the raised areas. Add details by watering down some metallic acrylic black paint and adding it to lines and edges of the indentations, giving it an antiqued look.
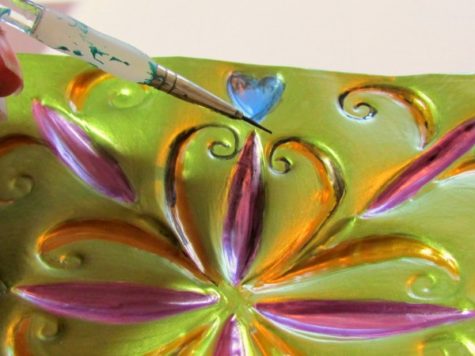
I used the same color scheme for each tile, so that they all worked together.
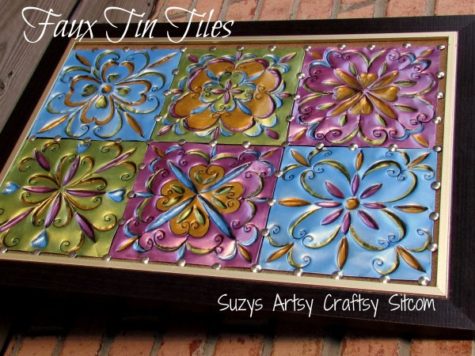
There are many ways to display your finished tiles. I chose to use a cork bulletin board and lined them up carefully, pinning them down with thumbtacks. This resulted in a great piece of wall art that will definitely surprise anyone when you tell them it started out life as a couple disposable cookie sheets.
Note:
I love this project. It does look time consuming, and the finished tiles are probably a bit flimsy. The idea of using thumbtacks to attach them seems easy and I like the way it looks. I bet this could be thumb tacked and also glued (just to be safe) to Styrofoam panels and attached to the ceiling.. That would be super cool and also add some great insulation.
Sources:
- Radical Self Care Project Overview by shirleytwofeathers - No Comment
- Radical Self Care Image Gallery by shirleytwofeathers - No Comment
- It’s A Wrap by shirleytwofeathers - 3 Comments
- Something To Consider by shirleytwofeathers - 1 Comment
- Nurturing Your Precious Self by shirleytwofeathers - 3 Comments
me: Make Your Own Violet Fire
Abdulrahman: Money Chant – Very Fast
Shirley Twofeathers: It’s A Wrap
Daniel Knirs: It’s A Wrap
Our current project began on July 4. We are exploring the concept and practice of Radical Self Care . Feel free to join in at any time!

Interested? You can visit our current project page, or you can take a look at the About The Project page if you are curious about the concept.
.
Please feel free to join in at any time! No experience necessary.
- Money Chant - Fast
- Money Chant - Slow
- Prosperity Plan
- Amazing Creator
- Cause and Effect
- I Am That I Am
- Spirit Rap
- Lakshmi Spirit Rap
- PowWow Spirit Rap
 Enter your question and receive the wisdom of the Occulatum. You may pose your question in any way that feels appropriate. The answer will come in the form of a small pop up. Try it - your life just might change for the better!


I think it's time to go shopping... maybe even buy some really cool stuff at my online shops!!