Creativity
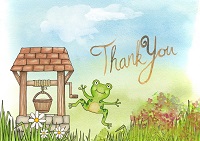
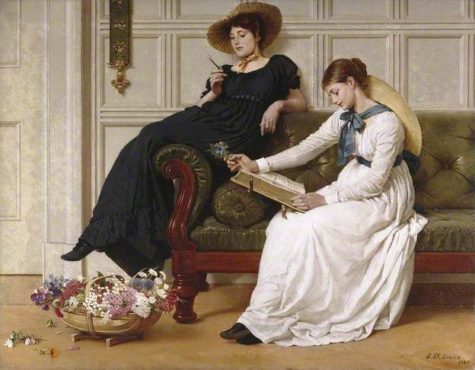
Stopping To Smell The Roses

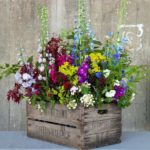
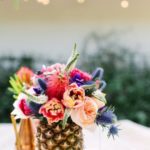
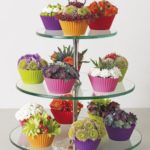
One of the most powerful ways to improve your home and life is by adding plants and flowers.
Feng Shui and Flowers
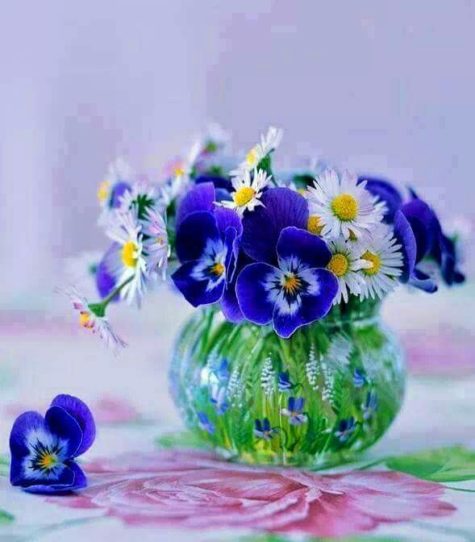
Beautiful plants and flowers lift the energy of your home, bringing beautiful healthy growing chi. And the most auspicious part of plants? Flowers. They are are the yang expression of a plant.
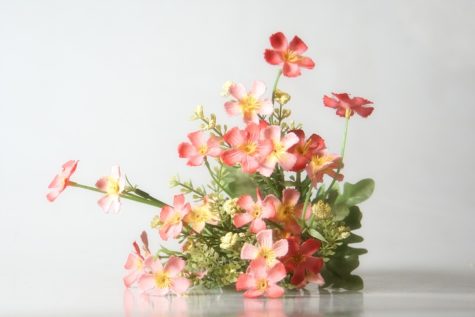
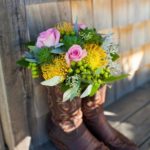
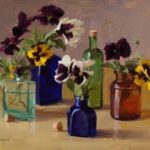
Flowering blooms aren’t just lovely to look at, they can promote love and are regarded as symbols of good fortune and bring auspicious energy. You can use them to brighten up your home by displaying them in vases in your home. A mixed bouquet brings bright, happy yang energy to the house. Think of flowers as the way a plant smiles – and those smiles create happy feelings for you, your family, and visitors to your home.
Bear in mind, though, that dried flowers are generally regarded as dead energy, making them unsuitable for lifting chi. Here are some more important guidelines on flower feng shui.
- Display flowers as an offering.
If you’d like to imbue fresh, spring-time or renewal energy for yourself or your home, place flowers in a vase according to the energy you wish to inspire. For healing energy, select white flowers, for love choose pink, and for wealth, display purple or gold flowers.
- Offer flowers to those in need.
When friends or family members are ill, offer them a bouquet of white flowers, such as magnolia or lilies. If friends or family are in need of more prosperity, offer a bulb flower, such as narcissus to inspire greater wealth. Golden-colored chrysanthemum and narcissus are always a good choice, too, for promoting wealth chi, particularly when moving into a new home, beginning a new undertaking, or at the beginning of the New Year. Pink hued flowers represent fond affection and happiness and are perfect for friends and creating loving ties.
- Singles should display peonies.
The Chinese have long held that peony flowers are the flower of romance and many a young Chinese woman displayed red peonies, the ultimate symbol of youthful love and romance. Singles who wish to marry should display a vase of peonies or a painting of the blossoms in the living room, where they represent seeking love versus in the bedroom where the flowers are a symbol of carnal love.
- The lotus is the flower of enlightenment.
As a symbol of purity, the lotus rises from the muddy waters to bloom, symbolizing rising above the worldly problems. Buddhas are often shown seated in a lotus and the Buddhist chant Om Mani Padme Hum literally means “Hail to the Jewel in the Lotus.” As such, it’s highly regarded as a symbol of great good fortune and enlightenment. The flower represents unending success and ceaseless abundance. Display these in a vase or as a painting or figure to inspire your life and home.
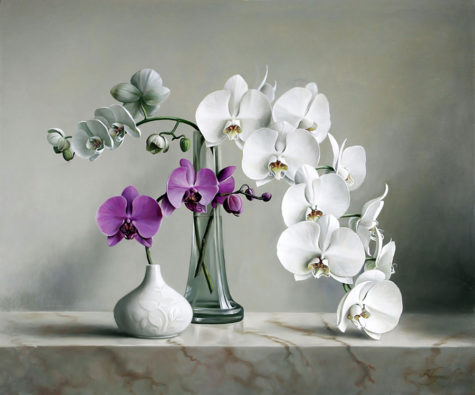
- Orchids are the career flower.
Despite their reputation as fickle flowers, orchids are quite simple to raise and bring beautiful career chi to those who display them. Purple orchids bring opportunity and success and are regarded as the most beneficial color to display. In a living room, the orchid bestows family luck and harmony.
- Flowers to symbolize prosperity, success, and wealth.
Chrysanthemum seen so abundantly in floral shops and in fall gardens represents bumper harvests, abundant joy and a long, fruitful life. Other flowers that represent acquired wealth include bulb flowers such as narcissus, tulips, paperwhites, gladiolas, iris or lily.
- Flowering branches represent longevity, overcoming adversity.
Whether it’s a plum, cherry, or peach branch, flowering branches because they typically bloom in winter represent overcoming obstacles. These are wonderful reminders of succeeding after difficulties and of longevity.
- Flower cleansing baths purify and uplift.
To create essential yang chi and clear your mind and rejuvenate your body, simply bathe in a bathtub that has been sprinkled with the petals of at least five different flowers in the five colors of the five elements. There should be pink, yellow, white, blue, and green petals from flowers or herbs, like rosemary, in your bath. You may also wish to include Bach flower essential oils in your bathe to help create a beautiful aroma as well, or use fragrant flowers such as lavender, jasmine or gardenia to perfume your water. This uplifting ritual will help to infuse your body with beautiful yang energy and soothe your mind.
- Choose color combinations carefully.
Although beautiful, red flowers are not regarded as auspicious for giving to someone who is ill and should be avoided when visiting someone sick or giving at the beginning of a relationship as the color can be overpowering and “flame out” the romance. Red peonies symbolize passionate, amorous love and can reawaken a dormant sex life for a couple when displayed in the living room.
When giving flowers in a new relationship, opt for sentimental colors such as pink or yellow or a combination of these colors. Red and white flowers should never be put together, but a rainbow of colors is always a good color option as long as all colors are represented. Purple is regarded as auspicious and harbinger of prosperous times and success, as is gold. Purple, gold and white are especially harmonious and auspicious.
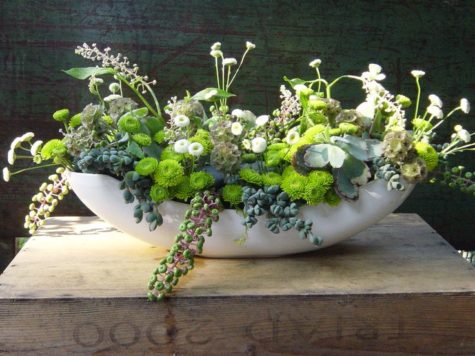
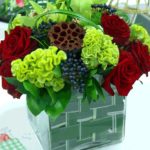
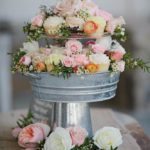
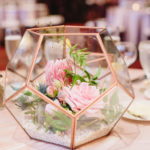
Have you ever gazed at a lush and beautiful floral arrangement and wished you knew how to pull one together? Now you can. We turned to a flower pro to give us her flower arranging tips, tricks, and styling shortcuts so you’ll never have to shell out money for a store-bought bouquet ever again.
Flower Arranging 101
- Create a foundation with foliage. This is the framework for the arrangement. Build a pleasing, asymmetrical shape that leans on the lip of the vase and has a high point in back. Make sure it’s not too thick, so there’s room for the flowers.
- Add large “face” flowers, cutting stems at different lengths so some blooms nestle low and others extend. The crisscrossed foliage stems in the vase work like webbing to hold flowers where you want them. Take your time, experimenting until it looks good.
- Weave in wispy elements, like climbing flowering vines or ferns, in three strategic spots: up high on one side, down low (spilling out of the vase), and in the middle, as if they’ve pushed their way through a cluster of larger blooms.
Flower Arranging Tips and Tricks
- Use opaque vases instead of glass. They hide messy stems and quietly complement flowers rather than competing with them.
- Mimic the randomness of nature. Think asymmetry, odd numbers, and varied depth and height when arranging.
- Don’t be afraid to cut tall flowers very short.
Playing with scale can give even a solitary bloom a lot of impact: Imagine looking down into the face of a single sunflower in a low, round bud vase.
- Clip backyard plants to make arrangements more interesting.
Shrubbery or garden foliage, like forsythia, coleus, begonia leaves, and ivy, can add depth to a display. And don’t dismiss beautiful weeds, such as Queen Anne’s lace.
- Opt for slender-necked vessels if you’re unsure about your skills.
Vases with smaller mouths do the work for you—holding flowers artfully without letting them plop—so even the most basic display looks gorgeous.
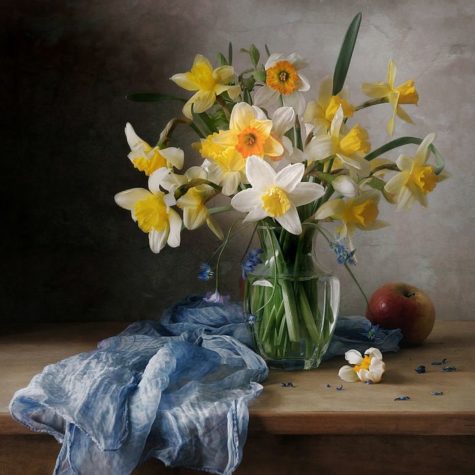
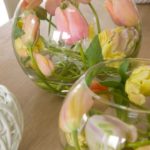
The Only Vases You Really Need
- A tall, fluted column, slightly wider on top than on the bottom, holds supermarket bunches, bouquets from guests, and any long-stemmed roses that come your way. A height of about 10 inches works well.
- A small footed urn is perfect for a centerpiece. It’s low, so it won’t interfere with dinner conversation, and it offers a nice view from above. Six inches tall by eight wide makes a statement but isn’t hard to fill.
- A trio of bud vases in complementary shapes can work as a cluster centerpiece or be separated to showcase single gorgeous blooms. Choose one medium-height, one tall, and one squat, all with narrow mouths.
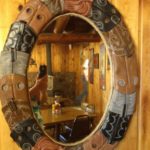
Think Outside The Box
There are a wide variety of items that make for wonderful flower holders and vases. Some of them allow for a small jar or vase to be placed inside, others are watertight enough to be used alone. I found a bunch of images that I think will give us some really great ideas:

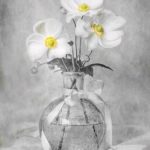
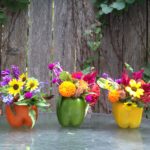
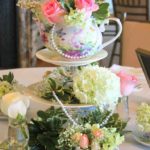
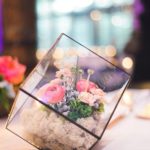
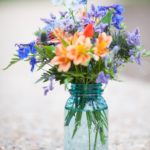

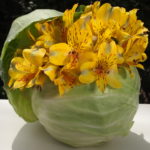
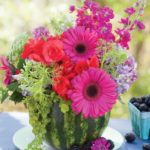
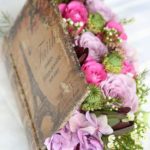
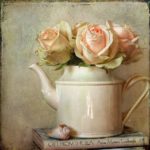
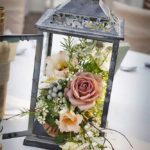

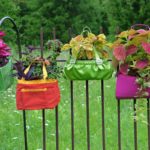
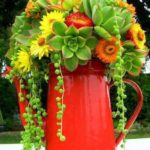
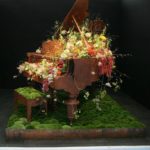
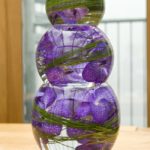


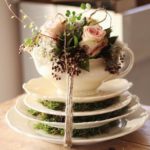
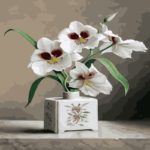
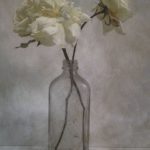
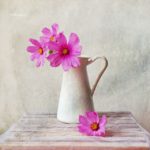

Some of these ideas might require some expertise and more than a little thought, but they really got my creative juices going. What about you? See any that you’d like to try?
The Language of Flowers
The language of flowers, sometimes called florigraphy, was a Victorian-era means of communication in which various flowers and floral arrangements were used to send coded messages, allowing individuals to express feelings which otherwise could not be spoken. This language was most commonly communicated through Tussie-Mussies, an art which has a following today.
I think it might be fun to make a flower arrangement with a message, here are some ideas. Much more can be found here: The Language of Flowers, and here: Dictionary of the Language of Flowers
- Domestic (happiness) – Honeysuckle (Sent Monthly); Holly;
- Encouragement – Golden Rod;
- Excellence (unpretending excellence) – Camellia japonica;
- Family (family union) – Pink Verbena;
- Feeling (warmth of feeling) – Peppermint;
- Feelings (warm feelings) – Spearmint;
- Friendship (everlasting) – Arborvitae;
- Friendship (lasting) – Pear Blossom;
- Friendship (true) – Oak Leaf Geranium;
- Fruitfulness – Hollyhock; Orange Blossoms;
- Gay Life – Peony;
- Gentility – Pompom Rose;
- Gladness – Myrrh;
- Good Luck – Camellia; Mugwort;
- Good News – Guelder Rose (Snowball-tree);
- Good Wishes – Sweet Basil;
- Goodness – White Zinnia; Snowball;
- Grace – Yellow Jasmine; Pink Rose; Multiflora Rose; China Rose;
- Gratitude – Campanula; Canterbury Bells; Dark Pink Rose;
- Happiness – Dandelion; Mugwort; Rose (Red and yellow together);
- Happiness (domestic) – Honeysuckle (Sent Monthly); Holly;
- Happiness (return of happiness) – Lily of the Valley;
- Happiness (rural) – Tulip-tree;
- Happy (love) – Bridal Rose;
- Happy (marriage) – Peony;
- Heart (light heartedness) – Shamrock;
- Hope – Flowering Almond; Hawthorn; Iris (Fleur-de-Lis); Star of Bethlehem; Snowdrop;
- Hope (hope in adversity) – Pine (Spruce);
- Hope (hope in misery) – Milkweed;
- Joy – Rose (Red and Yellow together);
- Joy (joys to come) – Celandine;
- Joy (of life) – Light Pink Rose;
- Lasting (pleasure) – Everlasting Pea; Parsley;
- Life (gay) – Peony;
- Life (joy of ) – Light Pink Rose;
- Life (long life) – Peach Blossom
- Life (you’ve made my life complete) – Lily of the Valley;
- Light heartedness – Shamrock;
- Luck – Bells of Ireland;
- Luck (good luck) – Camellia; Mugwort;
- Marriage (happy) – Peony;
- Pleasure – Red Poppy;
- Pleasure (blissful) – Sweet Pea;
- Prosperity – Peony; Cattail; Wheat;
- Protection – Juniper; White Heather;
- Success – Yellow Poppy; Palm Leaves;
- Victory – Palm Leaves;
- Warm (feelings) – Spearmint;
- Warmth (warmth of feeling) – Peppermint;
- Warmth (warmth of sentiment) – Spearmint;
- Welcome – Mayflower;
- Wisdom – White Mulberry; Iris (Fleur-de-Lis);
- Wish (a wish) – Fox Glove;
- Wishes (good) – Sweet Basil;
- Wishes (wishes will come true) – White Heather;
- Worth – Mignonette; Evergreen (trailing woodland plants that stay green all year);
- Worth (worth beyond beauty) – Sweet Alyssum;

LOL… I couldn’t resist!
Sources:
Out of the Closet
So now that we’re ready to tackle our closets, we need (I need) some good incentives to sort through our piles of jeans… t shirts… shoes… socks… clothes I’ll never wear again… clothes I love that are so past their prime I can’t wear them any more…
I found so many fun and creative ideas for old or discarded clothing that I had a hard time figuring out where to start! So let’s start with those old T shirts.
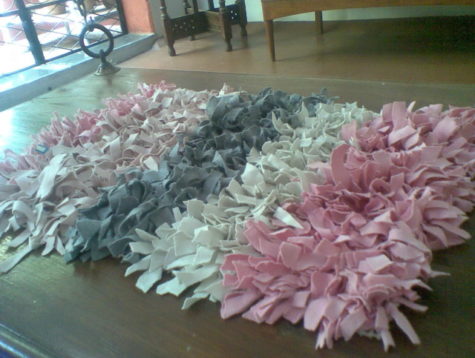
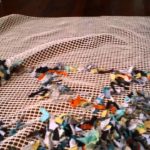
Did you know that old T shirts can be made into really cool rugs that require no sewing skills?
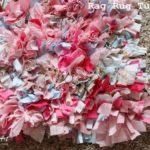
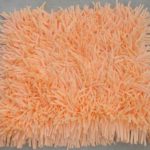
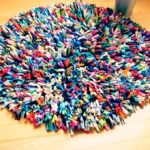
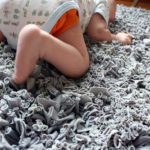

It looks pretty easy. All you need is some kind of backing with holes in it that are large enough to stuff a strip of T shirt into. This could be burlap or even the mesh that laundry bags are made from. I absolutely love this idea, and am really disappointed to discover that I don’t have nearly enough old T shirts!
Here’s a visual tutorial of rug made with burlap as the backing.
And here are some pics of work in progress:
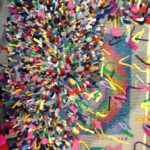

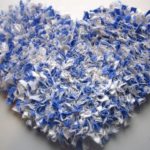
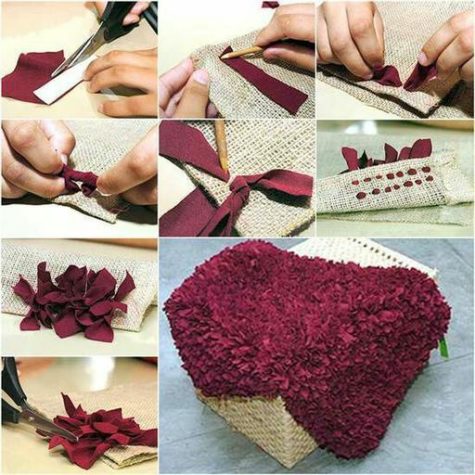
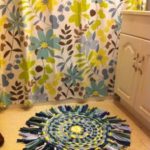
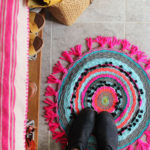
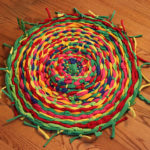
Not big on shaggy rag rugs? How about a round woven rug? Check this one out:
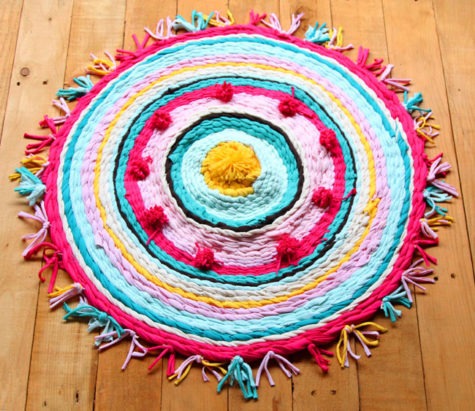
Pretty cute, huh? It’s not hard to make. Here are some pics that show how rugs like this can be made. It looks like a hula hoop is used as the frame.
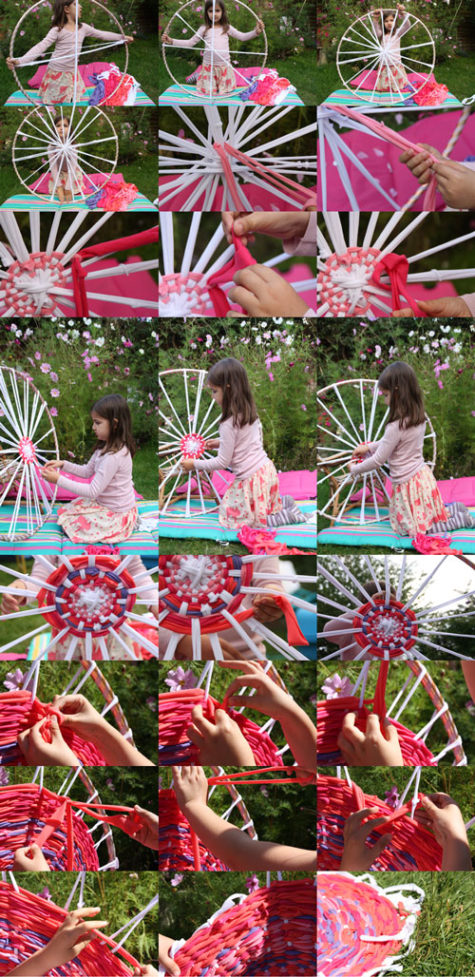
This may not be as easy as it looks. If you weave it too tightly, or if you use stretchy fabrics in strips that are too narrow, you may end up with a sort of limp basket. I found a post about this and a cute picture of a hula hoop rug fail. Here’s the link Project Hula Hoop Rug Fail and a pic:
I did find success story pics though, so I think it’s a matter of making sure that the weave isn’t too tight, and that the cross pieces are sturdy and thick. I think old towels might lend themselves to a project like this as well. Be interesting to try. Here are more pics:
Rugs aren’t the only things that can be made from old T shirts. Here’s a clever idea for making bags from T shirts. It requires no sewing skills whatsoever. I found it at Mommypotamus
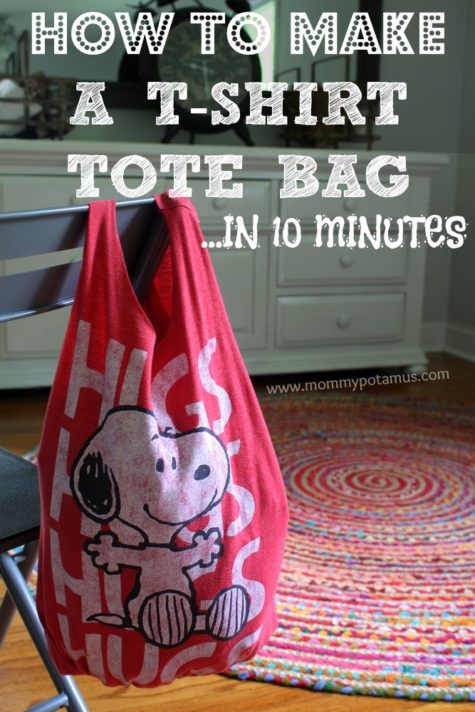
I’ve been looking for an easy-to-carry, washable alternative for the kids to use, and over the weekend I came across the perfect solution. My local thrift shop was selling cute t-shirts for 99 cents apiece that were practically begging to be upcycled into a farmer’s market tote. They’re 100% washable, and when they’re no longer useful as bags I can cut them into rags to clean with.
There was just one problem: I can’t sew. At all.
Fortunately, I came across some no-sew ideas that Katie and I adapted to fit our style (which, if you’re curious, generally favors the color red and anything Snoopy). The took no more than 10 minutes from start to finish, and I love how they turned out.
Supplies:
- Old t-shirt – The thicker the fabric, the sturdier the bag
- Sharp scissors, preferably fabric scissors
- Washable marker (optional)
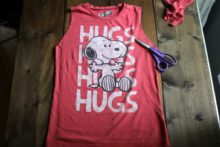 Step 1: Cut the sleeves off
If you’d like to fold the t-shirt in half you can cut both sleeves at once so that they are identical.
Or, if your material is too thick to cut them both at once, you can cut one, then fold it in half and use the cut side as a guide for the next sleeve.
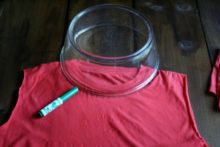 Step 2: Cut the neckline area
If you’d like, you can turn the shirt inside out and trace the outline of a bowl before cutting.
I used both methods and personally, I like free-hand cutting better because I prefer a slightly oval shape to a perfectly round one.
I ended up trimming this one a bit to make it more oval.
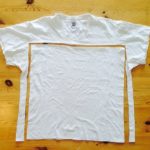
 Step 3: Determine how deep you want the bag to be
If you haven’t already turned your t-shirt inside out, do it now. Determine where you want the bottom of the bag to be and trace a line across.
Keep in mind that depending on the fabric used, your tote is likely stretch and become longer when it’s filled with stuff.
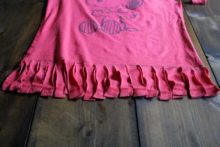 Step 4: Cut fringe
Now grab your scissors and cut slits from the bottom of the shirt up to the line marking the bottom of your bag.
You’ll want to cut both the front and back layers together because they need to match up for the next step.
I cut my slits about 3/4 to 1 inch apart.
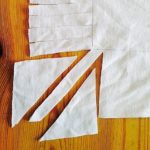
 Step 5: Tie Fringe
Okay, this is going to sound really complicated, but it’s NOT, promise. Take your first pair of fringe and tie it into a knot, then tie two more pairs.
Now if you lift your bag you’ll see that although the pairs are pulling the bag together, there’s a hole between each pair. This next step will close those holes.
In the photo above you see three sets of fringe that have been tied in knots. What I do next is grab one strand from the middle set (the one with the arrow pointing left) and tie it in a knot with one of the strands on the left set. Then I take the other strand from the middle set (the one with the arrow pointing right) and tie it in a knot with one of the strands on the right set.
Then I take the remaining strand on the right set and tie it to the next set of strands, and so on and so forth until all the strands are tied. Now turn your t-shirt right side out again and voila, you’re done!
A Couple Of Fun Variations
- Turn the bag right side out when tying the fringe so that it hangs from the bottom.
- Tie the straps in knots, or tie bits of t-shirt scrap to the top as embellishments
More T Shirt Ideas
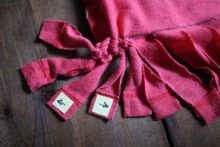
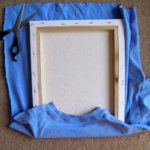
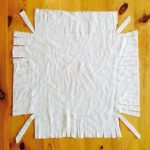
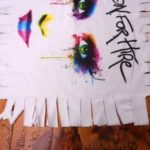
So totes are fun, and easy but maybe you really love that old T shirt. No problem. It’s really easy to turn T shirts into wall art. All you need is a blank canvas a pair of scissors, and a staple gun. Now staple gun? Thumb tacks will also work:

Pillows
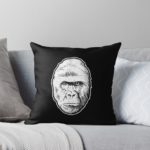
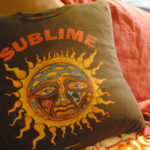
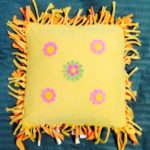
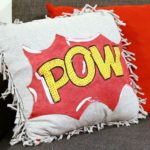
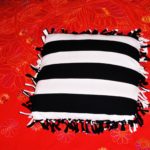
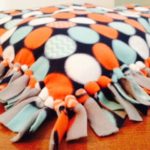
Because T shirt material doesn’t fray or unravel, it makes a for a very easy customized throw pillow. Old fleece blankets make a nice pillow as well. These pillows are so easy to make that I don’t think we even need an extensive step by step tutorial.
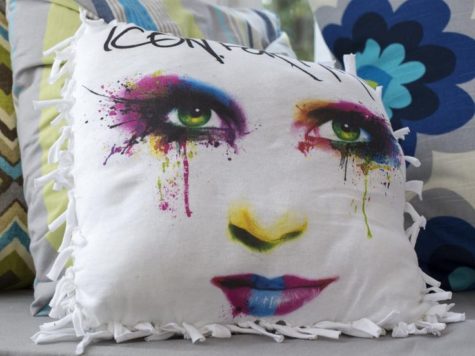
Simply cut the T shirt into as large of a square or rectangle as possible, then cut fringe around the edges. Tie the fringe together, and when you have 3 sides finished, stuff it with batting or insert a plain pillow. Then tie the last side up.
Here’s a series of pics that show how it works:
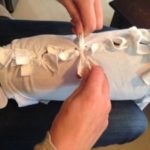
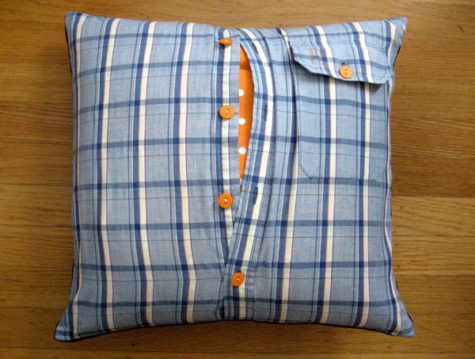
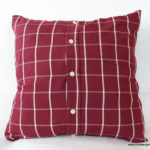
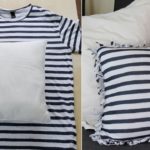
If you prefer a finished edge, you’ll need to do some sewing. Button down shirts can be made into pillow covers, and then unbuttoned and tossed into the washing machine. Simply button the shirt, turn it inside out and lay it on a flat surface. Smooth out the wrinkles and pin it together. Then cut it into whatever shape you like. Once it’s cut, sew the edges, flip it right side out… and Voila!! How fun is that?
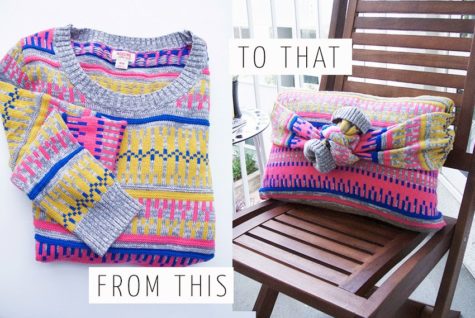
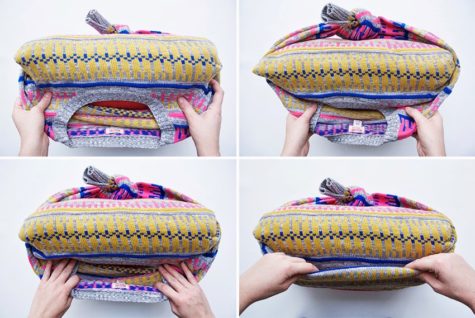
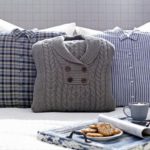
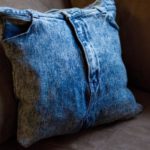
There is a boatload of cool ways to make pillows from shirts and T’s. You could also use old pajama tops and bottoms. The legs from old pajama bottoms would be super easy since two sides are already sewn. I even found a tutorial at Creme de la Craft for turning old sweaters into cool pillow covers. No sewing, no cutting. Here it is:
You don’t need to toss out your favorite sweater just because it’s got a hole! Instead, you can upcycle old or damaged sweaters into cozy pillows. This no-sew tutorial is so easy that it’ll take you less than five minutes to complete. Plus, it doesn’t require any cutting so you can use your sweaters as pillow covers during the summer and wear them again in the winter!
Steps:
- Stuff the pillow inside the sweater, stopping an inch below the underarm seam.
- Pull the sleeves from the back of the pillow and wrap them around the front of the pillow, knotting them together in the center. Fold back the cuffs if desired.
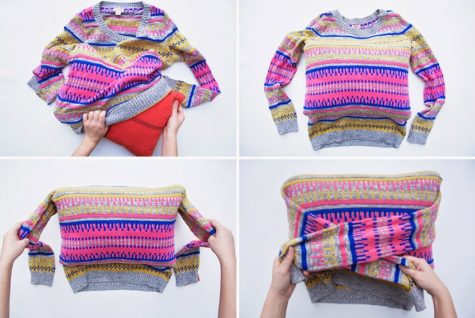
- Turn the pillow upside down to expose the bottom hem of the sweater.
- Tuck in one side of the bottom hem. Tuck in the other side to form a little pocket.
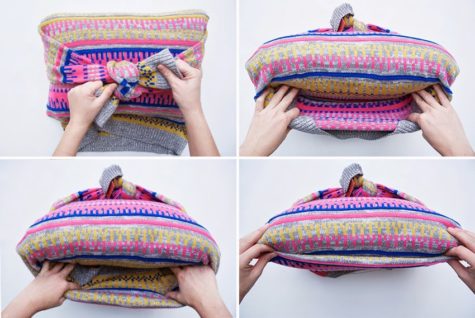
- Turn the pillow on its opposite side to expose the neckline of the sweater.
- There should be a little pocket that was formed on the back of the pillow after you knotted the sleeves in the front. Tuck the neckline of the sweater inside this little pocket so that it is hidden.
This technique can be used with any long sleeved shirt. I’m not sure if the knot on the back would bother me, and I am also unsure how well it holds up to continued use.

And just in case you’re still thirsty for pillow ideas, here is a nifty collection of a variety of pillows to get your creative juices churning:

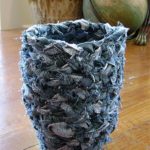
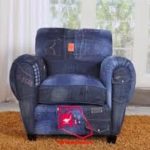
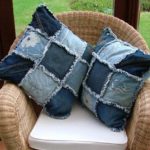
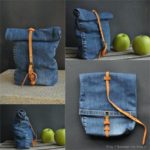
Alright, that’s enough of that… what about all those jeans you have that you can’t wear, but still love?
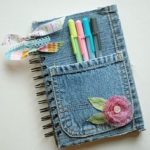
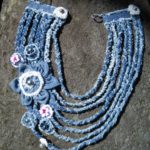
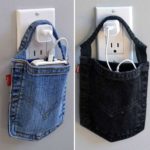
Jeans
Most of the ideas for jeans that I found require a bit of skill, but these coasters looked pretty easy:
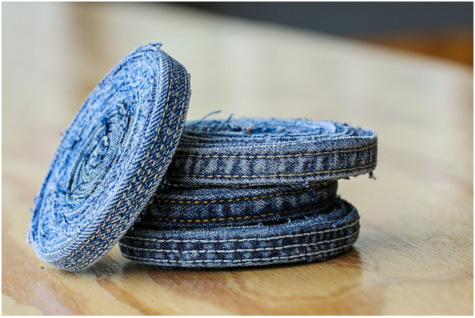
Cut out seams from the legs of old jeans and use them to create gorgeous looking coasters. All you need to do is tightly roll the seam into a spiral and keep gluing it on the inside to ensure it sticks well. Try and create a 3.5” spiral. If you do have a cork lying at home, cut it out and stick that to the bottom of your spiral seam coaster. This one’s just an addition; the coaster is good to be used without it too.
You could also use the jean pockets. Simply remove the pocket from the jean, and decorate the edges with lace, sequins, colorful buttons or anything else you fancy!
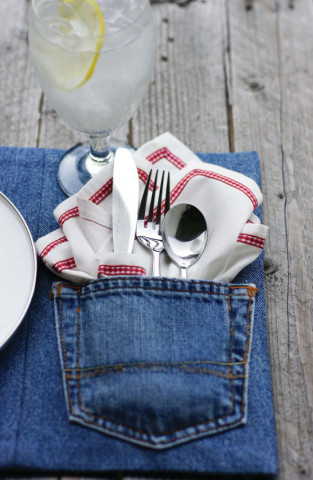 Placemats:
Make yourself an uber cool set of placemats using old denims. All you need is your old denim and some sewing skills. Basic hand sewing would also work/ alternatively you could look at using adhesives. Made from up cycled denims, these can include cute pockets to tuck away the cutlery too.
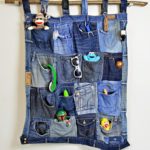
Workstation organizer:
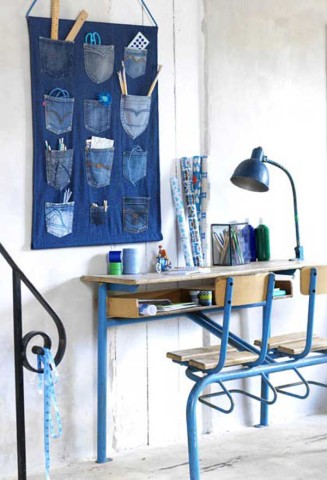
This project requires a bit of sewing. You need denim pockets, an old pair of jeans (use the same ones from which the pockets are being ripped off). A rod for the top and bottom of the organizer, and a cord to hang it with.
Cut open the denim legs and sew them together to get a flat piece of rectangular denim fabric (See image for reference). On this sew the various pockets. Ta da! Your organizer is ready.
An alternate to this could be to use any waste fabric lying at home as the base of the organizer. Another option is sticking the pockets onto a wooden panel.
But wait, there’s more!
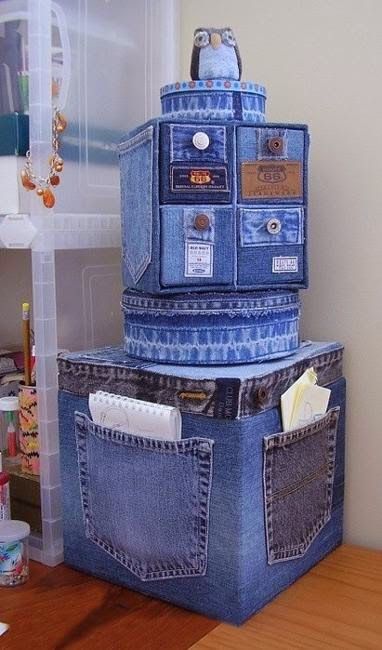
Jeans can be used to cover sturdy cardboard boxes. All you need is a supply of jeans, a sturdy cardboard box, a good idea, and glue. More ideas for how to turn those old jeans into something useful are as follows:


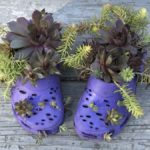
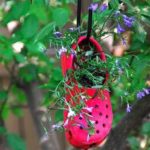
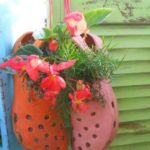
Crocs
Got some crocks that you no longer wear or that have lost their tread?
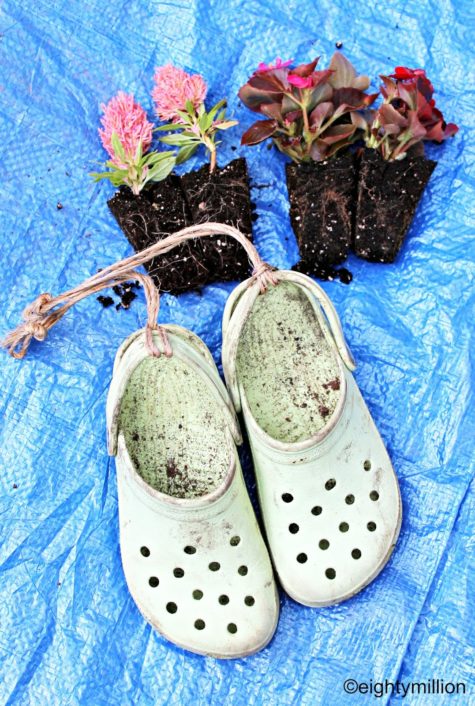
Crocks make great little planters. They have great drainage and they are easy to hang! Fill them with potting soil and plant flowers, hen and chicks or other sedums. If you are worried about the soil falling out through the holes, cover the inside with a piece of burlap. Keep them well watered and voila!
What a great way to grow a little mint garden, or maybe some small herbs like thyme… Here are some great ideas:


How fun! I wonder if I have crocks in my closet…
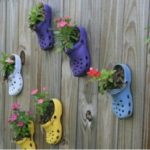
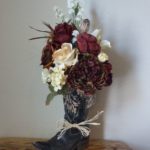
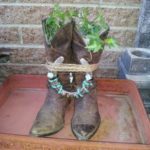
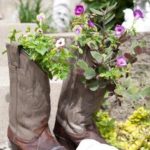
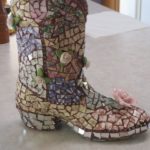
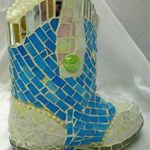
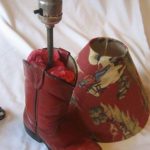
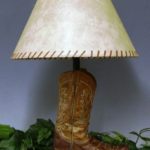
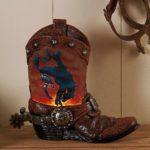
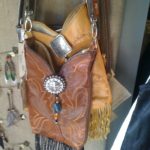
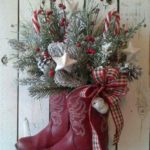
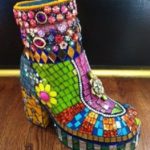
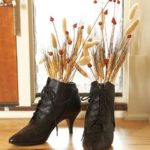
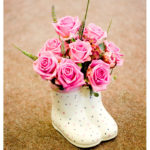
Western Boots
Western boots are super cool, and when the time comes to recycle them, there are a lot of options – some are easier than others.
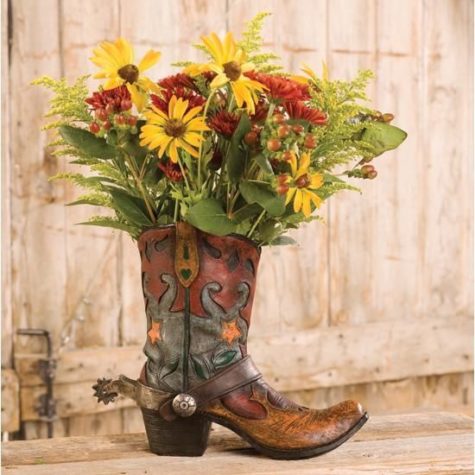
The easiest way to use a favorite boot that will never fit you again is to clean it up, paint it, and turn it into a flower holder. You can put a water filled vase inside the boot to display fresh flowers, which isn’t necessary if you are a lover of dried or silk flowers.


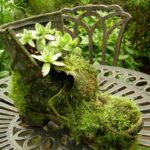
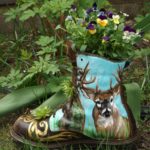
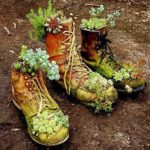
Old boots also make for cool planters. If you opt for the cool planters, don’t forget to make sure the boot has good drainage. If it already has holes in the sole, no worries. But if the boot is still in good shape, you’ll need to drill a drainage hole in the bottom.

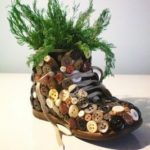
Mosaics on boots is a super nifty way to bling up your home. I’d use silicone caulking to attach the mosaic pieces because it allows for a bit of flexibility. You can use mosaic glass, beads, old jewelry… pretty much anything with sparkle and shine. The inside of the boot can be spray painted or covered with fabric or felt. Fun, huh? I love this idea, too bad I don’t have any old boots!

There are tons of other really cool uses for old western boots. Some of these ideas will require some skill and maybe a tutorial or two. You can make a lamp,a bird house, and a bunch of other cool stuff. Well worth the effort if you love western decor, or if you have access to a plethora of old western boots. Here are some pics:

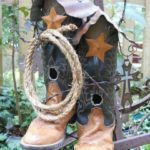

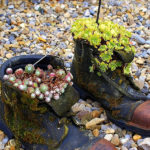
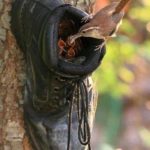
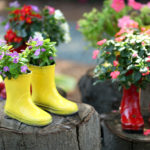
Work Boots and Mud Boots
Work boots, rubber boots, boots with heels, boots of all shapes and sizes are most often used as planters and flower holders. They can also be recycled into cute little fairy houses, of nifty bird houses. You can paint them, mosaic them, or let moss grow all over them. The possibilities seem endless:


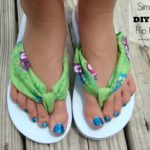
Flip Flops
If you have an abundance of old flip flops and colorful scarves, you can turn them into a really cool pair of sandals! This visual tutorial simply wraps the scarf around the flip flop and the ankles.

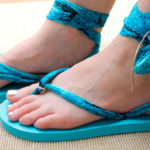
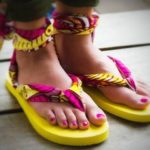
The following visual DIY tutorial for upgrading your flip flop fashion uses a braided strap to make the flip flops, but you can use colorful scarves and other fabrics as well.
There are so many possibilities on how you can add your favorite fabric to flip flops, but what I like most about this method is that you can make your flip flops fit perfectly so you don’t have to worry about doing the toe pinch every time you step to keep you flip flop on, or have your feet ache from flip-flops that are too tight.
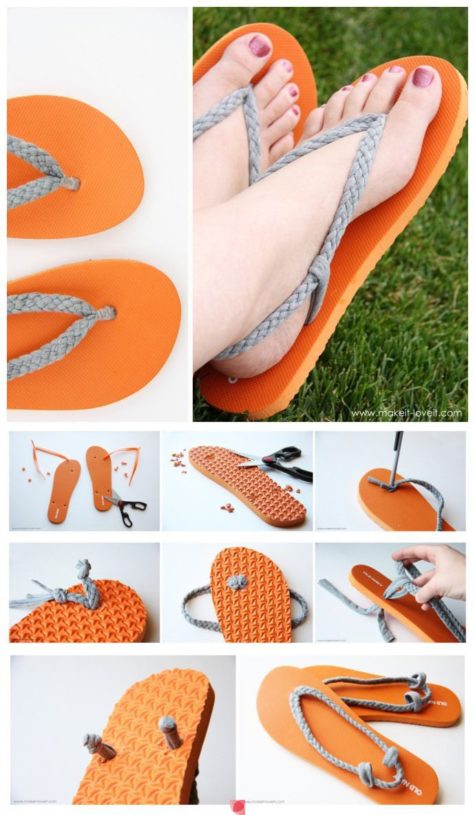
First of all, I found a very inexpensive pair of flip flops at Old Navy. (Or dig in your shoe stash. You know you have some in there.) Then, cut the plastic straps off of both flip flops.
Next, snip pieces of the flip flop away on the back of the flip flop, right around each hole of the flip flop. Don’t cut all the way through, making the hole bigger……..just make a bigger resting spot for your knot to lay (that you’ll be placing here in later steps). Cut about 1/3 of the way through the thickness of the sole.
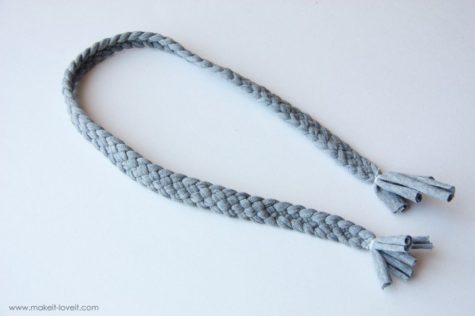 Then, create a long strand of braided knit material. T shirt fabric is great for this. Make sure you’re using a semi stretchy knit fabric so that the strap will fit snugly around your foot. This will help the sandal to stay in place.
To determine whether or not the braided section in long enough……wrap the braided knit around the back of your foot and then up over the top of your foot and down through your toes. And then make sure that there is enough to stick through the sandal and then tie in a knot. (Having a little more than you need helps.) At the ends of the braid, I just wrapped with thread really tightly, and then knotted it (the thread) in place.
Now, you need to shove the raw ends down into the hole by the toes of the sandal. I used a pen (in the “off” position) to shove the ends down in there. The hole will stretch so you can really shove a lot down in there with some effort.
You should have both ends coming out the bottom of the sandal. Be sure that the braid isn’t all twisted on the other side. Next, tie really tight knots into each end of the braid and then trim off the excess fabric. The trickiest part here is making sure that your braid is just the right length.
Then add a little hot glue beneath your knots and into the crevice of the flip-flop that you dug out earlier.
While the glue is still hot, press the knots into the foam sandal and as hard as you can, to really secure the knots in place…….and to force them into the sole of the sandal. (Depending on how big your knots are, depends on how much you should cut out of the sandal. You may feel the knots a bit while walking if you have bigger knots, so keep that in mind as well.)
Now, cut more strips of your knit fabric and make a loop of fabric on each side of the sandal, including the braided strap as you loop the side strap down in place.
After you have both side loops in place, make knots in the bottom and trim off the excess. Glue them in place the same way.
This next step is optional but it really helps make the section that goes between your toes, less bulky. I just wrapped some thread around the toe section over and over again as tight as I could (without breaking the thread) and knotted it in place.
And that’s it. Now your flip-flops are done and ready to wear.
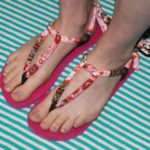
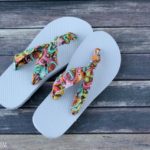
Here are some variations on this theme:


Ok… I think that about does it! Time to get cracking on our closets.
And of course, anything that doesn’t inspire an idea or appeal in any way needs to go bye bye. Either drop it in a Planet Aid bin, the trash bin, or your local thrift store.
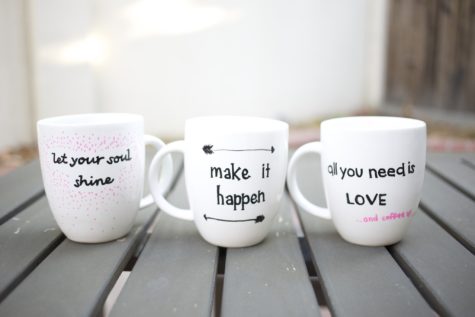
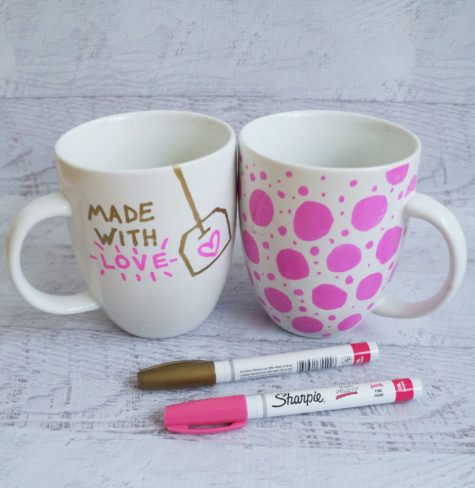
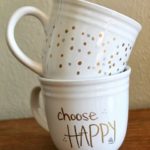
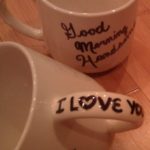
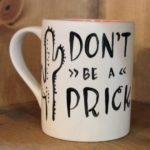
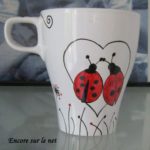
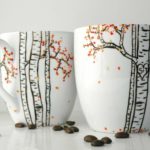
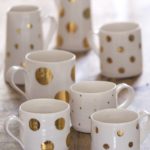
Getting Mugged

Yesterday, we explored a magickal cup of coffee, and it got me thinking about coffee mugs and so I went on a DIY search and found a bunch of tutorials on how to personalize and decorate coffee mugs. The first tutorial, found at Pop Sugar, features the use of sharpies. Here it is:
How to Make A Sharpie Mug
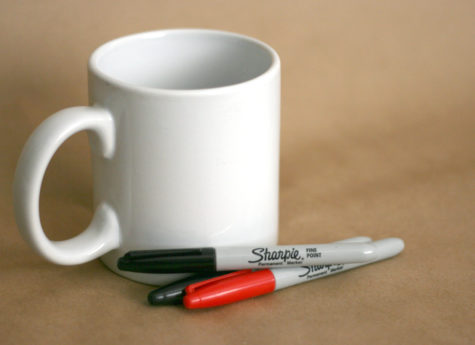
Do you have a plain, boring mug that needs a bit of spicing up? Personalize your cups and mugs by drawing on them! You can use them to add personality to your home or even give them as gifts to your loved ones. Here’s how to start:
- Buy some white cups or mugs. You can find them in superstores, thrift stores, dollar stores, and online. The cheaper the mug, the better this works.
- Pick a Sharpie. For long-lasting results, choose oil-based paint Sharpie markers. Regular Sharpie ink can come off even after baking. Pick a color to use on your mug. You can stay simple and choose one color, or be more ambitious and use multiple. If you’re sticking to one color, then black is usually a good choice, given its striking contrast to the white background of the mug.
- Wash the mug. Before applying the Sharpie, it’s important to get the mug completely clean and free of any oily residue from hands or fingers. Alcohol works well, after the mug has been washed with soap and water.
- Start drawing. Decide what you want to put on the cup, and maybe practice drawing it on a piece of paper before drawing on the mug. Pick a meaningful quote or a cute graphic to decorate the mug with, and get inspired by mugs being sold on Etsy or by googling examples of Sharpie mug projects online.
- Dry it out. For the best results, let the sharpie dry completely for 24 hours then bake at a low temp oven like 225° for 2 plus hours.
- Bake it. Remember to place the mug in the oven before it heats up and leave it in until the oven cools completely so there won’t be any cracks. You can choose to bake the mugs twice to really set in the Sharpie drawings. Baking the mug in the oven for 30 minutes at 350°F is what most tutorials recommend, but for best results, bake it at a lower temperature for a longer period of time (see above).
- Care and wash. If you use quality, oil-based sharpies, they should be dishwasher safe. All my pieces have gone through the dishwasher several times now, with no flaw. If you don’t feel sure about the dishwasher – hand washing is recommended.
Does it really work?
While Sharpie mugs are very popular right now, there doesn’t seem to be any consensus on how to best make the mugs. Some say that some of the colors change when baked, some say that they don’t stand up to dishwasher washing (or handwashing even…), and some say that the paint chips off the mugs after a couple uses.
I found an experiment using 14 colors of oil-based, fine point Sharpies and Dollar Tree mugs at Destination Decoration, and her results were as follows:
While decorating the mugs, I wore gloves so the oils from my skin did not affect the finished product. All parts of the mug were dried for 24 hours before baking.
Based on my experiment, baking a Dollar Tree mug at 250 degrees for 2 hours provided the best results. The color of the paint remained largely the same and paint on the mug did not chip at all (except for the minor top chipping).
Tips from other tutorials and crafters:
- I used Pebeo Porcelaine 150 Paint Markers and they work great and do not come off. You can find them at Michaels or Amazon.com. I have even put them in the dishwasher. Stayed on great.
- It didn’t work for me! I just got a paint pen. They work perfectly fine and not any more expensive than sharpies.
- I monogrammed plates and cups with Sharpie oil based markers and did not bake. Let dry for 48 hours been in dishwasher many times and none of mine have come off at all.
- Here is what I find that works. Cheap Walmart mugs are best. Regular sharpies. Wipe first with alcohol to remove any residue. Careful not to touch drawing area with hands. After putting design on, wait 24 hours. Then put in cold oven. Turn temp to 425 and set timer for 30 minutes. At 30 minutes turn off oven, leaving project in until it’s completely cool. Hand wash then do a test run in the dishwasher.
- “I read an extensive article about this somewhere. First, cheap mugs work best due to the inexpensive glaze used. Put mugs in COLD oven, turn oven to 450 (not 350). The glaze needs to re-melt to incorporate the marker into it!! AFTER oven reaches temp, bake for 30 minutes. Turn oven off.. LEAVE MUGS IN CLOSED OVEN (not yelling, just important). Cool for 15 min, slightly crack oven open and let cool over night. This should properly incorporate the ink with the glaze.
- My aunt did it one year, I think she used car paint for scratch fixes. Not sure about the baking part. They lasted for years!
- You can get enamel/glass clear medium and paint over it with that and re-bake. That may help if that doesn’t work, then probably nothing will.
- Clean glass with rubbing alcohol first. Oil base isn’t for glass. Use Folk Art enamels paint applying with a brush or paint pens for glass only! You still have to bake for 30 minutes but let sit for 1 hour before you bake.
Design Ideas


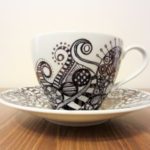


Untangle Your Thinking
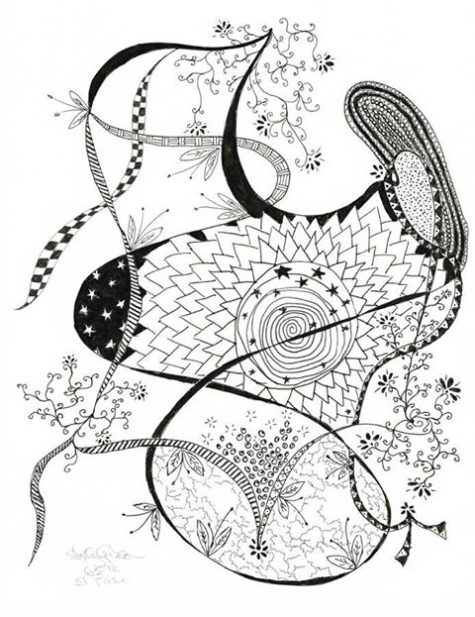
Creating Zentangle art provides a fun and lighthearted way to relax and intentionally facilitate a shift in focus and perspective. The Zentangle Method of creating art is unencumbered by dogma and cost which can weigh on other approaches. Nevertheless, it is sufficiently structured and organized so you can enjoy and benefit from an activity that otherwise might be considered whimsical.
Here’s a link to a website with lots of information and ideas: Zentangle.com
The image I shared with this post is the first zentangle I ever made. It is surprisingly easy to do, and really does help with focus and mental chatter.. worth checking out and trying. All you need is a pen and a piece of paper… so it’s really easy to try it out.
I Am that I Am

Here is a wonderful affirmation and chant from the book “Miraculii Song Of Ascension” by Astarius Miraculii
“I The Universe” (Anthem of the Soul)
I Am by whom the Universe has a Name!
I Am in whom the Universe has a Home!
I Am on whom the Universe has a Face!
I Am That I Am! I The Universe Am!
I the Universe am personified as this body, mind, heart and soul.
I the Universe dream awake infinite wholeness and healing in every cell of my body, mind, heart and soul.
I the Universe dream awake the Ascension of my soul, my cells, my human form and mother earth.
I the Universe dream awake Cosmic Consciousness of my human mind and express infinite creativity through my human soul.
I the Universe dream awake cellular memory of Universal Selfhood in my individual soul.
I the Universe as my human self feel sacred pride in the Divine Creations of every being throughout existence, including God-Goddess Absolute.
I am cellular co-creator of all that is created.
God-Goddess Absolute is cellular Creator of all that I Create!
I the Universe invoke and dream awake all the prosperity that is, was, or ever will be, through this my human life.
I my Human Soul am a Master Cell in the Being of God/Goddess, in the Cosmic Moment when the Universe was created!
I honor and acknowledge my co-creatorship of this great Universe which I also Am!
I am cellular co-creator of all that is created!
God/Goddess Absolute is cellular Creator of all that I Create!
I am the vastness of All that Is, thrilled to keep sacred company with myself through All Beings.
I the Universe call fourth “God/Goddess Absolute”, every Angel and Ascended Master to bless and prosper my human soul.
I my Human Soul, am a Cell in the Body of the Universe, holding the entire celestial blueprint of the “Universe At Large”.
The whole reality of the Universe, which is, was or ever will be, is held within my Cells.
I Am the Microcosmic container of the Macrocosmic All That Is!
I am a Soul in the Body of the Universe!
The Universe is a Cell in the Body of my Soul!
Within my Soul I hold the counterpart cells for all that is, was or ever will be.
I contain a cell for every man, woman and child, for every angel and ascended master, for every ocean, mountain and stream, for every mineral, plant and animal, for every elemental, star and galaxy.
I am the Master Cell, microcosmic container of God/Goddess Absolute!
My Greatest Love is the bond we share!
I Am by whom the Universe has a Name!
I Am in whom the Universe has a Home!
I Am on whom the Universe has a Face!
I Am That I Am! I the Universe Am!
Audio Only:
For those of us who prefer to simply listen, here’s an audio only version of this chant:
Sources and Links:
- His website: Astarius.com
- YouTube channel: Astarius Miraculii
- Facebook page: Astarius Miraculii
Amazing Creator
Chant for Awakening your INNER CREATIVE POWER from the album “Ascension Rap” by Astarius Miraculii. If you’d like to watch the video on YouTube, here’s a direct link: Amazing Creator – Awaken Your Inner Creative Power
I love this little chant. Here’s the gist of it:
I’m an amazing creator
Successful and Ascended
I’m an amazing creation
Successful and Ascended
I am that I am
Ascended I am
Audio Only
For those of us who would like to simply listen, here’s an audio only version:
Sources and Links:
- His website: Astarius.com
- YouTube channel: Astarius Miraculii
- Facebook page: Astarius Miraculii
We Are Powerful Creators
Astarius shares on Cause and Effect, The Universal Law of Necessity, and the way in which we create reality through the Power of Thoughts and Feelings.
For those of us who prefer to simply listen, here is an audio only version of this video:
Links:
- His website: Astarius.com
- YouTube channel: Astarius Miraculii
- Facebook page: Astarius Miraculii
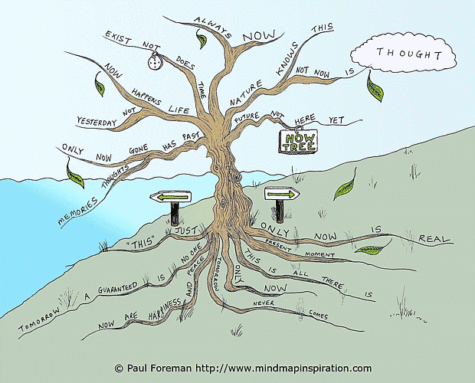
Mind Maps

I found a wonderful series of “mind maps” from Mind Map Inspiration. I thought these might be helpful to those of us who are finding ourselves lost in the wilderness of not getting stuff done that we said we would do, that we wanted to do, that we intended to do, that we wish we would do…

Spinning In Circles
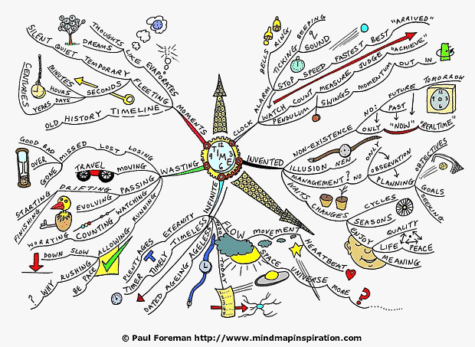
It’s About Time

Quick Fixes
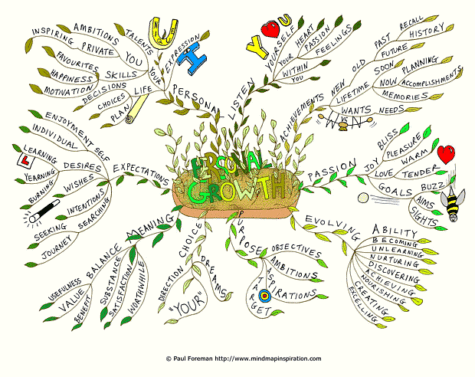
Personal Growth
Right Now
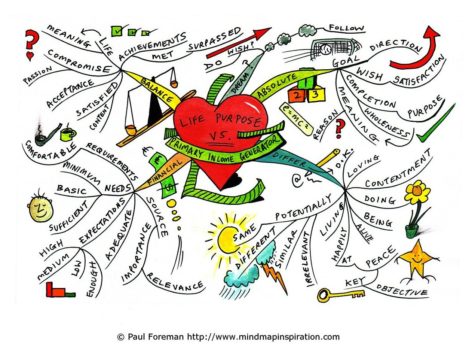
Life Purpose vs Primary Income
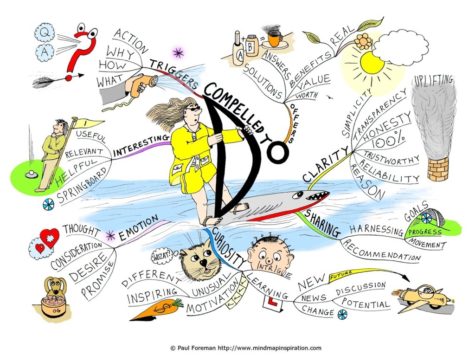
Motivation
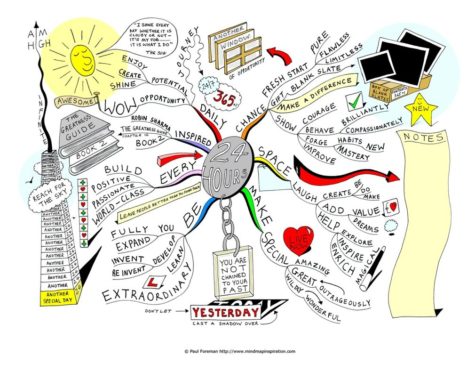
24 Hours
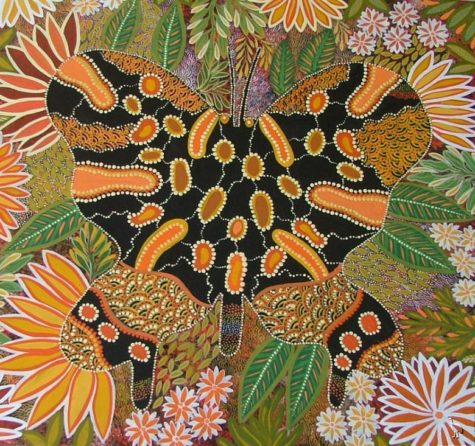
Art Therapy
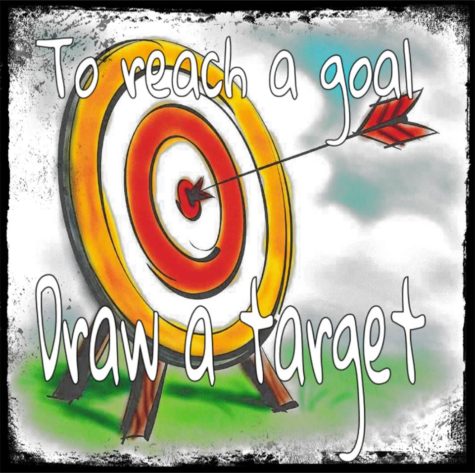
To reach a goal, draw a target.

If you’re in a rut, draw spirals.
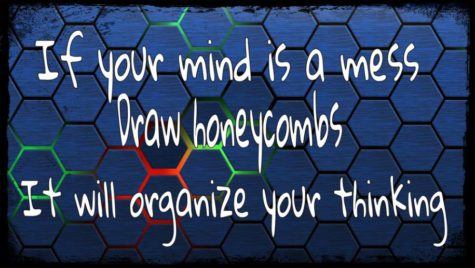
If your mind is a mess, draw honeycombs.
It will organize your thinking.
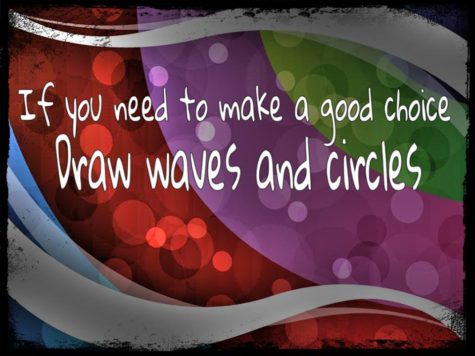
If you need to make a good choice, draw waves and circles.
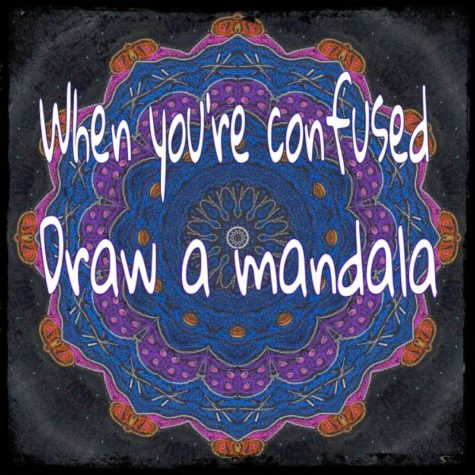
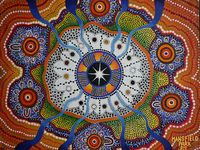
When you’re confused, draw a mandala.
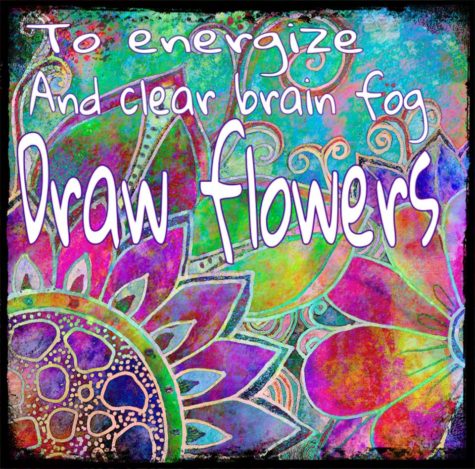
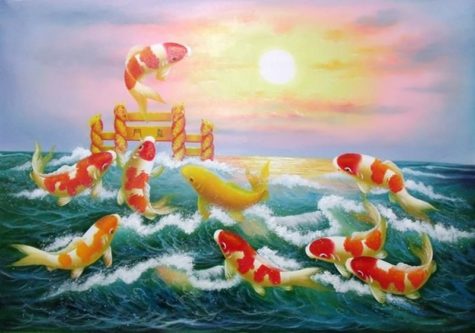
To energize and clear brain fog, draw flowers.
Removing Hazards to Creativity
Today we are removing hazardous elements in the creativity and children area of the home.
Fire is not good for this area. If you have a fireplace in this area, you can cure it by placing a large mirror over the fireplace, or a large picture of water. Carved ducks and fish can bring in the water element also. Candles are not good for this area.
Red is not good here. Red keeps your creativity fired up all the time and can eventually burn you out.
Triangular and pointy objects also represent fire and do not belong here.
If anything is literally blocked in this area, such as doors, drawers, furniture, walkways – unblock it immediately so the energy can flow freely to all areas.
From Move Your Stuff, Change Your Life
by Karen Rauch Carter
Note:
If you are unsure of where the creativity and children area is, see these posts:
- Radical Self Care Project Overview by shirleytwofeathers - No Comment
- Radical Self Care Image Gallery by shirleytwofeathers - No Comment
- It’s A Wrap by shirleytwofeathers - 3 Comments
- Something To Consider by shirleytwofeathers - 1 Comment
- Nurturing Your Precious Self by shirleytwofeathers - 3 Comments
Liana: A Prosperity Prayer
B. Joy Barrett: beautiful-turquoise-upholstered-accent-chair-for-living-room-with-within-colorful-accent-chairs-colorful-accent-chairs-transforms-the-look-of-a-room
Claudette Losier: Why Does It Work?
me: Make Your Own Violet Fire
Abdulrahman: Money Chant – Very Fast
Our current project began on July 4. We are exploring the concept and practice of Radical Self Care . Feel free to join in at any time!

Interested? You can visit our current project page, or you can take a look at the About The Project page if you are curious about the concept.
.
Please feel free to join in at any time! No experience necessary.
- Money Chant - Fast
- Money Chant - Slow
- Prosperity Plan
- Amazing Creator
- Cause and Effect
- I Am That I Am
- Spirit Rap
- Lakshmi Spirit Rap
- PowWow Spirit Rap
 Enter your question and receive the wisdom of the Occulatum. You may pose your question in any way that feels appropriate. The answer will come in the form of a small pop up. Try it - your life just might change for the better!

I think it's time to go shopping... maybe even buy some really cool stuff at my online shops!!