Gluten Free
A Kitchari Fast
In Ayurveda, the ancient wisdom of India dating back 5,000 years, this mix of rice and mung beans is considered extremely easy to digest and is said to purify the digestion and cleanse the body of toxins. Ayurvedic physicians often prescribe a kitchari diet before, during, and after panchakarma, a rejuvenative treatment that cleanses toxins stored in bodily tissues as it restores systemic balance.
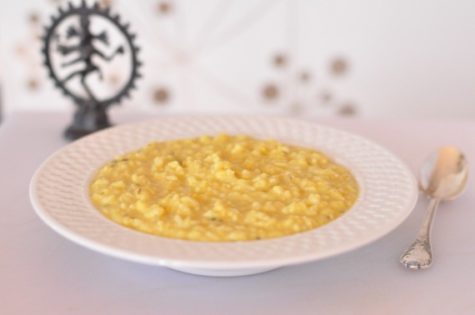
Kitchari provides solid nourishment while allowing the body to devote energy to healing. You can safely subsist on kitchari anytime in order to build vitality and strength as it helps balance all three doshas. For restless vata, the warm soup is grounding; for fiery pitta, its spices are calming; and for chilly kapha, it provides healing warmth.
According to Vasant Lad, in his book, The Complete Book of Ayurvedic Home Remedies, “A five-day kitchari fast, using plain kitchari with just some chopped cilantro leaves added, will cleanse the system and help to strengthen memory.”
Kitchari fasting is actually a mono-diet, which means the body receives a limited diversity of foodstuffs and therefore needs to produce a limited number of digestive enzymes. The work of the digestive system is lessened, allowing for greater healing and cleansing to occur. A kitchari cleanse can be calming, soothing and warming.
Kitchari tastes like a cross between a creamy rice cereal and a light dal, or lentil soup. If it is a cold, blustery day or you are feeling under the weather, a steaming bowl of this classic Indian comfort food can both warm up your bones and restore sagging energy. Everyone has his or her own special method of making kitchari. Ayurvedic Cooking for Self Healing offers a half-dozen kitchari recipes, including this one found on Yoga Journal:
Ingredients:
- 1 cup split yellow mung beans
- 1 tbsp peeled, chopped fresh ginger
- 2 tbsp shredded coconut
- handful chopped cilantro
- 1/2 cup water
- 1/2 tsp cinnamon
- 1/4 tsp each of cardamom, pepper, clove powder, turmeric, salt
- 3 bay leaves
- 3 tbsp ghee or butter
- 1 cup raw basmati rice
- 6 cups water
Directions:
First, rinse the mung beans and soak for several hours. Set aside. In a blender, liquefy the peeled, chopped ginger, shredded coconut, chopped cilantro with one-half cup of water. In a large saucepan, lightly brown the spices, salt; and bay leaves (remove before serving) in the ghee, or butter.
Drain the beans and then stir them into the spice mixture in the saucepan. Next, add the basmati rice. Stir in the blended spice and coconut mixture, followed by six cups of water. Bring to a boil, cover, and cook on low heat for approximately 25 to 30 minutes until soft.
Mint Chutney
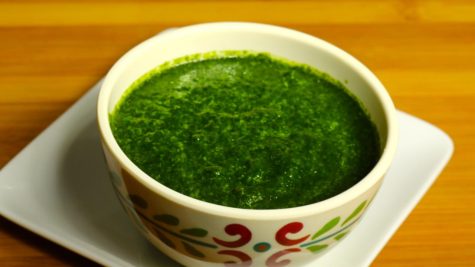
Mint chutney is a delicious condiment, blend of mint and cilantro combined with spices. Most Indian snacks are incomplete without chutney. Chutney also tastes great with a main meal. Try using mint chutney as a spread for your sandwiches – it tastes great!
Recipe will serve 6.
Preparation time 15 minutes
Cooking time 10 minutes
Ingredients:
- 1 cup packed mint (podina) leaves all the stems removed
- 1 cup packed Cilantro (hara dhania) roughly chopped
- 2 tablespoons green chilies chopped (adjust to taste)
- 2 tablespoons lemon juice (adjust to taste)
- 1/2 inch ginger chopped
- 1 teaspoons salt (adjust to taste)
- 2 tablespoons sugar
- Pinch of asafetida (hing)
- Approx. 3 tablespoons water use as needed
Instructions:
Blend all ingredients, except the mint and cilantro, into a paste. Add mint and cilantro, a little at a time, and blend until smooth. Add water as needed. Taste and adjust salt, green chilies, or lemon juice as desired. Tastes great with samosa, vegetable pakoras….
Suggestions:
You can make mint chutney in large quantity in advance and freeze it in ice cube trays. Store the frozen cubes in a zip-lock plastic bag. When ready to serve, defrost as many cubes of mint chutney as needed.
Note:
The most common mint used in Indian cooking is Podina or Peppermint. However, any variety of mint can be used. Just be aware that the flavor will not be quite the same.
From: Manjulas Kitchen
Coconut and Almond Fudge
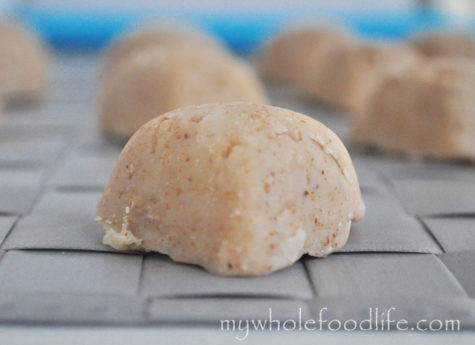
Coconut and almonds go beautifully to create a fudge that melts in your mouth. The best part? They fit almost every diet. They are grain free, gluten free and vegan.
Ingredients:
- 1/2 cup almond butter
- 1/2 cup coconut butter
- 2 tbsp maple syrup
- 1 tbsp coconut oil
- 1/4 tsp salt
- 1/2 tsp almond extract
Preparation:
In a saucepan , combine all the ingredients. Stir on medium heat until everything is combined. Pour into molds and store in the fridge to set. Yields 15. These should take 1-2 hours to set up in the freezer. Enjoy!
Note: I used chocolate molds to set my fudge, but mini muffin cups would work great too! If using mini muffin cups, please use a paper or silicone wrappers so they can be easily removed.
Source: My Whole Food Life
Almond Coconut Fudge
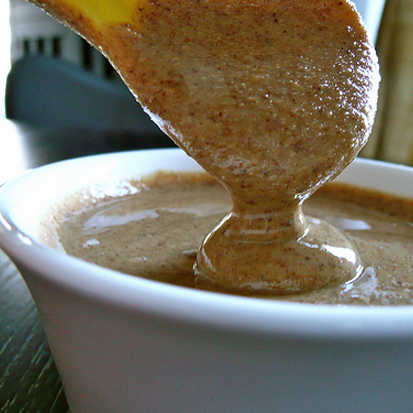
Almond Coconut Fudge isn’t only a delicate blend of sweet and savory, proteins and carbs, it is also specially formulated to keep your metabolism strong. Cinnamon and ginger not only stimulate digestion and improve absorption, they also stimulate your “agni” – your body’s natural umphh – to keep your energy levels strong. Plus, cinnamon helps to regulate the blood sugar levels.
Ingredients:
- 1/4 cup Almond Butter
- 1/4 tsp Cinnamon
- 1 tbsp Coconut Oil
- 1/4 tsp Ginger (dried, powdered)
- 1 tbsp Honey
- 1 pinch Salt (Mineral Salt is best)
Preparation:
Place all ingredients in a bowl and mash together until thoroughly mixed. The fudge will harden in the fridge, or retain a soft consistency at room temperature.
Source: Joyful Belly
Roasted Rice with Dates, Cinnamon and Cardamom

This is a decadent dish to serve your loved one on a sweet evening in! Lovely as a side dish for Mediterranean lamb dishes, any number of vegetables, or even as a sweet dessert, you can’t pass this recipe up!
In Ayurveda, the word for juicy, sensual vitality is “ojas.” Some special foods have lots of ojas, and, as it happens, you can eat them if you feel the need to increase your sense of vitality and juiciness. (There are probably not many people who don’t yearn for that sweet sensuality in life.) In the ancient texts of Ayurveda, Ojas is said to have the smell of toasted rice. The main two ingredients in this recipe, dates and rice, increase ojas in your body, thereby giving you a healthy, happy glow.
Roasted Rice with Dates, Cinnamon and Cardamom is very easy to digest. It’s even perfect for those who are recovering from illnesses or suffering from weak digestion. Sometimes, feeling rundown leaves us feeling sad – this recipe is the remedy for both! The soft, soothing nature of rice and dates will calm your belly and help you feel strong and stable.
Ingredients:
- 1 cup Basmati Rice
- 1/4 tsp Black Pepper
- 1/4 tsp Cardamom
- 1/4 tsp Cinnamon
- 4 whole Dates (dried)
- 1 tbsp Ghee
- 2 pinches Salt (Mineral Salt is best)
- 3 cups Water
Preparation:
Chop dates. Heat a medium saucepan on low, and add ghee. When it melts, add uncooked rice. Stir continually for 2-5 minutes, until it smells sweet and all the rice is coated with ghee. Add the spices and dates. Stir for one more minute. Add water and bring to a boil. Cover pot and lower to a simmer. Cook until rice is tender about twenty minutes.
Source: Joyful Belly
The Health Benefits of Millet
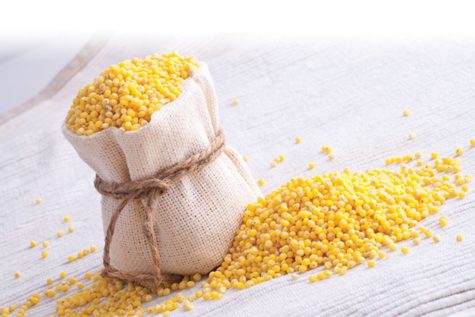
Most people have not even heard of millet, much less understand the benefits of millet nutrition. And yet, millet is one of the best-kept secrets of our ancient ancestors. Traced back to its origin in China, millet has been used throughout the ages and across many countries.
For centuries millet has been a prized crop in China, India, Greece, Egypt and Africa, used in everything from bread to couscous, and as cereal grain. Millet is even mentioned as a treasured crop in the Bible.
This tiny “grain” is gluten-free and packed with vitamins and minerals. In fact, while it’s often called a grain because of it’s grain-like consistency, millet is actually a seed. It’s often used in birdseed mixture, but if you think it’s just for the birds, you’re missing out on important benefits of millet nutrition for yourself!
The positive effects of Millet:
- Does NOT feed pathogenic yeast (candida),
- Acts as a prebiotic to feed important microflora in your inner ecosystem
- Provides serotonin to calm and soothe your moods.
- Helps hydrate your colon to keep you regular.
- Is alkaline.
- Digests easily.
Health benefits of Millet:
- Magnesium in millet can help reduce the affects of migraines and heart attacks.
- Niacin (vitamin B3) in millet can help lower cholesterol.
- Phosphorus in millet helps with fat metabolism, body tissue repair and creating energy (phosphorus is an essential component ofadenosine triphosphate or ATP, a precursor to energy in your body)
- Millet can help lower risk of type 2 diabetes.
- Fiber from whole grains has been shown to protect against breast cancer.
- Whole grains have been shown to protect against childhood asthma.
It’s not for everyone:
While millet may not contain gluten, it does contain goitrogens. Goitrogens are those substances in food that suppress thyroid activity and can lead to goiter, an enlargement of this very important gland which resides in the throat. Low iodine intake can also lead to goiter.
While the goitrogens in foods that contain them are usually reduced by cooking (such as cruciferous vegetables), cooking actually increases the goitrogenic effect of millet! Therefore, when folks begin eating large amounts of millet bread with a wholesale switch over from wheat, the goitrogenic effects of this simple dietary change can be profound.
Protect your thyroid at all costs! It is a real challenge to unwind the effects of hypothyroidism once this vital gland is weakened or enlarged. Don’t take any chances with your thyroid health by consuming large amounts of millet bread or millet based snacks. If gluten and/or wheat is a problem, then simply reduce bread consumption or use another grain that is both non gluten containing and non goitrogenic such as rice or oats. Occasional millet bread consumption is fine if your thyroid is healthy – just don’t overdo!
Source: Body Ecology and other sources
The Health Benefits of Buckwheat
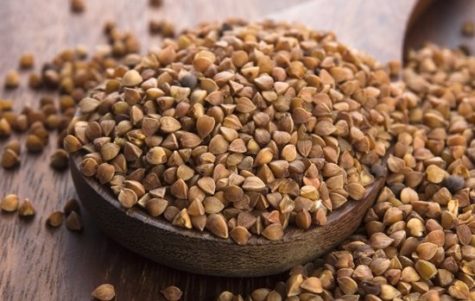
Buckwheat has an impressive catalog of nutritional properties:
- Non-GMO (It requires hardly any chemicals to grow well because it naturally grows so quickly).
- High quality proteins (it contains all 9 amino acids)
- Good energy booster (rich in iron and antioxidants
- Naturally contains vitamins and minerals (including zinc, copper and niacin)
- Great for digestion
Because of it being an insoluble fibrous food, buckwheat is essential for cleaning and strengthening intestines. Insoluble fiber also reduces the secretion of bile acids and lowers triglycerides (blood fats). This is particularly good for those suffering with IBS-D, or anybody who has stomach trouble immediately after consuming foods.
Full of healthy fats:
Anybody looking to remain satiated will know that eating plenty of healthy fats is the way forward. Rather than stocking up on high-calorie, low-energy foods such as bread and processed foods, foods high in healthy fats keep you fuller for longer and see that your nutrition quota is also met. Healthy fats are especially great for IBS sufferers as we need to eat small meals, regularly – the healthy fats mean sugar and fat cravings don’t come about to instigate any flare-ups.
Impressive fiber levels:
Although it depends which type of digestive ailment you suffer from, most people will be thankful for a little added fiber to their diet. High fiber foods bulk up the digested food particles, meaning they are easier to pass and less of a trial for your digestive tract. With 4.54 grams of fiber in just 1 cup, you can see that buckwheat is incredibly high in fiber.
Low glycemic index:
The great thing about buckwheat is that it has a low GI of 54, which means it lowers blood sugars and digests the glucose more slowly than similar products like rice or wheat. Studies have further found that whole buckwheat groats contributed to significantly lowered blood glucose and insulin responses than when the participants ate refined wheat flour products. Whole buckwheat also scored highest on their ability to satisfy hunger.
What can you do with buckwheat?
You can buy raw buckwheat from just about any supermarket or food store in the wholefoods section. I recommend playing with it and seeing what interesting, healthy recipes you can make with it. You can use buckwheat flour as a gluten free alternative when making pancakes and other breads. Soba or buckwheat noodles are a great substitute for pasta, particularly if you are on a gluten free diet.
A Few Quick Serving Ideas
- Combine buckwheat flour with whole wheat flour to make delicious breads, muffins and pancakes.
- Cook up a pot of buckwheat for a change of pace from hot oatmeal as a delicious hearty breakfast cereal.
- Add cooked buckwheat to soups or stews to give them a hardier flavor and deeper texture.
- Add chopped chicken, garden peas, pumpkin seeds and scallions to cooked and cooled buckwheat for a delightful lunch or dinner salad.
Source: My Wellbeing Journal
Simple Cooked Millet
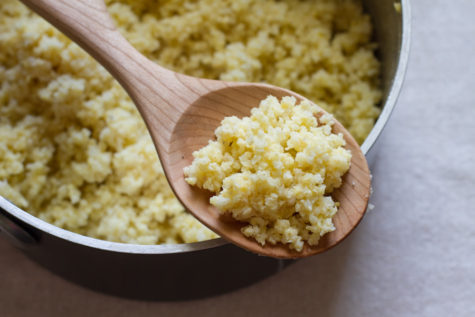
While it’s often called a grain because of it’s grain-like consistency, millet is actually a seed. Millet has a thin kernel wall that can be cooked without soaking. For best results, add to boiling water to cook thoroughly.
- 1 cup millet
- 3 cups water
- ⅛ tsp sea salt
Procedure – Wash and drain millet. Bring water to a boil. Add sea salt, then millet. Cover. Return to a boil. Simmer over low heat for 25 to 30 minutes, using a heat diffuser if needed.
Yield: 4 cups
Source: Ohsawa Macrobiotics
Simple Cooked Buckwheat
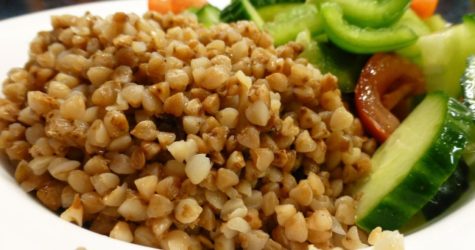
Buckwheat is a hearty delicious grain and simple to prepare. It requires no washing or soaking. Roasting improves its flavor. Kasha sold in natural food stores is buckwheat that has already been roasted; it can be cooked by adding to boiling water.
- 2 cups buckwheat
- 4 cups water
- ⅛ tsp sea salt
Dry roast buckwheat for 3 to 4 minutes until fragrant, add to boiling water, and simmer 25 minutes.
Yield: 7 cups
Source: Ohsawa Macrobiotics
Pressure Cooked Brown Rice
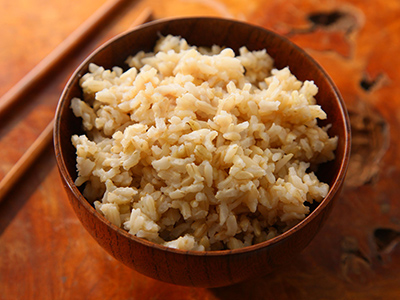
Soaking is recommended before cooking brown rice. If there is no time to soak, roast first. Roasting inactivates the enzyme inhibitors, boosts flavor, and produces a light and fluffy dish. These instructions are for a 2-quart pressure cooker. If using a 4-6 quart cooker, double the amounts.
- 2 cups short or long grain brown rice
- 2.5 to 3 cups water
- ⅛ tsp sea salt
Procedure – Wash and drain grain. Soak for the desired time in the full quantity of water. Add sea salt after soaking. Lock cover on pot. Set pressure according to pressure cooker instructions. Place cooker over medium-high heat. Bring to full pressure. Slip a heat diffuser under the cooker and turn heat to low. Cook at full pressure for the time indicated.
Yield: 6 cups for short rice; 6½ cups for long rice
Source: Ohsawa Macrobiotics


I think it's time to go shopping... maybe even buy some really cool stuff at my online shops!!
