Nuts
Gluten-Free Honey Almond Cake
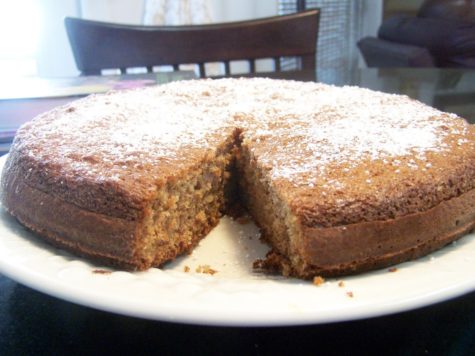
Super simple, moist and delicious almond meal and honey cake! This cake is gluten free and paleo friendly. Feel free to change up the flavors (see notes on how to do so). I think a lemon blueberry version would be delicious.
Ingredients:
- 2 cups (8 ounces) almond flour or almond meal, firmly packed into measuring cups
- 1 teaspoon baking powder
- ½ teaspoon baking soda
- ½ teaspoon ground cardamom
- ½ teaspoon ground ginger
- ½ teaspoon fine-grain sea salt
- 4 eggs, beaten
- ⅔ cup + 1 teaspoon honey, divided
- ¼ cup extra-virgin olive oil
- One orange, preferably organic
- 6 ounces raspberries, preferably organic
Garnish:
- Sprinkle of powdered sugar (optional)
- ½ cup chopped raw pistachios
Instructions:
Preheat the oven to 325 degrees Fahrenheit. Grease a 9-inch pan (I used a springform pan) with butter and dust with almond flour/meal.
In a large mixing bowl, whisk together the almond meal, baking powder, baking soda, cardamom, ginger and sea salt.
In another bowl, combine the beaten eggs, honey, olive oil and the zest of your orange. Use a whisk to mix well. Pour the wet ingredients into the dry. Stir just until there are a few clumps remaining, then gently fold in the raspberries.
Pour the mixture into your prepared pan.
Bake for 40 to 45 minutes, until the cake is golden brown and the center is firm to the touch. Place the cake on a wire rack to cool to room temperature.
Once the cake is out of the oven, slice your orange in half and squeeze out ¼ cup juice. Combine the juice with 1 teaspoon honey in a small saucepan. Warm over medium heat, while stirring, just until the honey is blended into the juice. Brush the orange-honey glaze over the warm cake. It should soak right in.
Once the cake is cool, use a sharp knife to slice into 8 pieces. Transfer each piece to a plate, sprinkle with powdered sugar (optional) and finish with a sprinkle of chopped pistachios.
Notes:
Store this cake in the refrigerator, covered, for longevity. Those juicy berries make this cake more quick to spoil at room temperature.
Substitute an equal amount of other berries or fresh fruit for the raspberries and/or trade lemon or lime zest for the orange zest and/or garnish with fruit instead of powdered sugar and pistachios. If you omit the fruit completely, the cake will be done somewhere around 35-40 minutes. If you add additional fruit, you’ll need to bake longer.
Found at: Cookie and Kate
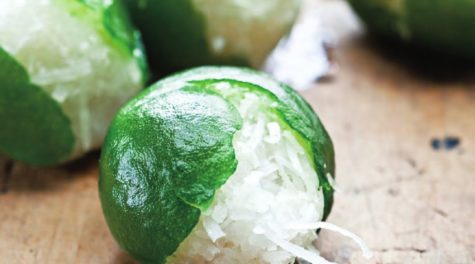
Coconut Stuffed Limes
Ingredients
- 2 teaspoons baking soda
- 12 medium-large limes, rinsed well
- 2 1/2 cups sugar
- Green food coloring (optional)
- 2 cups shredded fresh coconut
- 1/2 cup water
Instructions
Bring 2 quarts of water to a boil over high heat, add 1 teaspoon of the baking soda, stir to combine, and then add the limes. Cook at a soft simmer until slightly tender, 10 to 15 minutes. Remove the limes from the water with a slotted spoon and let cool.
Make a small incision in the top of each lime with a sharp paring knife and carefully scrape out the flesh, making sure you don’t tear the rind; discard the filling. Return the intact rinds to the pot, add cold water to cover, and stir in the remaining 1 teaspoon baking soda. Bring to a boil, strain, and repeat this process (without any more baking soda) 3 more times to remove the bitterness from the limes.
Return the limes to the pot, add cold water to cover, then stir in 1 1/2 cups of the sugar and a few drops of food coloring. Cook over medium-low heat, stirring, until the syrup has thickened to the consistency of corn or maple syrup, 15 to 20 minutes. Remove from the heat, let cool completely in the syrup, then transfer the limes to a wire rack and let dry.
Combine the coconut, the remaining 1 cup sugar, and the 1/2 cup water in a saucepan and cook over medium heat, stirring, until the coconut is soft, almost translucent, and thick. Let cool until it is safe to handle.
Fill the limes with the coconut mixture and let cool completely. Eat by biting into the lime. Store in an airtight container lined with parchment paper in a cool, dry place for up to 2 months.
From: The Splendid Table
Making Coconut Milk
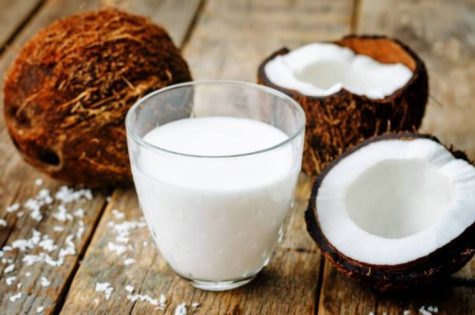
Here are tips for selecting, opening, and creating basic milk from the coconut. This coconut milk has numerous purposes and can be used in the recipe for Roasted Stuffed Papaya.
- Selection
Choose a coconut with a chestnut-brown hull, that is smooth with no apparent holes or mold. Shake and listen for a water sound. If it still contains water, it will be moist and tasty.
- Opening the Nut
Bore two holes in the eyes using an ice pick or sharp knife. The eyes are the dark brown spots at either end of the coconut. Pour the coconut water into a bowl. You can drink the coconut water, add it to your bath or beauty recipes, or save it for magickal or ritual uses. If you choose to save the coconut water, you will need to refrigerate or freeze it depending on how long you wish to keep it.
Now that the water has been drained from the coconut, hit the hull on a hard surface sharply a few times – it should crack open. You can also hit the nut with a mallet or hammer. This will be easier to do if the nut is wrapped with a dish towel to keep it stabilized.
Once cracked open, scoop out the flesh, which is called coconut meat. The coconut meat that comes out of the hard shell may have a thin brown skin that will need to be peeled off. This is most easily done with a potato peeler.
- Making Coconut Milk
Heat 1 1/2 cups water in a kettle on medium high heat. While it’s heating up, grate the coconut flesh and put it in a sieve over a large bowl. Just before the water comes to a boil, slowly pour it over the grated coconut in the sieve. Press the coconut meat with the back of a wooden spoon until all the water has been pressed out.
Pour this liquid into a Pyrex measuring cup with a pouring spout. Now pour the collected coconut milk once again into the sieve full of coconut meat and press it once again with the back of the wooden spoon and into the bowl.
Repeat 3 to 4 times. This makes about 1 1/4 cups rich coconut milk.
- Coconut Cream
To make coconut cream, bring `1 1/2 cups full-fat milk almost to a boil. Go through the steps above (making of coconut milk). Coconut cream is a bit denser, with a full-bodied, sweeter taste, just right for deserts and drinks.
- Toasted Coconut
Remove coconut from the hull with a sharp knife. With a potato peeler, peel off any remaining dark skin. Shred the coconut. Add 1 tablespoon olive oil to a cast iron skillet. Add a pinch of sea salt if desired. Toss until medium brown.
Toasted coconut is a great low-carb snack. I like to toast almonds and sunflower seeds with it and use this as a snack food when watching movies. You can also use toasted coconut as a topping for fruit salads, yogurt, or cereal.
From: Four Seasons of Mojo
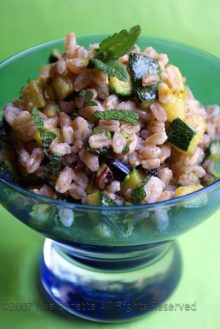
Lemony Zucchini With Farro
 Ingredients:
- 350 g/12.3 oz farro, you can also use brown rice
- 400 g/14.1 oz zucchini, diced
- 1 large lemon
- 4-5 tblsp chopped pistachio nuts
- A small bunch of lemon balm, finely chopped
- 1 clove of garlic, chopped
- Salt
- Olive oil
Boil the farro in abundant salted water until soft, it usually takes 20-30 minutes. Meanwhile you first either grate the zest of the lemon or you use a lemon zester and put it in a pan with the garlic and some olive oil.
Braise for a minute before adding the diced zucchini and go on braising until the zucchini is sift and golden. Add the pistachio nuts and the farro and then drizzle a little of lemon juice over it. Add the Lemon balm and stir. Serve!
Makes 4 servings.
Found at: Lucullian
Pickled Walnuts
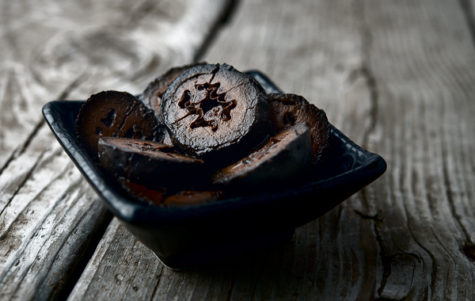
What do you do with them? They are particularly good with cheddar, and in Britain they are traditionally part of a ploughman’s lunch, with other pickles, cheese and cold meats. They can also be tossed into beef or lamb stews (pot pies and pasties, too!) in wintertime, and in summertime served in cool salads alongside tomatoes, and accompanying shellfish such as scallops or shrimp.
The flavor is a bit like eating solid steak sauce, with a little floral aroma and a zephyr of bitterness that just barely let you notice it. Eaten alone they are fairly soft, puckery and strangely floral with a Worcestershire-Heinz 57 taste to it.
For the recipe you need green, unripe walnuts to make pickles. And yes, you use the whole thing, hull and all.

It is very important that you test to see that the walnuts are green enough to use. How to do this is slice an unripe nut in half. You need to do this, either with a knife or a stout needle or a long nail, because you have to catch the unripe walnuts before the shell forms. Once that shell forms inside the walnut’s hull, you’re too late.
The traditional harvest date in England is late June.
Any walnuts will work with this recipe, from tiny native Arizona walnuts to big, fat English walnuts, which are the kind you buy in stores. But you do need them hull and all, so this only works if you have a tree nearby.
The process for pickling walnuts is not hard at all, but it takes more than a week. You need to brine the green walnuts for a good long time before they will be ready to pickle properly. The brine time helps with preservation and removes some of the bitterness in the unripe walnuts. Once brine pickled, they are pretty durable. Do you need to sun-blacken the walnuts? No, but doing so gives you a nice, uniform look to them. Otherwise they will be olive green in some places, blotchy black in others.
The pickling liquid in my recipe is very traditional; you’ll see variations on it throughout England. I’ve also made a Chinese-inspired version with Sichuan peppercorns and star anise replacing the allspice.
Makes about: 3 to 4 quarts.
Prep Time: 8 days, fermenting time
Cook Time: n/a
- About 50 to 60 green, unripe walnuts
- 1/2 cup kosher salt
- 1/2 gallon water
- 2 quarts cider or malt vinegar
- 1 tablespoon cracked black pepper
- 1 tablespoon cracked allspice berries
- 10 cloves
- 1 ounce ginger, smashed (about 1 1/2-inch pieces)
- 1 cup brown sugar
Instructions:
- Dissolve the salt in the water to make a brine. Put on some rubber gloves if you have them, because walnut juice will stain your hands for weeks — and it won’t come off. Trust me on this one. Properly gloved, stab each walnut with a fork in several places; this helps the brine penetrate. Submerge the walnuts in the brine and let them ferment for 8 days at room temperature.
- Remove the walnuts and put them on a baking sheet and leave them outside in the sun for a day, until they turn uniformly black. You can do this step without gloves if you want.
- Pack the walnuts into quart jars. Bring the remaining ingredients to a boil and pour over the walnuts. Leave very little headspace in the jars. Seal and keep in a cool place, either the fridge or a basement — you just want them to rest below 70°F — for at least a month before you eat them. Kept this way they will last a year.
Note: When you use the walnuts in recipes or for lunches, be sure to keep the vinegar as it is said to be a great gargle for coughs when you have a cold or the flu.
From: Honest Food
Simple Roasted Nuts and Seeds
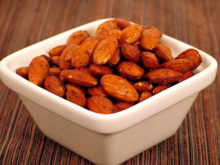
- almonds, 12 minutes
- pumpkin seeds, 7 minutes
- sunflower seeds 10 minutes
Procedure – Roast nuts or seeds in the oven when roasting a large quantity. Place one layer of any kind of nut or seed on a baking sheet. Place in a pre-heated, 350-degree oven. Roast for the times indicated, until fragrant, beginning to pop, and browning. Stir occasionally.
If desired, add soy sauce after roasting. Place hot roasted nuts or seeds in a bowl. Add 3 or 4 drops soy sauce per ¼ cup nuts or seeds.
Source: Ohsawa Macrobiotics

I think it's time to go shopping... maybe even buy some really cool stuff at my online shops!!
