Recipes
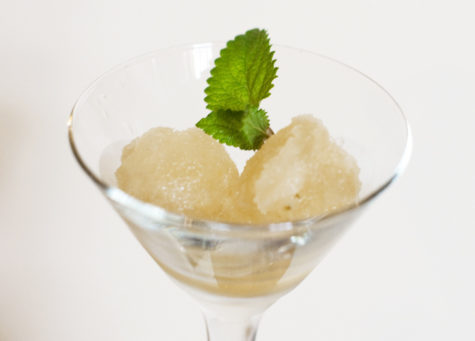
Lemon Balm-Apple Sorbet
 Ingredients:
- 2 large apples, chopped
- 1 cup lemon balm leaves
- 2 cups water
- 1 cup honey
- Juice of 2 lemons
Puree apples and lemon balm in a blender or food processor. Transfer puree to a sauce pan. Add water and honey. Simmer over low heat until thick and bubbly. Strain. Add lemon juice, stir briskly, and cool. Place mixture in an ice cream maker and freeze. If you don’t have an ice cream maker, freeze, then blend the mixture just before serving. Garnish with fresh lemon balm sprigs, and serve with scones or tea biscuits.
FREAKING DELISH!!!
Found at: Bay Witch Musings
Savory Fenugreek and Coriander Pancakes
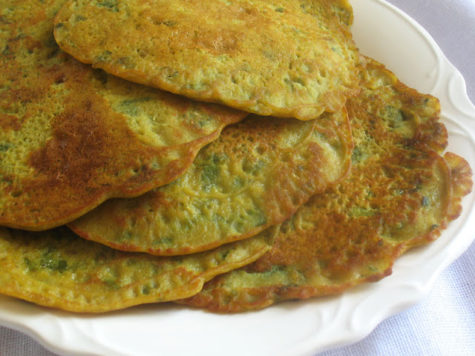
Thin, soft Indian flat breads with a savory fenugreek and coriander flavor. These pancakes feature fresh fenugreek leaves — also known as “methi” — an annual herb that I was lucky enough to get my hands on. It is commonly used in Indian cooking and that includes the seed and ground powder from the seed. Slightly sweet, with a hint of bitterness, it is well worth using the fresh herb, but if you can’t find it — and this is sometimes a challenge — substitute about 3/4 cup dried fenugreek instead.
Most Asian and Indian grocers carry the dried leaves, seeds and powder, and often the fresh leaves. These grocers will also carry chickpea flour and chapati (or “atta”) flour, but for 1/2 cup of chapati flour you may substitute 1/3 cup sifted whole wheat flour and combine with enough pastry flour to make 1/2 cup.
Masala paste:
- 4 to 6 green chilies (or fewer if preferred), seeded and chopped
- 1 clove garlic, crushed
- 1-inch fresh ginger, finely sliced
- 1/4 teaspoon sea salt
Pancake batter:
- 1 cup brown rice flour
- 1/2 cup chapati (atta) flour*
- 1/3 cup chickpea (besan) flour
- 1 teaspoon cumin seeds
- 1/2 tablespoon ground coriander
- 1 teaspoon turmeric
- 1/2 teaspoon paprika
- 1/4 teaspoon asafetida
- 1 1/2 teaspoons sea salt, or to taste
- 2 teaspoons coconut sugar or brown sugar
- 2/3 cup whole fat yogurt
- 1 1/2 cups warm water, or as needed
- 1 2/3 cup fresh fenugreek leaves (methi), roughly chopped*
- 3 tablespoons ghee or sesame oil for frying, or as needed
Instructions:
*Substitutions: Substitute 1/2 cup chapati flour with 2 parts sifted whole wheat flour and 1 part pastry flour. Substitute fresh fenugreek leaves with 3/4 cup dried fenugreek leaves.
For the paste, combine the chilies, garlic, ginger, salt and 1 teaspoon of water in a small blender to blend into a paste. Alternately, use a mortar and pestle.
Whisk together the flours, cumin seeds, ground coriander, turmeric, paprika, asafetida, salt and sugar in a large bowl until well combined. Stir in the yogurt, 1 cup of the water to start with, and the fenugreek leaves. Stir well to combine, adding more water until the batter is pourable but fairly thick.
Line a plate with a large piece of foil.
Heat a few teaspoons of ghee or oil in a large heavy-bottomed frying pan over medium heat. When hot, ladle about 1/2 cup of the batter into the hot pan and spread out in a circular fashion with the back of the ladle into a thin 7- or 8-inch round. Cover and let cook for a minute. With a spatula, gently flip the pancake and cook for another few minutes, until the bread is golden brown. Transfer the pancake to the plate, fold the foil over to cover, and repeat the process until all of the pancakes are cooked.
Enjoy warm or reheat them in a 175° oven. They are best when served the same day that they are made.
Makes about 10 pancakes
Recipe by Lisa Turner
Pickled Nasturtium Seeds
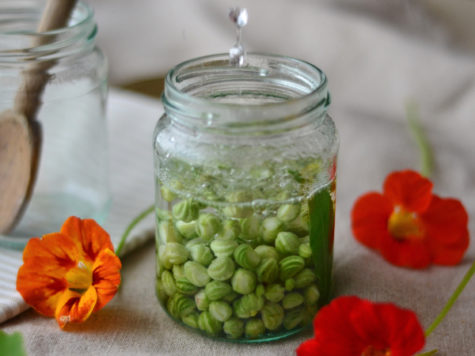
Use green nasturtium seeds, and in picking retain a short length of stem on each. Lay the seeds in cold salted water for two days (two tablespoons salt to one quart water), then place them in cold water for another day. Drain well and place the seeds in a glass jar, cover with vinegar heated to the boiling point, and close the jar tightly. In a few days the seeds will be ready to use. They are an excellent substitute for capers.
From: Herbal Gardens
Nasturtium Lemon Butter
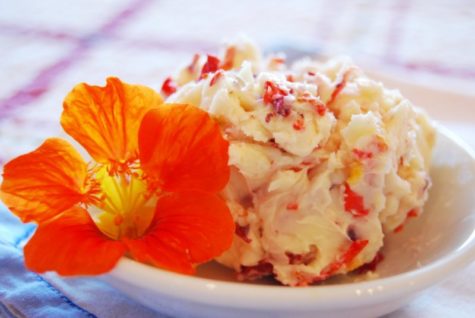
This lovely butter has a mild lemon/pepper flavor and a colorful appearance. It is wonderful on fish, chicken and vegetables. This is also great on those small party breads, pumpernickel especially.
- 1/2 cup unsalted butter softened
- 1-2 teaspoons grated lemon peel (according to taste)
- 1 tablespoon lemon juice
- 3 tablespoons finely chopped nasturtium blossoms
Mix all of the ingredients well until smooth and well blended. Refrigerate or freeze until ready to serve. Makes 3/4 cup flavored butter.
From: Herbal Gardens
Nasturtium Vinegar
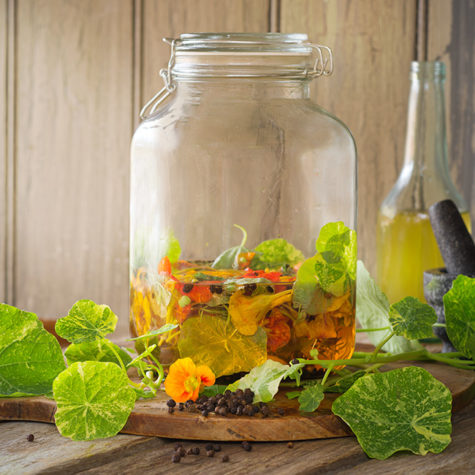
Nasturtiums have a wonderful peppery flavor and add zest to any recipe.
- 1 cup nasturtium leaves, flowers, and buds
- 1 pint champagne or white wine vinegar
Place the ingredients in a clean clear glass jar or bottle. Tightly seal. Let sit for at least 3 weeks before using. Place a new nasturtium in the finished bottle for decoration, but you should make sure the vinegar always covers the flowers or they will mold. Makes 1 pint vinegar to use in salads, sauces and flavoring in other dishes.
From: Herbal Gardens
Stuffed Nasturtium Flowers
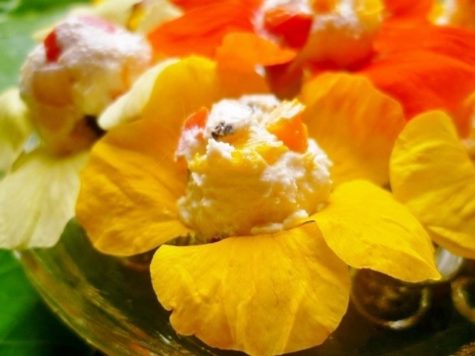
Nasturtium flowers have a wonderful peppery flavor.
Mix 8 ounces softened cream cheese with 2 Tablespoons finely minced chives or other herbs of your choice. Stuff the mixture into nasturtium flowers and place on a tray that has been lined with nasturtium leaves. Serve at room temperature.
From: Herbal Gardens
How To Make Sprouts
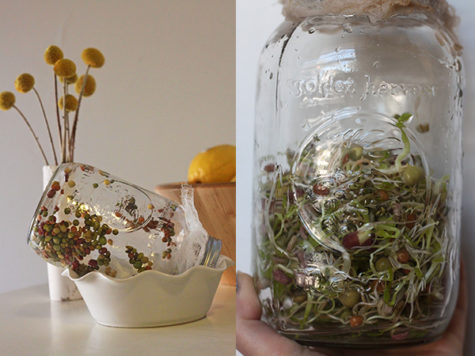
Use one part seed to at least three parts water. Soak in a wide-mouth jar. All measurements below yield one quart of ready sprouts. Half-gallon or larger jars are more convenient.
- 1 cup aduki beans – soak 12 hours – 3 to 5 days to sprout
- 2 tablespoons alfalfa seed – soak 6 hours – takes 5 to 6 days to sprout
- 2 tablespoons red clover seed – soak 6 hours – takes 5 to 6 days to sprout
- 1/2 cup fenugreek – soak 8 hours – 3 days to sprout
- 1 cup garbanzo beans – soak 12 hours – 3 to 5 days to sprout
- 1 cup legumes – soak 12 hours – 3 to 5 days to sprout
- 1/2 cup lentils – soak 8 hours – 3 days to sprout
- 1/2 cup mung beans – soak 8 hours – 3 to 5 days to sprout
- 1/4 cup mustard seed – soak 6 hours – takes 5 to 6 days to sprout
- 1/4 cup radish seed – soak 6 hours – takes 5 to 6 days to sprout
- 1 cup rye – soak 12 hours – 3 days to sprout
- 1 cup soy beans – soak 12 hours – 3 to 5 days to sprout
- 2 cups sunflower seeds – soak 12 hours – 2 days to sprout
- 1 cup wheat – soak 12 hours – 3 days to sprout
Instructions:
Cover the mouth of the jar with a plastic or stainless steel sprouting screen or cheesecloth, which is tied on or secured with a rubber band (sprouting jars, bags, and automatic sprouting machines are also available).
After soaking seeds for the prescribed amount of time, drain well, and keep in a warm (65 degree F) dark place. They can be covered with a cloth or bag. Sprouting time increases with more light and cooler conditions.
Rinse twice a day, ideally morning and evening. An exception is soy, which may rot if not rinsed four times daily. Keep jar tilted mouth down for better drainage. A dish drainer works well for this. Thorough rinsing and complete draining improve sprout flavor.
After three days place alfalfa, red clover, radish, and mustard sprouts in a cool place with indirect sunlight to induce chlorophyll. Continue rinsing twice daily until sprouts are ready.
Radish and mustard seed sprouts exhibit biting pungency, which adds a delightful zesty quality when mixed with other sprouts or in various dishes.
During the sprouting process, the hulls on certain seeds slough off. It is important to remove hulls from alfalfa and radish sprouts since these easily rot. Hulls from mung, aduki, and fenugreek are often removed for a lighter-tasting quality, although they can be eaten and provide fiber.
To remove the loose hulls from sprouts, place them in a large bowl of water and agitate them, further loosening and brushing them aside. Gently reach under the sprouts and lift them out of the water, without disturbing the sunken hulls, which can then be discarded.
Drain sprouts well. If refrigerated, they keep up to one week in a plastic bag or covered glass jar.
Note:
Alfalfa may not sprout in polluted tap water. Use distilled or spring water or sprout with other seeds (mung, lentil, fenugreek) in the same jar. You will have a delicious salad. Save all rinse water for cooking, watering plants, or to give your animals.
From: Healing With Whole Foods
Summer Tea
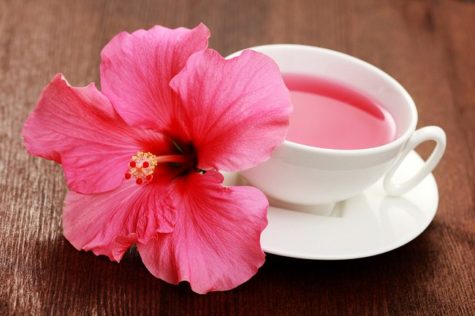
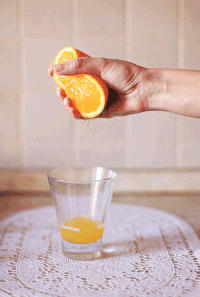
This tea is refreshing on any warm day or after exertion in the garden. It is equally pleasant hot or cold.
- 2 tsp hibiscus flowers
- grated peel of ½ a lemon (optional)
- grated peel of ½ a lime (optional)
Note:
This blend is for one person and is intended to have half a pint of boiling water poured over it. Allow the infusion to stand for 10 minutes before straining and do not stir, as this bruises the plants. Obviously, you can adjust the amount of water or standing time to your own taste. If you prefer your tea sweet, add a little honey, not sugar, to the strained infusion.
Elderberry Ice cream
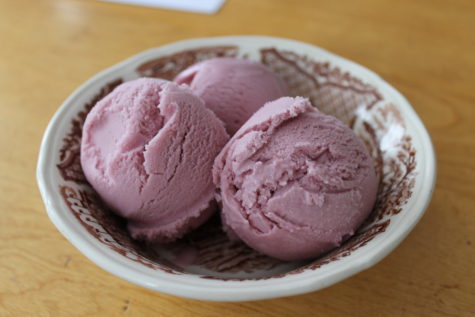
Ingredients:
- Elderberries (destalked)
- Sugar
- Juice of 1/2 a lemon
- 1/2 pint Double cream
- 2 Egg whites
First pick your elderberries. The easiest way is to snip off whole bunches, and then strip the individual berries off using the prongs of a fork at your leisure. I picked about half a carrier bag of bunches, which came out to a big saucepan of berries.
Put the berries into a saucepan with a little water, a sprinkling of sugar and the juice of half a lemon. Go steady on the sugar, you can always add more later if you need to.
With a lid on the saucepan, gently simmer for about 45 minutes, or until the berries have gone very soft. Leave to cool, and then push the berries through a sieve, discarding the pips that remain. This will leave a rich elderberry syrup. Taste it, and add more sugar if required. As a guide I had about a pint of syrup at the end.
Whip half a pint of double cream until it stands in peaks, and in a separate bowl whisk two eggwhites until they are stiff enough to tip the bowl upside down. This can be quite a feat with a hand whisk!
Fold the cream, egg whites and elderberry syrup together gently, until the whole mixture is a uniform lurid purple. Pour into a suitable freezer container – I used a Pyrex glass bowl. Then stick it into your freezer.
By John Kennett
A Healing Bone Broth
Bone broth is the most accessible “cure-all in traditional households and the magic ingredient in classic gourmet cuisine, stock or broth made from bones of chicken, fish and beef builds strong bones, assuages sore throats, nurtures the sick, puts vigor in the step and sparkle in love life–so say grandmothers, midwives and healers.

For chefs, stock is the magic elixir for making soul-warming soups and matchless sauces. Stock contains minerals in a form the body can absorb easily-not just calcium but also magnesium, phosphorus, silicon, sulphur and trace minerals. It contains the broken down material from cartilage and tendons–stuff like chondroitin sulphates and glucosamine, now sold as expensive supplements for arthritis and joint pain.
It works great as a base for soups, sauces, grains, beans or add some kraut and a bit of miso for a delicious and easy lunch. A warm cup in the morning is a simple and nourishing tonic to begin the day. This is the flavor of love!
Here’s a simple recipe:
Every time you come upon a beef bone, like when you have steak, keep it. Collect leftover bones in a gallon bag in the freezer. Eventually, you’ll have enough for a pot of stock. If you like, you can buy some bones as well, or instead.
You can buy soup bones at a butcher store or your supermarket’s butcher counter. They might be labeled soup bones, marrow bones, or even “dog bones,” although people can eat them, too! If you don’t see them on display, ask the nice folks behind the counter, and they’ll set them aside to sell you when they remove them from the meat they process, or even order them for you.
Ingredients:
- Beef bones, about 3 quarts, or 3 pounds – you can use any mix of leftover bones or soup bones, marrow bones or bones sold for dogs
- Water
Equipment that bears mentioning:
- Tall stock pot (ideal), or any big pot
- Tongs
- A big bowl or another big pot
- Several freezer-safe containers
In a nutshell:
Roast bones until browning and fragrant. Simmer bones 6 to 12 hours. Cool and strain. Lift off tallow when completely cool.
Yield:
About 1 gallon.
Temperature and time:
- Oven: 350 F : 45 minutes.
- Stovetop: Low : 6 to 12 hours
In detail:
Heat water. Fill a stockpot or other large pot with water about halfway and set on the stove on high heat. It takes a while for this to get to the boil, so you might as well get it started while the bones are roasting.
Roast bones. Set oven to 350 F. Spread bones out on a shallow baking sheet or rimmed cookie sheet. Place in oven for 45 minutes, or until browned and sizzling. Don’t allow them to burn or get singed, or the whole batch will taste burnt.
Remove the pan of bones from the oven and set it near the pot. Use kitchen tongs to transfer the bones carefully into the water. The bones will be sizzling hot — up to 350 F (think about it) — so don’t drop them in so that they make a splash that could burn you. Slide or place them carefully.
Simmer bones. Add water, if there’s space in the pot, so that there approximately a gallon plus a quart of water. That’ll give you a gallon of stock, after about a quart of loss to evaporation, absorption into the bones and clinging to the bones. The precise amount of water is not important. If you don’t have a pot big enough for this amount of water and/or bone, just use less.
Bring the water to the boil. Turn the heat to the lowest setting possible that will maintain a gentle simmer. The surface of the water should be waving gently and making many tiny bubbles. It should not be frothing crazily.
Over the course of the next several hours, check the soup every hour or so to see that the simmer level is good.
After six to twelve hours, turn off the heat. The amount of time depends on your convenience. You could cook this overnight, but the strong cooking aroma might disturb your sleep, despite being wonderful.
Cool and strain. Let the stock cool. This will take an hour or two. Pour the stock through a strainer into a big bowl or another big pot.
Skim tallow. If desired, cool it long enough that you can easily lift the tallow (beef fat) that has collected and solidified atop the liquid. Store this separately in the refrigerator. It makes an excellent, stable and tasty cooking fat with a high smoke point.
Store stock. Ladle the stock into individual containers and store in refrigerator or freezer.
Variations:
- Use any other kind of animal bones you like, chicken especially will take less time due to smaller pieces.
- Add a splash of vinegar when simmering the bones. (The acidity will help extract more minerals from the bones).
- Add chopped veggies like carrots, celery and onions for more flavor or variety.
A crock pot makes this recipe super-simple, but you can also use a large stock pot (hence the name) or an enameled cast-iron dutch oven type of pot.
Recipe from: How To Cook With Vesna

I think it's time to go shopping... maybe even buy some really cool stuff at my online shops!!
