Monthly Archives: February 2019
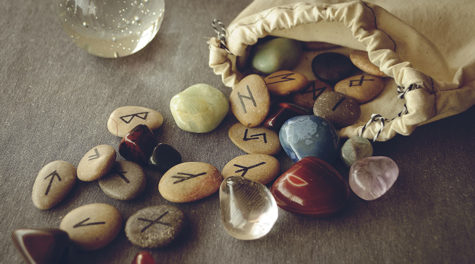
Although Rune-sets can be bought from New Age shops, it is preferable to prepare your own. An effective Rune-set can be easily prepared with small stones or pebbles collected from a walk in a natural location.
Choose a time when you can go out into a natural environment – woodland, open countryside, or seashore – in search for your stone helpers. Shamans of all cultures and traditions who have a deep affinity with the Earth regarded the Mineral Kingdom as the most ancient since it appeared on the Earth before there were trees and plants, or animals, birds, and humans.
Rocks were perceived as the “bones” of the Earth and like a skeleton, provided the structure that supported and held everything in place. Rocks and stones are of great age so were considered to be “wise” helpers for the human being who sought to commune with Nature and seek its support. Rocks and stones, including gems and crystals, were perceived as the “holders” of energy since their vibratory pattern is very slow and they are in a state of inertia. That is why stones are very suitable for a Rune-set for they will hold firmly and constantly the vibration of each Rune pattern.
Finding Your Stones
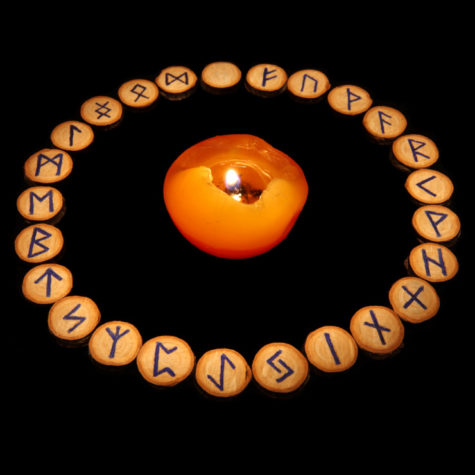
The search for 25 pebble-size stones for your set – one for each Rune plus a 25th which will serve as your stone of destiny – needs to be performed in an unhurried way, for it is not a question of simply picking up whatever stones may be seen during a gentle stroll through natural surroundings.
You must allow the stones to choose you! How? Simply, by having that intention clearly in your mind as you set out on your quest. Just tell yourself – that is, instruct your subconscious self: “I am taking this shamanic walk to enable the stones required for my Rune-set to identify themselves.”
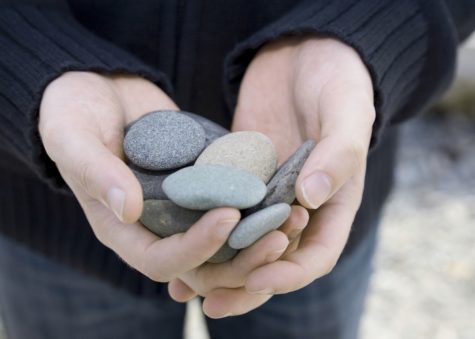
In some way your attention will be drawn to a particular place or places on your walk, to a stone or stones that will be lying there. What you are seeking are small, flat stones about 2 centimeters in diameter. The full set of 25 stones should all be approximately the same size.
When your attention is drawn to a stone, pick it up or gently prize it from the earth or sand using a pen-knife or small metal tool. If it looks the right size and shape, hold it in your right hand, close your eyes, and ask for an indication that it is a stone you need.
Then wait for a response. You will have a clear “feeling” or impression of the stone is right for you – an inner assurance which is intuitive. If no response comes, return it to the place where you found it. Treat it with respect.
You may receive a positive connection with only two or three stones in your quest, so you may need to make several such journeys before your set is complete. On each occasion take the stones home, wash them thoroughly and keep them in a safe place, preferably near a window where they fan be the light. When your collection is complete you will be ready for the next stage of preparation.
Crafting Your Rune Stones
Before crafting your set, it will be a good idea to familiarize yourself with the staves (symbols) and their meanings. You will need the following materials to complete your set of Rune stones:
- A soft pencil
- A watercolor painting brush
- Blue enamel paint
- Clear varnish
- White spirits for cleaning the brush
- Cocktail sticks
- Tissues
Choose a place to work where your stones and the materials can be left safely for a few days as this work cannot be completed in a single session. On each occasion light a candle before you begin.
The candle flame serves as an on-off switch when shamanic work is undertaken. It is also a powerful symbol of the living Light that is within you – the inner light of your Spirit and the illumination which you seek. It also serves as a reminder of the Greater Light that is at the Source of the Universe. Make sure the candle is secure in a holder and is safely located where it will not be a fire hazard.
Lay out a sheet or two from an old newspaper to protect your working surface and have handy all 25 stones you have collected. They should have been thoroughly washed to remove any dirt, grease, or grime. Also be sure that they are completely dry.
Cover each stone with a coat of clear varnish, using the watercolor painting brush. This task will need to be completed in two stages to allow the upper surface to dry thoroughly before turning each stone over to varnish the other side.
Apply just a little varnish at a time so it covers the surface evenly. If you overload the brush, the varnish will run and spoil the finish. You will need to exercise patience by ensuring that the varnish has thoroughly dried on both sides before attempting to apply the paint for the Rune Stones.
The kind of paint best suited for Rune Stone sets is one that has a strong pigment, is quick drying, and permanent. Matt enamel as used for plastic models and sold in miniature tins is both convenient and inexpensive. Nail polish can also be used.
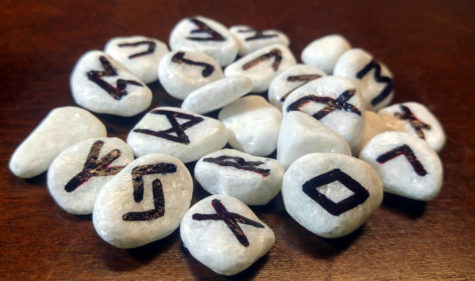
Do not apply the paint with a painting brush. Use a cocktail stick instead. The sharp end of the stick is simply dipped into the paint and spread gently along the lines of the Rune-stave, which is best outlined first with a pencil. Just a globule of paint is required for each application.
Continue carefully in this way until each line of the Rune shape is complete. Remove any excess paint with a tissue. Replace the cocktail stick frequently so you maintain a sharp point for painting.
This task should be carried out with great care and concentration. As you apply each portion of paint, whisper the Rune’s name and sense the flow of Runic potency into the stave as the pattern takes shape. Remember vertical strokes should be made downwards and diagonal lines generally from left to right, but do what feels natural to you.
The 25th stone is the “destiny” or Odin stone, and is left blank after varnishing.
Once thoroughly dry, the stones are ready for consecration. This should only be done at a time when you can be undisturbed for a while. You will need to have your candle alight.
Consecrating Your Runes
Consecration is in four stages. The first is to consecrate through the power of Air (mind) and Smoke (spirit), and we can do this through a process called smudging. You can use a smudge stick, or incense, whatever is best for your situation.
Before consecrating the stones, draw some of the smoke towards yourself with your hands as a gesture of your own need for consecration and purification. Then past the stones through the smoke several times, turning them over slowly so that each one becomes thoroughly immersed in the smoke. As you so so, concentrate on your intention of setting each stone aside for the special task of holding the power of the Rune they carry.
The second stage is to consecrate through the element of Earth. Salt is often used to represent the essence of Earth because it is used to preserve and to conserve and therefore emphasizes the qualities of the Element of Earth. The salt used should be rock salt, which comes from the Earth, and not sea salt. Pour a little into a shallow dish or bowl. . Then in an act of consecration and with your mind focused on the intent hold each stone above the dish and sprinkle salt over it. Then, immerse the stone in the dish.
The third stage is consecration through the Element of Water. Use another shallow bowl or dish to contain a small quantity of water. Preferably use spring water, but if this is not readily available, you can use any source of clean water. Dip each stone into the water so that it is fully immersed and again state your intention silently.
The fourth and final stage is consecration through the element of Fire. You may here use the candle flame as a symbol of the Fire Element and it’s great transmuting powers. Pass each stone through the flame several times, again repeating your intention. If your stones are small, you may want to use a small candle with a small flame so that you don’t burn your fingers.
Activating Your Rune Set
Each Rune Stone you have crafted is activated by holding the stone in the palm of your left hand and curling up the right hand into a cylinder through which the breath can be blown forcefully into the Rune-stave. Each time you breathe in you should have the deliberate intention of taking in the life-energy of Chi.
Hold that breath briefly as you place your mouth over the top of the curled hand and concentrate on the name of the Rune, and then blow the breath of life into it. Repeat this action three times.
This procedure is repeated for all 24 Runes and for the blank Rune which may be called “destiny.”
Your Rune Set is now ready to use. By crafting your own set of Runes, consecrating them, and activating them through your own Life-force, they have now become entirely personal to you. So treat them with the care they deserve. To ensure that they can be protected and carried about safely, keep them in a special Rune bag.
Do not allow others to handle your Rune Set; the stones will become tainted with their vibrations. Treat them as something “special” and personal to YOU – which, of course, they are.
The Rune Bag
Now that you have your own set of Runes, you will need something to keep them in and to protect them as they are carried about. Traditionally, Runic shamans kept their Runes in a pouch made from natural material such as linen or leather. Choose a material that is soft and pliable, or chamois leather which is readily obtainable and easily worked.
- Here is a tutorial for a very simple bag: Make A Simple Mojo Bag
The pouch can be plain and simple or elaborately decorated and embroidered , or painted with symbols, whatever is significant to you. It can be sewn together by machine or by hand. It is also perfectly acceptable to find and buy a drawstring bag for your Rune set.
Have the Runes in their bag with you as often as possible to begin with. When relaxing, keep the bag and its contents on your lap so it is near your navel region, the center of your physical being. When you go to bed, put them under your pillow. In this way the Runes will quickly become attuned to your energy-system.
More information on using your Runes for divination can be found here: Rune Stone Reading.
Source: Rune Power
Copal can be used for protection, divination, cleansing / purification, banishment, exorcism, hex-breaking, love spells, meditation, and other rituals or spiritual ceremonies.
Here’s how to make a Copal infused wash:
- Add 1 oz of ground or powdered copal to a bottle of vodka
- Let it sit to cure for 3-6 months.
The results will be a beautifully perfumed Ritual Wash for your Magickal articles and Healing Space.
Be careful… do not use on sensitive skin.
Source: Old Earth
Pour red wine into a pot or cauldron and add anise, cloves, rosemary, ground cumin, honey, and orange zest. Add two candied rose geranium leaves. (Substitute candied violets, angelica, or ginger if the geranium isn’t available.)
Stir the pot, let the wine come to a boil, then reduce the heat and simmer gently while you focus on your desires. When it starts steaming, turn off the heat and let the potion cool off.
Strain the solids out using a fine sieve. Warm up the wine once more. When the aroma is arousing, pour it into glasses and serve it to the one you love.
- 5 drops Cypress
- 2 drops Cinnamon
- a small piece of dried Orris root
Add the true essential oils and the Orris root to an olive-oil base. Anoint your body to bring a love into your life.
Note: The proportions listed here are the suggested ones. If you wish to deviate from these, simply keep in mind that the first ingredient listed should generally constitute the main scent. Each succeeding ingredient should be added to consecutively smaller amounts.
Found at: Mystic Ways Wiki
