Recipes
Elderberry Jams and Jelly
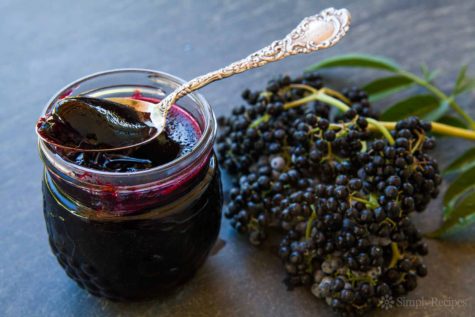
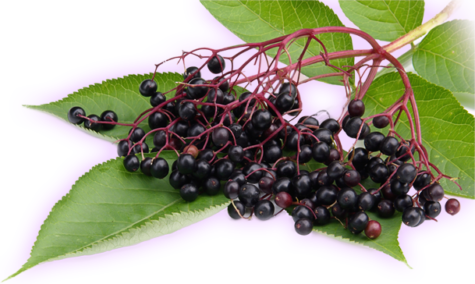
Most species of Elderbery are edible when picked ripe and then cooked. Both the skin and pulp can be eaten. However, it is important to note that most uncooked berries and other parts of plants from this genus are poisonous. Sambucus nigra the European Elderberry is the variety that is most often used for health benefits as it is the only variety considered to be non-toxic even when not cooked.
The Fruit Preserving Section of the Food Ministry issued during the War the following recipe for Elderberry and Apple Jam:
- 6 lb. Elderberries,
- 6 lb. sliced apples,
- 12 lb. sugar.
Make a pulp of the apples by boiling in water till soft and passing through a coarse sieve to remove any seeds or cores. The Elderberries should also be stewed for half an hour to soften them. Combine the Apple pulp, berries and sugar and return to the fire to boil till thick.
Another Recipe:
Equal quantities of Elderberries and Apples, 3/4 lb. sugar and one lemon to each pound of fruit. Strip the berries from the stalks, peel, core and cut up the apples and weigh both fruits. Put the Elderberries into a pan over low heat and bruise them with a wooden spoon. When the juice begins to flow, add the Apples and one-third of the sugar and bring slowly to the boil. When quite soft, rub all through a hair sieve. Return the pulp to the pan, add the rest of the sugar, the grated lemon rind and juice and boil for half an hour, or until the jam sets when tested. Remove all scum, put into pots and cover.
Elderberry Jam without Apples:
To every pound of berries add 1/4 pint of water, the juice of 2 lemons and 1 lb. of sugar. Boil from 30 to 45 minutes, until it sets when tested. Put into jars and tie down when cold.
Elderberry Jelly:
The Elderberry will, of course, also make a jelly. As it is a juicy fruit, it will not need the addition of any more liquid than, perhaps, a squeeze of lemon. Equal quantities of Elderberry juice and apple juice, and apple juice from peeling, will require 3/4 lb. of sugar to a pint. Elderberry Jelly is firm and flavorous, with a racy tang.
Source: A Modern Herbal
Elderberry Ketchup
Here is a very old recipe for Elderberry Ketchup. When making this recipe, be sure that you are using the berries from the European Elder, Sambucus nigra, as berries from other varieties may cause nausea and vomiting.
Elderberry Ketchup
- 1 pint Elderberries,
- 1 oz Shallots
- 1 blade Mace
- 1/2 oz Peppercorns
- 1 1/2 oz whole Ginger
- 1 pint Vinegar
Pick the berries (which must be ripe) from the stalks, weigh and wash them. Put them into an unglazed crock or jar, pour over the boiling vinegar and leave all night in a cool oven. Next day, strain the liquor from the berries through a cloth tied on to the legs of an inverted chair and put it into a pan, with the peeled and minced shallots, the ginger peeled and cut up small, the mace and peppercorns. Boil for 10 minutes, then put into bottles, dividing the spices among the bottles. Cork well.
From: A Modern Herbal
Green Elder Shoots
 In spring and early summer the European Elder, Sambucus nigra, produces very vigorous strong green shoots from the base of the plant and sometimes the green growths arise along older branches. These can be cut, peeled and after being soaked in salted water overnight they can be eaten raw or cooked. The most surprising thing is that they are very tasty.
Elder has a very long history of household use as a medicinal herb and is also much used by herbalists. The plant has been called “the medicine chest of country people.” Visit the Encyclopedia of Herbology for more info on this useful herb.
Collecting the shoots
Cut the vigorous green growths in late spring. They can be a meter long or more, Do not collect any woody portions of the stems. If you try them and like them, you may want to have a couple of shrubs of Sambucus nigra that you grow especially for the stems. European Elder is an ideal plant for hard pruning in late winter. By cutting the previous years growth to with in 10 cm of the base in February each year strong vigorous shoots will be produced. Not all of these should be harvested, leave some to grow and produce food for the following year’s growth, much like one would treat asparagus.
Preparing the shoots:
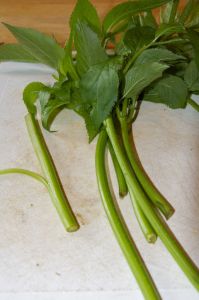 Remove the very soft tips and the leaves. Discard any portion of the stem that is becoming woody, either cut it or snap it away.
Use a sharp knife and remove all the skin from the stem. It peels away very easily. When you have peeled the shoots cut them into 15 cm lengths or whatever size suits.
The young shoots can now be boiled in salted water with a pinch of soda to preserve the colour, they prove beautifully tender, resembling spinach, and form quite a welcome addition to the dinner table.
To Brine the shoots:
Put the peeled shoots in a bowl, cover with water and add salt, a teaspoon in about 400 ml should be enough and then add a squeeze of lemon. I find that the lemon helps preserve the color.
Leave the stems over night. The following morning refresh the water, place the shoots in a sterilized jam jar with screw top lid. You can use less salt and add a squeeze of lemon juice to help preserve the shoots.
I am not sure how long the elder shoots will hold in this way, we are still experimenting! Now that you have the shoots, how do you eat them? Here’s a quick and tasty snack, easy to prepare.
Brined Elder shoots on toast with goat cheese:
- Slices of brown bread
- Clove of garlic
- Goat cheese (you can use cheddar or any cheese)
- Dried oregano
- Some green elder shoots in brine
Method:
Toast the bread in a toaster, meanwhile peel the garlic clove and slice or grate cheese, enough to cover your bread slices, heat up the grill too! When bread has popped from the toaster rub the peeled garlic on one side of the bread.
Place the cheese on the side rubbed with garlic, sprinkle with oregano and slice the elder shoots in half and place on top. Place bread under the grill and toast until the cheese has melted.
Collected from various sources including: Blooms and Food
Beet Latkes stuffed with Goat Cheese
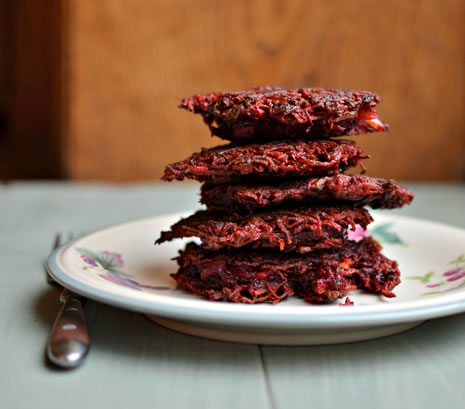
Beets and goat cheese are a classic pairing, most typically found in salads, but I’ve given them a new spin in this latke recipe, and let me tell you—they are INCREDIBLE.
You’ll want to freeze the goats cheese slightly so that it doesn’t ooze out while frying, so that’s our first step. Slice the goats cheese thinly and put it in the freezer.
Now you’re ready to fry and assemble the latkes. Adding a piece of carrot to the oil any time you’re frying helps absorb the burnt taste. When the carrot starts to look shriveled, remove it and put in a fresh piece. It works. Trust me. I take my frying carrots very seriously.
Ingredients:
- 20 oz. shredded raw beets
- ½ a large onion, shredded or finely diced
- 2 eggs
- ¼ cup flour
- 1 tsp. kosher salt
- goat cheese (I used a 7oz. tube)
- oil for frying
Directions:
Finely slice the goat cheese into rounds and freeze for 15-20 minutes. Mix the shredded beets, onion, flour, eggs and salt. Pour 2-4 tbsp. of oil into the frying pan and heat on medium-high. Use a spoon, or a small measuring cup (1/8 cup) to scoop up the batter. Gently place a spoon of batter in the pan and flatten it. Place a piece of goat cheese on top of the batter, then cover the goat cheese with another scoop of batter. Fry for 3-4 minutes, then gently flip the latkes and fry for another 1-2 minutes on the second side. When ready, the latkes will be crisp on the outside and soft on the inside, with the goat cheese deliciously melted. Repeat until batter is finished.
Yields: 12 latkes.
Source: Chabad
Butternut Squash Sweet Potato Latkes
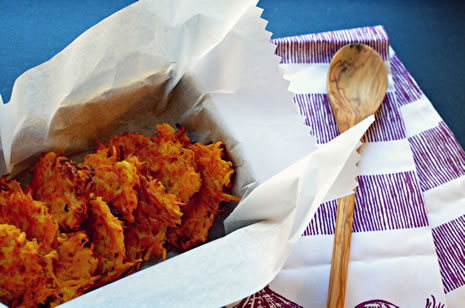
Instead of making sweet potato pie for Thanksgiving, and potato latkes for Chanukah, try these sweet potato butternut squash latkes. You’ll get the flavors of Thanksgiving but the crispy fried texture of Chanukah.
Two tips for latke making:
- Stick a small piece of carrot in the oil. The carrot absorbs the burnt taste the oil sometimes gets. When the carrot looks dark ad shriveled, take it out and replace with a new one.
- To make the latkes a uniform size, use a 1/3 cup measuring cup to scoop up the batter.
Ingredients:
- 1 butternut squash
- 2 Yukon Gold potatoes
- 1 large onion
- 1 sweet potato
- 4 eggs
- ½ to ¾ cup flour
- 2 tbsp. kosher salt
- Olive oil for frying
- Optional: If you’re serving these at a dairy meal, throw in ½ cup grated parmesan cheese
Directions:
Dice and sauté the onion in 2 tbsp. olive oil and ¼ tsp. salt. Peel and shred the butternut squash, sweet potatoes and potatoes. Mix all the ingredients in a large bowl. Heat olive oil in a non-stick frying pan. Scoop the batter using a measuring cup for uniformity. Drop into the hot oil (keep the flame on medium-high). Fry each latke until brown on one side—approximately 3-4 minutes. Flip and fry on the other side another minute or two, or until brown, on the second side. Remove from oil and drain on a paper towel. The paper towel soaks up the excess oil while keeping the latkes fresh. Repeat until all the batter has been fried.
Serve immediately—that is, if they make them out of the kitchen at all.
Note: Recipe makes approximately 30 medium latkes.
Source: Chabad
Winter Tea

When the chill winds blow and you feel the need for something warming, try this- it even smells of Yule.
- 1 tsp cinnamon
- ½ tsp nutmeg
- 4 whole cloves
- 1 crushed cardamom seed
Note: This recipe is for one person and is intended to have half a pint of boiling water poured over it. Allow the infusion to stand for 10 minutes before straining. You can adjust the amount of water or standing time to your own taste. If you prefer your tea sweet, add a little honey, not sugar, to the strained infusion.
Source: Live Journal
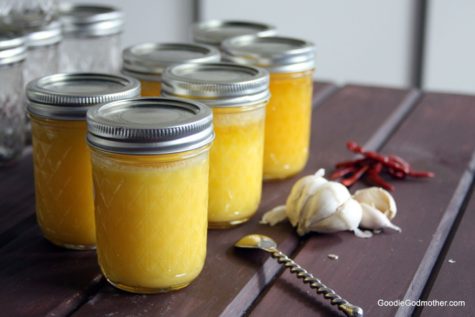
Slow Cooker Flavored Ghee
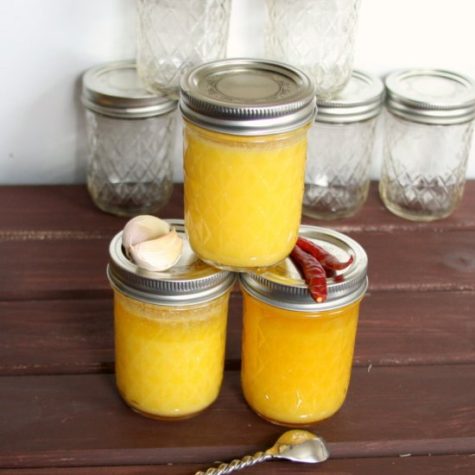
With minimal preparation time and easily available ingredients, making your own ghee is a great way to save money while eating healthy.
Ingredients:
- 1 lb unsalted butter
- 8 peeled and smashed cloves of garlic (or) 6 dried hot chili peppers (or) 2 6″ sprigs of fresh rosemary, washed and dried
Instructions:
Place your butter in your slow cooker. Add your ingredient of choice. Set the slow cooker to low and cook for 8 hours. Line a kitchen sieve with a double layer of muslin or a layer of cheesecloth and strain out the clumps in the ghee. Pour the ghee into sterile jars, cover, and allow to set. Store in a cool dark place up to 6 months.
Note: For unflavored ghee, simply omit the additional ingredients.
Author: Goodie Godmother
Flavored Ghee
In the process of clarifying butter, (Simple Recipe For Making Ghee), you can add all sorts of herbs and spices to infuse their aroma and color and give the resulting ghee a delicious taste that will give the food you prepare an even more delicious taste. When making flavored ghee, it’s better to clarify the butter with the boiling method so the herbs or spices have a chance to infuse all their taste. Add your favorite combination of herbs and spices right about when the butter is melted and leave them until the very end of the process.
Here are some popular examples (the quantities are for a pound of butter):
- Garlic ghee: 6-7 crushed or minced garlic cloves.
- Cardamom ghee: 6-7 crushed cardamom pods.
- Mint-Jalapeño ghee: 1/2 cup mint leaves and 1 large, chopped jalapeño.
- Rosemary-thyme ghee: 6 sprigs each of rosemary and thyme.
- Ginger ghee: 2 tbsp fresh minced ginger.
Source: Paleo Leap
Simple Recipe For Ghee
Ever used ghee? It is the best of both worlds. It has the benefits of butter without the casein and proteins that some people react to in butter.
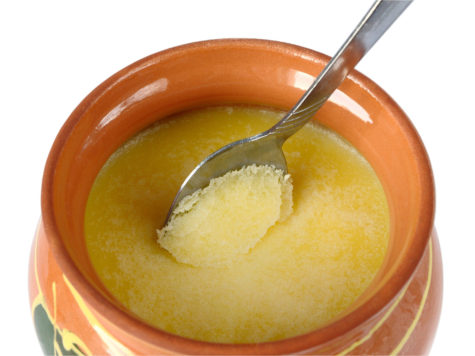
What is Ghee?
Ghee is a traditional food that was considered sacred in some cultures. It is a form of clarified butter, made by separating the milk proteins from the pure healthy fats, creating a flavorful and delicious fat for cooking or on vegetables. In technical terms, Ghee is a clarified, unsalted butter with the milk proteins removed. It has a high smoke point, making it perfect for cooking, and an incredible flavor. Many people who cannot tolerate dairy can handle ghee and it is a revered food in Indian cuisine.
The Benefits of Ghee
Ghee is considered “liquid gold” and revered in Indian culture (and has been for centuries). When made from high quality butter, it is a great source of fat soluble vitamins like Vitamin K and is great for teeth, hair, skin and nails.
Ghee is like butter on crack. More intense flavor and more nutrients. A little bit goes a really long way and the flavor is great in many different recipes and dishes.
I like using ghee for stir fry in a wok since it has such a high smoke point and with wok cooking, only a tiny amount is needed. Ghee is also incredible on a baked sweet potato, in eggs or on steamed or roasted vegetables.
Ghee is expensive to buy but simple to make. Unlike butter, it does not need to be refrigerated (though I typically still store in the fridge) and it is great for traveling. If you’ve never tried it, I highly suggest making ghee and using it in your cooking.
How to Make Ghee:
Ingredients:
- 16 ounces (1 pound) of butter- preferably unsalted, organic and grassfed
Equipment:
- A medium size saucepan
- A fine wire mesh strainer
- Cheesecloth
- A spoon
- 16-ounce or larger measuring cup
- Clean jar for storage
Instructions:
Cut the butter into cubes and place in the saucepan. Heat the butter over medium heat until completely melted. Reduce to a simmer. Cook for about 10-15 minutes (this will vary based on how hot your stove is). During this time, the butter will go through several stages. It will foam, then bubble, then seem to almost stop bubbling and then foam again. When the second foam occurs, the ghee is done. At this point, the melted butter should be bright gold in color and there should be reddish brown pieces of milk solids at the bottom of the pan.
Let cool slightly for 2-3 minutes and then slowly pour through the wire mesh strainer lined with several layers of cheesecloth. The small bits of milk protein are usually discarded, though a friend told me that her grandmother used to mix those with flour (or almond flour) and a small amount of honey to make a flavorful fudge-like treat.
Ghee will last up to a month at room temperature or even longer in the fridge. I typically store mine in the fridge, just to be safe.
Use as a cooking oil for stir fry, to top sweet potatoes, or melted on steamed/roasted vegetables. Ghee is much more flavorful than butter, so use sparingly!
Makes: 2 cups
Author: Wellness Mama
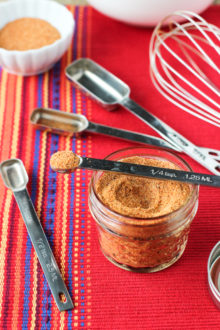
Healthy Heart Spice Mix
 Ingredients:
- 1 part ground turmeric
- 2 parts ground cumin
- 3 parts ground coriander
- 4 parts ground fennel
Directions:
Mix the spices and store in an airtight jar. When it is time to cook the meal, steam the vegetables. Melt a small amount of ghee in the pan, and add ½ to 1 teaspoon of the spice mixture per serving. Sauté the spices until the flavor is released. Add the vegetables, sauté lightly, add salt and pepper to taste, and serve immediately.
Source: Mapi.com

I think it's time to go shopping... maybe even buy some really cool stuff at my online shops!!
