Creativity
About The Orissa Art Tradition
Orissa is situated at the eastern coast of India. The state of India has been the home of rich art and culture since time immemorial. Orissa was earlier called Utkal or ‘land of rich art forms’ in deference to its wealth of arts and crafts.
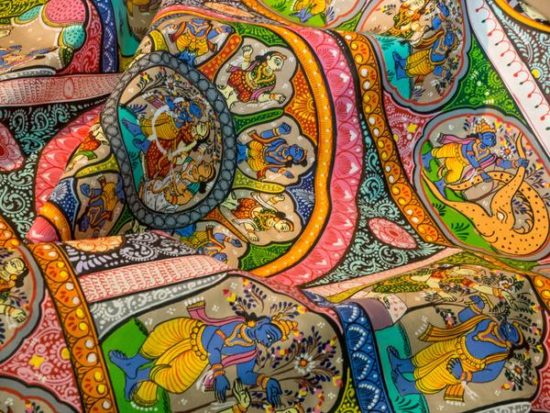
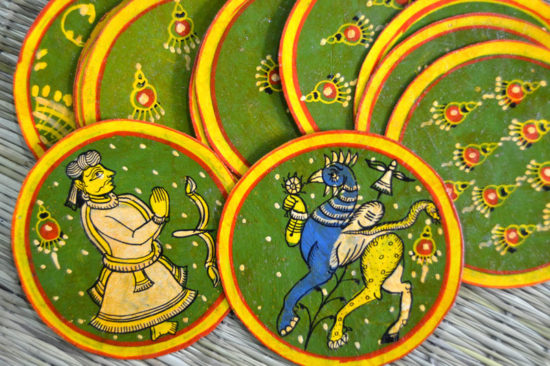
The Patta Chitra, one of the fascinating art form of Orissa has a tradition that goes back centuries. Soaked in puranic culture and classical romances, with vibrant colors, superb craftmanship, simplicity in design the patta chitra is a distinct form of art and has captured the imagination of artists and art lovers alike. The term patta chitra has its origin from the Sanskrit. Patta means vastra or cloth and chitra means paintings. So patta chitra means paintings on cloth.
The use of cloth for painting has been in vogue in India for a very long time. So also was the case with Orissa. It is said that thin cloth paintings were sent to China from Orissa during the rule of Bhaumakars and the craftmanship was highly appreciated.
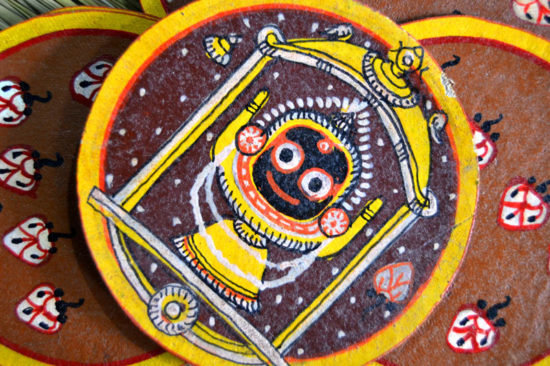
The patta painting has its root in religion. It is evolved, nourished and flourished under the cult of Lord Jagannath. Therefore the Patta paintings of Orissa is considered to be as old as the construction of the temple of Lord Jagannath at Puri. i.e. 12th Century A.D.
The subject matter of Patta paintings is traditionally limited to Hindu religious themes. However, as time passed, the subject matter as become widely varied. In addition to the stories from Ramayan, Mahabharat and Vesas of Jagannath, new themes on the life and philosophy of Lord Buddha, pictures on Jainism, Jesus Christ and important historical events are also depicted in patta paintings.
In recent years some artists are putting modern concepts/themes to it. Some PACADian animators are doing animation with pattachitra style. With the advancement of time, a lot of changes have been noticed in the preparation, color, theme, approach to the subject and in, the market-ability of patta paintings.
The Traditional Method Of Painting
The preparation of pattas on canvas in its traditional way for painting is very interesting. It is ingenuously prepared. A large piece of cloth is washed neatly and spread out over the surface of a cot or on the varandah floor. The tamarind seed is powdered and some water is put on it to prepare a special gum. This gum is applied over this piece of cloth. Before this gum dries up, another piece of the cloth of same size is placed on it and a fresh coating of gum is pasted on it.
Then the patta is allowed to dry in the sun. After it is dried, a chalk like paste of soft white stone powder and tamarind seed gum is mixed in an ideal proportion and applied on both sides. After both sides dry completely, the cloth is cut into required sizes.
After cutting to sizes, the next work is to polish it to make them smooth and suitable for painting. The polishing is first made with a rough stone and then it is polished with a pebble whose surface is smooth. The polishing require long hours of work. The work of preparation of the pati for painting is traditionally done only by the woman folk of the chitrakar families.
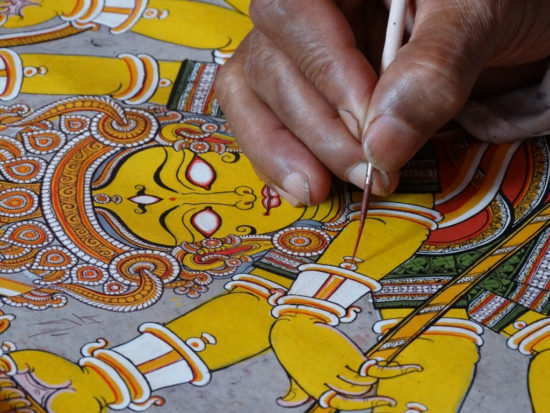
Then over the polished cloth, which looks off white in color, the chitrakar start painting on it. The colors used are bright and primarily white, red, yellow, blue, green and black. Red is used predominantly for the back ground.
The colors are prepared out of the natural ingredients.
- White is prepared from powder of conch-shell
- Yellow from Haritala, a kind of stone
- Red from geru (Dheu)
- Hingula black from burning lamp and coconut shell
- Green from leaves
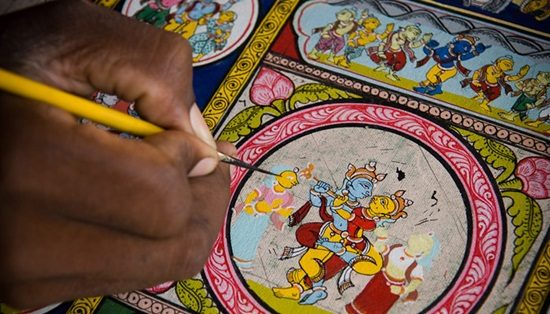
The artists follow a sequential procedure for preparation of the paintings. Single tone colors are used. First the border and the sketch is drawn on the patis either in pencil or in a light color. The artists put correct lines to make the figure more prominent. The lines are broad and steady, then the color is applied.
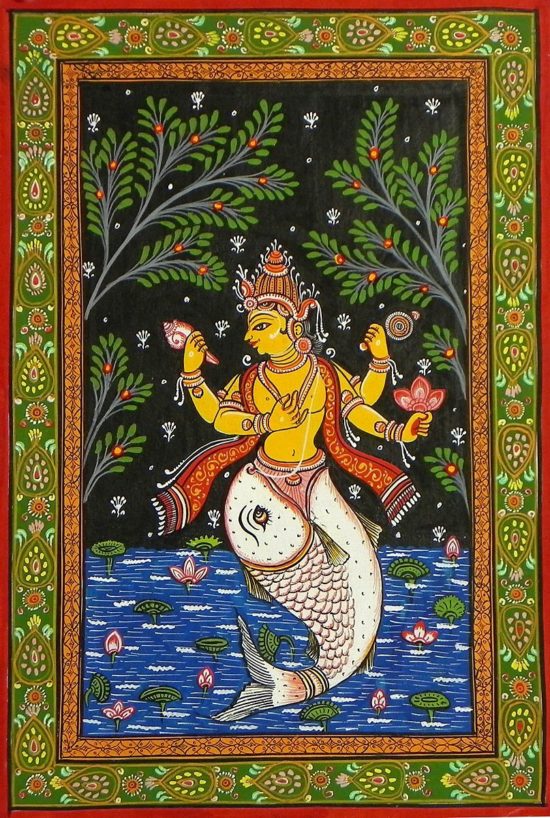
The visual appeal of a patta painting is in its color combination.The human figures are generally presented frontally but the face, leg are shown side-wise but the elongated eyes are drawn from the front side. Sharp nose and round chins are prominently depicted. The typical hair style, clothing, ornamentation, beards and mustaches are used for different persons, so that there will not been any confusion to recognize which figure is a king, minister sage, royal priest, common man, the God, the Goddesses and the like.
A decorative border is drawn on all sides to give it a frame like look. In this style of painting overlapping is avoided as far as possible. Also, the sense of far and near is neglected. The typical face style makes this type of painting different from other schools of art. The paintings are conspicuous for their elegance charm and aesthetic appeal. Central focus of the painting is the expression of the figures and the emotion they portray, the strong color only reinforce them.
Traditionally, three types of brushes were used. They are broad, medium and fine. These are prepared out of the hairs of the buffalo, calf and the mouse respectively. The Pattachitra style has been elaborated and applications are made on other items besides the Patis. Paintings are made on wooden and bamboo boxes, masks, and pots. Ganjapa, playing cards are also painted in this style. Palm leaf is also used as a base for patta paintings.
The Patta chitra artists are known as chitrakaaras. This family occupation is a tradition is inherited by the artists and passed along through the generations.
This unique form of art must be protected and nourished for generations to come.
Source: Wet Canvas
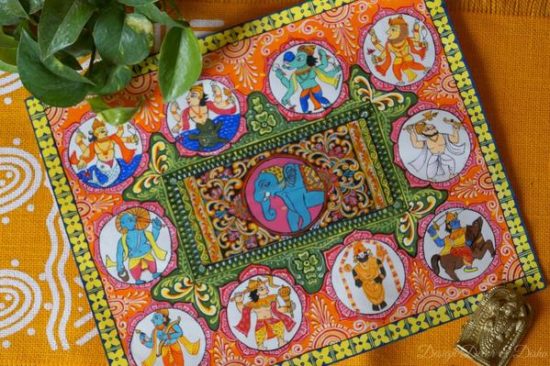
About Ganjapa Playing Cards
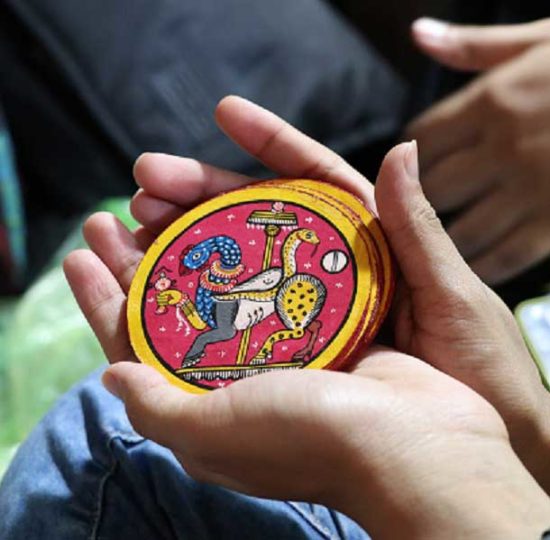
In the 16th Century in Orissa, circular cards with exquisite paintings on them – an art called Ganjapa were very popular among the people of Ganjam; they were used to play ordinary card games. Ganjapa, also called “Ganjapa” is derived from a Persian word “Gajife.“ The earliest mention of Ganjapa is in 1527 A.D. in the memoirs of Emperor Babur.
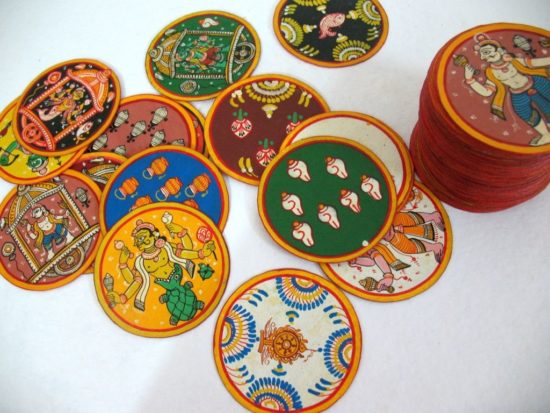
The cards are arranged in sets in packs of different numbers such as 46, 96, 120, 144 and so on. Each pack has sets of 12 cards, with each set being a different color.
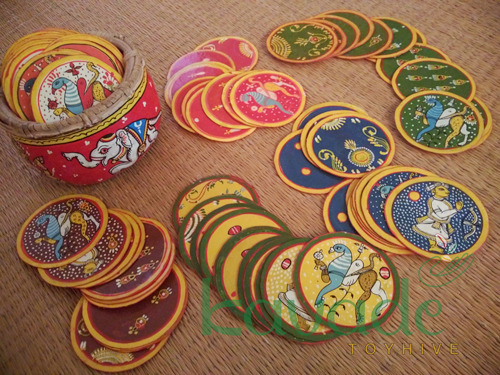
Based on the number of colors in a set, the packs are called atharangi (eight colors), dasarangi (10 colors), bararangi (12 colors), chaudarangi (14 colors) and sholarangi (16 colors). A maximum of 24 colors are used. Of these, the atharangi is the most common.
The themes used vary from common decorations to figurative representations of the Ramayana, the 10 incarnations of Vishnu, and gods and goddesses of Hindu mythology. They vary from region to region and are in Odissi style.
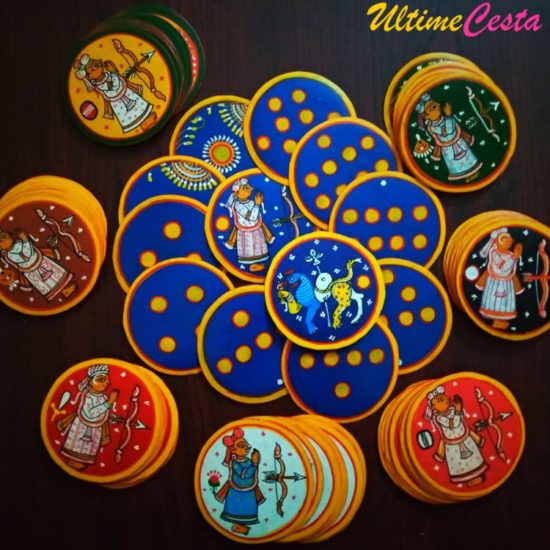
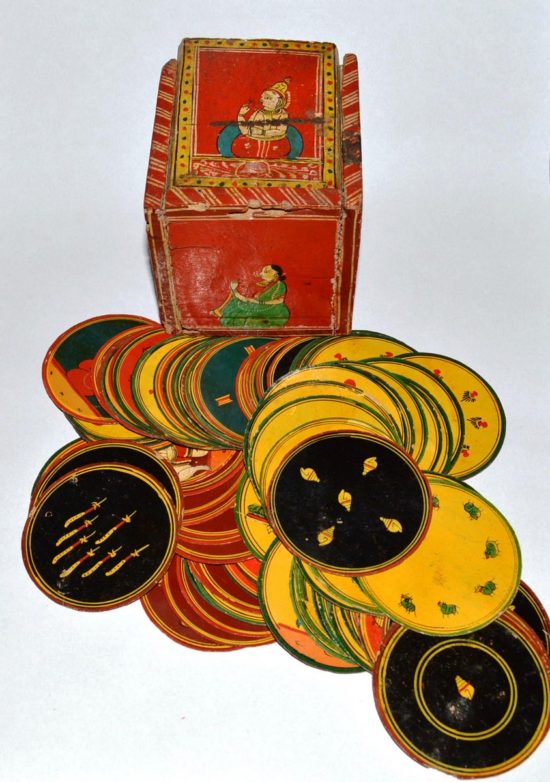
There are eight suits in a pack of cards, each one recognizable by a distinct background color. Each suit has 10 numbered cards and a king and vizier. The king is the highest in value with the vizier coming next, followed by the series in descending order. The king is distinguished as either sitting, or with legs folded at the knees, while the vizier is depicted standing.
Sometimes, the king is on a chariot and the minister mounted on a horse. In some other sets, the king is recognized by his two heads, while the minister is shown with one head. Somewhere on the card is another head of an animal. Eka, Douka, Teeka, Chouka, Pancha, Chhaka or Atha are the numbers of the cards. The horse, rat, Ganesha, Kartika, lotus or fish are the figures generally used.
Exotic Ganjapa cards were popular while luxury cards engraved on plates of wood were exclusive.
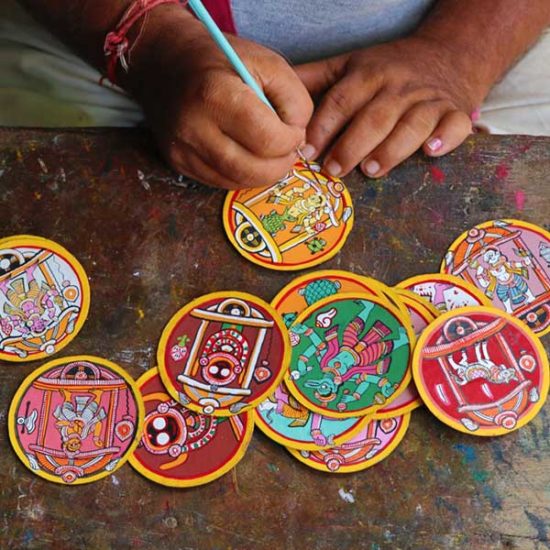
Making a Ganjapa card is an art that resembles pata chitra. A piece of cloth is dipped several times in a glue made of tamarind seeds and then dried to make it crisp. Circles are cut out of the cloth with a hollow iron cylinder. Two such circles of cloth, or a circle each of cloth and paper are pasted together. Finally a paste of chalk powder is applied. After this has dried, paints made from lac dye are used to make a base for painting. Cards are hand-printed.
The cards are mainly done by the women folk of artisan families. They prepare the cloth sheets, tamarind glue and traditional color and lacquer paste at home. Male artists traditionally paint figures on the cards.
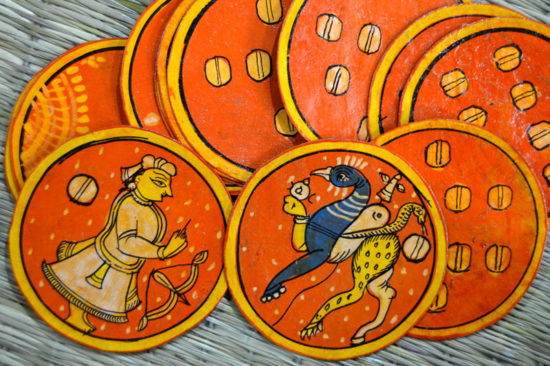

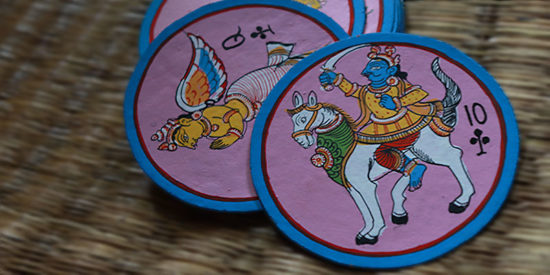
Colors are used to distinguish the figures. For instance, in the Dasavatara series, blue is used to depict Vishnu avatara (the incarnation of Vishnu). Green personifies Rama, with red as a background color. In Matsya avatara, white is used for the figure (fish) with black as a background color. Kuchha avatara is shown in green, with background yellow as a contrast color.
Source: Ria/Ce
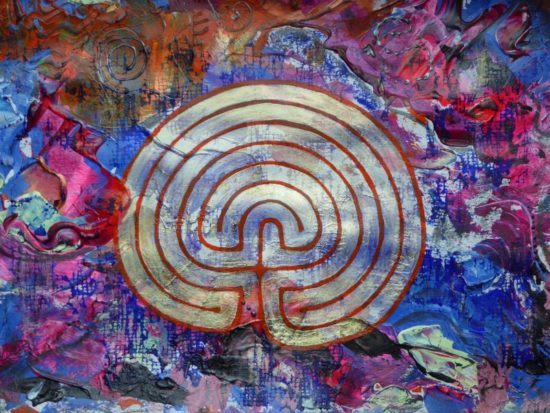
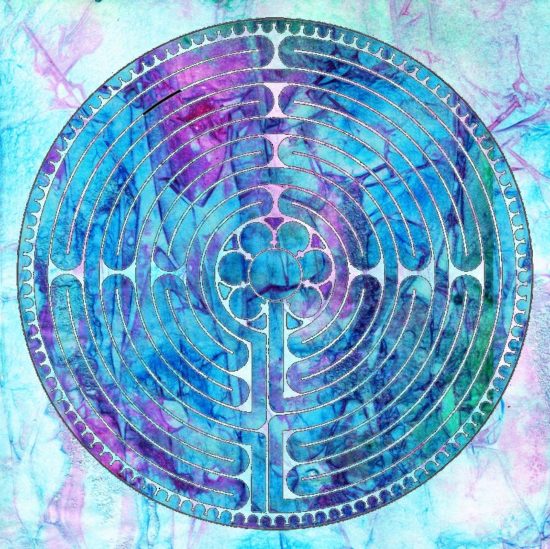
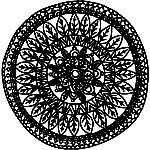
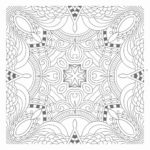
Labyrinth Art
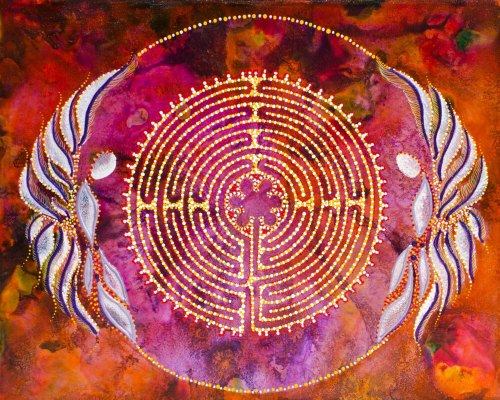
Here is a small collection of labyrinth art.
![]()
How To Draw A Labyrinth
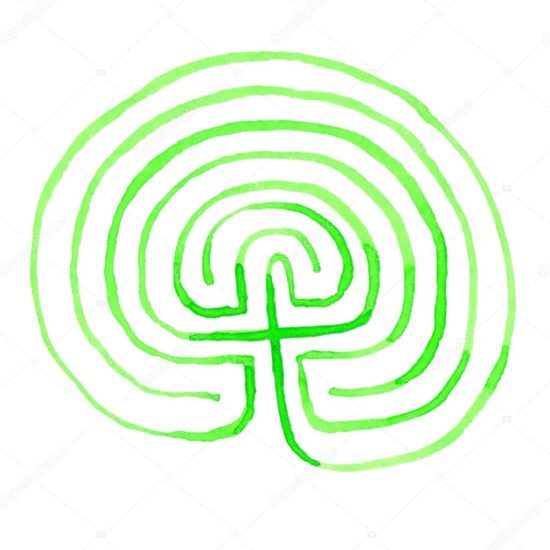
Labyrinthos has a nice little tutorial on how to draw labyrinths. They also have great tips and tricks for creating a large one out doors.
Here, we have two nice little gifs that show a really simple way to draw a labyrinth. As you can see, they are the same, the only difference being the starting point.

I know this is cyberspace, but I beg you to draw some labyrinths with paper and pencil (you remember those crude stick-like writing implements?). The construction of a labyrinth is a lesson in sacred geometry. If you do it just with your brain and not with your hand, you won’t really gnow what it is all about.
Please draw this labyrinth at least ten times! Look for the feeling you get when you draw a labyrinth and that point when you don’t have to think about it any more, and your hand gnows what to do ‘by itself’. Gnowing is consciously using both your analytical/left-brain and your intuitive/right-brain assets equally.
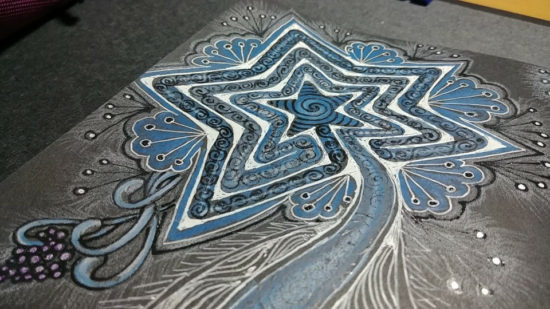
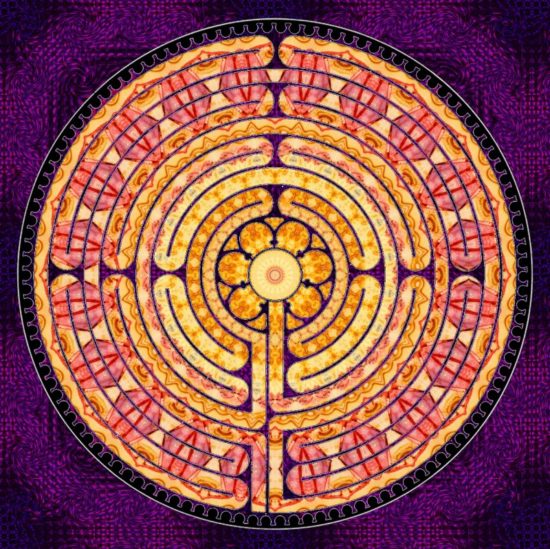
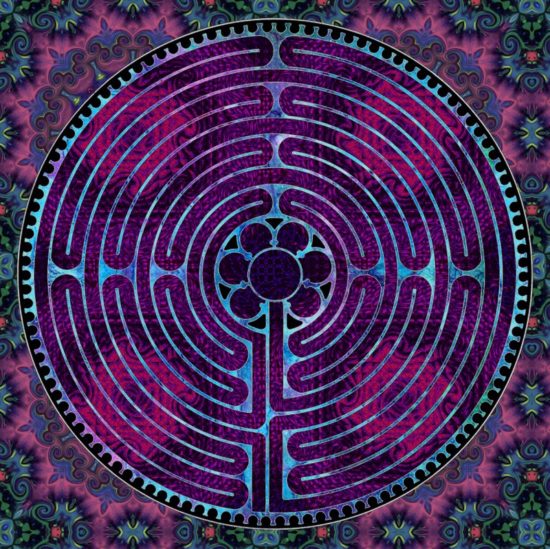
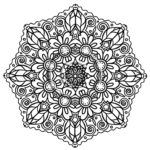
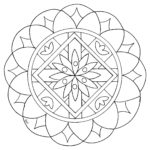
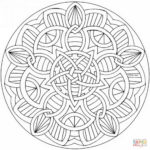
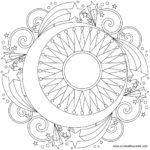
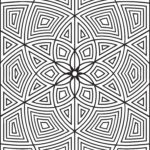
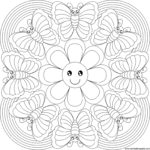
A Labyrinth To Color
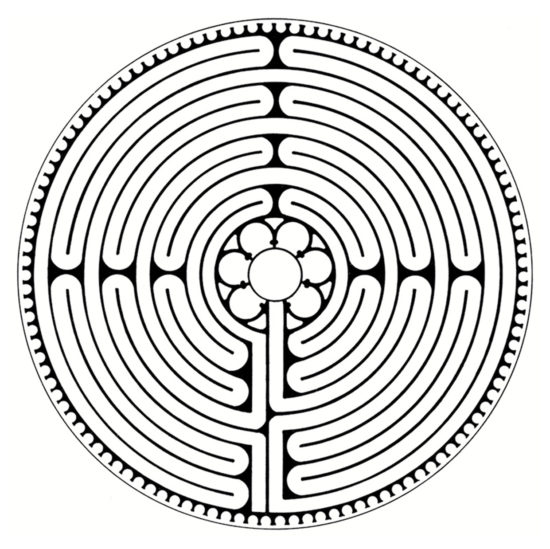
Here’s a labyrinth to play with. I played around with one of my graphics programs, and these are the colored versions I came up with. They aren’t perfect, but it was fun!

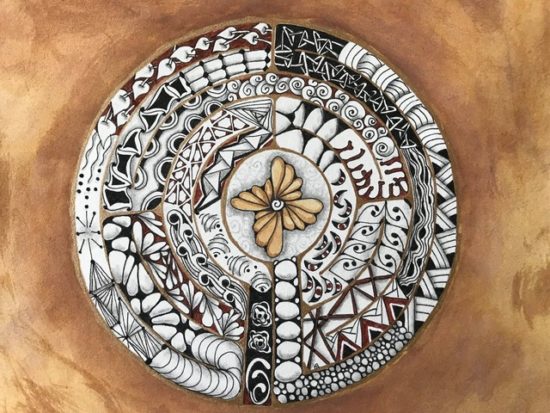
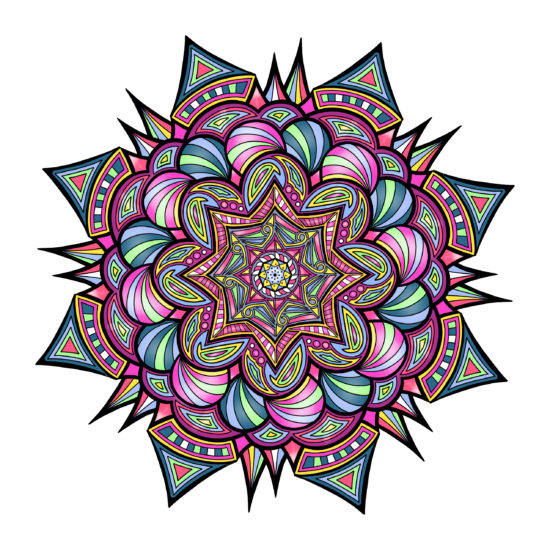
Coloring Mandalas for Healing Therapy
 “I awaken to the power of the mandala,
A sacred circle of light and energy,
A pathway to center—to my center and to the universal All,
A channel for healing body, mind, and spirit.”
~ author unknown ~

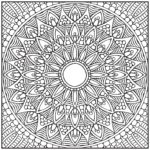
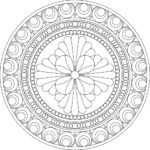
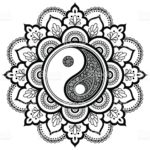
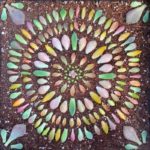
The Mandala (Sanskrit for “circle” or “completion”) has a long history and is recognized for its deep spiritual meaning and representation of wholeness.
The circle is a symbol of wholeness, continuity, connection, unity, harmony and the cycle of life. Unlike other shapes, the circle flows and has no hard edges or angles. Circles are believed to help individuals focus inward.

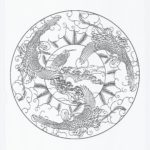
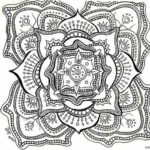
Coloring Mandalas
If you choose to color a mandala it will tap into your creativity without any need for artistic expertise. Mandalas are used universally to promote healing and other positive states of being. Why? One explanation comes from its very design. The mandala is a circular matrix with a center point—a point from which all things are possible
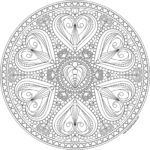
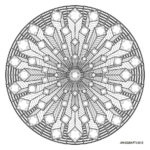
If you are not ready to design an original mandala, internet sites have mandalas ready for coloring as a free copy or download. It is always best to select colors intuitively when coloring a mandala. Listed below are colors and their symbolic meanings.
- RED for strength, high energy and passion
- PINK for love, intuition and the feminine
- ORANGE for creativity transformation,self-awareness and intuition
- YELLOW for learning, wisdom, laughter and happiness
- GREEN for physical healing, psychic ability, love of nature and caring
- BLUE for emotional healing, inner peace and meditation
- PURPLE for all things spiritual
- WHITE for spiritual focus
- BLACK for mystery, deep thinking and individuality
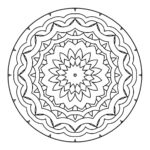
Once you’ve created your mandala, put it somewhere you’ll see it every day, on the wall, as a screen saver on your phone, laptop, or computer, so that it will work its magic in your life.
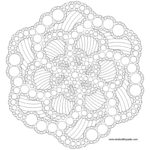
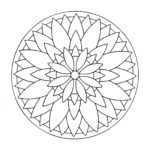
Love the idea but don’t have a mandala to color? Here are a bunch of mandalas to choose from:


From: Balanced Women’s Blog
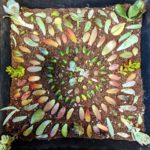
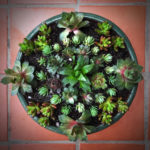
Succulent Propagation Mandalas
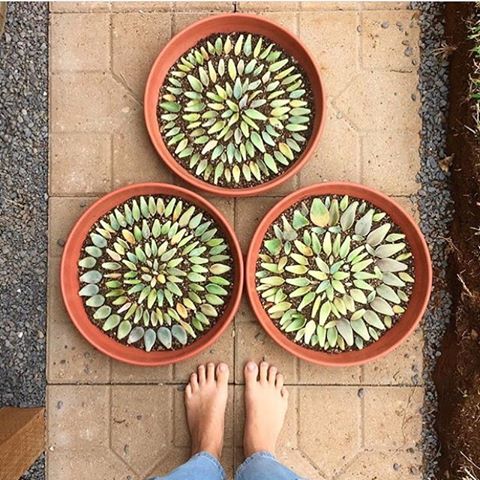
From Leaf and Clay, we have this great little tutorial on how to make succulent propagation mandalas.
If you’ve ever propagated a succulent from a leaf, you know it’s a lengthy process. We’re talking months and months. Since I’m not the most patient person in the world I decided to make the most of it by making succulent propagation mandalas. Basically arranging the leaves in a pattern that then becomes living art. I’m excited to share some tips and tricks and hope this will inspire you to create your own!
What you’ll need:
- Succulent leaves
- Something to propagate on: a tray, bowl, serving platter, pie dish, basically anything large and sturdy enough to hold the soil and leaves.
- Soil
- Spray bottle or watering can

Step 1: Getting Leaves For Your Propagation Mandalas
If you’re unfamiliar with how to remove succulent leaves it’s fairly simple. Gently twist the leaf back and forth and it should snap right off. Just be sure to remove the leaf in its entirety, if it tears or a portion remains on the stem it won’t root. (If you have plants that have become “leggy” this is the perfect time to remove those bottom leaves!) After removing the leaves you need to give them a few days to dry out. Putting them directly on the soil without allowing the ends to callous over can cause them to rot instead of root. I typically wait about 2-3 days.
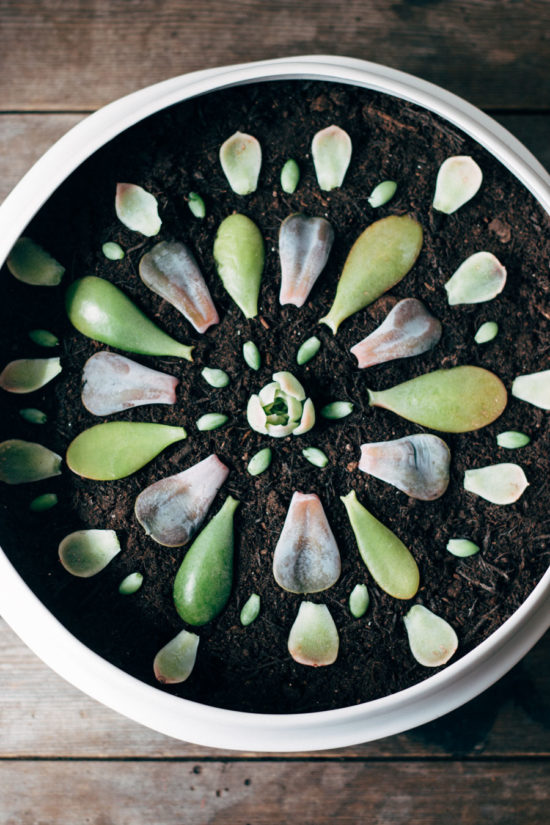
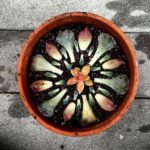
Step 2: Picking A Propagation Mandala Tray
Have you ever gone to a nursery and bought a handful of plants and been given a plastic tray to carry them on? Save them! This is the perfect opportunity to reuse them! These are great because they allow the water to drain and they’re deep enough for the roots to grow. If you have access to the trays that’s great, if not just look around the kitchen, you’re sure to find something in there that will work! Possible items to use include trays, bowls, serving platters, pie dishes, or basically anything large and sturdy enough to hold the soil and leaves.
Step 3: Filling Your Tray With Soil
I typically use E.B. Stone Naturals Cactus Mix, however, I have also used regular potting soil. Cactus soil retains less moisture which is ideal for potted succulents. When you’re propagating you won’t be doing heavy watering so it’s not as important. You’ll want at least an inch or two of soil. If you have a nursery tray put down a few layers of newspaper to prevent the soil from falling out.

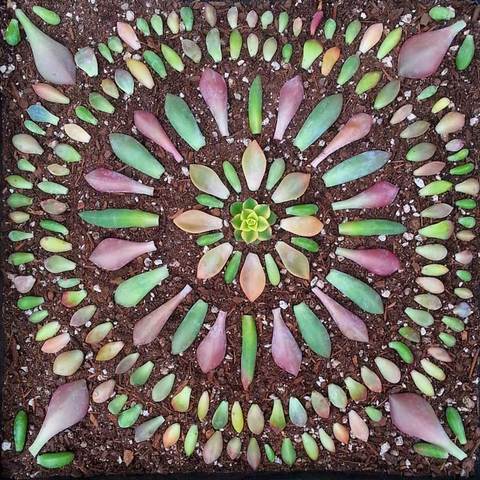
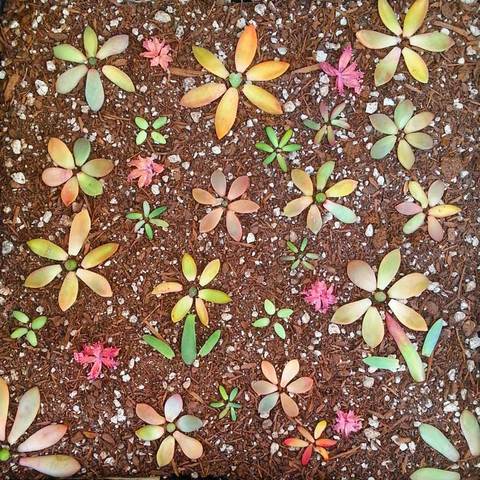
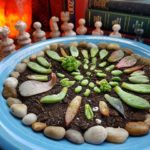
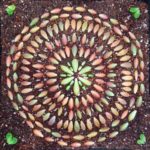
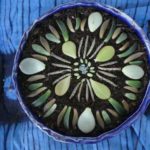
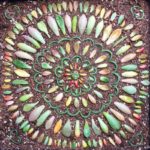
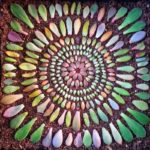
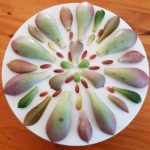
Step 4: Arrange Your Propagation Mandala
Now the fun part! I like to quickly sort my leaves by color and/or size. This makes it easier to create the mandala. Arrange your leaves in a circular and symmetrical manner. The possibilities are endless, just let your creativity flow! Take a look at some of my designs below to get some inspiration.
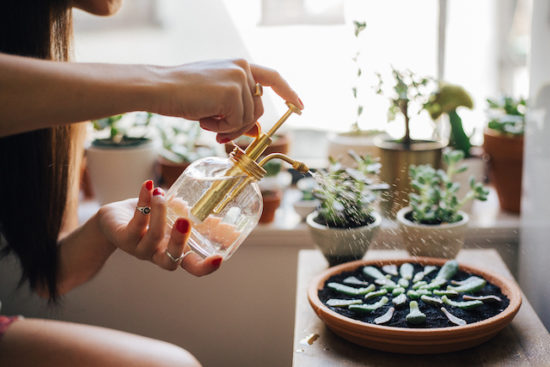
Step 5: Water Your Propagation Mandala
The simplest way to water is with a spray bottle. Unlike fully grown succulents, your leaves will need to be watered on an almost daily basis. Just give the leaves a nice spritz. Be sure you don’t soak the soil, especially if you are propagating on something that doesn’t have drainage. I use a watering can because I keep my trays outside and it’s much easier because I have so many! Never water unless the soil has completely dried from the previous watering.
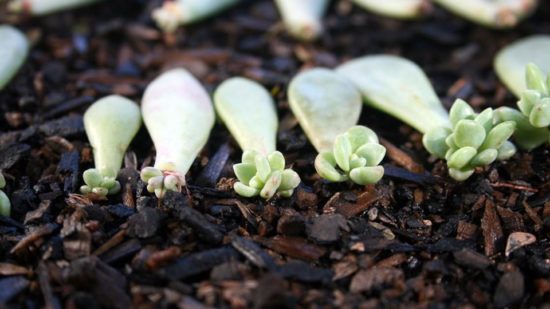
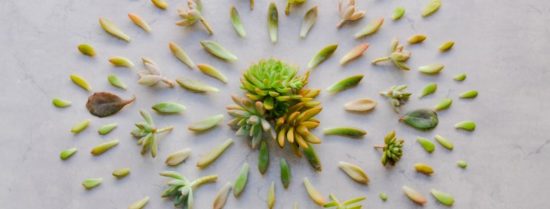
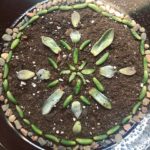
Step 6: Hurry Up And Wait
Finally, sit back and enjoy your propagation mandala! It can take months for your leaves to produce pups; at least you have something pretty to look at while you wait.
Tips:
- Place the completed mandala where it can get plenty of indirect sunlight.
- If you don’t see much progress at first, be patient. Some leaves will sprout within a week, others can take up to a month or longer.
- Know when to toss a leaf. If it begins to look transparent, feels mushy, or shrivels and dries out, toss it. Be prepared for some loss. Not all the leaves will make it but if you’re doing things right, you should only lose a few.
- This is a really fun activity to involve kids in! A pie tin is the perfect size for a child to create a mandala of their own.
- Spring/Summer is the best time to propagate!
- It can also be fun to incorporate different elements. I’ve used seashells, crystals and heart shaped rocks in my mandalas.
Some Ideas:

The Artist’s Mission
It is the artist’s mission to penetrate…in the womb of nature, in the primal ground of creation where the secret key to all things lies hidden.
~Paul Klee
The Womb of Nature
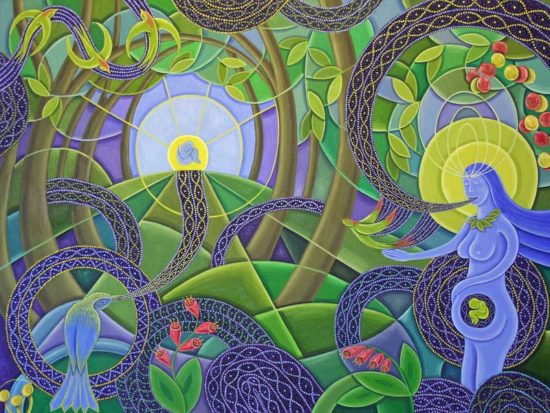
It is the artist’s mission to penetrate…in the womb of nature, in the primal ground of creation where the secret key to all things lies hidden.
~Paul Klee

")
I think it's time to go shopping... maybe even buy some really cool stuff at my online shops!!
")