Monthly Archives: May 2020
How To Make A Salve
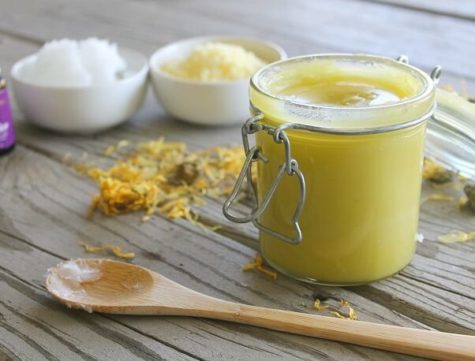
A salve is an herb-infused oil with beeswax melted into it. Once cooled, it assumes a consistency somewhere between petroleum jelly and hard lip balm, depending on the amount of wax added and the ambient temperature.
Administration and Dosage Guidelines
Apply a liberal amount of salve to the affected area at least twice a day. Salves are best applied when the skin is hydrated and the pores are open, like after a shower or a soak.
Shelf Life and Storage Guidelines
Salves can be stored in glass jars, metal tins, or nonreactive plastic containers. Choose wide-mouth vessels that are not too deep, so you can reach to the bottom easily.
Salves are very stable, but should be used within 1 year for best potency.
Necessary Tools, Equipment, or Ingredients
- Herb-infused oil
- Beeswax, chopped, grated or pellets.
- Essential oil (optional)
- Small pot
- Shot glass
- Storage vessels
- Labels
Preparing Remedies – Step by Step
In a small pot over low heat, warm the oil gently and slowly. DO NOT boil.
Add the beeswax. Use approximately 1 ounce of wax for every 6 to 8 fluid ounces of oil. For a softer salve, use less wax. This is helpful when it will be applied to sensitive skin, or if used in cold climates. For a harder salve, use more wax. This is better if the salve will be used in hot climates or as lip balm.
Stir continuously until the wax melts.
Spoon some wax into a shot glass and freeze for a few minutes; it will set to its finished hardness. Take it out and test it with your finger to see if it is the consistency you want.
Add more wax to the pot if you want to harden the salve; add more oil if you want to soften it.
Add the essential oil:
- If you are pouring the hot salve into a single storage vessel, add the essential oil after doing so. Stir quickly and close the vessel so the essential oil does not evaporate.
- If you are pouring the hot salve into multiple small vessels, add the essential oil before pouring, stir quickly, pour, and close the vessels immediately.
Label each vessel with the ingredients used, and the date the salve was made.
Pros
- Portable. Salve is a good way to take a messy oil infusion and make it much more manageable.
Cons
- Not for use on wet or open wounds
Salves should not be used on a fresh burn, weeping rash, open lacerations, or puncture wounds. The oil and wax form a seal that prevents airflow and can allow bacteria to grow in the wound. In the case of a burn, that seal prevents heat from dispersing.
Use poultices or compresses until the wound closes up and dries out, and for a burn, until the skin begins to itch.
Additional Considerations
Clean your pot and utensils with paper towels, newsprint, or a dishrag while the salve is still hot and liquid. If it sets, use very hot water to melt it and wash it away.
You can buy empty tubes and pour hot salve directly into them to make your own lip balm.
Source: Herbal Medicine for Beginners
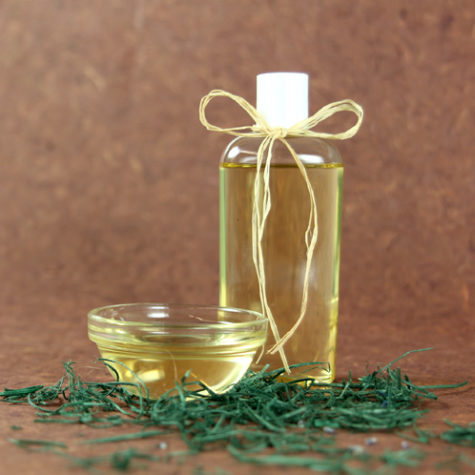
How To Make A Liniment
A good liniment can be made with a blend of herb-infused oil with tincture, and can also include essential oils. This combination of alcohol and oil allows you to get a full constituent extraction from the herbs, and it has both quick acting and slow-release qualities in one. It is intended for topical use only.
Administration and Dosage Guidelines
When applying a liniment, massage it in until your hands no longer feel oily. Work the liniment into the tissue; don’t just lightly rub it onto the surface.
Liniments should be applied 3 to 5 times per day, or ore as needed.
Shelf Life and Storage Guidelines
It’s better to store liniments in bottles with flat caps rather than dropper tops, as the oil can degrade the rubber on exposure. Simply tip a little into your palm when you want to use it.
Liniments are shelf stable and will retain potency for at least 1 year.
Necessary Tools, Equipment, or Ingredients
- Tinctures
- Infused oils
- Essential oil (optional)
- Funnels
- Bottles and caps
- Labels
Preparing Remedies – Step by Step
In order to make this type of liniment, you will first need a tincture and an infused oil. Instructions on how to make them can be found here:
In your storage bottle, combine the tincture and the infused oil. Cap the bottle, shake well, and label with the ingredients used and the finish date. Store in a cool dark place.
You can use equal parts tincture and oil, or experiment with ratios such as those used in an oxymel or elixir. Instructions for those can be found here: Making Oxymels and Elixirs. If you are using essential oils, add at a ratio of 10 to 30 drops of essential oil per ounce of liniment.
Shake well before each use.
Pros
- Double action. The tincture is rapidly absorbed and begins to work quickly, while the oil is absorbed more slowly and releases its medicine over time.
- Safe essential oil use. Essential oils disperse nicely in a liniment, making this a safe way to work with them for topical purposes.
Cons
- Messy. While not quite as troublesome as simple infused oils, liniments have a tendency to leak from their bottles. If you travel with a liniment, enclose the bottle in a resealable plastic bag.
Additional Considerations
Some herbalists define a liniment as a tincture made in rubbing alcohol or another substance that cannot be consumed, intended for topical use only.
Source: Herbal Medicine for Beginners
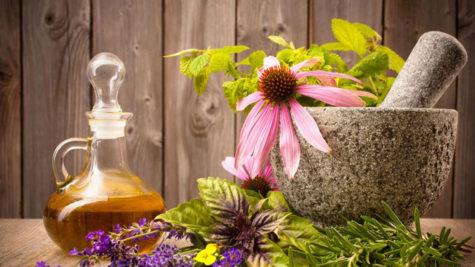
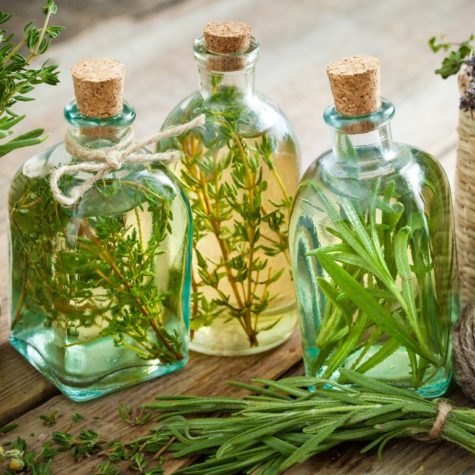
Making Herb-Infused Oils
Oils extract a very different set of chemical constituents from herbs than do water or alcohol. Infused oils can be consumed – think of a nice rosemary-infused olive oil with vinegar on a salad – though most often herbalists work with them in topical preparations.
Administration and Dosage Guidelines
Infused oils may be employed directly as massage oil, conveying their effects into the skin and underlying tissues, or mixed with other ingredients to make a liniment or lotion. If you melt wax into an oil and let it cool and harden, you’ve made a salve.
For most purposes, apply the infused oil liberally to the affected area 1 to 5 times per day. massage it into the tissue as much as possible; don’t just wipe it over the surface. Work it in for a few solid minutes to encourage absorption and get the best effects.
Shelf Life and Storage Guidelines
Herb-infused oils should be stored in dark, light-blocking bottles in a cool, dry place. They will retain their potency for about 1 year if stored well.
Necessary Tools, Equipment, or Ingredients
- Herbs, fresh or dried
- Oil: olive, coconut, grapeseed, almond, etc
- Oven-safe dish
- Mason jars, various sizes, for maceration
- Wire mesh strainers
- Cheesecloth
- Funnels
- Storage bottles
Preparing Remedies – Step by Step
When working with fresh herbs, a heat method is recommended. This allows the water to evaporate and helps prevent mold.
- Chop the herbs coarsely and place in an oven-safe dish. Pour in enough oil so the herbs are submerged.
- Put the dish in the oven and turn it to its lowest setting – ideally, 180° or lower.
- Note: If your oven doesn’t go that low, here are some other options: set up a double boiler on the stove, use a simmer burner or hot plate, or use the “warm” (not low) setting on a slow cooker.
- Leave the herbs and oil exposed to heat for 8 to 12 hours. This doesn’t have to be consecutive – you can turn the oven on for a few hours, then turn it off, as long as the total heating time is completed within 3 days.
- Strain the oil and wrap the herbal residue (marc) in cheesecloth. Squeeze out the last drops of oil from the residue, much as you would squeeze out a tea bag when making tea.
- Bottle in light-blocking (colored) glass and label with ingredients used and the finish date.
- Use within one year.
When working with dried herbs, you may use the same heat method as above, or this no-heat method.
- Fill a mason jar half to three-fourths full with the herbs you want to infuse.
- Pour in enough oil to fill the jar.
- Close securely and label the jar with the ingredients used, along with the date you started.
- Macerate (allow the herbs to infuse in the oil) for 4 weeks.
- Shake the bottle every day or so to encourage maximum constituent release. Otherwise, keep in a cool, dark place.
- Strain the oil and wrap the herbal residue (marc) in cheesecloth. Squeeze out the last drops of oil from the residue, much as you would squeeze out a tea bag when making tea.
- Bottle in light-blocking (colored) glass and label with ingredients used and the finish date.
- Use within one year.
Pros
- Great for topical needs. Herbal oils are soothing, restorative, and hydrating to the skin. They also help herbal constituents penetrate into the tissue to do their work.
- Innate benefits of oils. Each oil has its own beneficial qualities. Coconut oil is anti-fungal, olive oil is extra moistening and highly anti-inflammatory. Remember that the base oil matters at least as much as the herbs you put into it.
Cons
- Potential for mold.
Examine your oil at least once a day while infusing. If there’s any sign of mold growth on the surface, you can usually skim this off with a spoon without losing the entire batch. If there’s mold growth at the bottom of the jar, though, the batch is lost. This is primarily a problem when infusing oil with fresh herbs and is a good reason to use the heat method.
- Preparation time.
A heat infusion can be ready in 1 or 2 days, but a cold infusion takes at least 2 weeks.
- Messy.
Oils tend to leak out of their bottles no matter how securely they’re closed. If you keep some infused oil in a first aid kit or travel bag, enclose it in a resealable plastic bag as well.
Additional Considerations
Olive oil is the standard for infusions today, but only because it’s so widely available. In the past, animal oils such as lard, tallow, and lanolin were the go-tos for these preparations. They’re extremely well absorbed by human skin, and are worth consideration. For some purposes, it’s preferable to use a lighter oil, like grapeseed or almond; other times, you want a thicker oil like cocoa butter, shea butter, or castor oil.
Try different oils to see which you prefer. Whichever you choose, make sure it’s made by a cold-press process. Cold-pressed oils are better quality than solvent-extracted oils, which are more likely to be rancid, plus there is solvent left in the oil and many times those solvents are toxic.
- Note:
An herb-infused oil is not the same thing as an essential oil. Essential oils are created by a distillation process and are extremely concentrated and potent. Never apply them directly to the skin without diluting in a carrier oil first, and do not take internally.
Source: Herbal Medicine for Beginners
Making Oxymels and Elixirs
An oxymel is a blend of vinegar and honey. The vinegar releases minerals from the herbs, whereas alcohol really doesn’t, and offers a substitute for those who avoid or don’t want to use alcohol “Plain” oxymel is an ancient remedy that lends particular support to the digestive and respiratory systems.
An elixir, broadly speaking, is a tincture combined with any sweetener. Honey is the preferred sweetener, though occasionally a better choice might be maple syrup, molasses, or even the option of tincturing herbs in a sweet liqueur. For example: Rose petals steeped in St. Germain, an elder flower liqueur.
Administration and Dosage Guidelines
Elixirs and oxymels are generally taken by the dropperful, like tinctures, though they can also be taken in teaspoon or even tablespoon doses, as they are somewhat less potent than straight tinctures.
Shelf Life and Storage Guidelines
Oxymels and elixirs should be stored just like tinctures, in amber or blue glass bottles kept in a cool, dry place. Use flat caps on storage bottles and dropper tops on dose bottles. They’ll keep for 6 to 12 months.
Necessary Tools, Equipment, or Ingredients
- Alcohol or vinegar
- Honey
- Mason jars, various sizes, for maceration
- Dose and storage bottles
- Wire mesh strainers
- Funnels
- Labels
Preparing Remedies – Step by Step
You can blend tinctures or vinegars you’ve already made with honey (either plain or herb infused) to create your oxymel or elixir, or you can macerate your herbs in the honey and alcohol or honey and vinegar, at the same time.
If you are macerating the herbs in honey and alcohol or vinegar at the same time, proceed as if making a tincture or herb-infused vinegar, but fill the jar only half way with one of these liquids. Then add honey to fill the rest of the way.
Instructions for making tinctures and vinegars are found here:
Close securely and label the jar with the ingredients used, along with the date you started.
Macerate (allow the herbs to infuse in the alcohol or vinegar) for 4 weeks. Shake the bottle every day or so to encourage maximum constituent release. Otherwise, keep in a cool, dark place.
Strain, re-bottle, and re-label making note of ingredients used and the finish date.
Pros
- Effective in small doses. Oxymels and elixirs exert noticeable effects in dropperful and teaspoon amounts.
- Portable. These are shelf stable and can be easily carried in a pocket or handbag.
- Good tincture substitute. Oxymels are preferred for those who can’t consume alcohol, can be nearly as potent as tinctures, and extract a broad range of constituents, they’re better than infused vinegar alone.
Cons
- Preparation time. If you’re starting from scratch, it will be 1 month or so before your oxymel or elixir is ready to use.
- Note: If you are blending premade tinctures, infused vinegars and honeys, this isn’t a problem.
Additional Considerations
- For Elixirs:
You might use equal parts honey and alcohol as described previously, or you might use as little as 1:3, that is, the final mix will be 1/4 honey and 3/4 alcohol. You could include less honey, but below that ratio you will start to lose the honey’s medicinal contributions.
- For Oxymels:
Equal parts honey and vinegar is standard, but a 1:5 ratio – 1 part honey and 5 parts vinegar will still get good effects.
Feel free to combine alcohol, vinegar, and honey all in one.
Source: Herbal Medicine for Beginners
Making An Herbal Syrup
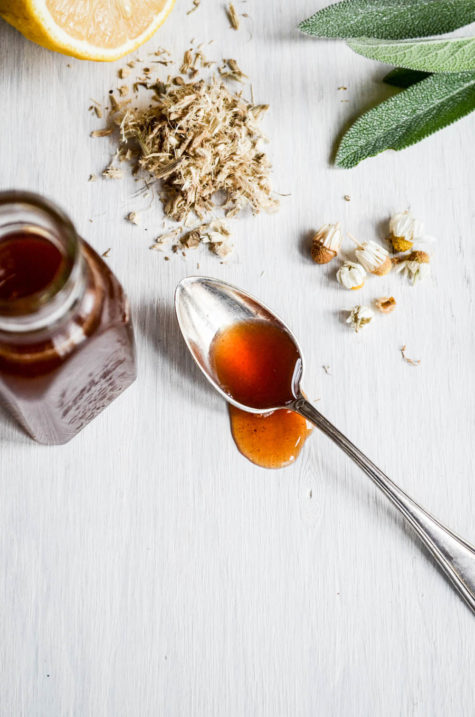
Syrups are often made using sugar, but working with honey is preferred because of its innate benefits. While the finished product is not shelf stable, it keeps well refrigerated.
Administration and Dosage Guidelines
Syrups are taken by the teaspoon or tablespoon, straight up, or stirred into tea.
Shelf Life and Storage Guidelines
Kept refrigerated, a honey-based syrup will last for several months. Light-blocking storage bottles are best, but as the syrup will be in the dark refrigerator most of the time, they are not as critical as they are for tinctures.
Necessary Tools, Equipment, or Ingredients
- Herbs
- Water
- Pot for decoction
- Wire mesh strainers
- Honey, plain or herb infused
- Funnels
- Storage bottles
- Labels
Preparing Remedies – Step by Step
Prepare a tea with your herbs and water – either an extra strong infusion (use twice as much herb as usual) or a concentrated decoction. If making a decoction, allow the water to evaporate as it simmers, reducing the original volume of water to half or one fourth the original amount.
Strain and combine the concentrated decoction with an equal amount of honey, warming gently as you stir to mix thoroughly.
Close securely and label the jar with the ingredients used, along with the date. Store in the refrigerator.
Pros
- Delicious. Syrups are appealing to almost everyone because of their sweetness.
- Multiple extractions. If you use an herb infused honey, your syrup contains both honey and water extracts of herbs, maximizing the extraction of a broad array of plant chemicals.
Cons
- Needs refrigeration. This makes the syrup less portable.
- Potential for old. Always examine your syrup when you open the jar to take a dose. If there’s any sign of mold growth on the surface, discard it and make a new batch.
Additional Considerations
Some recipes for herbal syrups call for sugar as this creates a shelf-stable product. Instead of adding honey, you would add twice as much sugar as you have tea. For example: for 4 cups of tea add 8 cups of sugar. That’s a lot of sugar and the major reason this is not the preferred method.
You can make a honey syrup shelf stable by adding an equal amount of tincture to your syrup once it’s made. For 2 cups of finished syrup, add 2 cups of tincture. This could be the same herb (or herbs) used in your syrup – again increasing the range of constituents extracted – or complementary plants, creating a synergistic formula.
Source: Herbal Medicine for Beginners
Making Herb-Infused Honey

Herbal honeys are profoundly medicinal and they taste great. When herbs are infused into honey, the honey absorbs all the water soluble components of the herb and all the volatiles (essential oils), as well. This yields an excellent extraction of the herb’s complex chemistry and preserves it very well.
Administration and Dosage Guidelines
For internal use, herb-infused honeys can be taken as they are. More often, though, they’re used as ingredients in composite remedies, such as elixirs, oxymels, or syrups. Herbal honeys are also applied topically for skin blemishes, wounds, burns, etc.
If taken straight up, teaspoon and tablespoon doses of herb-infused honey will deliver an effective dose of herbal constituents.
Shelf Life and Storage Guidelines
Finished herbal honeys should be stored in sealed glass jars, away from light and heat. They will retain their potency for many years.
Necessary Tools, Equipment, or Ingredients
- Fresh herbs
- Honey
- Wide-mouth jars
- Wire mesh strainer
- Labels
Preparing Remedies – Step by Step
Coarsely chop your fresh herbs and allow them to wilt for a few hours before infusing.
Put your herbs into a wide-mouth jar and fill half to three-fourths full.
If the honey you’re working with is a liquid consistency, simply pour it into the jar up to the shoulder. If it’s solid or semi-solid, gently warm it to get it runny. This is easily done by setting the honey jar in a pot of hot (but not boiling) water for 10 to 20 minutes. The honey will soften and become easier to pour.
Using a chopstick or spoon, stir and work the herbs around in the honey. Close securely and label the jar with the date and the herbs used.
Place in a warm area (like on top of the refrigerator) and leave to macerate (infuse into the honey) for 4 weeks.
Gently warm the closed jar in a pot of hot water until the honey has a liquid consistency, then strain into a new jar. Press the herbal residue (marc) against the strainer to express as much honey as you can.
Be sure the finished jar of infused honey is labeled with the herbal ingredients and the finish date. Store in a cool dark place.
Pros
- Honey’s innate benefits.
Even before infusing with herbs, honey is an excellent wound healer and antimicrobial agent with a long history of use.
- Long shelf life.
Honey is an incredible preservative. You can expect your infused honey to last for years and retain its effects.
- Delicious.
Getting someone to take a honey medicine never seems to require much bargaining, even with kids and those who have picky palates.
Cons
- Sweet means sugar.
Herbal honeys taken alone are not ideal for those with insulin resistance, diabetes, or other blood sugar regulation problems. (When mixed into an oxymel or elixir, though, this concern is minimal).
- Potential fermentation.
Because we’re infusing fresh herbs into honey, there’s the possibility that the water content of the herbs will thin out the honey, making it sufficiently liquid to allow it to ferment spontaneously.
- Preparation time.
Infused honeys take 1 month or more to prepare.
Additional Considerations
Choose local honey whenever possible. Aside from supporting local beekeepers (and local bees), honey made in your area will help you acclimate to pollen and reduce seasonal allergies.
Raw, unfiltered, unpasteurized honey has the most medicinal efficacy, but don’t worry too much if you can’t find this in your area. Most studies on honey as a wound dressing have been done with processed and irradiated honey, and it’s still very effective.
Do be aware that some “honeys'” sold in stores have been found to contain high fructose corn syrup or other adulterants. Make sure your honey is actually honey!
Source: Herbal Medicine for Beginners
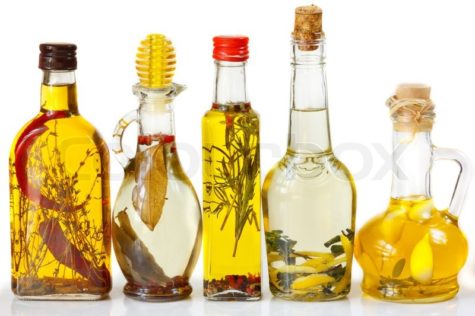
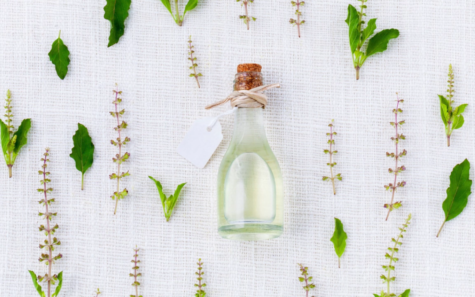
Making Herb-Infused Vinegars
Vinegar is a useful solvent (the technical term is menstruum) for herbal extracts. Its acidity helps draw out certain constituents called alkaloids, which are often some of the most potent chemicals in an herb. It also helps dissolve plant cell walls and release mineral content. Apple cider vinegar is standard in these preparations.
Administration and Dosage Guidelines
Herbal vinegars may be useful as remedies in their own right, or they may be combined with honey to make an oxymel.
Herb-infused vinegars are frequently taken in doses of 1/2 to 1 fluid ounces at a time.
Shelf Life and Storage Guidelines
Like tinctures, store herbal vinegars in dark, light-blocking glass bottles in a cool, dry place. Vinegars will last at least 6 months and up to several years.
Necessary Tools, Equipment, or Ingredients
- Herbs. If using fresh, let wilt for a half day or so spread out on brown paper bags or a clean tabletop, this will allow some water content to evaporate. Then chop or run through a blender before you put in the jar and add the vinegar.
- Apple cider vinegar
- Mason jars of various sizes for maceration
- Dose and storage bottles
- Strainers
- Funnels
- Labels
Preparing Remedies – Step by Step
Fill a mason jar half to three-fourths full with the herb you want to tincture. If using roots, which tend to swell in liquid, stay on the half-full side. If using leaves or flowers, fill to the three-fourths mark.
Fill the jar to the top with apple cider vinegar.
If using a mason jar with a metal lid, insert a piece of wax paper under the jar lid before screwing down the ring. The vinegar fumes will degrade the coating on the underside of the jar lids. If you like, use plastic lids instead to avoid this issue.
Close securely and label the jar, including the date you started. For example: Nettle infused vinegar, 4/3/2019.
Macerate (allow the herbs to infuse in the vinegar) for 4 weeks. Shake the bottle every day or so to encourage maximum constituent release. Otherwise, keep in a cool, dark place.
Strain, re-bottle in colored glass vials, and add the finish date to the label.
Pros
- Vinegar’s innate benefits. Taken internally, vinegar stimulates digestion and can help with blood sugar control. Topically, it has antimicrobial, antifungal, and anti-inflammatory effects. Adding herbs enhances these further.
- No alcohol. Vinegar extracts can be given in place of tinctures for those who can’t consume alcohol, though they’re not quite as strong.
Cons
- The acidity. For some people who have heartburn or ulcers, vinegar’s acidity can be too irritating to tissues already tender and inflamed.
- Preparation time. Infused vinegars take at least 2 to 4 weeks to prepare.
Additional Considerations
Always use high-quality, preferably raw, apple cider vinegar – not distilled white vinegar. Raw apple cider vinegar has probiotic content that can be helpful in some circumstances, like when making a digestive formula as a vinegar extract.
Source: Herbal Medicine for Beginners
How To Make Tinctures
Tinctures are among the most important methods of herbal medicine making you can learn, because of their potency, versatility, portability, and long shelf life. Fortunately, making a good tincture isn’t much harder than making a nice cup of tea.
Administration and Dosage Guidelines
Tincture doses are usually measured by the dropperful, with the assumption that you’re working from a dose bottle that is 1 to 4 fluid ounces in size and has a dropper top. Squeezing the dropper and allowing it to fill as much as possible makes 1 “dropperful” even though the entire glass dropper won’t be filled to the top. A dropperful equals approximately 30 drops. Measured strictly, this will be about 1 millilitre of liquid per dropperful.
Most tinctures are taken in doses of 1 to 4 droppersful, 3 to 5 times per day.
If you don’t have any dropper tops on hand, use a teaspoon. One teaspoon is equivalent to about 5 millilitres, so if the remedy calls for a dose of 2 to 4 droppersful, you can use 1/2 to 1 teaspoon and it will be close enough.
Shelf Life and Storage Guidelines
Tinctures should be stored in colored glass bottles, or kept in a dark place, to prevent degradation from light exposure. For long-term storage, use a bottle with a flat cap rather than a dropper top – the rubber in the dropper will degrade over time if exposed to alcohol fumes.
If stored properly, tinctures will retain full potency for 5 to 10 years, or even longer.
Necessary Tools, Equipment, or Ingredients
- Herbs.
If using fresh, let wilt for a half day or so spread out on brown paper bags or a clean tabletop, this will allow some water content to evaporate. Then chop or run through a blender before you put in the jar and add the alcohol. - Vodka, or Brandy.
Other alcoholic beverages can be used as long as they are 80 or 100 proof (40 to 50 percent alcohol content). - Mason jars of various sizes for maceration.
- Dosage and storage bottles
- Strainers
- Funnels
- Labels
Preparing Remedies – Step by Step
Fill a mason jar half to three-fourths full with the herb you want to tincture. If using roots, which tend to swell in liquid, stay on the half-full side. If using leaves or flowers, fill to the three-fourths mark. Fill the jar to the top with alcohol.
Close securely and label the jar, including the date you started. For example: Chamomile tincture in vodka, 50 % alcohol, 1/3/2018.
Macerate (allow the herbs to infuse in the alcohol) for 4 weeks. Shake the bottle every day or so to encourage maximum constituent release. Otherwise, keep in a cool, dark place.
Strain, re-bottle in colored glass vials, and add the finish date to the label.
Pros
- Small amounts are effective.
For herbs with unappealing flavors, you can get an effective dose without having to drink a pot of tea.
- Versatile.
Tinctures can be taken as they are, blended into formulas, or mixed with other ingredients, as in elixirs and liniments.
- Portable.
Tincture dose bottles can be carried easily in a bag or stashed in a drawer at work, and are ready to take as soon as you need them.
- Long shelf life.
Tinctures can last decades if properly stored.
Cons
- Contain alcohol.
Tinctures cannot be used by those who cannot consume alcohol due to liver problems, being a recovering alcoholic, religious reasons, or other situations in which alcohol is not advised or appropriate.
- Preparation time.
Tinctures made by maceration take at least 2 weeks, usually 1 month, to be ready. You’ll have to plan ahead.
Additional Considerations
There is some variation in tincture-making processes, and more precise methods use weights and measures to arrive at a standardized ratio of plant matter to solvent often seen on a tincture bottle as a ratio such as 1:5, indicating that each 5 millilitres of tincture carries the equivalent of 1 gram of herb material. The simple maceration method described here will suffice in most situations.
You can use any alcohol you like for tincturing as long as it has a high enough alcohol content. For example, an excellent tincture of herbs for the urinary system might use gin because it already contains juniper, which is a urinary antiseptic herb. Tequila and catnip are also nice in combination.
Some plants require more alcohol, some more water. The vast majority of plants are fine to tincture in vodka or brandy (40 to 50% alcohol). When extracting resins, consider using grain alcohol (95% alcohol). When extracting mucilages use water with just enough alcohol to prevent molding (20% of the total) For shelf-stable preservation, 20% alcohol is the minimum.
You can tincture herbal powders, they just require a lot more shaking to extract well and are a bit more difficult to strain at the end.
Practically speaking, you’ll make larger amounts (pints to quarts) of individual plant tinctures, then blend them together in small amounts (2 to 8 fluid ounces) of formulas. As time goes on, you may find a lot of help from a particular formula and want to have more on hand, but wait until you’ve worked through your first few ounces ( to make sure you like it or know better how much you need) before you do that.
It’s also okay to tincture more than one plant together right from the start, rather than tincturing them all individually and then blending the tinctures.
Source: Herbal Medicine for Beginners
Preparing Poultices and Compresses

A poultice is a mass of warm, wet plant matter applied directly to the skin or a wound. A compress is simply a tea-soaked cloth or bandage applied similarly. Used for similar functions as a bath or soak, these can be applied to a specific area more easily and precisely.
Administration and Dosage Guidelines
Once you have the poultice or compress in place, keep it there for 5 to 20 minutes. Repeat 1 to 3 times per day.
Shelf Life and Storage Guidelines
Poultices and compresses are made on as-needed basis. They are not stored. However, dry herbs that you might want to use in poultices or compresses can keep for years if they’re stored in airtight containers.
Necessary Tools, Equipment, or Ingredients
- Herbs
- Water
- Washcloth, rag, bandanna, etc
- Cheesecloth or gauze bandage
Preparing Remedies – Step by Step
Start by gently cleaning the affected area.
- For A Poultice:
Place 4 to 6 tablespoons of the herb mixture in a heat-proof dish.
Pour boiling water over the herbs, just enough to fully saturate them – not enough so they’re swimming. Let the herbs soak for about 5 minutes.
Scoop the herbs out of the dish onto a piece of cheese cloth or a gauze bandage and give it a squeeze (like you would a teabag when you take it out of the water).
Apply the mass of herbs, warm and wet, to the affected area. You may prefer to wrap the herbs in a layer or two of cheesecloth or gauze to keep them contained.
Cover with a cloth and keep in place for 5 to 20 minutes, then gently dry the area.
Clean the area again, and bandage or cover if appropriate.
- For A Compress:
Prepare the infusion or decoction of the herbs you’ll be working with and strain.
Soak a cloth in the hot tea, holding it by a dry spot and allowing the cloth to cool in the air until hot but comfortable to the touch.
Lay the wet cloth over the affected area. Cover with a dry cloth
Get comfortable and let it oak in for 20 to 20 minutes.
Clean the area again, and bandage or cover if appropriate.
Pros
- Delivers the medicine where it’s needed.
Poultices and compresses can be used to deliver herbal medicines to areas that are hard to soak. They work quickly for topical issues where internal use would be very slow or ineffective.
- Soothing and stimulating.
These preparations stimulate local circulation in the skin and underlying tissues, which helps speed healing. At the same time, they relax tension that prevents healthy, fluid movement.
Cons
- Messy.
It’s easy to get herbs or tea all over yourself and your furniture when applying a poultice or compress. Lots of towels and secure wrapping help.
- Takes Time.
Between preparation and execution, it can take at least 30 minutes to prepare and administer a poultice or compress.
- Not portable.
Because they are messy and time consuming, poultices and compresses are usually only done at home.
Additional Considerations
Don’t use the same compress cloth twice in one sitting – use a new cloth for each tip into the infusion or decoction. This is most critical when dealing with infected wounds, but make a habit of it in all situations.
You may want to prepare a hot water bottle when setting up your poultice or compress to lay on top and keep the application warm for a longer period of time.
Be sure to clean the affected area both before and after using your compress and especially when using a poultice. Don’t leave any little bits of herbal material on the irritated skin or in the wound.
Source: Herbal Medicine for Beginners
Preparing An Herbal Bath or Soak
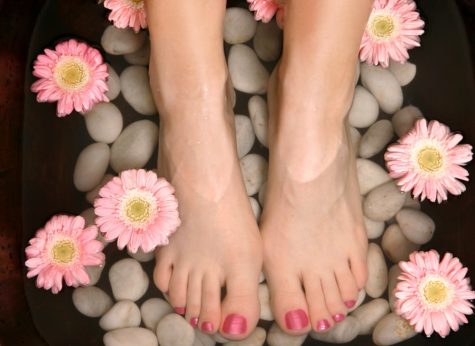
Bathing or soaking part of the body in an herbal tea is a great way to get the herbs in contact with the affected part. These are good for infected skin or wounds, burns, rashes, and all manner of topical troubles.
Administration and Dosage Guidelines
You might make a whole-body bath with herbs, or you may just soak a particular part (as with a foot bath or sitz bath). Keeping the water as hot as tolerable is best, as this facilitates absorption of the herbal medicines.
For most issues, it’s effective to soak for 15 to 20 minutes, 1 to 3 times per day.
Shelf Life and Storage Guidelines
Baths and soaks are made on as-needed basis. They are not stored. Dry herbs blended for a herbal bath or soak formula can keep for years if they’re stored in airtight containers.
Necessary Tools, Equipment, or Ingredients
- Herbs
- Water
- Salt (optional)
- Vinegar (optional)
- Bathtub, dish basin, or other soaking vessel
Preparing Remedies – Step by Step
Prepare an appropriate herbal tea. This can be either an infusion, a decoction, or a combination of both.
Pour the tea into a dish basin or similar container. For a whole-body bath, fill the bathtub with hot water, and pour in the herbal tea (at least one full quart).
If using vinegar, salt, or additional water, add it now. Stir to incorporate and dissolve. Test the heat with your hand, and submerge the affected body part.
Soak for a maximum of 15 to 20 minutes.
Pros
The benefit of an herbal bath or soak is that it delivers the medicine where it’s needed.
Baths and soaks are great for skin conditions and wounds. They work quickly for topical issues where internal use would be very slow or ineffective.
Cons
- Not everything fits. Some body parts don’t fit well into a soaking vessel, or are hard to soak separately (shoulders, for example). Use a compress in those cases.
- Takes time. Between preparation and execution, it can take at least 30 minutes to conduct an effective soak.
- Not portable. Baths require space and privacy, so they’re usually done at home.
Additional Considerations
If your town or city chlorinates its tap water it is best to use a chlorine filter on the water you bathe or soak in. Inexpensive filters can be found online. Filters that use vitamin C cartridges or tables are recommended because this takes care of chloramines as well.
Warm, moistened skin is more absorptive after a good soak, follow up with salve or other topical applications. They will work even better than usual.
Source: Herbal Medicine for Beginners
Bobdogstar: Lilac
Vincent: Mulberry
Rennie Luttrull: queen-annes-lace-seeds
Rosanna: Spignel aka Bald Money
Annamarie Squatrito: Fumitory
I think it's time to go shopping... maybe even buy some really cool stuff at my online shops!!