Monthly Archives: May 2020
How To Make Herbal Steams
Herbal steams are excellent for addressing issues in the lungs and sinuses, the face, and eyes. The evaporating steam carries light chemicals from the herbs, including some with antimicrobial, anti-inflammatory, relaxant, and immune-stimulating effects. These get into direct contact with the respiratory tract and skin, exerting their effects strongly.
Administration and Dosage Guidelines
Administer a steam whenever you want to stimulate the surface or respiratory tissues with moist heat. For acute illness, it’s best to steam at least twice a day. For ongoing skin or respiratory support, once a day is sufficient.
Shelf Life and Storage Guidelines
Steams are made on as-needed basis. They are not stored. Dry herbs blended for an herbal steam formula can keep for years if they’re stored in airtight containers.
Necessary Tools, Equipment, or Ingredients
- Herbs
- Water
- Gallon-size or larger pot
- Towel or blanket
Preparing Remedies – Step by Step
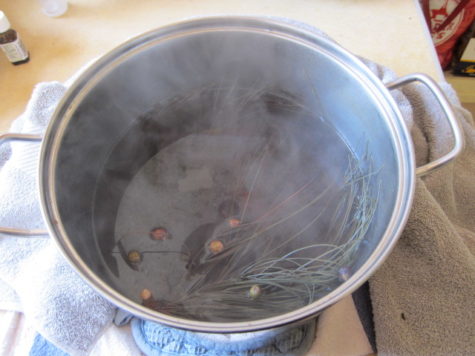
- On the stove, boil 1/2 to 1 gallon of water in a covered pot.
- Once at a full boil, remove from the heat and place the pot on a heat-proof surface.
- Make a tent by draping a blanket or towel over your head.
- Remove the lid from the pot and add 1/4 to 1/2 cup of your herb mixture to the water.
- Position your face over the steam and remain there for 5 to 20 minutes, catching the steam with your tent.
- For respiratory issues, inhale the steam as deeply as you can so the medicated steam gets deep into your lungs.
- Keep a handkerchief nearby – the steam will clear your sinuses and make your nose run.
Pros
- Delivers the medicine where it’s needed.
Particularly for antimicrobial effects, steam is the most direct method for getting the herbs in contact with the respiratory tract tissues.
- Stimulating but soothing.
The warmth and moisture of steams help activate immune function in the mucous membranes and at the same time relieve irritation and calm a cough or ease difficult breathing.
Cons
- Takes time. Between preparation and execution it can take at least 30 minutes to conduct a good effective steam.
- Not portable. Steams require some space and a stove to make effectively, so they’re mostly done at home.
Additional Considerations
After steaming, you can use the leftover liquid – it is essentially a hot infusion. Drink it, soak your feet in it, soak a cloth and make a compress, or employ it in some other way so nothing is wasted. If nothing else, let it cool and feed it to your garden or houseplants. Plants like tea, too.
You can also make a good steam using essential oils. Simply boil water and set up your steaming station as directed, but instead of adding dry herbs, tap in 10 to 30 drops of essential oil. DO NOT however, drink the leftover liquid when done steaming. It can, however, be used as a foot soak.
Source: Herbal Medicine for Beginners
How To Make A Decoction
Another method of making tea, decoctions are necessary when working with roots, barks, seeds, and other hard or woody plant parts. These require more time exposed to high heat to release their benefits into the water.
Administration and Dosage Guidelines
Like infusions, decoctions are generally drunk as they are. They may also serve as an ingredient in another remedy (bath, soak, compress, syrup, lotion, etc). Each decoction has its own dosage range depending on the herbs used, but in general it is normally recommended that you drink two cups to a quart of decoction daily.
Self Life and Storage Guidelines
Dry herbs blended for a decoction formula can keep for years if they’re stored in airtight containers. Once water is added, decoctions are generally only good for 1 or 2 days at room temperature. If kept refrigerated, this could extend to 3 days. Trust your tongue. If the decoction tastes “skunky” or otherwise off, best to make a new batch.
Necessary Tools, Equipment, or Ingredients
- Herbs
- Water
- Quart to gallon size pot
- Mesh strainer
Preparing Remedies – Step by Step
- Unless otherwise specified, use 2 to 4 tablespoons of herbs per quart of water.
- Put the herbs and water in a lidded pot on the stove, cover, and bring to a boil.
- Once boiling, reduce the heat and simmer for 20 minutes to an hour, stirring occasionally.
- Strain the liquid for consumption and compost the leftover herb material. The technical term for this material is marc.
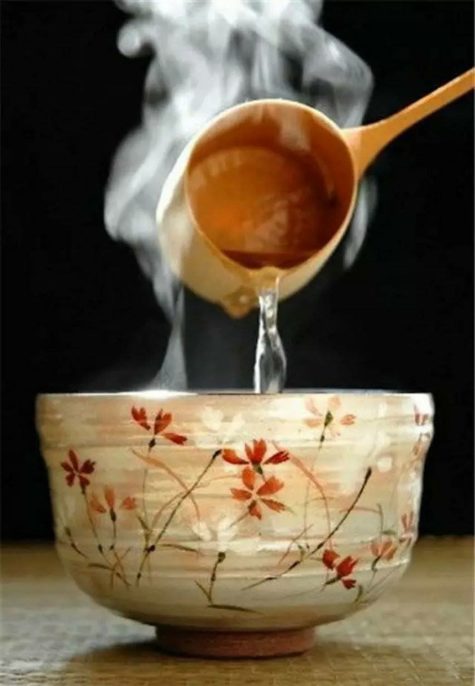
- You may also choose to ladle out a teacupful at a time, leaving the water and the herbs in the pot until you strain off the last cup.
Pros
- Easy to make: A stove, herbs, water, and a good pot are all you need.
- Versatile: Decoctions can be employed in a variety of ways, depending on need.
- Potent: Decoctions can be quite potent, as the simmering process extracts a majority of the herbs’ available constituents.
- Hydrating: Drinking enough water is important for good health; decoctions count as water intake.
Cons
- Take time to make: Decoctions require a bit of time to prepare, so they’re not great for resolving something quickly like a bee sting or an asthma attack.
- Taken in quantity: When you drink a decoction, you need at least a teacup or two for beneficial effects. Not all herbs taste good, and decoctions are often quite strong and can be unpleasant to drink in that quantity.
- Short shelf life: Once made, consume decoctions promptly.
Additional Considerations
Generally, each herb is either infused or decocted, depending on what kind of plant part it is:
- Leaves, flowers, and stems are usually infused.
- Roots, seeds, and barks are usually decocted.
If you want to include both types of herb material in one drink, first decoct your hard herb parts. Then strain that liquid while still hot, and add your lighter plant bits to it for infusion. Strain one more time and it’s ready to drink.
Sometimes decoctions are made in an open pot, allowing evaporation to reduce the volume of water. This concentrates the decoction’s strength. In some Syrups, for example, the herbs are first decocted, the liquid is reduced to half, then it is mixed with honey.
Source: Herbal Medicine for Beginners.
How To Make An Infusion
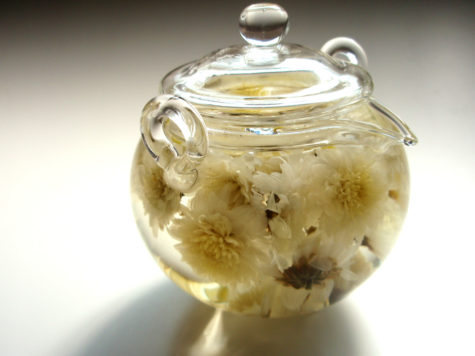
If you think of making tea, you probably picture an infusion. It’s the simplest, most fundamental way to work with herbs, and is a preferred method in most circumstances. Infusions can be prepared in a variety of ways, but the these are the most common:
- Hot Infusion:
Like using a tea bag, a short, hot infusion means pouring boiling water on your herbs, letting them steep for a few minutes, and drinking as soon as tolerably cool. This method is best for herbs with aromatic, or volatile constituents, which will evaporate if left to infuse for too long.
- Cold Infusion:
This method is used for demulcent, or mucilaginous herbs, such as marshmallow – those that increase the water’s viscosity as they infuse, rendering it first ‘velvety,’ then slimy. This only happens in cold water, hot water doesn’t release the constituents responsible for this effect.
- Long Infusion:
Whey trying to extract mineral content from nutritive herbs such as nettle, a long infusion is required. When done in a tightly sealed jar, this method also allows us to combine the quick-release aromatic constituents of one herb with the slow-release mucilage from another, as the initially hot water cools over time.
Administration and Dosage
Infusions are generally drunk as they are. They may also serve as an ingredient an another remedy (bath, soak, compress, syrup, lotion, etc). Each infused herb or formula has its own dosage ranges, but it is normally recommended to drink a quart of infusion daily, sometimes more.
Shelf Life and Storage Guidelines
Dry herbs blended for an infusion can keep for years if they’re stored in airtight containers. Once water is added, infusions are generally only good for 1 or 2 days; if kept refrigerated, this could extend to 3 days. Trust your tongue. If the tea tastes “skunky” or otherwise off, best to make a new batch.
Necessary Tools, Equipment, or Ingredients
- Herbs
- Water
- Teacup, teapot, mason jar, French press, or other container
- Mesh strainer
Preparing The Remedies – Step by Step
Unless otherwise specified, use 2 to 3 tablespoons of herbs per quart of water. If making only a single cup of tea, use 1 to 3 teaspoons of herbs.
Combine the herbs with the water and let it steep:
- Hot infusion: Pour boiling water over the herbs, cover and steep for 20 minutes or until cool enough to drink.
- Cold infusion: Pour cold or room temperature water over the herbs and steep for 4 to 8 hours.
- Long infusion: Pour boiling water over the herbs, cover tightly, and steep for 4 to 8 hours or overnight.
Once the herbs have steeped, you may strain the liquid and compost the leftover herb material. The technical term for this material is marc.
Pros
- Easy to make: Hot water, herbs, and a container are all you need.
- Versatile: Infusions can be employed in a variety of ways, depending on need.
- Potent: Each infusion method extracts a broad spectrum of constituents from the herbs, giving a good reflection of their full potential.
- Hydrating: Drinking enough water is important for good health; infusions count as water intake.
Cons
- Taken in quantity: When you drink an infusion, you need at least a teacup or two for beneficial effects. Not all herbs taste good, and some can be unpleasant to drink in that quantity.
- Short shelf life: Once made, infusions must be consumed promptly.
Additional Considerations
A press pot is a handy way to make infusions – you can steep them inside for a long time while still keeping them hot.
For long infusions, you can also use a drop coffee maker. Put the herbs into the carafe (not the filter basket), turn it on, and let the water drip down onto them. They’ll stay warm on the hot plate, shortening the amount of time you need to infuse them. If it was ever used for coffee, though, this will add a coffee taste to your tea.
Source: Herbal Medicine for Beginners
Bobdogstar: Lilac
Vincent: Mulberry
Rennie Luttrull: queen-annes-lace-seeds
Rosanna: Spignel aka Bald Money
Annamarie Squatrito: Fumitory
I think it's time to go shopping... maybe even buy some really cool stuff at my online shops!!