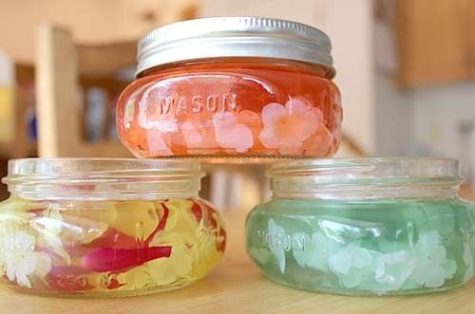
Lemonade Room Spray
What’s better than a cool, refreshing glass of lemonade on a hot summer’s day? How about this all-natural, homemade lemonade air freshener? The sweet, tangy smell of Lemon combines with subtle notes of Basil and Spearmint to give your home a fresh, sunny vibe no matter the weather outside. And not only does it smell great, but with the therapeutic benefits of essential oil, it’s also helps energize, clear the mind, and focus on the task at hand.
To make room spray:
- Fill 8 oz glass spray bottle about 3/4 full with distilled water
- Fill most of the rest of the way full with Witch Hazel
- 28 drops Lemon essential oil
- 6 drops Basil essential oil
- 6 drops Spearmint essential oil
- put on sprayer top and shake well to mix
To use: Shake bottle gently before each use. Spray into the air to freshen room. Use as often as needed.
Source: One Essential Community
Just Beachy Room Spray

The sweet citrusy scents of Tangerine and Bergamot combine with the clean, fresh scent of Spearmint in this room spray. The aroma reminds me of spending a warm summer day on the beach surrounded by the cool, refreshing ocean air. The result is an air freshener that’s both uplifting and energizing.
To make room spray:
- Fill 8 oz glass spray bottle about 3/4 full with distilled water
- Fill most of the rest of the way full with witch hazel
- 15 drops Spearmint essential oil
- 15 drops Tangerine essential oil
- 10 drops Bergamot essential oil
- Put on sprayer top and shake well to mix
To use: Shake bottle gently before each use. Spray into the air to freshen room. Use as often as needed.
Source: One Essential Community
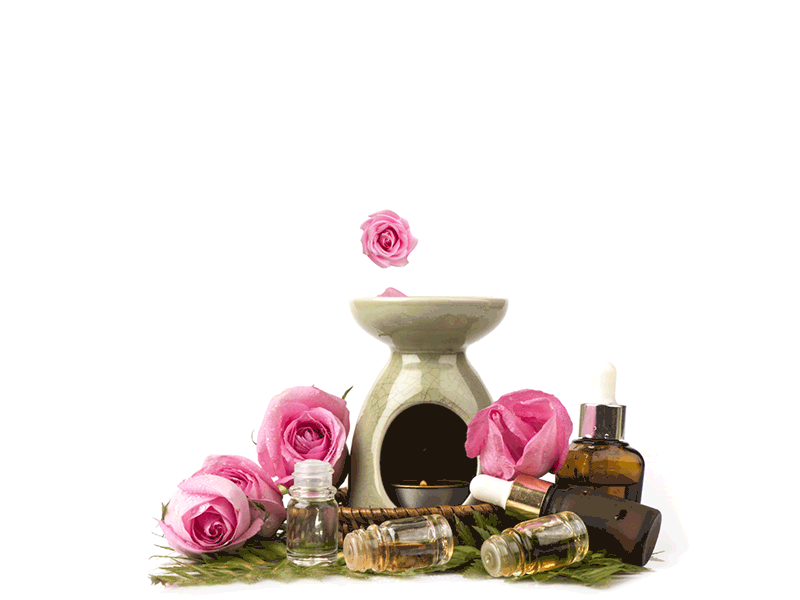
Make A Gel Diffuser
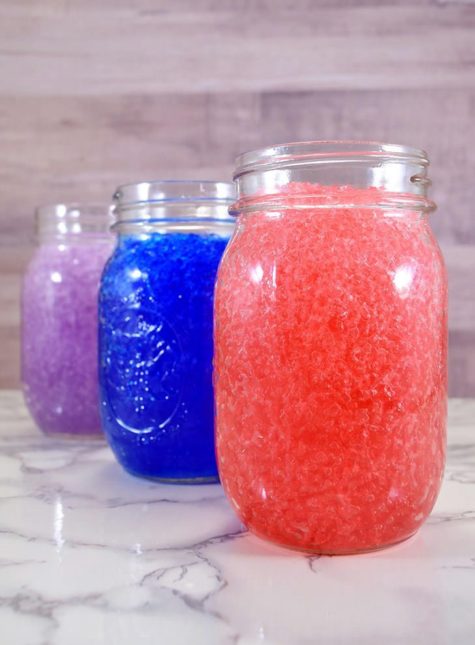
Have you tried making a gel air freshener? These are incredibly simple to make. It’s just polymer absorbent crystals (like these), water, and essential oils. The polymer absorbent crystals also come in the form of beads (clear and colored), and are called “water beads.”
Here’s a recipe from One Essential Community:
- 1 tsp water-storing crystal (a little goes a long way)
- 1 cup hot water
- 20 drops essential oil
Stir together until well mixed. Keep gel freshener in glass jar without a lid (so that the gel/oil mixture can easily scent the air). Large glass salt and pepper shakers are decorative, and have holes in the lids to allow the aromas to diffuse easily.
- If you are using water beads:
1 tsp dry beads will yield about 1 quart when fully hydrated. The marble size creates glimmering floral or candle arrangements in clear vases and bowls. Ideal for candle, silk and fresh flower arrangements. Easy to use – just add water and essential oils. Layer your favorite colors for stunning effects.
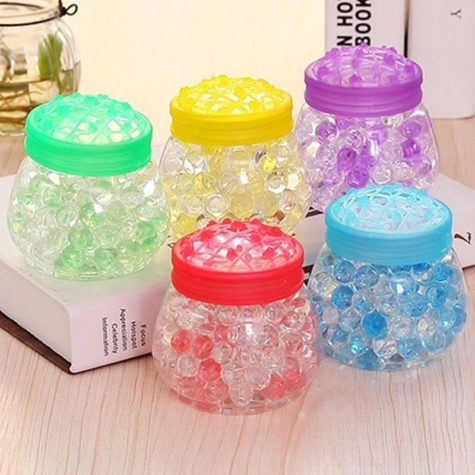
Beads can be allowed to shrink and dry out for later use, or be kept alive by adding water and essential oils every 7 weeks. Completely non toxic however should not be placed in mouth due to choking hazard.
If you decide to use water beads, you can find them at Walmart and on Amazon. More about water beads can be found at the Jelly Beadz website. Here’s a link to their FAQ.
Make it with Gelatin
If you prefer, you can make your own gel. It’s pretty simple. This recipe is from One Good Thing. Here’s what you need:
- 1 cup water
- 2 individual envelopes of unflavored gelatin
- 1 Tbsp. Salt
- 20 drops of your favorite essential oils
- Heat-Safe Containers
- Food Coloring (optional)
- Silk Flowers (optional)
In a small saucepan on the stove, heat 3/4 cups of water (or liquid potpourri) and the salt. When the salt is completely dissolved, slowly add the gelatin, and stir until that is completely dissolved as well. If you add the gelatin too quickly, it might get a little sticky and “clumpy,” but just keep stirring until it dissolves.
Remove the saucepan from the heat and then add the remaining liquid. Stir until fully blended, and pour the mixture into the containers of your choice.
Now add your essential oils. You can always add more or less essential oils based on your preference, and you can do different oils in each air freshener!
Now it’s time for a bit of decoration, if you want to! Some silk flowers and a drop or two of food coloring make them look so fun! Now that your air fresheners are scented, colored and decorated; let them cool to room temperature.
You don’t have to add a lid, but the gel will dry out a little faster without a lid. You could also use a hole punch to make your own vented lid! Just a couple of punches through a standard lid will work perfectly.
This project is super easy, and a cute flowery air fresheners would make a great hostess gift! You could easily double or triple the recipe to make more at a time, but keep in mind that they do dry out in a month or so (faster if you don’t use a lid of some sort.)
Make A Shower Steamer
No time for baths, but love the aromatherapy benefits of bath bombs? Try shower melts!
The basic recipe is as follows:
- 1 cup baking soda
- 1/3 cup distilled water
- 25 drops essential oil
Mix together. Add more baking soda and/or water to get the consistency to a thick paste. Spoon into silicone molds. Let air dry for 1-2 days, and then once completely dry store them in airtight containers.
To use place a shower steamer on the floor of your shower. Put it in a spot where it will get a little wet, but out of the main water stream. As the water hits it, it will dissolve and give off the aroma (and benefits) of the essential oils you used to make it. Be careful though to not get it too wet too quickly or it will just completely dissolve and run down the drain before you even get to enjoy the smell of the oils.
Don’t have the time to make a shower steamer? There’s a simple alternative:
Just put a few drops of essential oil on a washcloth. Put the washcloth in a spot on the shower floor where it will get a little wet, but out of the main water stream. As the water hits it, it will give off the aroma (and benefits) of the essential oils.
Source: One Essential Community
10 Helpful Tips for Diffusing Essential Oils
- Ensure the diffuser of your choice meets electrical safety standards for your country, especially since many are being shipped from China.
- Check the thickness or viscosity of the oils you wish to use. For instance, patchouli is a very thick oil and it can easily plug up your diffuser. If it takes forever to coax out of the oil bottle, it’s probably not a good oil to diffuse.
- Start slowly with diffusing times − this allows your body and your brain to become more accustomed to the oils. Start with 15 minutes per day and slowly increase the diffusing time. If diffusing makes you feel bad, it could be that your body is detoxing. Drink some water and back off the diffusing time until your body adjusts.
- Place the diffuser up as high as possible in the room so that the oil mist falls down through the air.
- Always wash the diffuser before use, especially when changing oils or blends. Read and follow the cleaning instructions supplied for your diffuser.
- In the ultrasonic cool mist diffuser, use distilled water for best results.
- Try not to use too many different oils together as this can be overwhelming to your senses. Diffuse two to three oils at a time for best results.
- If using a nebulizer-style diffuser, only run it for ten minutes at a time − two to three times per day for adults, and much less for children due to the concentrated nature of the essential oils emitted.
- If using the ultrasonic diffuser, make sure that the room where you wish to use the unit does not suffer with mold or mildew or you will need to treat that first with specific essential oils because this method does increase the humidity in the room where the diffuser sits.
- Do not use citrus oils in ultrasonic cool mist diffusers.
From: The Truth About Cancer
Why Diffuse Essential Oils?
 There is a profusion of good reasons for diffusing essential oils! Here are some of the best:
- Rid your home or office of unwanted odors and purify the air
- Deepen your meditation practice
- Get rid of dangerous airborne bacteria
- Help a loved one (or yourself) with a head cold or bronchitis get better quicker
- Promote a low stress but high functioning workplace
- Promote optimal sleep
- Remove mold from a room, basement, or attic
- Create calm and peace before guests arrive (or in the rooms of warring children!)
- Reduce food cravings
- Dispel negativity
- Boost immunity
- Increase mental clarity and recall
- Boost motivation
As you can see, diffusing essential oils makes a lot of sense for a lot of reasons!
From: The Truth About Cancer
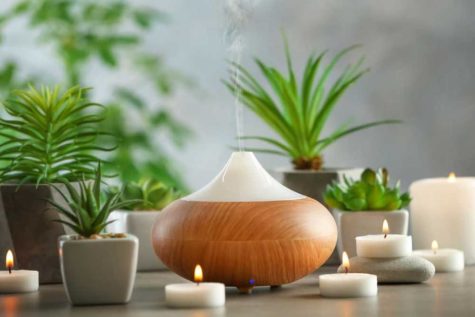
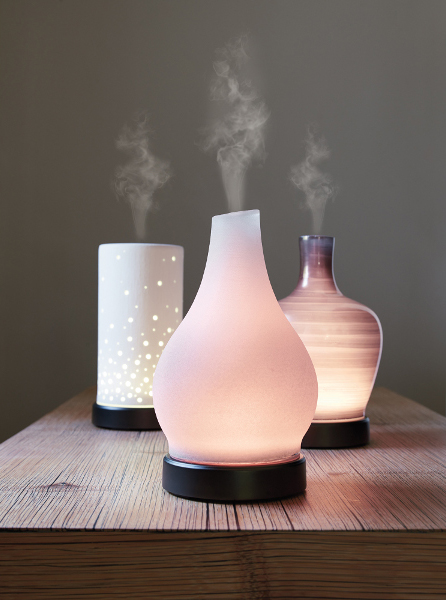
A Guide To Essential Oil Diffusers
If you’re an essential oil newbie (or even if you’ve been using oils for awhile) you might feel completely overwhelmed by the different methods of diffusing essential oils. After all, there are a vast array of diffusing devices out there in the market place. How do you know which essential oil diffusers are the best to use? Which ones are best avoided? Have no fear, this article will help you through the maze of essential oil diffusers. You’ll discover how they work, and the pros and cons of each one.
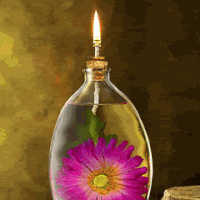
Tea Lght Essential Oil Burner
- How It Works:
Oil burners usually work by placing the essential oils of your choice into a ceramic reservoir, with or without water, and then placing it over a heat source. The heat source is usually a naked flame (like a tea light candle). The heat acts to vaporize the essential oil and release it into the air.
- Pros:
Oil burners are cheap, easy to find and they produce an excellent aroma. They are portable, robust and don’t easily break, and can be used pretty much anywhere that is safe (ie not a fire hazard and out of reach of children and pets). They are lovely to look at, and only a few drops of essential oil are required.
- Cons:
Oil burners require a lit candle, which means you’ll have a naked flame in your home and that means there is a fire risk. Also, oil burners create an aroma by heating the essential oil, which changes the composition of the oil slightly and you don’t get as pure an aroma as when you inhale the oil in its natural room temperature state. The heat from the candle flame obviously heats the bowl with the water and oil which means there is a risk of being burnt – be careful not to touch the bowl or spill the contents!
- Safety Precautions:
Oil burners are best kept out of reach of children and pets and on raised surfaces – bedside tables, coffee tables, cabinets, mantelpieces, desks and worktop surfaces etc. Also, please don’t leave them unattended… there is a naked flame and anything can happen! If you leave the room, it’s best to put the candle out. Make sure the water doesn’t completely dry up whilst the candle is still burning or you’ll burn the container.
Electric Essential Oil Burners
The electric essential oil burners are similar to a tea light essential burner, but instead of a lit candle, an electric element, such as a light bulb, is used to create heat, which vaporizes the oil and disperses it into the air. Some types consist of a terracotta ring that fits over an incandescent light bulb.
- Pros:
These burners are cheap, easy to find and they produce an excellent aroma. They are portable, robust and don’t easily break, and can be used pretty much anywhere within reach of an electrical outlet, and is safe (ie not a fire hazard and out of reach of children and pets). They are lovely to look at, and only a few drops of essential oil are required.
- Cons:
They are powered by electricity so there is a risk of electric shock – they should not be used in bathrooms or within reach of children or pets. Oil burners create an aroma by heating the essential oil, which changes the composition of the oil slightly and you don’t get as pure an aroma as when you inhale the oil in its natural room temperature state. The reservoir will be hot, so be careful not to touch the bowl or spill the contents!
- Safety precautions:
Electric oil diffusers are a little safer to use than oil burners because there is no naked flame. Just be very careful about the wire, especially with pets around! Also, don’t use them in a bathroom – electric appliances and bath water are not a good combination! Make sure you get one that has an automatic off switch. This helps to keep the diffuser in good working order and also helps to prevent any electrical problems that may cause a fire.
Reed Diffuser
- How It Works:
A reed diffuser comprises a small bottle or vase that is partially filled with an aromatic oil and several natural rattan reeds. The oil wicks up the reeds and releases the fragrance into the room where the diffuser sits, on an ongoing basis.
- Pros:
Reed diffusers look stylish. If you make your own you can utilize high quality essential oils and enjoy the aromas. They are inexpensive to make (depending upon the essential oils used).
- Cons:
Reed diffusing tends to be a more expensive way to diffuse essential oils because a large quantity of essential oil is required. Unlike nebulizers or ultrasonic diffusers, the aroma of the oil is not carried throughout the room, but only in a small zone around the reeds.
- Be Wary of Reed Diffuser Kits
The kit-style reed diffuser generally comes with a container of fragrance. This fragrance not usually therapeutic grade, and cannot be counted on to be free of pesticides, herbicides, or other chemicals that you may not want to diffuse into your home.
By making your own reed diffuser using organic essential oils and other good quality ingredients, you can turn this style of diffusing into a much healthier and enjoyable way to diffuse essential oils.
Nebulizer Diffuser
- How It Works:
When you turn on the nebulizer − sometimes known as a cold air diffuser − an air pump sends condensed air to a nozzle tube which controls the direction of the oil. A stream of air whizzes across the nozzle tube, creating a vacuum and causing the essential oils to move upward. As they rise, the stream of pressurized air hits the essential oil droplets and causes them to atomize into micro-particles which fill a glass reservoir. Once in the glass reservoir, the micro-particles rise and are emitted out of a glass cap as a vapor which is released into the room.
- Pros:
This type of diffuser is considered to be one of the most therapeutic because the essential oils are not diluted − the nebulizer operates without water or a carrier oil. It also does not heat the essential oils, thus the therapeutic properties of the oils are retained. The essential oil molecules released into the room are so fine they tend to remain suspended in the air for a few hours. Some feel this method energizes the oils and increases the oxygen content in the oil molecules. Another benefit is that it adds no humidity to the room, which can occur with the ultrasonic cool mist diffuser. Most models allow you to sit the bottle of essential oil directly on the atomizer so it is relatively easy to use.
- Cons:
Nebulizers tend to cost more than other styles of diffusers for essential oils. A nebulizer can be fairly noisy while operating unless it is specifically designed not to be. To avoid this, look for models that say “whisper quiet” or “silent.” Because the essential oils are not diluted, much more essential oil is utilized during operation. This method really eats up the oils.
It is more difficult to use a blend of essential oils since a single bottle is normally placed on the atomizer. You can overcome this by mixing up the oils of your choice and putting them into an essential oil bottle, or by using a pre-made essential oil blend.
Ultrasonic Cool Mist Diffuser
- How It Works:
An ultrasonic diffuser has a water reservoir that is covered with a lid. At the bottom of the unit is a small, flexible membrane which vibrates ultrasonically. This passes energy to the water, breaks up the water molecule, and turns it from a liquid into a vapor. The vapor is propelled into the air and carries along with it the volatile components of the essential oils. It effectively disperses the oils you are using into the entire room where the diffuser is sitting and helps them to stay suspended in the air for a long period of time.
- Pros:
This is one of the most economical ways to diffuse essential oils. Due to the fact that the oils are dripped into a water reservoir, only a few drops of each oil are required. The cool mist diffuser can double as a humidifier − it does add humidity to the room. This type of diffuser generally has a timed function so you can set it to run for a particular length of time. It usually also has a safety off-switch when the water level falls too low, and is easy to clean and refill. Some ultrasonic diffusers also have lights that change colors, which is a nice feature to some people. This is a good style of diffuser to use with children as the concentration of the oil will not be too potent.
- Cons:
The ultrasonic cool mist diffuser can be a little on the expensive side although cheaper models are increasingly available. Also, because it does emit the oils in a micro-fine mist, it does add humidity to a room. If there is an existing mold problem, this may not be the best diffuser to choose. It is also not recommended to use citrus oils with the cool mist diffuser because they can potentially damage the diffuser.
The Oldest Method – Your Hands!
- How It Works:
Simply drip the oils you wish to breathe into your hands, just a drop or two will suffice. Rub your hands together and make a tent over your nose with your hands (be careful to leave your eyes out of the tent) and breathe in deeply. Some have described this process to be as if one were pulling the oils up into and over the brain and/or lungs. Take several deep breaths.
- Pros:
This is one of the quickest ways to get instant results. It is cost-effective, as it only requires one to two drops of essential oil. It can be done almost anywhere.
- Cons:
The benefits are only enjoyed by one person, and only briefly as the oils are absorbed by the skin quite quickly. If the desire is to get rid of airborne bacteria, or mold, or to have more than one person reap the benefits, diffusing by nebulizer or ultrasonic diffuser is preferable.
From: The Truth About Cancer and other sources.
7 DIY Essential Oil Blends
Many essential oils are sold as blends, but here are seven different blends of essential oils that you can easily make yourself. Start with a 1:1 ratio of oils (i.e. 1 drop lavender + 1 drop orange), but feel free to experiment with different proportions of oils to suit your personal taste.
- Lavender with Orange:
Both are calming essential oils that help to relieve anxiety and stress, improve immune system function, and are antibacterial oils. Great for diffusing prior to sleep.
- Clove with Grapefruit:
These oils are effective antibacterial and antifungal oils, so if you do have a problem with mold in your house, this would be a good pair to diffuse. They are also both powerful anti-inflammatory oils.
- Rosemary with Clove and Eucalyptus:
This is a powerful combination against airborne bacteria. This would be a great trio to help someone fight or prevent a cold, bronchitis, or flu. Add or substitute oregano essential oil for additional germ-killing power.
- Basil with Geranium Rose and Orange:
This trio makes a great study blend or for any time when increased mental functioning would be useful. All three oils have been researched for increasing mental alertness, brain clarity, and concentration. If nervous jitters are also present, add a single drop of lavender to the diffuser.
- Geranium Rose with Lavender and Oregano:
If allergies are causing you big problems, this trio of oils has research showing they have anti-allergy properties. Oregano works by decreasing inflammatory markers. Lavender has anti-inflammatory effects and has been used to treat asthma. Geranium rose has an inhibitory effect on certain immune cells involved with triggering allergic reactions.
- Frankincense with Orange or Lemon:
Spiritually uplifting, great for meditation, and relieving stress. It is also good for assisting creativity.
- Pine, Cinnamon, and Orange:
Spicy, warming, and uplifting, this blend is great for massage sessions, meditation, clearing the mind, and grounding.
Source: The Truth About Cancer
Perk Up Diffuser Blend
Here is a great Diffuser Blend to try, it will make you home smell good and it is perfect for a natural perk up in the morning before work or school:
- 2 drops Lemon essential oil
- 2 drops Orange essential oil
- 2 drops Peppermint essential oil
- 2 drops Rosemary essential oil
Source: Loving Essential Oils
Best Diffuser Blends for Sleep

- Blend #1
3 drops Lavender
3 drops Cedarwood
- Blend #2
3 drops Bergamot
3 drops Lavender
- Blend #3
3 drops Lavender
3 drops sweet (wild) Orange
- Blend #4
2 drops Lavender
2 drops Vetiver
2 drops Marjoram
- Blend #5
3 drops Roman Chamomile
2 drops Bergamot
2 drops Frankincense
- Blend #6
2 drops Lavender
2 drops Roman Chamomile
2 drops Marjoram
- Blend #7
3 drops Patchouli
2 drops wild (sweet) Orange
2 drops Frankincense
- Blend #8
3 drops Vetiver
3 drops Lavender
2 drops Frankincense
- Blend #9
3 drops Lavender
3 drops Vetiver
- Blend #10
3 drops Patchouli
3 drops sandalwood
Source: One Essential Community

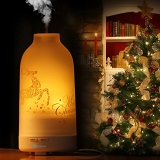
Be Merry