DIY
Make Your Own Hydrosols

It’s true that it’s easier just to buy a pre-made hydrosol, but it can also be kind of expensive, especially when you factor in the shipping costs you’ll probably have to pay if you buy a hydrosol online. And chances are pretty good you would have to shop online for one because hardly any stores carry hydrosols except for maybe rosewater, and even then you usually have to watch out for added preservatives or other ingredients.
Pure, good-quality hydrosols are hard to find. And if you want a hydrosol that’s different from the standard rosewater (like elderflower water), it’s even harder to find.
If you make your own homemade hydrosol, though, you can choose exactly which flowers or herbs you want to use. And the best benefit of all is that it is so much cheaper to make your own. Like ridiculously cheap!
For 4 oz of a good-quality hydrosol, you’ll probably spend between 5-10 dollars. And then add shipping on top of that if you order it online.
I made about 4 oz (I was so excited to try using my hydrosol that I forgot to measure exactly how much I had . . .) for about 1 dollar. That’s it! I used some dried elderflowers that I had bought for $4.75, and I didn’t even use a quarter of the package to make my hydrosol. So, for less than the price of one store bought bottle of hydrosol, I can make four bottles myself at home.
Bonus number three of making your own homamde hydrosol is that you don’t have to wait a week for it to arrive in the mail. You can have it right away. And the final bonus of making a hydrosol yourself is that your house will smell absolutely amazing while your flowers or herbs simmer on the stove.

What You Need:
To make a homemade hydrosol, you will need the following:
- Large stockpot
- Round cake pan (or stone, or bowl, etc.)
- Bowl to catch the distilled water
- Lid for large stockpot
- Ice (plenty)
- Filtered water
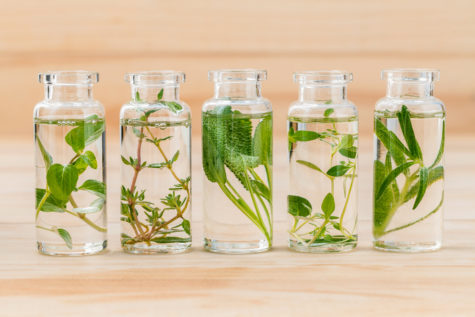
- Organic herbs or flowers
* I believe that the traditional method of making a hydrosol usually uses fresh flowers and herbs instead of dried ones. Seeing as how I have no access to fresh elderflowers at the moment, though, I decided to try making a hydrosol with dried flowers instead. You could also try lavender flowers, or roses, or herbs like rosemary or thyme.
I’m definitely no expert on hydrosol-making yet, especially since this was only my first experiment with hydrosols, but the dried flowers seem to have worked quite well. There may be a difference in the strength of the hydrosol between using fresh flowers and dried ones, but I’ve tried several different hydrosols before, and the hydrosol I made with the dried flowers seems to be the same. It’s hard to describe exactly, but my homemade hydrosol looks, smells, and feels just like the other hydrosols I’ve tried.
When the season for fresh flowers comes around again, I’d like to try making a hydrosol again using fresh fowers. Maybe I’ll even try a different type using some of the herbs and flowers in my garden like lavender or chamomile.
How it works:
Hydrosols are made when the herbs and flowers are distilled using steam into a water that contains the properties of the herb or flower. I am nowhere even close to being a scientist, but basically what you are trying to do is to create a situation where steam (containing your filtered water and the herbs or flowers you are using) will rise to the top of your stockpot, hit a cold, ice-filled lid, and then condense back into water and drip into your bowl, making your hydrosol.

These are the things you need to do to create this type of situation:
- Something flat and stable to hold up the bowl that will catch the hydrosol (see C in the above graphic).
Place a flat object in the bottom of your stockpot. Some methods involve using a brick or a stone, but since I was making the elderflower water in the middle of a blizzard, I wasn’t about to go outside and dig around in the drifts of snow, so I rummaged through the kitchen cupboards instead to find anything that would work.
I tried a few different things but couldn’t find anything that wasn’t either too tall or wide. I finally found that an 8″ cake pan, resting upside down in the pot, was the perfect fit. Just about any object could work here, as long as it is heat safe. It’s best if it has a flat surface, though, so that your bowl can rest easily on the top. You want something that will allow your bowl to sit a couple of inches higher than the bottom of the stockpot.
- A heat safe bowl to catch the condensation (see B in the above graphic)
Place a small, heat-safe bowl on top of the cake pan. You’ll want to use a bowl that is large enough to catch the condensed water, but you don’t want the bowl to be too large and tall. You need to be able to rest the lid of the stockpot upside down on top of the pot. I found that a regular cereal-sized bowl was the best size for my pot.
- Filtered water
Fill the stockpot with filtered water up to the level of the upside-down cake pan. You want to use either filtered water or spring water for this, not tap water, because whatever might be in the tap water (chlorine, fluoride, etc.) will end up in your final product.
- Herbs or flowers
Place your herbs or flowers on top of the filtered water. There’s no exact measurement for how much you need to use, but the more of your herb or flower that you use, the more concentrated your hydrosol will be in the end. I used about 2/3 of a cup of dried elderflowers to about 6 cups of water. The amount of water you use will depend on the size of your pot and the height of your cake pan (or other flat object) of course.
- Heat
Put your pot on the stove at medium heat until the water reaches a low boil. You don’t want a rolling boil, just a light one. Once you’ve reached a low boil, reduce the heat to low so that the water will just simmer.
- An inverted lid filled with ice to create the condensation
Place your lid upside down on the pot and fill the surface of the lid with ice. It’s best to put the ice in little sandwich baggies so that you don’t have a watery mess inside the lid when the ice starts to melt. You also want to make sure you have plenty of ice on hand in the freezer to refill the bags when they start to melt. I ran out of ice and I ended up refilling the bags over and over again with cold water because I hadn’t realized how much ice I would need.
- Time and Patience
Let the pot simmer for a couple of hours, occasionally checking the level of water inside the bowl and the state of your ice. You don’t want to lift the lid of the pot too often or all of your steam will just evaporate instead of condensing back into water, but every once in awhile you want to check to make sure that your bowl isn’t overflowing.
You’ll also want to check the ice on top of the lid to see if the bags need to be refilled with fresh ice. You can let the pot simmer until your bowl is full or until all of the water at the bottom of your pot is gone. I let mine go for about 2 1/2 hours.
- And that’s it!
Once your pot has finished simmering, turn off the heat and let it cool down (with the lid still on so you don’t lose any hydrosol from evaporation.) Once it’s cool, remove the bowl with your hydrosol and pour it into a bottle or jar to store it.

Storing Your Hydrosol
Hydrosols keep best if you store them in a cool, dark place. If it’s cool in your house and you’re planning to use your hydrosol up within a few weeks, storing your hydrosol in a cupboard would probably be just fine. If it’s summertime and your house is very hot, though, or if you’re planning to store your hydrosol for several months, keeping it in the fridge would probably be the best idea.
If you’re going to use your hydrosol as a toner for your face or as a body spray and you can’t stand the idea of using it cold straight from the fridge, you could always store it in two different bottles – a large one to keep the majority of the hydrosol fresh in the fridge, and a smaller one you can keep at room temperature so you don’t have to feel like you’re rubbing an ice cube on your face.
I like to use glass cork-topped bottles for storing my hydrosol because they’re pretty and they look old-fashioned, but any glass bottle or jar will do.
Found at: Our Heritage of Health
Hydrosols for Intimate Apparel

The summer is a very appropriate time to experiment with hydrosols, washing your intimate apparel, silks, and scarves in the gentle essences of blossoms. Here’s how:
Fill a basin 2/3 full of spring water. Add 1/4 cup soapwort infusion (soapwort is used traditionally for valuable textiles ~ but any mild soap will do as long as it is safe for use on the fabrics you are washing).
Next add 1 cup of your favorite hydrosol. Swish clothing in this water gently to work up lather. Soak 20 to 30 minutes. Rinse. Hang up to dry.
Qualities of the three most popular hydrosols to consider:
- Lavender is relaxing and unisex.
- Neroli builds confidence in sexuality, and helps with recovery from embarrassment.
- Rose lends energy, is stimulating, and aids the adventurous spirit.
From: Four Seasons of Mojo
Make Your Own Lemon Oil
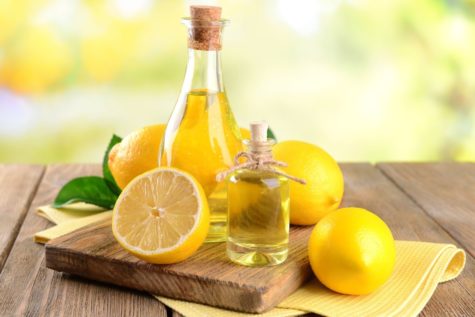
It’s not difficult to make your own Lemon Oil. These simple recipes use the cold process method. Because this method does not use heat the enzymes and micronutrients are better preserved, but the Lemon oil you make will not be as strong as the distilled Lemon essential oil that you might purchase.
Recipe #1
Ingredients
- 1 lemon
- Cold-pressed olive oil
Directions
Grate the outside of the lemon over a bowl. Fill a small glass bottle halfway with the grated lemon zest. Fill the rest of the bottle with olive oil. Set the bottle on a windowsill or somewhere else that gets a lot of sun.
Leave it there for a few days, but shake the bottle a few times per day. Store lemon oil in an airtight container at room temperature.
Recipe #2
Ingredients
- Lemons
- Coconut Oil
Directions
Wash and dry lemons. Using a vegetable peeler, cut thin slivers of the yellow skin in long ribbons. (Or if you have a zester, use that!) Make sure not to peel off the bitter white pith, just the outside will do. Pack peels tightly in a jar, then pour in just enough coconut oil to cover.
Place in a sunny window for 1-2 weeks, shaking every day. Strain peels and pour oil into a jar. Store in a dark cabinet or the fridge.
Recipe #3
I prefer an olive oil infusion for salads, but because it’s so vulnerable to oxidation via sunlight I let mine “steep” longer in a dark cabinet to attains its distinct flavor. Like the cold process coconut oil version, this method preserves enzymes and micronutrients.
Ingredients
- Lemons
- Olive Oil
Directions
Wash and dry lemons. Using a vegetable peeler, cut thin slivers of the yellow skin in long ribbons. (Or if you have a zester, use that!) Make sure not to peel off the bitter white pith, just the outside will do. Pack peels snugly in a jar, then pour in just enough olive oil to cover. Seal tightly and place in a dark cabinet for 1-2 months, shaking every few days.
Strain peels and pour oil into a jar. Store in a dark cabinet or the fridge.
Sources:
How to Make Your Own Essential Oils
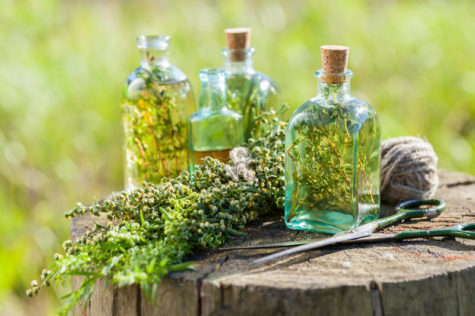
Making your own pure essential oils at home involves a distilling process and this means purchasing or building your own still! While it is possible to make your own still from various items around the home, it may be safer to purchase a home still from an online store. Something like one of these alcohol stills on Amazon will set you back over a hundred dollars, but could be viewed as a nice investment.
Having said that, if you intend to build a home still, you can find the parts you need in a home-brew store or the specialist section in a hardware store. For in-depth directions, I would advise that you take a look at this book on Amazon The Secrets of Building an Alcohol Producing Still.
As a beginner we recommend that you start with an alternative and more traditional oil infusion process. An oil infusion will give you very nice fragrant results, and although not as strong as distilled essential oil you can vary the strength for your needs, and you will not need to dilute.
The key to making good oil infusions is choosing the right materials. You’ll need to use pale colored oil that has a mild scent that won’t overpower the flowers, herbs or spices you intend to use with it. Olive oil, jojoba oil, safflower oil, almond oil or canola oil can often work very well.
-
Choosing Herbs
You can use almost any garden herb when you make your own essential oil. You should use the leaves and flowers, but avoid using any woody stems or branches. Always chop the leaves to release their scent before you add them to the oil. The most popular are Lavender, Rosemary, Peppermint, Thyme and Lemon Balm.
-
Choosing Spices
Perhaps the most common spices found in essential oils are the most aromatic. The most popular seem to be Cinnamon, Coriander, Cumin, Nutmeg and Cloves. You will need to crush the spices to release their aromas fully before adding them to your oils with a mortar and pestle.
-
Choosing Flowers
Scented flowers are very popular additions into many homemade essential oils. You can decide to use one or a combination of flowers in your own oils. Be sure you use the petals only as these hold much of the fragrance you want.
Cut the flowers while they are still not completely opened and remove the petals for use in your oils. Most fragrant flowers are fine to use in essential oil, such as Roses, Carnations, Frangipani, Hyacinth, Lavender, Violets, Marigolds and plenty of others.
Important Points
Now, when you make your own essential oil there are a few things to keep in mind:
- The plant material you use must be clean and free of pesticides, herbicides, fungicides, and other chemicals.
- The final product will not be as potent as essential oils you can purchase.
- You can use fresh or dried plant material.
- You can use herbs, spices, flower petals, or citrus fruit rinds.
- Always store infused and essential oils in dark, glass containers in a cool, dark place.
Extraction and Infusion Methods:
These are all primitive methods of distilling or extracting the oil out of the plant material. The heat used in the distilling methods below will damage the essential oil and will lessen some of the benefits from the essential oils. Also, the oils obtained from the extraction methods below will not be 100% pure.
The methods are listed in order of the quality of essential oil you’ll get (best first).
-
Method #1
Place plant material into a crock pot filled with distilled water. Cook on low for 24 hours. Leave crock pot open and allow it to sit for a week. Collect the oil off the surface of the water and put it into a dark, glass container. Cover with a piece of cloth and allow it to sit for a week to evaporate off any extra water. It will last for about 12 months.
-
Method #2
Place ground up plant material in a cotton or linen bag. Tie it shut and place it in a pot of distilled water. Bring water to a boil and simmer slowly for 24 hours. Collect the oil off the surface of the water (you may have to squeeze the bag) and put it into a dark, glass container. Cover with a piece of cloth and allow it to sit for a week to evaporate off any extra water. It will last for about 12 months.
-
Method #3
Half-fill a large glass bottle with olive oil (or almond, jojoba, or rapeseed). Cram as much plant material as possible into the bottle. Cap it and let it sit in a cool, dark place for 24 hours. Shake it. After three days strain it through cheese cloth and put liquid in a dark, glass container. (If scent is not strong enough add more plant material and repeat process.) It will last for about 6 months.
-
Method #4
Stir 1/2 ounce of plant material into 2 cups olive oil (or almond, jojoba, or rapeseed). Cook in crock pot on low for about 6 hours. Strain the mixture with unbleached cheese cloth and put liquid in a dark, glass container. It will last for about 6 months.
-
Method #5
Place 1 Tablespoon ground up plant material, 1/2 cup of olive oil (or almond, jojoba, or rapeseed), and 1/2 teaspoon of white vinegar into a small bottle (cap on). Put it in a warm place (sunny window) for three weeks. Shake it well twice a day. Strain the mixture with unbleached cheese cloth and put liquid in a dark, glass container. It will last for about 6 months.
-
Method #6
Soak plant material in a bottle of rubbing alcohol for two weeks (cap on). Pour it out into a wide container. Allow alcohol to evaporate. Collect the oil left in the container and put it into a dark, glass container. It will last for about 6 months. Please note that this method should NOT be consumed.
Have fun making your own essential oils!
Found at:
Make A Gel Diffuser
Have you tried making a gel air freshener? These are incredibly simple to make. It’s just polymer absorbent crystals (like these), water, and essential oils. The polymer absorbent crystals also come in the form of beads (clear and colored), and are called “water beads.”
Here’s a recipe from One Essential Community:
- 1 tsp water-storing crystal (a little goes a long way)
- 1 cup hot water
- 20 drops essential oil
Stir together until well mixed. Keep gel freshener in glass jar without a lid (so that the gel/oil mixture can easily scent the air). Large glass salt and pepper shakers are decorative, and have holes in the lids to allow the aromas to diffuse easily.
- If you are using water beads:
1 tsp dry beads will yield about 1 quart when fully hydrated. The marble size creates glimmering floral or candle arrangements in clear vases and bowls. Ideal for candle, silk and fresh flower arrangements. Easy to use – just add water and essential oils. Layer your favorite colors for stunning effects.
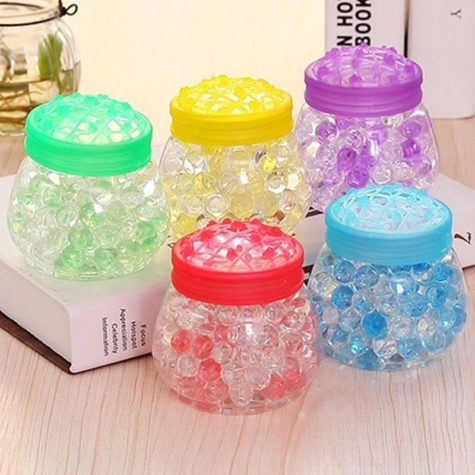
Beads can be allowed to shrink and dry out for later use, or be kept alive by adding water and essential oils every 7 weeks. Completely non toxic however should not be placed in mouth due to choking hazard.
If you decide to use water beads, you can find them at Walmart and on Amazon. More about water beads can be found at the Jelly Beadz website. Here’s a link to their FAQ.
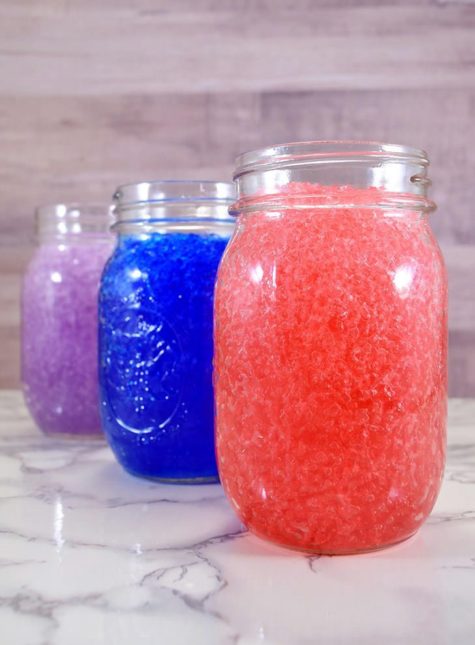
Make it with Gelatin
If you prefer, you can make your own gel. It’s pretty simple. This recipe is from One Good Thing. Here’s what you need:
- 1 cup water
- 2 individual envelopes of unflavored gelatin
- 1 Tbsp. Salt
- 20 drops of your favorite essential oils
- Heat-Safe Containers
- Food Coloring (optional)
- Silk Flowers (optional)
In a small saucepan on the stove, heat 3/4 cups of water (or liquid potpourri) and the salt. When the salt is completely dissolved, slowly add the gelatin, and stir until that is completely dissolved as well. If you add the gelatin too quickly, it might get a little sticky and “clumpy,” but just keep stirring until it dissolves.
Remove the saucepan from the heat and then add the remaining liquid. Stir until fully blended, and pour the mixture into the containers of your choice.
Now add your essential oils. You can always add more or less essential oils based on your preference, and you can do different oils in each air freshener!
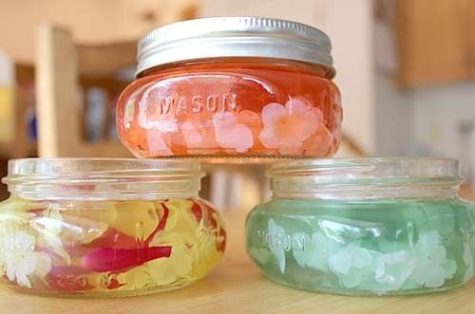
Now it’s time for a bit of decoration, if you want to! Some silk flowers and a drop or two of food coloring make them look so fun! Now that your air fresheners are scented, colored and decorated; let them cool to room temperature.
You don’t have to add a lid, but the gel will dry out a little faster without a lid. You could also use a hole punch to make your own vented lid! Just a couple of punches through a standard lid will work perfectly.
This project is super easy, and a cute flowery air fresheners would make a great hostess gift! You could easily double or triple the recipe to make more at a time, but keep in mind that they do dry out in a month or so (faster if you don’t use a lid of some sort.)
Make A Shower Steamer
No time for baths, but love the aromatherapy benefits of bath bombs? Try shower melts!
The basic recipe is as follows:
- 1 cup baking soda
- 1/3 cup distilled water
- 25 drops essential oil
Mix together. Add more baking soda and/or water to get the consistency to a thick paste. Spoon into silicone molds. Let air dry for 1-2 days, and then once completely dry store them in airtight containers.
To use place a shower steamer on the floor of your shower. Put it in a spot where it will get a little wet, but out of the main water stream. As the water hits it, it will dissolve and give off the aroma (and benefits) of the essential oils you used to make it. Be careful though to not get it too wet too quickly or it will just completely dissolve and run down the drain before you even get to enjoy the smell of the oils.
Don’t have the time to make a shower steamer? There’s a simple alternative:
Just put a few drops of essential oil on a washcloth. Put the washcloth in a spot on the shower floor where it will get a little wet, but out of the main water stream. As the water hits it, it will give off the aroma (and benefits) of the essential oils.
Source: One Essential Community
7 DIY Essential Oil Blends
Many essential oils are sold as blends, but here are seven different blends of essential oils that you can easily make yourself. Start with a 1:1 ratio of oils (i.e. 1 drop lavender + 1 drop orange), but feel free to experiment with different proportions of oils to suit your personal taste.
- Lavender with Orange:
Both are calming essential oils that help to relieve anxiety and stress, improve immune system function, and are antibacterial oils. Great for diffusing prior to sleep.
- Clove with Grapefruit:
These oils are effective antibacterial and antifungal oils, so if you do have a problem with mold in your house, this would be a good pair to diffuse. They are also both powerful anti-inflammatory oils.
- Rosemary with Clove and Eucalyptus:
This is a powerful combination against airborne bacteria. This would be a great trio to help someone fight or prevent a cold, bronchitis, or flu. Add or substitute oregano essential oil for additional germ-killing power.
- Basil with Geranium Rose and Orange:
This trio makes a great study blend or for any time when increased mental functioning would be useful. All three oils have been researched for increasing mental alertness, brain clarity, and concentration. If nervous jitters are also present, add a single drop of lavender to the diffuser.
- Geranium Rose with Lavender and Oregano:
If allergies are causing you big problems, this trio of oils has research showing they have anti-allergy properties. Oregano works by decreasing inflammatory markers. Lavender has anti-inflammatory effects and has been used to treat asthma. Geranium rose has an inhibitory effect on certain immune cells involved with triggering allergic reactions.
- Frankincense with Orange or Lemon:
Spiritually uplifting, great for meditation, and relieving stress. It is also good for assisting creativity.
- Pine, Cinnamon, and Orange:
Spicy, warming, and uplifting, this blend is great for massage sessions, meditation, clearing the mind, and grounding.
Source: The Truth About Cancer
Make A Reed Diffuser
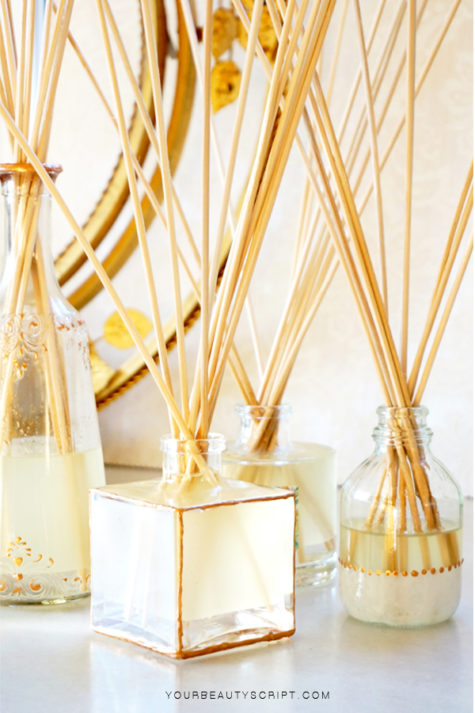
Reed diffusers are great for small spaces and rooms where you may not have easy access to a wall outlet. They’re perfect for bathrooms, foyers, and closets!
It only takes a few ingredients, and you probably have most (if not everything) you need already in your kitchen. There are so many great reasons to make your own reed diffuser:
- Much less expensive than buying one, and they work great!
- Almost anything (with a narrow neck) works as a vase– match your décor!
- Create your own custom scent.
- It’s really simple. Just mix 3 ingredients together and you’re done.
- Great for small rooms where a plug-in diffuser just isn’t practical- perfect for bathrooms!
- Makes a great gift too!
Making A Reed Diffuser
It’s simple. All you need is…
- A glass container with a narrow opening (to slow evaporation)
- 1/4 cup of a light oil like apricot kernel oil or safflower oil
- 15-20 drops essential oil
- 2 Tbsp of alcohol to help oils travel up reeds (vodka works great)
- Reed sticks
First You Need A Container
Any narrow-opening container made of an essential-oil-safe material can be turned into a reed diffuser. Glass, ceramic, earthenware, wood, or stainless steel all work great. Look around your home, you probably already have something that will work. Other great places to find a vase or jar for your reed diffuser?
- Garage sales
- Consignment stores
- Goodwill or other thrift stores
- Craft stores (Michaels, JoAnn’s, Hobby Lobby)
The How To:
- Add 1/4 cup of a light oil (like apricot kernel oil or safflower oil) to a glass measuring cup
- Add 2 Tbsp of alcohol to the measuring cup. The alcohol is to help thin out the oils and help oils travel up reeds. Cheap vodka works great!
- Add 15-20 drops essential oil
- Use one of the reeds to stir the oil and alcohol mixture. Stir well until the essential oils and carrier oil are somewhat well dispersed in the alcohol.
- Pour the oil and alcohol mixture into your chosen container
- Bundle the reeds and insert them into the neck of the vase
- Fan the reeds out
The oil will saturate into reeds, and as it wicks up the reeds, it will release the aroma into the air. It will take a few days for the reeds to absorb the oil. Flip sticks every few days to refresh scent. Replace the oil-alcohol mixture once it evaporates and replace the reed sticks about once a month.
Some Favorite Essential Oil Blends
The following blends are perfect for using in this reed diffuser:
- 10 drops Eucalyptus + 10 drops Spearmint
- 6 drops Grapefruit + 6 drops Orange + 4 drops Lemon + 2 drops Bergamot
- 3 drops Geranium + 9 drops Lavender + 6 drops Orange
- 9 drops Lavender + 6 drops Clary Sage + 6 drops Orange
- 6 drops Lemongrass + 6 drops Lavender + 6 drops Eucalyptus
- 6 drops Tangerine + 6 drops Spearmint + 6 drops Lemongrass
- 3 drops Geranium + 6 drops Lavender + 9 drops Lime
- 12 drops Lemon +3 drops Frankincense + 3 drops Ylang Ylang
- 6 drops Lavender + 6 drops Lemon + 6 drops Rosemary
- 6 drops Lavender + 6 drops Lemon + 6 drops Peppermint
- 6 drops Lemon + 6 drops Lavender + 6 drops Grapefruit
Source: One Essential Community
Make Your Own Room Sprays
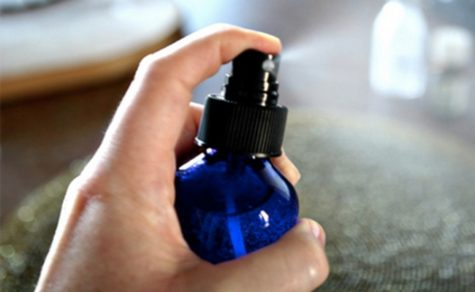
I love making room sprays! It’s an all-natural (chemical and toxin-free) way to freshen my home, bring in the scents of the season, and get the amazing therapeutic benefits of essential oils. They’re so easy to make and they save money over those commercial sprays.
These room sprays are, of course, great to use in your own home, but they also make FABULOUS GIFTS for teachers, friends, hairdressers, moms, neighbors, sisters, … makes a unique hostess gift, thank you gift, gift exchange item, teacher gift, …. They’re cute, functional, non-toxic, and smell AMAZING!!
Recipe #1:
- 16 oz glass spray bottle
- 8 oz distilled water
- 2 oz. organic witch hazel (or substitute 2 tsp Epsom salt)
- 30-40 drops essential oil
- Shake well before each use
Recipe #2:
- This recipe calls for a 2 oz glass spray bottle.
- Fill 1/4 of the bottle with vodka.
- Add 10 – 15 drops essential oil and shake.
- Fill the rest of the way with distilled water.
Recipe #3:
- 4 oz spray bottle
- 1 tablespoon of vodka or rubbing alcohol
- 20 – 30 drops essential oil
- 6 tablespoons of water
The glass spray bottles can be found on Amazon (here), and come in amber, blue, and clear.
When You Don’t Have A Diffuser

You don’t have to have a diffuser to enjoy the benefits of aromatherapy. Here are some simple ideas for how to benefit from the healing fragrances of essential oils without having to buy a diffuser
- Inhale Directly from an Essential Oil Bottle
This basic approach to getting the aromatic benefits of essential oils works great in a pinch. Simply uncap the essential oil bottle, hold it a few inches from your nose and move your hand back and forth over the top of the essential oil bottle, moving the essential oil vapors towards your nose.
- Use Your Hands
Put a drop of essential oil in your hand, rub your hands together, then cup your hand over your nose and inhale deeply
- Toilet Paper Roll
Put a few drops of essential oil on the cardboard tube inside a roll of toilet paper. Every time someone unrolls some toilet paper air will flow across the essential oil and diffuse it into the air. Use single oils like lavender, lemongrass, or orange. Or combine a couple different essential oils for great new blended scents.
- Furnace Filter
Put a few drops of essential oil on your furnace filter. When the furnace blows air over the filter the essential oils will be diffused throughout your home. The scent will fade after a couple of days. You’ll need to add additional drops of essential oil to the furnace filter every couple of days.
- Use a Cotton Ball
Just need a quick burst of essential oils? Try using a cotton ball. Put a few drops of essential oil on a cotton ball and then place the cotton ball in your car vent, in your floor vent, or even on the blade of a fan (please be safe– unplug fan and then tape the cotton ball to the fan and completely remove hands from the fan before plugging it back in and turning it on).
- Tissue Method
Don’t have a cotton ball? No Problem. You can use a tissue instead. Put a couple drops of essential oil on a tissue and put it near where you work or sleep.
- Pillow Method
Don’t have a cotton ball or a tissue? No problem. Use a cloth or even your pillow case. Put a couple drops of essential oil on the corner (or even underside) of your pillow. Perfect way to drift off and have a great night’s sleep.
- Stuffed Animal
Similar to the pillow method, you can also put a couple drops of a kid-safe essential oil (like lavender) on a favorite stuffed animal.
- Facial Steamer
Pour hot water into a bowl and add a few drops of essential oil, cover your head and the bowl with a towel, and breathe deeply.
- Baking Soda in a Jar
Want the perfect little air freshener for a closet or mud room? Try baking soda and essential oils in a mason jar. Easy and effective! Fill a wide mouth 1 pint mason jar 1/2 full of Baking Soda, then add about 8-12 drops of your favorite essential oil.
You can paint the outer ring of the lid with spray paint to match your decor. The inner disc of the lid can be replaced with card stock or other thick decorative paper that has been cut to fit. This makes it easier to poke holes in the lid to allow the aroma to diffuse into the room.
- Scented Pinecones
If you have collected pinecones from your yard or nature, then first start with baking the bugs out of your pinecones. Bake in 200 degree oven for 1 hour and then let completely cool
If you bought your pinecones at a store or are reusing ones from your collection of decorations, then you can skip the baking step.
Place your pinecones in a large glass or stainless steel bowl. Sprinkle pinecones with 15-20 drops of cinnamon essential oil (or Christmas blend of your choice). Toss them to coat. Cover bowl tightly. Every couple of days shake pinecones to distribute essential oil and scent. After a few weeks the pinecones are ready to use.
Source: One Essential Community