Hydrosol
Make Your Own Hydrosols
It’s true that it’s easier just to buy a pre-made hydrosol, but it can also be kind of expensive, especially when you factor in the shipping costs you’ll probably have to pay if you buy a hydrosol online. And chances are pretty good you would have to shop online for one because hardly any stores carry hydrosols except for maybe rosewater, and even then you usually have to watch out for added preservatives or other ingredients.
Pure, good-quality hydrosols are hard to find. And if you want a hydrosol that’s different from the standard rosewater (like elderflower water), it’s even harder to find.
If you make your own homemade hydrosol, though, you can choose exactly which flowers or herbs you want to use. And the best benefit of all is that it is so much cheaper to make your own. Like ridiculously cheap!
For 4 oz of a good-quality hydrosol, you’ll probably spend between 5-10 dollars. And then add shipping on top of that if you order it online.
I made about 4 oz (I was so excited to try using my hydrosol that I forgot to measure exactly how much I had . . .) for about 1 dollar. That’s it! I used some dried elderflowers that I had bought for $4.75, and I didn’t even use a quarter of the package to make my hydrosol. So, for less than the price of one store bought bottle of hydrosol, I can make four bottles myself at home.
Bonus number three of making your own homamde hydrosol is that you don’t have to wait a week for it to arrive in the mail. You can have it right away. And the final bonus of making a hydrosol yourself is that your house will smell absolutely amazing while your flowers or herbs simmer on the stove.
What You Need:
To make a homemade hydrosol, you will need the following:
- Large stockpot
- Round cake pan (or stone, or bowl, etc.)
- Bowl to catch the distilled water
- Lid for large stockpot
- Ice (plenty)
- Filtered water
- Organic herbs or flowers
* I believe that the traditional method of making a hydrosol usually uses fresh flowers and herbs instead of dried ones. Seeing as how I have no access to fresh elderflowers at the moment, though, I decided to try making a hydrosol with dried flowers instead. You could also try lavender flowers, or roses, or herbs like rosemary or thyme.
I’m definitely no expert on hydrosol-making yet, especially since this was only my first experiment with hydrosols, but the dried flowers seem to have worked quite well. There may be a difference in the strength of the hydrosol between using fresh flowers and dried ones, but I’ve tried several different hydrosols before, and the hydrosol I made with the dried flowers seems to be the same. It’s hard to describe exactly, but my homemade hydrosol looks, smells, and feels just like the other hydrosols I’ve tried.
When the season for fresh flowers comes around again, I’d like to try making a hydrosol again using fresh fowers. Maybe I’ll even try a different type using some of the herbs and flowers in my garden like lavender or chamomile.
How it works:
Hydrosols are made when the herbs and flowers are distilled using steam into a water that contains the properties of the herb or flower. I am nowhere even close to being a scientist, but basically what you are trying to do is to create a situation where steam (containing your filtered water and the herbs or flowers you are using) will rise to the top of your stockpot, hit a cold, ice-filled lid, and then condense back into water and drip into your bowl, making your hydrosol.
These are the things you need to do to create this type of situation:
- Something flat and stable to hold up the bowl that will catch the hydrosol (see C in the above graphic).
Place a flat object in the bottom of your stockpot. Some methods involve using a brick or a stone, but since I was making the elderflower water in the middle of a blizzard, I wasn’t about to go outside and dig around in the drifts of snow, so I rummaged through the kitchen cupboards instead to find anything that would work.
I tried a few different things but couldn’t find anything that wasn’t either too tall or wide. I finally found that an 8″ cake pan, resting upside down in the pot, was the perfect fit. Just about any object could work here, as long as it is heat safe. It’s best if it has a flat surface, though, so that your bowl can rest easily on the top. You want something that will allow your bowl to sit a couple of inches higher than the bottom of the stockpot.
- A heat safe bowl to catch the condensation (see B in the above graphic)
Place a small, heat-safe bowl on top of the cake pan. You’ll want to use a bowl that is large enough to catch the condensed water, but you don’t want the bowl to be too large and tall. You need to be able to rest the lid of the stockpot upside down on top of the pot. I found that a regular cereal-sized bowl was the best size for my pot.
- Filtered water
Fill the stockpot with filtered water up to the level of the upside-down cake pan. You want to use either filtered water or spring water for this, not tap water, because whatever might be in the tap water (chlorine, fluoride, etc.) will end up in your final product.
- Herbs or flowers
Place your herbs or flowers on top of the filtered water. There’s no exact measurement for how much you need to use, but the more of your herb or flower that you use, the more concentrated your hydrosol will be in the end. I used about 2/3 of a cup of dried elderflowers to about 6 cups of water. The amount of water you use will depend on the size of your pot and the height of your cake pan (or other flat object) of course.
- Heat
Put your pot on the stove at medium heat until the water reaches a low boil. You don’t want a rolling boil, just a light one. Once you’ve reached a low boil, reduce the heat to low so that the water will just simmer.
- An inverted lid filled with ice to create the condensation
Place your lid upside down on the pot and fill the surface of the lid with ice. It’s best to put the ice in little sandwich baggies so that you don’t have a watery mess inside the lid when the ice starts to melt. You also want to make sure you have plenty of ice on hand in the freezer to refill the bags when they start to melt. I ran out of ice and I ended up refilling the bags over and over again with cold water because I hadn’t realized how much ice I would need.
- Time and Patience
Let the pot simmer for a couple of hours, occasionally checking the level of water inside the bowl and the state of your ice. You don’t want to lift the lid of the pot too often or all of your steam will just evaporate instead of condensing back into water, but every once in awhile you want to check to make sure that your bowl isn’t overflowing.
You’ll also want to check the ice on top of the lid to see if the bags need to be refilled with fresh ice. You can let the pot simmer until your bowl is full or until all of the water at the bottom of your pot is gone. I let mine go for about 2 1/2 hours.
- And that’s it!
Once your pot has finished simmering, turn off the heat and let it cool down (with the lid still on so you don’t lose any hydrosol from evaporation.) Once it’s cool, remove the bowl with your hydrosol and pour it into a bottle or jar to store it.
Storing Your Hydrosol
Hydrosols keep best if you store them in a cool, dark place. If it’s cool in your house and you’re planning to use your hydrosol up within a few weeks, storing your hydrosol in a cupboard would probably be just fine. If it’s summertime and your house is very hot, though, or if you’re planning to store your hydrosol for several months, keeping it in the fridge would probably be the best idea.
If you’re going to use your hydrosol as a toner for your face or as a body spray and you can’t stand the idea of using it cold straight from the fridge, you could always store it in two different bottles – a large one to keep the majority of the hydrosol fresh in the fridge, and a smaller one you can keep at room temperature so you don’t have to feel like you’re rubbing an ice cube on your face.
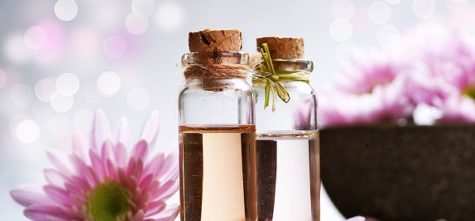
I like to use glass cork-topped bottles for storing my hydrosol because they’re pretty and they look old-fashioned, but any glass bottle or jar will do.
Found at: Our Heritage of Health
Hydrosols ~ What are they?
Hydrosols, also known as “flower waters,” are produced by distilling fresh leaves, fruits, flowers, and other plant materials. With similar properties to essential oils, these aromatic waters are much less concentrated. Their aromas are often soft and subtle when compared to their essential oil counterpart.
These aromatic products usually have a scent similar to their essential oil, but also can have a greener note. This comes from the water soluble constituents in the plant material that are not present in the essential oil.
Offering skin care benefits and uplifting aromatherapy properties; they make wonderful single ingredient perfumes, deodorants, facial toners, air fresheners, and aromatherapy sprays. And they are great additions to your DIY projects when blended with other flower waters, essential oils or used as a replacement for water in your favorite body care, perfume, or green cleaning recipe.
Source: Mountain Rose Herbs
Hydrosols for Intimate Apparel
The summer is a very appropriate time to experiment with hydrosols, washing your intimate apparel, silks, and scarves in the gentle essences of blossoms. Here’s how:
Fill a basin 2/3 full of spring water. Add 1/4 cup soapwort infusion (soapwort is used traditionally for valuable textiles ~ but any mild soap will do as long as it is safe for use on the fabrics you are washing).
Next add 1 cup of your favorite hydrosol. Swish clothing in this water gently to work up lather. Soak 20 to 30 minutes. Rinse. Hang up to dry.
Qualities of the three most popular hydrosols to consider:
- Lavender is relaxing and unisex.
- Neroli builds confidence in sexuality, and helps with recovery from embarrassment.
- Rose lends energy, is stimulating, and aids the adventurous spirit.
From: Four Seasons of Mojo


