Puppy Training
Teaching Give
 What it means:
Put what you have in your mouth into my hand, right now.
Verbal command – “Give”
Tone of voice – Firm, no nonsense
Hand signal – Hand out, palm up
Body Language:
Confident, self assured
Enforcing the command:
Have your puppy on leash, sitting or standing next to you. In your right hand have something (treat or toy) that your puppy is interested in. Toss the item out in front of your puppy. As you toss it, give the command “Get it!”.
How far?
In the beginning, don’t send your puppy out farther than 6 feet or so. As soon as your puppy begins to understand, you can begin to increase the distance.
Do’s and Don’ts:
GO OVERBOARD WITH PRAISE, especially in the beginning. This should be FUN. Motivation will be the key to willing compliance. If your puppy seems unsure, let him sniff the treat or get excited about the toy. The item you use MUST be something your puppy wants.
What your puppy learns:
Cooperation in the context of a game. This command can be used as a reward for good obedience, and lays the foundation for retrieving, tricks, and also helps teach your puppy that active obedience can be fun and rewarding. It also helps to instill greater focus on you, the owner, and is a great way to bond with your puppy.
Written by: Shirley Gibson
Note:
You are welcome to share this post but ONLY IF you give credit and a link back to Teach Your Dog To Behave or shirleytwofeathers.com.
Teaching Get It
What it means:
Run quickly, and get that thing..
Verbal command – “Get it!” or “Fetch”
Tone of voice – Encouraging, exciting
Hand signal – Point in the appropriate direction
Body Language:
Excited, happy.
Enforcing the command:
Have your puppy on leash, sitting or standing next to you. In your right hand have something (treat or toy) that your puppy is interested in. Toss the item out in front of your puppy. As you toss it, give the command “Get it!”.
How far?
In the beginning, don’t send your puppy out farther than 6 feet or so. As soon as your puppy begins to understand, you can begin to increase the distance.
Do’s and Don’ts:
GO OVERBOARD WITH PRAISE, especially in the beginning. This should be FUN. Motivation will be the key to willing compliance. If your puppy seems unsure, let him sniff the treat or get excited about the toy. The item you use MUST be something your puppy wants.
What your puppy learns:
Cooperation in the context of a game. This command can be used as a reward for good obedience, and lays the foundation for retrieving, tricks, and also helps teach your puppy that active obedience can be fun and rewarding. It also helps to instill greater focus on you, the owner, and is a great way to bond with your puppy.
Written by: Shirley Gibson
Note:
You are welcome to share this post but ONLY IF you give credit and a link back to Teach Your Dog To Behave or shirleytwofeathers.com.
Teaching Your Puppy to Come When Called
This is one of the most important commands your puppy will learn and one day could save your puppy’s life. It is well worth the time and effort required to teach it.
What it means:
Come here to me right now.
Verbal command – “your puppy’s name COME!”
Tone of voice – Friendly, Enthusiastic, Welcoming
Hand signal – none
Body Language:
Crouch down, lean forward, look inviting, encouraging, even playful. Remember to smile!
Enforcing the command:
When teaching this command be sure to always have your puppy on leash. If the puppy is highly distracted and pays no attention, or comes very slowly, give the leash a quick pop – just enough to get the puppy started in your direction, then use your voice and body language to bring your puppy in. For a very lazy or stubborn puppy, you may have to use a rather sharp tug on the leash to get your puppy up and moving in your direction.
Alternatively, you could turn and run the other way (with the leash in your hand). Stop running as soon as the puppy is headed your way.
Do’s and Don’ts:
Always use a positive tone of voice. This should be an enjoyable command for your puppy. All your body movements should be inviting. Give treats and rewards when your puppy comes. If correction is needed, remember to say “NO!” when pulling on the leash.
Avoid pulling your puppy all the way to you, or reeling him in like a fish. It’s better to give a sharp tug on the leash followed by a friendly voice, and then another sharp tug (if needed) followed always by friendliness. If you want your puppy to make the decision to come to you willingly, he must be given a chance to come of his own accord.
What your puppy learns:
To respond to his name. Teaches him to look to you for leadership, love, and all good things. Also begins to establish the necessary groundwork for a reliable “come when called no matter what”.
Written by: Shirley Gibson
Note:
You are welcome to share this post but ONLY IF you give credit and a link back to Teach Your Dog To Behave or shirleytwofeathers.com.
Teaching The Name
 What it means:
I want your attention. I have something to tell you, show you, and/or give you.
Verbal command – “Your Puppy’s Name”
Tone of voice – Friendly, Enthusiastic
Hand signal – none
Body Language:
Friendly and inviting.
Enforcing the command:
When conditioning your puppy to this command (the first week) be sure to always have a food reward or beloved toy when saying the name. After the conditioning has been completed, inattention can be corrected using a shake can (or other loud startling noise). A quick pop on the leash is also an effective way to get your puppy’s attention. As soon as your puppy looks at you, praise him, be happy with him, and then say, show, or give whatever it was you had in mind initially.
Do’s and Don’ts:
Keep the treats out of sight (except for the first few days). Holding the treat behind your back is a good way to keep it out of sight. Give the treat AFTER the puppy has given the desired response rather than as bait to obtain the response.
Use your puppy’s name only when something good will happen. Do not use your puppy’s name in connection with a correction, or in a demanding, angry tone of voice. If correcting is needed, you can say “Bad Puppy!” or “Shame On You” or “No!”
Praise your puppy with enthusiasm whenever he responds to his name.
What your puppy learns:
That his name is his own special word, teaches him to look to you for leadership, love, and all good things. Also helps to establish the necessary groundwork for a reliable “Come” when called.
Written by: Shirley Gibson
Note:
You are welcome to share this post but ONLY IF you give credit and a link back to Teach Your Dog To Behave or shirleytwofeathers.com.
Teaching Your Puppy to Drop It
 What it means:
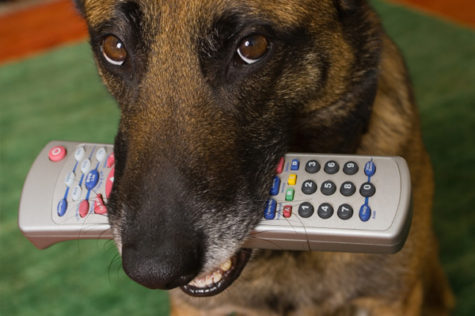
Spit that out of your mouth this instant, and never pick it up again.
Verbal command – “Drop It!”
Tone of voice – Sharp, firm, demanding
Hand signal – none
Body Language:
When teaching this command, have your puppy on leash. You can either sit or stand, but try to keep a low profile, you want your puppy to forget you are watching.
Enforcing the command:
As soon as the puppy picks up the item, say the command “Drop It!” in a sharp tone of voice. If your puppy does not spit the item out, or tries to run off with it, repeat the command “Drop It” in a louder, somewhat startling and more demanding tone, and at the same time give the leash a sharp jerk. If the leash correction isn’t sufficient to induce the puppy to drop the item, pull it from the puppy’s mouth, put it back on the floor, and wait to see if the puppy will pick it up again. If he does, repeat the correction, each time with a sharper tone and a stronger pop on the leash.
Do’s and Don’ts:
Do leave the item out where the puppy can see it and has access to it (under your direct supervision only). This will give you plenty of chances to reinforce this command.
Do not put the item out of reach until the puppy has decided not to pick it up again. Do not allow your puppy to run off with and keep the item.
Use this command ONLY with items you never want your puppy to have in his mouth. Do not use this command with toys or items that are sometimes OK to play with.
What your puppy learns:
Self control, and that everything in the world is NOT for the taking. This command also strongly reinforces your position of leadership in the relationship.
Written by: Shirley Gibson
Note:
You are welcome to share this post but ONLY IF you give credit and a link back to Teach Your Dog To Behave or shirleytwofeathers.com.
A Training Game
Here is a fun and useful “training” game you can play with your puppy. This game will reinforce (and teach) the following commands:
Sit * Stay * Sniff it * Find it * Come * No
You will need a willing puppy, a leash and collar, and a handful of yummy puppy biscuits, or other treats.
Begin by placing your puppy in a Sit / Stay. As soon as your puppy is settled, hold a biscuit in front of your puppy’s nose, saying Sniff It. Your puppy may grab for the treat, so hold it tight. If your puppy lunges for the treat, say NO, reinforce the Sit / Stay command, then repeat Sniff It. You might be able to see your puppy’s nose wiggle as he sniffs.
Place the treat on the floor where your puppy can see it. Insist that your puppy stay properly seated for a count of 10. Then, with an excited tone of voice, release your puppy from the Sit / Stay saying: OK! Find it! As soon as your puppy finds it, call your puppy to Come, praise your puppy, and then do it all over again.
A favorite toy can be substituted for a treat, but only if your puppy is highly motivated to find, get, and play with the toy.
Important:
During the teaching phase, the treat must be in plain sight and super easy to find. If your puppy seems confused, or has any trouble finding the treat, you must help him find it. Do several simple repetitions. As soon as your puppy understands the concept, begin gradually to increase the difficulty by hiding the treat in other rooms, or out of sight.
Note:
You are welcome to share this post but ONLY IF you give credit and a link back to Teach Your Dog To Behave or shirleytwofeathers.com.
Teaching Your Puppy to Lie Down
 What it means:
Lie down, right here, right away.
- Verbal Command: “Down”
- Tone of voice: Downward tone, somewhat commanding
- Hand Signal: Right hand palm down, moving in a downward motion
How to:
Start with your puppy in a sit at your left side. Bend over or kneel down next to the puppy. With your left hand reach over the top of your puppy and grasp his left front leg, and with your right hand grasp his right front leg. Then gently pull his front feet out from under him.
If he resists, use your left hand (or for large puppies – left forearm) to exert pressure on his shoulders. The instant that he begins to lie down, release the pressure on his shoulders and let go of his feet. If your puppy breaks out of the “sit,” put him back into a sitting position and continue placing him in the “down.”
Do’s and Don’ts:
Everything for the “down” command goes down, your voice, the leash correction, the puppy. As long as the puppy is in the “down” position, the leash should be down. Do not inadvertently pull up on the leash, or put any pressure on the leash while the puppy is in the “down” position.
If your puppy is lying down behind or in back of you, he may be feeling intimidated by the command. Just slide him back into position next to you, and try not to loom. Be patient, maintain a sense of humor, do not lose your temper, but persist until the puppy has obeyed.
As soon as the puppy is lying down, stand up and be casual, as if you knew all along that he would comply with the command. Do not loom or lean over the puppy. Avoid using a dominant posture to coerce your puppy into staying “down.” You want your puppy to stay in position because he decided to, not because he sees that you are watching. Avoid eye contact, and don’t pet the puppy until after he has been released from the “down” command.
Don’t push down on your puppy’s back, or smash down hard on his shoulders. Gentle pressure on the shoulders along with pulling the feet out from under the puppy will usually suffice.
Problem solving:
If your puppy bites at your hands a lot, use the leash to control your puppy’s head while using your left hand to put pressure on the shoulders. Don’t hover over a biting puppy, this will escalate the problem. Pop the puppy into the down position quickly and with authority, then stand up straight. This is not the time to address the biting issue. Avoid and ignore it while teaching down. Your puppy won’t be able to bite you if he is in a down at your side and you are standing up.
If the puppy is very resistant and naughty with the biting, put your left foot on the leash, close to the collar and pin the puppy’s neck to the floor with your foot. The instant your puppy relaxes and gives in, take your foot off the leash. Do not hover over a biting puppy, this will escalate the problem.
If your puppy starts chewing on your shoe laces, or the leash, or your pant leg, give the “stay” command and step farther away. If this brings the puppy out of the down, that’s OK. Just put the puppy back into position.
Very Young Puppies:
If your puppy is very young, (6 to 8 weeks) you can sit down (on the floor) with your puppy, and place the puppy in front of you facing sideways. This makes it easier to put the puppy into a down, and discourages leaning on you. As soon as the puppy is placed, let go and move back, staying ready to grab the leash if the puppy tries to bolt.
What your puppy learns:
This command requires your puppy to assume a submissive position. Many puppies will offer some resistance when learning this command. The higher the resistance, the more important it is that you assert your position of leadership in the other areas of your puppy’s life.
Down for a treat:
Start with your puppy in a sit. Hold the treat in your right hand close to your puppy’s nose. Then, take the treat down to his toes. Nose to toes is how it should go. This requires the puppy to go almost into a down in order to get the treat. Some puppies will lay down spontaneously, most puppies will need a bit of help in the form of a small amount of pressure on the shoulders. The instant that the puppy lies down, give the treat. When using food it is important to keep the treat close to the puppy’s nose to discourage jumping up, and then take it directly down to the puppy’s toes. If you move the treat forward as you take it down, the puppy will move forward to get the treat instead of lying down. If your puppy backs up, or gets up out of the sit, place the puppy back into a sitting position and repeat the down command and the downward motion with the treat
Do’s and don’ts with treats:
Do not allow the puppy to grab for and get the treat. Because you will be practicing and doing this more than once, use a really small treat, something that smells good and is easy to eat. Don’t worry about teaching the stay command when using a treat for the “down.” That can come later, after the puppy knows and understands how to lie down for a treat. Give the treat to the puppy as soon as he is in the down. Don’t wait for him to get up or move around.
Written by: Shirley Gibson
Note:
You are welcome to share this post but ONLY IF you give credit and a link back to Teach Your Dog To Behave or shirleytwofeathers.com.
Teaching Your Puppy “Leave It”
What it means:
Get that little nose out of there.. away from my food… out of the trash can… etc
Verbal command – “Leave It!” or “Out!”
Tone of voice – Sharp, firm, demanding
Hand signal – none
During the teaching phase, a release command is also taught.
Verbal command – “OK!”
Tone of voice – Friendly, encouraging
Hand signal – none
Body Language:
When teaching this command, you can be either standing or sitting. For best results, your puppy should be in front of you, with a leash on. During the training stages of this command, it will be helpful to have someone else handling either the leash or the treat. It’s important that you radiate an air of relaxation and calm.
The Food Reward:
This command is taught with a treat. For best results, use a “people food” treat that can be cut into very small pieces. Chunks of cheese or chicken work well. Most importantly, the food must be something that smells really good, tastes really good, and does not in any way resemble treats you normally use for training. It should also be something that is easily and quickly eaten.
How to do it:
Best taught with two people. One person is in charge of handing out the treat. The other person is in charge of administering the correction. If you do this by yourself, hold the treat in one hand, and the leash in the other. Holding the treat firmly with your thumb and forefinger, hand the treat to the puppy, saying “OK!” as you do this, and when the puppy reaches for the treat, let him have it. Do this 3 or 4 times to get the puppy excited and interested in this new game of “free” food.
Now it’s time for the “Leave it!” or “Out” command. Do everything exactly the same way as you did the 3 or 4 times previously, hold the treat the same way, hand it toward your puppy the same way, BUT instead of saying “OK!” and letting the puppy have the treat, say “Leave it!” or “Out.” As you say the command, the person handling the leash simultaneously jerks the puppy back and away from the treat.
It’s best if the “Leave it!” command and the jerk of the leash happen at the same time. This will surprise and startle the puppy. Do not move your hand, the one holding the treat, or jerk it back. Leave it where it is and give your puppy a few seconds to decide what to do next. If the puppy goes in for the treat again, repeat the “Leave it!” and the jerk. If the puppy tries to run away, grab him and give him lots of hugs, kisses, love, belly rubs, and praise.
Now, repeat the procedure with the “OK!” 3 or 4 times. More if the puppy is hesitant to take the treat, less if the puppy is still determined to grab it. When the puppy is taking the treat with no hesitation, repeat the procedure with the “Leave it!” and the jerk on the leash.
If your puppy immediately backs away from the treat. Give lots of love and praise, and repeat the “OK!” procedure 3 or 4 times. If your puppy goes for the treat when you say the “Leave it” command. Repeat the “Leave it!” procedure again, only this time use a sharper jerk on the leash. A very determined puppy may have to practice the “Leave it” command several times in a row before he will willingly back off without a correction.
Do the commands as a series of 3 or 4 of the “OK!” commands followed by 1 or 2 of the “Leave it!” commands until your puppy is happily taking the treat with the “OK!” and not the least interested on the “Leave it!”
End the training session on a positive note with several “OK!” commands.
Do’s and Don’ts:
Do not allow your puppy to grab and eat the treat unless or until you have given the “OK!” If your puppy does manage to get the treat out of your hand, you will have to pry his mouth open and dig it out. If it is already swallowed, do this anyway – as if you are fully prepared to go in after it.
Do not jerk your hand back or away when you say “Leave It.” You don’t want your puppy to key into anything you might consistently do with your hand. You want your puppy to respond only to the verbal command, not a hand movement. Because of this, it’s very important that you hand and hold the treat exactly the same way for both the “Leave It” command and the “OK!” command.
The best time to teach this command is when your puppy is hungry.
When to Use this Command:
When your puppy has learned what “Leave it!” means, and is reliable off leash when working with a food in a controlled environment, you can begin to use it in every day practical situations. It will be really helpful if you set your puppy up with a series of temptations while on leash so that you can step in to correct if need be.
Use and enforce this command any time your puppy is interested in something they might want to eat (or sniff) that is inappropriate, or unacceptable. Examples include: The litter box, garbage can, ice cream cone in a toddler’s hand, a plate of snacks on the coffee table, rabbit poop… I’m sure you can think of a few more.
What your puppy learns:
It is never OK to grab food out of the hands of anyone without permission. Your position of authority is reinforced by the concept that you are in charge of what, and what is not, acceptable to grab and eat.
Written by: Shirley Gibson
Note:
You are welcome to share this post but ONLY IF you give credit and a link back to Teach Your Dog To Behave or shirleytwofeathers.com.
Teaching Your Puppy Not To Bite
What it means:
Do not bite me (her, him, it).
- Verbal Command: “NO BITE!”
- Tone of voice: Sharp, firm, demanding, stern
- Hand Signal: None
Body Language:
Self confident commanding
Enforcing the command:
Grab the puppy firmly around the muzzle, holding his mouth shut, give direct eye contact, hold the puppy firmly in place until all resistance stops and the puppy looks away. As you do this, say “No Bite” in a sharp, firm tone.
If this is ineffective (and it will be for some puppies), pinch the skin of the muzzle into the puppy’s canines (eye teeth). This should be done firmly enough to make the puppy whine. Again, repeating the “No Bite” command.
As soon as the puppy stops resisting the correction – praise the puppy, and stroke the muzzle and face. Do this in the same way that a mother dog might lick her puppy’s face. If the biting recurs, repeat the correction. If the biting stops, and especially if it is replaced by licking, praise the puppy some more and reward with a tummy rub or toy.
Alternative Enforcement Methods:
For aggressive puppies that enjoy a contest of wills, try using a squirt bottle with a 50% lemon juice or Tabasco, and squirt it directly into the puppy’s mouth as he is biting. Be very careful to avoid the puppies eyes. Putting the puppy immediately into a long down stay is also quite effective.
What Your Puppy Learns:
Self control, and to inhibit biting behavior. Pinching the skin of the muzzle into the eye teeth sounds rather severe, but actually, it stimulates the same correction a mother dog uses to stop puppies from biting instead of sucking when they get their teeth in. The only difference is that she will actually bite the puppy on the nose. Not hard enough to injure the puppy, but certainly hard enough to cause the puppy to cry out. She will then very earnestly lick his little face, soothe his worried soul, and once again all will be well in his world.
Other info:
Puppies taken from their mother and siblings too early will often engage in a lot of biting behavior, presumably because the mother dog was not available to teach the puppy that biting too much, or too hard is not OK.
Written by: Shirley Gibson
Note:
You are welcome to share this post but ONLY IF you give credit and a link back to Teach Your Dog To Behave or shirleytwofeathers.com.
Chewing Problems?
Chewing appears to be an enjoyable behavior for nearly all puppies and many older dogs. In the young pup, healthy development of nervous and muscle tissue, as well as proper teething, depends on vigorous chewing exercise. In animals of all ages chewing is an important part of eating, investigation, and protection from entrapment.
Most puppies are basically a set of teeth with skin, hair, and other appendages attached somewhere behind. These guys play, release tension, eat, defend themselves, and explore the environment with their mouths. You must be prepared to accept the fact that puppy chewing may extend well into the first year of life, and will be directed toward everything within reach.
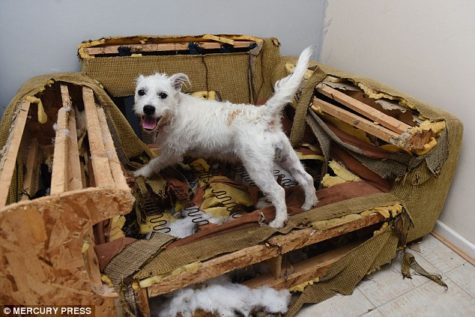
If you do not want to be faced with a situation such as the one pictured above, it will be important to provide the following:
Supervision and Confinement
The first important principal in preventing chewing problems which is that constant supervision or confinement must be consistently provided until the puppy is older and can be completely trusted. Until that time arrives, it is absolutely essential that the puppy be closely supervised 100% of the time when loose in the house, and when supervision is not possible, the puppy must be confined in a crate or safe area.
Now, let’s talk about supervision. For some owners, supervision means being in the same galaxy with the puppy. Fortunately, most owners realize that they need to at least be home to supervise. Here’s the thing… even being in the same room with a puppy is not the same as constant supervision, especially if the owner is on the phone, watching television, or otherwise engaged. Supervising a puppy means that eyes must be on the puppy at all times.
Puppies move very quickly and the time that it takes to grab something off the stove, or answer the phone is more than enough time for the puppy to eat a favorite book, destroy the couch, or chew into an electric cord.
Be aware of what your puppy is doing at all times. One way to achieve this is to keep the puppy on a leash or a tie out that allows for movement and exploration in an area that has been “puppy proofed.”
When adequate supervision cannot be provided, the puppy must be confined. Confinement areas can include a pen or a crate. Confinement is important when you are not at home, or if you are too busy to attend to the puppy properly. Just be aware that constant confinement teaches your puppy NOTHING, and undermines your relationship.
Acceptable chew toys
An acceptable chew toy is attractive to the puppy, virtually indestructible, safe and dissimilar to other objects around the house that the owner does not want chewed. This immediately removes from consideration such items as old shoes, stuffed toys, flimsy toys, and dad’s old socks. These types of items make it more difficult for the puppy to distinguish between the puppy’s toys and the owner’s things.
The number of toys which are provided is also important. I have found that three toys at a time are adequate. Too many toys at a time give the puppy the false impression that every item in the house is probably one of their toys. At the same time, puppies will sometimes get bored with the same old stuff, so it’s a good idea to switch things up every day or two by swapping toys. If an old favorite goes away for a few days and then suddenly reappears, it’s almost as good as a brand new toy.
Puppy-Proofed Environment
It is important that all areas accessible to a puppy are puppy-proofed. Any objects that are dangerous or precious should be kept out of the reach of an exploring puppy. An object that was ignored all last week might suddenly become interesting and exciting next week. So take your puppy proofing seriously.
If the puppy develops a habit of chewing on furniture, wall molding or other objects that can’t be put out of reach, these may be painted with cayenne pepper paste, oil of citronella, or any of a variety of “no chew” products.
Avoid Contributing to the Problem
Besides guiding the puppy’s chewing in the right direction with proper chew toys, and taking measures to prevent mistakes with supervision, confinement, and a puppy-proofed environment, it is also very important that you do nothing to encourage excessive chewing tendencies. Teasing, tug of war games, and corrections given too long AFTER the inappropriate chewing can all contribute to unwanted chewing.
Certain puppies are just more oral than others and this tendency, coupled with stressful situations, can produce tension which may be released by chewing. Some situations which can cause excessive tension in puppies include highly emotional departures and homecomings by the owner, excessive attention from the owner, social isolation, boredom, and delayed feeding time.
Timely Correction
For correction to be used effectively, the aversive stimulus must be of an appropriate intensity and given with correct timing. Unfortunately, most dogs are punished too harshly and too late. The correction should be just enough to elicit a response from the dog, but not so strong that a high degree of anxiety is produced.
Timing is very important. The correction must be giving DURING the behavior to be effective. If the delay between behavior and correction is as little as 5 to 10 seconds, the puppy will learn, but the learning will be slow. If the delay is as long as several hours, the puppy will not have a clue as to what the correction was for, and may even attach the correction to a completely different circumstance.
Teaching Self Control
Teaching your puppy some basic commands goes a long way to helping your puppy learn a measure of self-control. These commands could and should include : Sit, Stay, Down, and Come. Of these commands, the Stay command is the most important as it teaches your puppy that you mean what you say when you say it.
Adapted from an article written by Dr. Wayne Hunthausen
