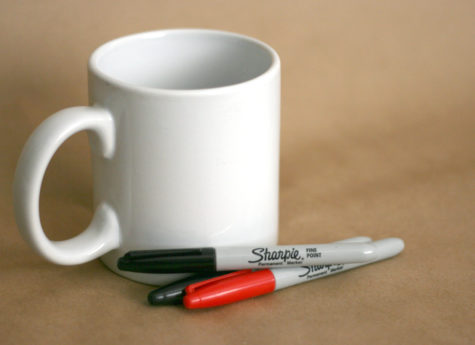
Sharpies
Decorating Mugs!

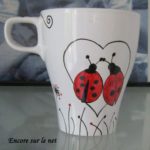
Yesterday, I explored a magickal cup of coffee, and it got me thinking about coffee mugs and so I went on a DIY search and found a bunch of tutorials on how to personalize and decorate coffee mugs. The first tutorial, found at Pop Sugar, features the use of sharpies. Here it is:
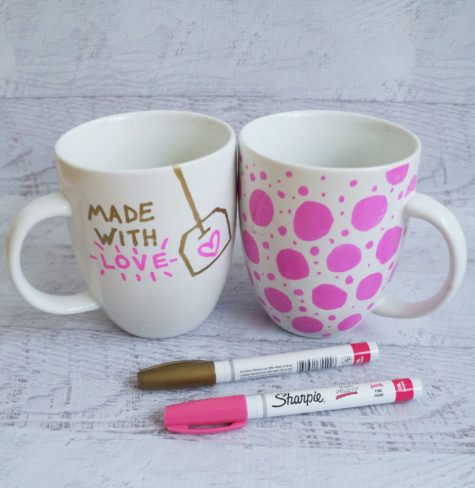
How to Make A Sharpie Mug
Do you have a plain, boring mug that needs a bit of spicing up? Personalize your cups and mugs by drawing on them! You can use them to add personality to your home or even give them as gifts to your loved ones. Here’s how to start:
- Buy some white cups or mugs. You can find them in superstores, thrift stores, dollar stores, and online. The cheaper the mug, the better this works.
- Pick a Sharpie. For long-lasting results, choose oil-based paint Sharpie markers. Regular Sharpie ink can come off even after baking. Pick a color to use on your mug. You can stay simple and choose one color, or be more ambitious and use multiple. If you’re sticking to one color, then black is usually a good choice, given its striking contrast to the white background of the mug.
- Wash the mug. Before applying the Sharpie, it’s important to get the mug completely clean and free of any oily residue from hands or fingers. Alcohol works well, after the mug has been washed with soap and water.
- Start drawing. Decide what you want to put on the cup, and maybe practice drawing it on a piece of paper before drawing on the mug. Pick a meaningful quote or a cute graphic to decorate the mug with, and get inspired by mugs being sold on Etsy or by googling examples of Sharpie mug projects online.
- Dry it out. For the best results, let the sharpie dry completely for 24 hours then bake at a low temp oven like 225° for 2 plus hours.
- Bake it. Remember to place the mug in the oven before it heats up and leave it in until the oven cools completely so there won’t be any cracks. You can choose to bake the mugs twice to really set in the Sharpie drawings. Baking the mug in the oven for 30 minutes at 350°F is what most tutorials recommend, but for best results, bake it at a lower temperature for a longer period of time (see above).
- Care and wash. If you use quality, oil-based sharpies, they should be dishwasher safe. All my pieces have gone through the dishwasher several times now, with no flaw. If you don’t feel sure about the dishwasher – hand washing is recommended.

Does it really work?
While Sharpie mugs are very popular right now, there doesn’t seem to be any consensus on how to best make the mugs. Some say that some of the colors change when baked, some say that they don’t stand up to dishwasher washing (or handwashing even…), and some say that the paint chips off the mugs after a couple uses.
I found an experiment using 14 colors of oil-based, fine point Sharpies and Dollar Tree mugs at Destination Decoration, and her results were as follows:
While decorating the mugs, I wore gloves so the oils from my skin did not affect the finished product. All parts of the mug were dried for 24 hours before baking.
Based on my experiment, baking a Dollar Tree mug at 250 degrees for 2 hours provided the best results. The color of the paint remained largely the same and paint on the mug did not chip at all (except for the minor top chipping).
Tips from other tutorials and crafters:
- I used Pebeo Porcelaine 150 Paint Markers and they work great and do not come off. You can find them at Michaels or Amazon.com. I have even put them in the dishwasher. Stayed on great.
- It didn’t work for me! I just got a paint pen. They work perfectly fine and not any more expensive than sharpies.
- I monogrammed plates and cups with Sharpie oil based markers and did not bake. Let dry for 48 hours been in dishwasher many times and none of mine have come off at all.
- Here is what I find that works. Cheap Walmart mugs are best. Regular sharpies. Wipe first with alcohol to remove any residue. Careful not to touch drawing area with hands. After putting design on, wait 24 hours. Then put in cold oven. Turn temp to 425 and set timer for 30 minutes. At 30 minutes turn off oven, leaving project in until it’s completely cool. Hand wash then do a test run in the dishwasher.
- “I read an extensive article about this somewhere. First, cheap mugs work best due to the inexpensive glaze used. Put mugs in COLD oven, turn oven to 450 (not 350). The glaze needs to re-melt to incorporate the marker into it!! AFTER oven reaches temp, bake for 30 minutes. Turn oven off.. LEAVE MUGS IN CLOSED OVEN (not yelling, just important). Cool for 15 min, slightly crack oven open and let cool over night. This should properly incorporate the ink with the glaze.
- My aunt did it one year, I think she used car paint for scratch fixes. Not sure about the baking part. They lasted for years!
- You can get enamel/glass clear medium and paint over it with that and re-bake. That may help if that doesn’t work, then probably nothing will.
- Clean glass with rubbing alcohol first. Oil base isn’t for glass. Use Folk Art enamels paint applying with a brush or paint pens for glass only! You still have to bake for 30 minutes but let sit for 1 hour before you bake.
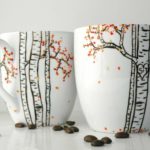
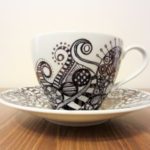
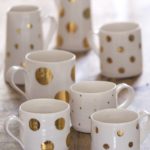
Design Ideas


I think it's time to go shopping... maybe even buy some really cool stuff at my online shops!!
