shirleytwofeathers
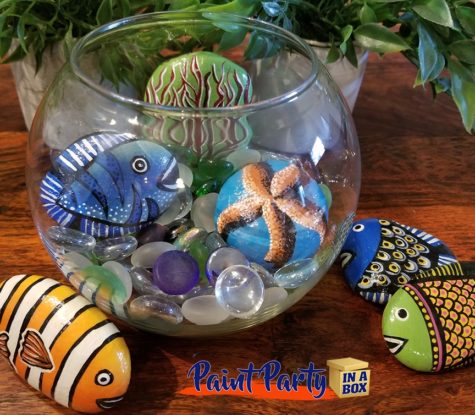
A Fun Project
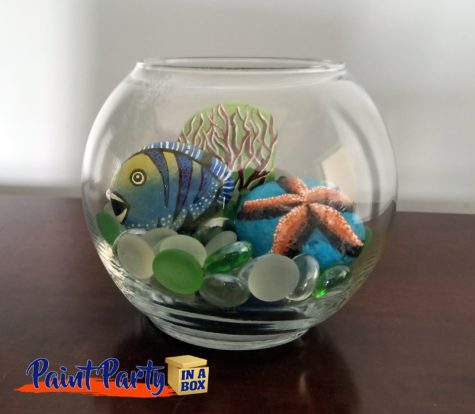
Yes, it’s a kit that you can buy, but I don’t see why a person couldn’t find rocks, some glass pebbles, and a fish bowl and make their own.

Creative People
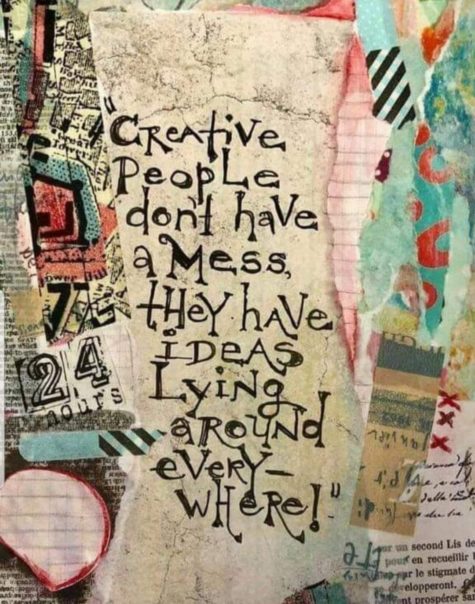
Creative people don’t have a mess.
They have ideas lying around everywhere!
Make A Pillow Bed
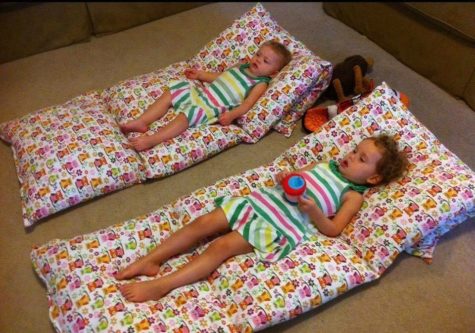
Here’s a fun idea. I think it’s especially good for nap times and sleepovers when you have little kids. But it’s also an idea for the next time we go camping… might make for a nice “mattress” for a camping cot. Also might be something comfy to sit on if we camp at a lake that has a rocky shoreline.
Sew 4 pillow cases together, insert the pillows, and you have a bed. It’s easy to keep clean, as the pillows slip easily out of the covers and can go straight into the wash.
Cinnamon Ornaments

- 1 part cinnamon
- 1 part applesauce
- Splash of nutmeg, cloves or ginger
Mix ingredients until it is a firm dough. If too try and crumbly, add more applesauce. If too moist, add more cinnamon or nutmeg. Roll out on a cinnamon-dusted board, rolling 1/4 to 1/8 inch thick.If the dough is really sticky, you can roll it out between 2 sheets of plastic wrap.
Use cookie cutters to make your ornament shapes. Using a pencil, straw, or skewer, make a small hole near the top for ribbon or string to hang the ornament with, and set aside until dry.
They may take a few days to a week to dry. (Some recipes say to bake them in a 200 degree oven for 2 to 2 1/2 hours and then allow them to thoroughly dry, but others don’t. Use your best judgment on that.) As they are drying, turn them occasionally.
Note: You can also make tiny balls with this recipe to use in scented sachets. Extra dough may be placed in plastic bag for later use.
If you feel despair…
If you feel despair…
Draw your way out of it.
Salt Scrubs
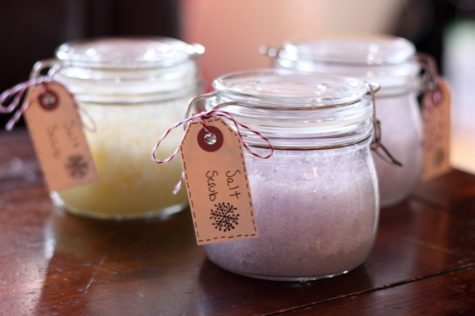
As an alternative to the sugar scrub, here’s a recipe for a salt scrub:
Pink Himalayan Salt Scrub
- 1 cup of Salt (your choice)
- ¼ to ⅔ cup of Oil (again, your choice, for this scrub I used equal parts of jojoba, avocado and coconut)
- 1 T Glycerin
- ½ t Vitamin E
- Approx 20 drops of essential oils (or more depending on oil and strength desired)
Instructions:
- Add ingredients to the bowl and mix well.
- Scoop into your jars and enjoy!
Variations:
For a grapefruit and ginger scrub, add the following ingredients to the basic recipe:
- 1 tsp grated fresh ginger,
- 1 tsp ground Frankincense
- zest of grapefruit
For a citrus and poppyseed scrub, add the following ingredients to the basic recipe:
- 1 tbsp poppyseeds
- zest of citrus fruit
Borrowed from: The Prosperity Project
Sugar Scrubs
Those expensive sugar scrubs you see in department stores and spas… they cost pennies to make! Sugar scrubs are a simple beauty recipe with countless variations, and they can be incredibly moisturizing and exfoliating to the skin.

They can be used on face, body, and (especially) feet, for silky skin. You can add endless ingredients for your desired outcome, and they take under ten minutes to make.
Ingredients
- 1/2 cup sugar (white or brown sugar- preferably organic)
- 1/2 cup oil (olive oil and coconut oil work great)
- Optional: essential oils of your preference
Instructions
- Mix all ingredients and store in an air tight jar.
- Use 1 tablespoon as needed in the shower. Scrub skin with the mixture and rinse will. it will leave your skin feeling like silk.
Sound simple? It is!
Variations
- Pumpkin Pie Scrub: 1 cup of brown sugar, 1/2 cup coconut oil, 1/2 tsp vitamin E oil and 1/2 tsp pumpkin pie spices (or just 1/2 tsp cinnamon)
- Vanilla Brown Sugar Scrub: 1 cup brown sugar, 1/2 cup almond oil, 1/2 tsp Vitamin E oil and 1 tsp real vanilla extract
- Lemon Hand Scrub (for after washing dishes): 1 cup white sugar, 1/2 cup olive oil, 1/2 tsp vitamin E oil, 15-20 drops (or more) of lemon or orange essential oil
- Vanilla Lavender Relaxing Facial Scrub: 1 cup white sugar, 1/2 cup almond oil, 1/2 tsp Vitamin E oil, 1/2 tsp real vanilla extract and 15 drops lavender essential oil
These last on the counter for up to 2 months (or more) and smell good enough to eat… Actually, they are good enough to eat, but don’t… sugar is bad for your intestines!
Borrowed from: The Prosperity Project
Bath Bombs DIY
When I was younger, I loved bath bombs, but avoided them as I’ve gotten older because store bought versions typically contain artificial ingredients such as dyes and fragrances.
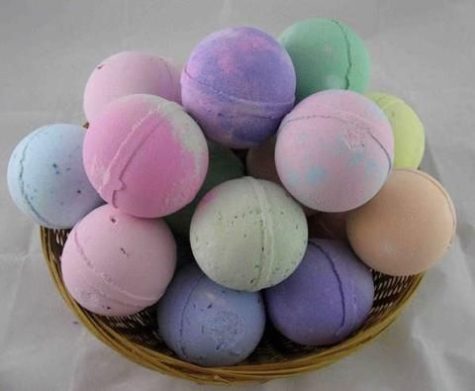
These homemade bath fizzies are a great solution! Made from nourishing sea salt or epsom salts, alkalizing baking soda and fizzing citric acid with a nourishing oil and vanilla base.
These can be packaged for a great gift or made countless ways for relaxing baths anytime! They are simple to make with kid-safe ingredients and are completely versatile. Let the kids think of ways to mix up the scents, colors, and other customizations.
Bath bombs only take seconds to make, so it is important to have the ingredients on hand and measured before you start. Most of the ingredients are pantry staples in many homes, but make sure you have these on hand:
- Baking Soda
The backbone of this recipe is alkalizing baking soda. It is a necessary complement to the acidic citric acid and part of the fizzing reaction. Food-grade aluminum free baking soda is best.
- Citric Acid
The more obscure ingredient in this recipe that a lot of people don’t have on hand is citric acid. It is necessary for the fizzing reaction that makes bath bombs feel like bathing in champagne. You can find citric acid on amazon, here’s a link: Citric Acid
- Corn Starch or Arrowroot
Corn starch provides the silky feel that we all love from bath bombs. I usually use organic corn starch powder in this recipe. Arrowroot also works but doesn’t provide quite as silky of a finished product.
- Salt, Oil and Liquid
These are all very versatile and you can pick any combination that you have on hand. You’ll need some kind of:
Oil: Pick a simple oil like olive oil, almond oil or coconut oil or get more fancy with sea buckthorn oil, argan oil or apricot oil.
Salt: Stick to basic salt or take it up a notch with epsom salt or another favorite salt option.
Liquid: Basic water works, but I also love using organic witch hazel for some extra skin soothing.
- Scents and Colors
This is where the options get endless. Use your favorite essential oils, add dried herbs or make them scent free. You can even add some natural dyes to change the color.
- Other Equipment
These are easy to make with measuring cups and your hands, but for a fancier and more uniform product, it helps to also have a digital scale to get the proportions exactly right.
- Molds
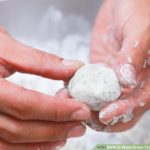
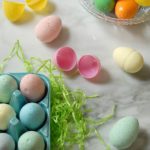
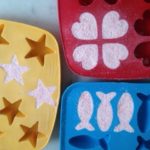
For the easiest version, just form these into balls with your hands, but if you are making as gifts or just want fancier shapes, molds are the way to go. You can buy actual bath bomb molds at amazon if you’d like. But you could also use those plastic holiday ornaments that come apart or Easter eggs for the molds if you already have either of those on hand. Some tutorials recommend greased muffin tins. I think those silicone ice cube and candy molds would also work just fine.
Here are a bunch of different ideas for molding your bath bombs:


- Added bonus
It seriously makes your whole room smell amazing while you make these!
Bath Bomb Basic Recipes
I found two basic recipes and am including them both here:
Bath Bomb Recipe 1
- 8 ounces Baking Soda (about 1 cup)
- 4 ounces Citric Acid (1/2 cup)
- 1/2 cup (4 ounces) Sea Salt or Epsom Salt
- 4 ounces Cornstarch (about 3/4 cup)
- 2 tablespoons oil of choice (this is my personal favorite but any liquid oil will work)
- 2 teaspoons witch hazel (or water) plus a little more if needed
- 1 teaspoon vanilla extract (or more water)
- 30-40 drops of Essential oils or powdered dried herbs (ginger is great)
Bath Bomb Recipe 2
- 4 oz. baking soda
- 2 oz. corn starch
- 2 oz. citric acid
- 2 oz. Epsom salt
- 1 to 1 1/2 teaspoons water
- 1 teaspoon essential oil
- 1 1/4 teaspoon oil (I like coconut or olive oil here)
- 1-2 drops food coloring (optional)
Makes two bombs (you can easily double or triple this recipe).
Instructions:
In a bowl combine the dry ingredients. Whisk to remove any clumps, corn starch tends to be clumpy. In a small glass jar stir together the wet ingredients. If you’re using coconut oil, give it a quick melt in the microwave or stove top first so it will more easily combine with the other ingredients.
Slowly pour the liquid mixture in with the dry mixture, whisking as you go. If you see the mixture fizz or foam, you may be adding the liquid too quickly. Once all the wet ingredients are combined with the dry, take a small amount in your hand and squeeze it together.
Mixture should hold together when squeezed without crumbling. It should stick together fairly well in one or two big chunks.
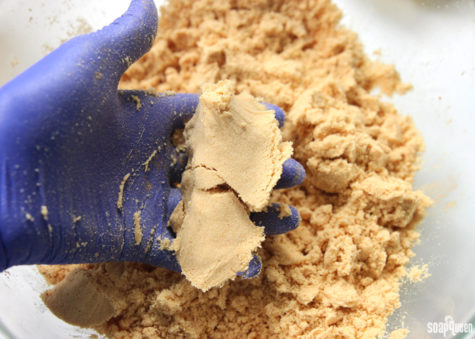
If it’s still too powdery to hold together, just add a tiny bit more water (or witch hazel) and mix until it does hold together.
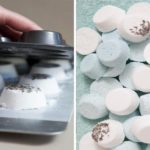
If you are using a mold that makes a ball, fill each half of your bath bomb mold with the mixture until it’s just overflowing a little. Press together, then gently remove one side of the mold. Place the bath bomb on a tray and allow to dry out just a little (10-12 minutes) before removing the other side. Once you are ready to remove the other side, gently invert the bath bomb so the uncovered side is facing down, then gently remove the other half of the mold from the top. The key word, if you haven’t noticed, is gently. These can fall apart on you very easily if you’re not careful. If a bath bomb does crack in half while you’re removing it, you can gently press it back on top of the other half, or remove all the mixture back to the mixing bowl and start the molding process again. I had this happen to a few, so don’t fret, it’s easy to fix.
If you are using tins or trays, quickly push mixture into the greased muffin tins or any other greased container. Press in firmly and leave at least 24 hours (48 is better) or until hardened. It will expand some and this is normal. You can push it down into the mold several times while it is drying to keep it from expanding to much. Using the metal molds will create a stronger and more effective final bath bomb.
Note: I have seen some reports of the bath bomb sticking to these type of molds and refusing to come out., so be sure it is well greased.
Once they are completely out of the mold, allow them to dry out for 8 hours or overnight. Once very dry, you can wrap them in plastic wrap and store in a dry place until you’re ready to use them, or you can gift them to friends.
Tips and Variations:
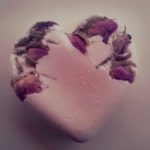
You can add dried flower buds, like lavender buds, to these pretty easily. Just remember to use food grade dried flowers to avoid flowers that might have been grown with pesticides as you don’t want to soak in a bath with that. No thanks! Do keep in mind that after using a bath bomb with dried petals, you will have to remove these from your tub. So if that bothers you, then leave the buds out.
If you want to create two tone bath bombs, just mix up your batter in two separate bowls and only add the food coloring to one. Easy!
Here’s a YouTube tutorial:
Bath bombs are a great way to relax in the tub after a long day of dealing with kids, cooking, and all the other activities that motherhood entails. If you’ve never tried them, I highly encourage it, as it’s one of my favorite things to do at the end of the day.
Fool proof homemade bath bombs These turned out to be a lot of fun to make, and they are even more fun to use! I highly recommend giving them a try, or you could make a batch to give away to friends or family. Enjoy!
Borrowed from: The Prosperity Project
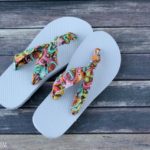
Upcycle Your Flip Flops
If you have an abundance of old flip flops and colorful scarves, you can turn them into a really cool pair of sandals! This visual tutorial simply wraps the scarf around the flip flop and the ankles.

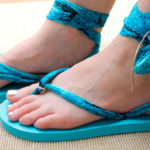
The following visual DIY tutorial for upgrading your flip flop fashion uses a braided strap to make the flip flops, but you can use colorful scarves and other fabrics as well.
There are so many possibilities on how you can add your favorite fabric to flip flops, but what I like most about this method is that you can make your flip flops fit perfectly so you don’t have to worry about doing the toe pinch every time you step to keep you flip flop on, or have your feet ache from flip-flops that are too tight.
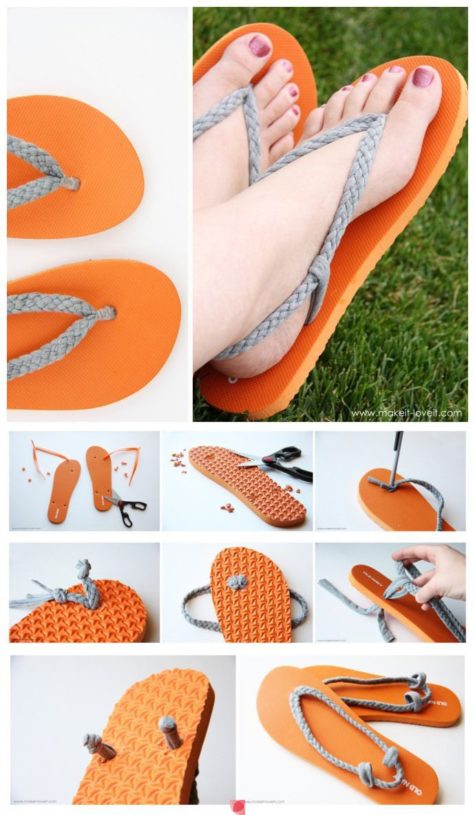
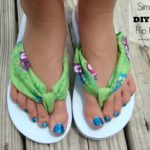
First of all, I found a very inexpensive pair of flip flops at Old Navy. (Or dig in your shoe stash. You know you have some in there.) Then, cut the plastic straps off of both flip flops.
Next, snip pieces of the flip flop away on the back of the flip flop, right around each hole of the flip flop. Don’t cut all the way through, making the hole bigger……..just make a bigger resting spot for your knot to lay (that you’ll be placing here in later steps). Cut about 1/3 of the way through the thickness of the sole.
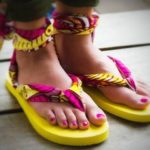
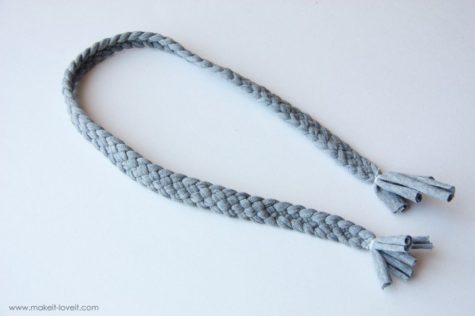 Then, create a long strand of braided knit material. T shirt fabric is great for this. Make sure you’re using a semi stretchy knit fabric so that the strap will fit snugly around your foot. This will help the sandal to stay in place.
To determine whether or not the braided section in long enough……wrap the braided knit around the back of your foot and then up over the top of your foot and down through your toes. And then make sure that there is enough to stick through the sandal and then tie in a knot. (Having a little more than you need helps.) At the ends of the braid, I just wrapped with thread really tightly, and then knotted it (the thread) in place.
Now, you need to shove the raw ends down into the hole by the toes of the sandal. I used a pen (in the “off” position) to shove the ends down in there. The hole will stretch so you can really shove a lot down in there with some effort.
You should have both ends coming out the bottom of the sandal. Be sure that the braid isn’t all twisted on the other side. Next, tie really tight knots into each end of the braid and then trim off the excess fabric. The trickiest part here is making sure that your braid is just the right length.
Then add a little hot glue beneath your knots and into the crevice of the flip-flop that you dug out earlier.
While the glue is still hot, press the knots into the foam sandal and as hard as you can, to really secure the knots in place…….and to force them into the sole of the sandal. (Depending on how big your knots are, depends on how much you should cut out of the sandal. You may feel the knots a bit while walking if you have bigger knots, so keep that in mind as well.)
Now, cut more strips of your knit fabric and make a loop of fabric on each side of the sandal, including the braided strap as you loop the side strap down in place.
After you have both side loops in place, make knots in the bottom and trim off the excess. Glue them in place the same way.
This next step is optional but it really helps make the section that goes between your toes, less bulky. I just wrapped some thread around the toe section over and over again as tight as I could (without breaking the thread) and knotted it in place.
And that’s it. Now your flip-flops are done and ready to wear.
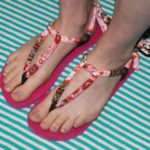
Here are some variations on this theme:


Borrowed from: The Prosperity Project
Western Boot Planters
Western boots are super cool, and when the time comes to recycle them, there are a lot of options – some are easier than others.
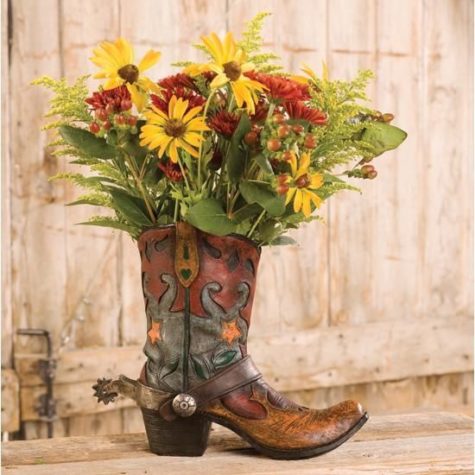
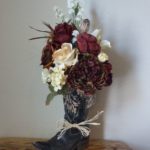
The easiest way to use a favorite boot that will never fit you again is to clean it up, paint it, and turn it into a flower holder. You can put a water filled vase inside the boot to display fresh flowers, which isn’t necessary if you are a lover of dried or silk flowers.


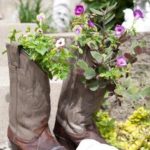
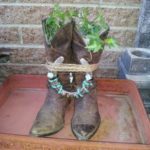
Old boots also make for cool planters. If you opt for the cool planters, don’t forget to make sure the boot has good drainage. If it already has holes in the sole, no worries. But if the boot is still in good shape, you’ll need to drill a drainage hole in the bottom.

Borrowed from: The Prosperity Project


I think it's time to go shopping... maybe even buy some really cool stuff at my online shops!!
