Flip Flops
Upcycle Your Flip Flops
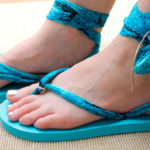
If you have an abundance of old flip flops and colorful scarves, you can turn them into a really cool pair of sandals! This visual tutorial simply wraps the scarf around the flip flop and the ankles.

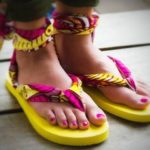
The following visual DIY tutorial for upgrading your flip flop fashion uses a braided strap to make the flip flops, but you can use colorful scarves and other fabrics as well.
There are so many possibilities on how you can add your favorite fabric to flip flops, but what I like most about this method is that you can make your flip flops fit perfectly so you don’t have to worry about doing the toe pinch every time you step to keep you flip flop on, or have your feet ache from flip-flops that are too tight.
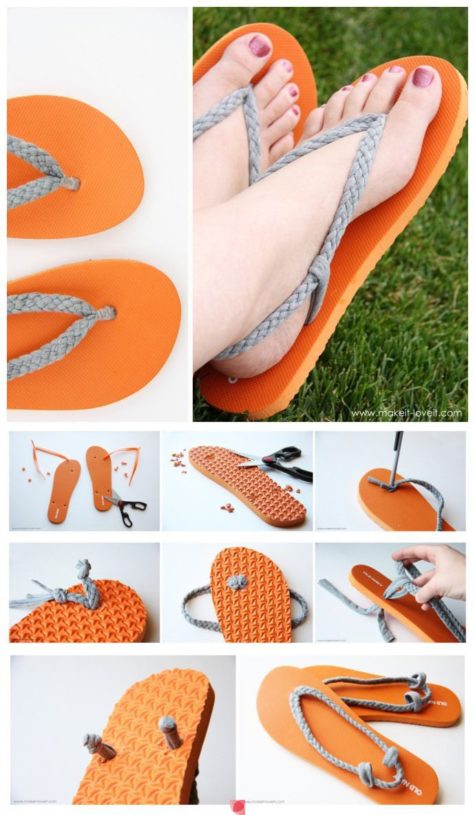
First of all, I found a very inexpensive pair of flip flops at Old Navy. (Or dig in your shoe stash. You know you have some in there.) Then, cut the plastic straps off of both flip flops.
Next, snip pieces of the flip flop away on the back of the flip flop, right around each hole of the flip flop. Don’t cut all the way through, making the hole bigger……..just make a bigger resting spot for your knot to lay (that you’ll be placing here in later steps). Cut about 1/3 of the way through the thickness of the sole.
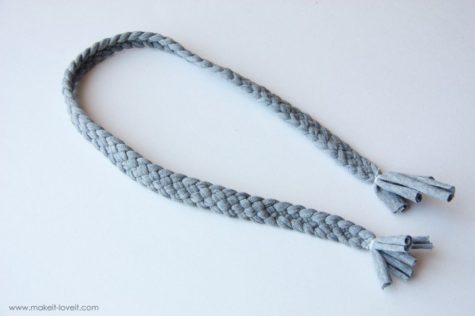 Then, create a long strand of braided knit material. T shirt fabric is great for this. Make sure you’re using a semi stretchy knit fabric so that the strap will fit snugly around your foot. This will help the sandal to stay in place.
To determine whether or not the braided section in long enough……wrap the braided knit around the back of your foot and then up over the top of your foot and down through your toes. And then make sure that there is enough to stick through the sandal and then tie in a knot. (Having a little more than you need helps.) At the ends of the braid, I just wrapped with thread really tightly, and then knotted it (the thread) in place.
Now, you need to shove the raw ends down into the hole by the toes of the sandal. I used a pen (in the “off” position) to shove the ends down in there. The hole will stretch so you can really shove a lot down in there with some effort.
You should have both ends coming out the bottom of the sandal. Be sure that the braid isn’t all twisted on the other side. Next, tie really tight knots into each end of the braid and then trim off the excess fabric. The trickiest part here is making sure that your braid is just the right length.
Then add a little hot glue beneath your knots and into the crevice of the flip-flop that you dug out earlier.
While the glue is still hot, press the knots into the foam sandal and as hard as you can, to really secure the knots in place…….and to force them into the sole of the sandal. (Depending on how big your knots are, depends on how much you should cut out of the sandal. You may feel the knots a bit while walking if you have bigger knots, so keep that in mind as well.)
Now, cut more strips of your knit fabric and make a loop of fabric on each side of the sandal, including the braided strap as you loop the side strap down in place.
After you have both side loops in place, make knots in the bottom and trim off the excess. Glue them in place the same way.
This next step is optional but it really helps make the section that goes between your toes, less bulky. I just wrapped some thread around the toe section over and over again as tight as I could (without breaking the thread) and knotted it in place.
And that’s it. Now your flip-flops are done and ready to wear.
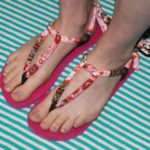
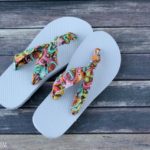
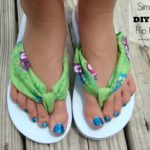
Here are some variations on this theme:


Borrowed from: The Prosperity Project


I think it's time to go shopping... maybe even buy some really cool stuff at my online shops!!
