Yearly Archives: 2017
Make A T-Shirt Tote
Here’s a clever idea for making bags from T shirts. It requires no sewing skills whatsoever. I found it at Mommypotamus
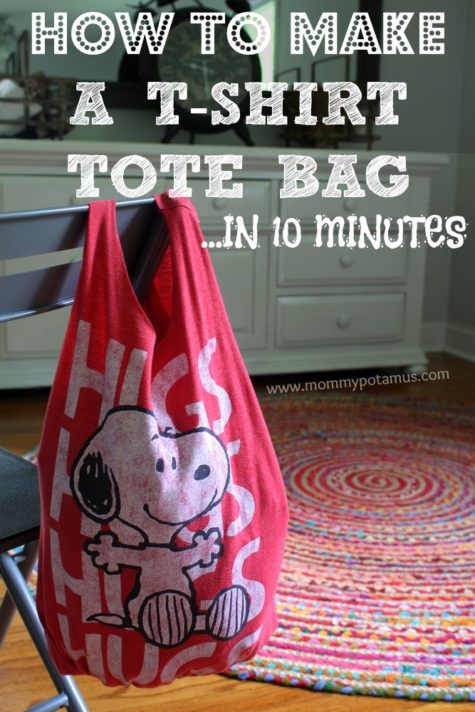
I’ve been looking for an easy-to-carry, washable alternative for the kids to use, and over the weekend I came across the perfect solution. My local thrift shop was selling cute t-shirts for 99 cents apiece that were practically begging to be upcycled into a farmer’s market tote. They’re 100% washable, and when they’re no longer useful as bags I can cut them into rags to clean with.
There was just one problem: I can’t sew. At all.
Fortunately, I came across some no-sew ideas that Katie and I adapted to fit our style (which, if you’re curious, generally favors the color red and anything Snoopy). The took no more than 10 minutes from start to finish, and I love how they turned out.
Supplies:
- Old t-shirt – The thicker the fabric, the sturdier the bag
- Sharp scissors, preferably fabric scissors
- Washable marker (optional)
 Step 1: Cut the sleeves off
If you’d like to fold the t-shirt in half you can cut both sleeves at once so that they are identical.
Or, if your material is too thick to cut them both at once, you can cut one, then fold it in half and use the cut side as a guide for the next sleeve.
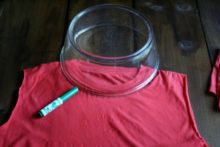 Step 2: Cut the neckline area
If you’d like, you can turn the shirt inside out and trace the outline of a bowl before cutting.
I used both methods and personally, I like free-hand cutting better because I prefer a slightly oval shape to a perfectly round one.
I ended up trimming this one a bit to make it more oval.
 Step 3: Determine how deep you want the bag to be
If you haven’t already turned your t-shirt inside out, do it now. Determine where you want the bottom of the bag to be and trace a line across.
Keep in mind that depending on the fabric used, your tote is likely stretch and become longer when it’s filled with stuff.
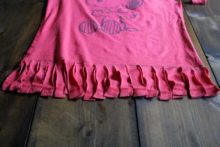 Step 4: Cut fringe
Now grab your scissors and cut slits from the bottom of the shirt up to the line marking the bottom of your bag.
You’ll want to cut both the front and back layers together because they need to match up for the next step.
I cut my slits about 3/4 to 1 inch apart.
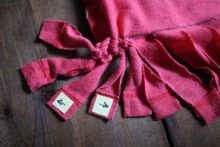 Step 5: Tie Fringe
Okay, this is going to sound really complicated, but it’s NOT, promise. Take your first pair of fringe and tie it into a knot, then tie two more pairs.
Now if you lift your bag you’ll see that although the pairs are pulling the bag together, there’s a hole between each pair. This next step will close those holes.
In the photo above you see three sets of fringe that have been tied in knots. What I do next is grab one strand from the middle set (the one with the arrow pointing left) and tie it in a knot with one of the strands on the left set. Then I take the other strand from the middle set (the one with the arrow pointing right) and tie it in a knot with one of the strands on the right set.
Then I take the remaining strand on the right set and tie it to the next set of strands, and so on and so forth until all the strands are tied. Now turn your t-shirt right side out again and voila, you’re done!
A Couple Of Fun Variations
- Turn the bag right side out when tying the fringe so that it hangs from the bottom.
- Tie the straps in knots, or tie bits of t-shirt scrap to the top as embellishments
Delicious and Aromatic
Here is a collection of recipes for some deliciously decadent wonderfully aromatic cleaning products that you can make yourself.

White vinegar is something of a super tool when it comes to cleaning. It’s non-toxic, inexpensive, easy to find, and cleans, oh, just about everything: It brightens windows, freshens laundry, banishes spots on carpeting, and much more. A spray-bottle of a vinegar solution is great to have around for pesky cleaning tasks (though, avoid using it on marble countertops and hardwood floors, since the acidity could damage them).
The most effective cleaning mixture is 50% white vinegar, 50% water, but you can also add fruit peels, herbs or essential oil to the bottle so your house will smell great, too. Just give it a shake and let it infuse for at least a week.
Here’s an all purpose recipe:
Get a spray bottle and fill it up. If you’re recycling a bottle from a previous cleaner make sure you rinse it out well before mixing your ingredients (duh).
You’ll need:
- Warm Water
- White Vinegar
- Isopropyl Alcohol
- Dish Soap (a drop)
- Fresh aromatic herbs and/or your favorite essential oil.
Put your leaves in the bottle and bruise them with a wooden spoon handle. You can also just twist them up or squeeze them in your hand. This activates the leaves to produce their natural oils. Make sure your herbs are very fresh so you get as much scent as possible from them. It’s really hard to completely mask the smell of vinegar but that’s just the price we pay for DIYing it. The smell quickly dissipates when it dries so it’s fiiiiine.
The mixture is easy:
- 1 part warm water,
- 1 part vinegar,
- 1/2 part alcohol.
- Add a DROP of dish soap and shake it up.
The herbs will permeate the mixture with their natural essential oils. Not only does it help cut the alcohol and vinegar scent some but herbs and essential oils also act as a natural antibacterial component.
There you go!
In summer I like to add orange or lemon peels. You can easily use essential oils to scent your spray as little or as much as you’d like. They work a little better since the scent is concentrated.
Note: You can refresh the scent with essential oils if and when your mixture begins to smell too much like vinegar.
Variations
1. A Balanced Blend: Two or three pieces of lemon rind and a few springs of rosemary blend together to create a clean, fresh scent. Plus, the fruit’s acid adds extra cleaning properties — perfect for stubborn stains.
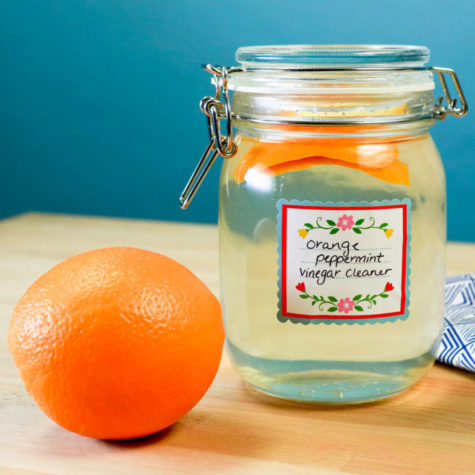
2. A Hint of Citrus: A little bit of essential oil goes a long way, and 2-3 drops of peppermint are just enough to lend an energizing burst to the summery scent of orange rinds.
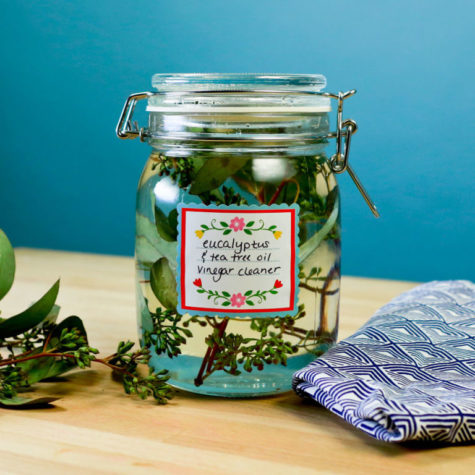
3. A Cool Burst: A few sprigs of eucalyptus and 2-3 drops of tea tree oil create a stench-absorbing powerhouse — and some people believe tea tree fights bacteria, too. Whether that’s true or not, this combination is incredibly invigorating.
4. An Earthy Option: Infuse your solution with fresh sage leaves.
5. Spicy and Sweet: This recipe adds interest with orange peels, cinnamon sticks and vanilla beans. You could also add cloves, allspice, and nutmeg for something a little more seasonal.
6. A Relaxing Aroma: Infuse your vinegar solution with fresh lavender, lemon balm, or even delightful spicy scented geranium leaves.
7. Play with Oils: Essential oils come in many fun scents (and some will kill bacteria and mold). Just be sure to shake to combine before using. Add about 10 drops of a pure essential oil (no synthetic fragrances or you’re defeating the purpose of non-toxic cleaning) to your half vinegar-half water spray bottle. Of all the essential oils I’ve tried, peppermint is one of the few that actually masks the odor of the acetic acid in vinegar. Not a mint fan, try clove or eucalyptus which are also strong oils.
Borrowed from: The Prosperity Project
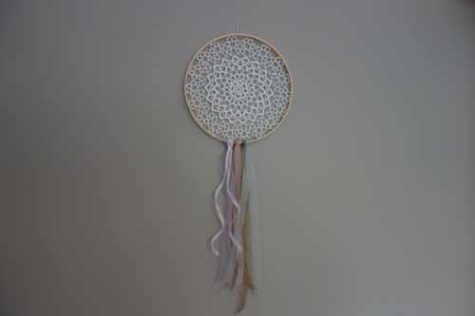
A Dream Catcher From A Doily
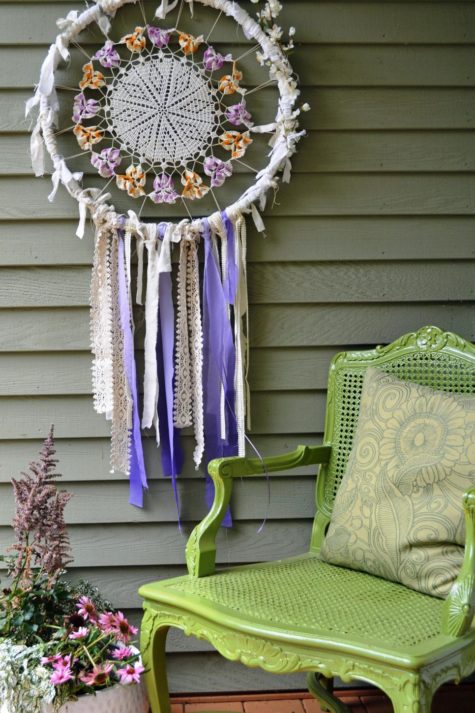
Hang a dream catcher on or next to your door. Let it catch your troubles as you pass. The one in the picture was made from a bicycle wheel, a doily and some ribbon. Dream catchers made from doilies are amazingly easy to put together!
Here’s a short visual tutorial:
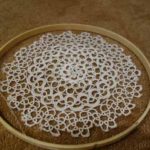
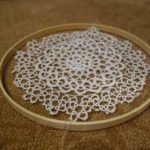
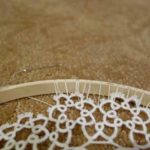
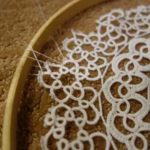

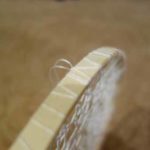
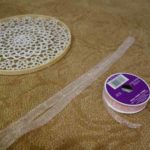
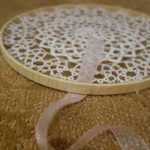

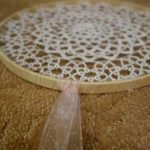

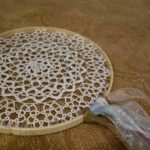
Basically, you use the inside hoop of an embroidery hoop for the frame, and then you tie the doily on in four places to keep it stabilized. Then, using embroidery thread, you attach the doily to the frame. When that’s complete, add the ribbon and voila! Read the complete tutorial at: Bumble Bee Linens
This is the finished product:
Borrowed from The Prosperity Project
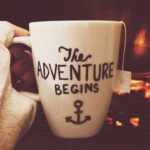
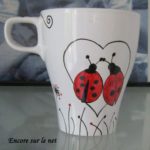
Decorating Mugs!

Yesterday, I explored a magickal cup of coffee, and it got me thinking about coffee mugs and so I went on a DIY search and found a bunch of tutorials on how to personalize and decorate coffee mugs. The first tutorial, found at Pop Sugar, features the use of sharpies. Here it is:
How to Make A Sharpie Mug
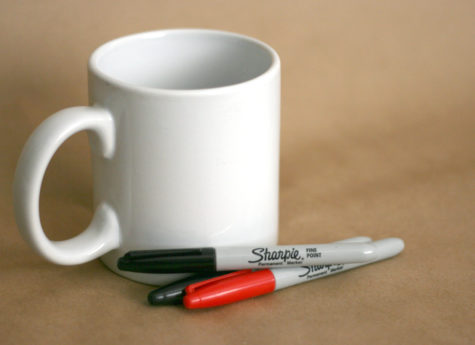
Do you have a plain, boring mug that needs a bit of spicing up? Personalize your cups and mugs by drawing on them! You can use them to add personality to your home or even give them as gifts to your loved ones. Here’s how to start:
- Buy some white cups or mugs. You can find them in superstores, thrift stores, dollar stores, and online. The cheaper the mug, the better this works.
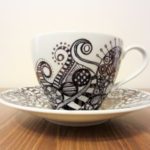
- Pick a Sharpie. For long-lasting results, choose oil-based paint Sharpie markers. Regular Sharpie ink can come off even after baking. Pick a color to use on your mug. You can stay simple and choose one color, or be more ambitious and use multiple. If you’re sticking to one color, then black is usually a good choice, given its striking contrast to the white background of the mug.
- Wash the mug. Before applying the Sharpie, it’s important to get the mug completely clean and free of any oily residue from hands or fingers. Alcohol works well, after the mug has been washed with soap and water.
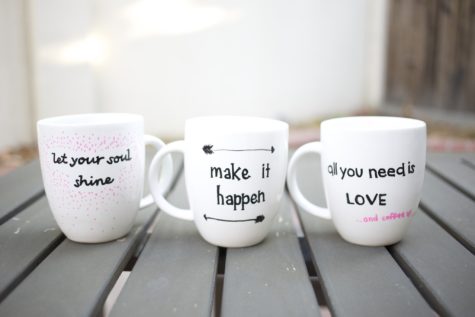
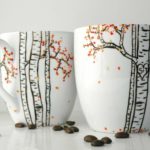
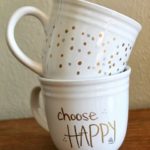
- Start drawing. Decide what you want to put on the cup, and maybe practice drawing it on a piece of paper before drawing on the mug. Pick a meaningful quote or a cute graphic to decorate the mug with, and get inspired by mugs being sold on Etsy or by googling examples of Sharpie mug projects online.
- Dry it out. For the best results, let the sharpie dry completely for 24 hours then bake at a low temp oven like 225° for 2 plus hours.
- Bake it. Remember to place the mug in the oven before it heats up and leave it in until the oven cools completely so there won’t be any cracks. You can choose to bake the mugs twice to really set in the Sharpie drawings. Baking the mug in the oven for 30 minutes at 350°F is what most tutorials recommend, but for best results, bake it at a lower temperature for a longer period of time (see above).
- Care and wash. If you use quality, oil-based sharpies, they should be dishwasher safe. All my pieces have gone through the dishwasher several times now, with no flaw. If you don’t feel sure about the dishwasher – hand washing is recommended.
Does it really work?
While Sharpie mugs are very popular right now, there doesn’t seem to be any consensus on how to best make the mugs. Some say that some of the colors change when baked, some say that they don’t stand up to dishwasher washing (or handwashing even…), and some say that the paint chips off the mugs after a couple uses.
I found an experiment using 14 colors of oil-based, fine point Sharpies and Dollar Tree mugs at Destination Decoration, and her results were as follows:
While decorating the mugs, I wore gloves so the oils from my skin did not affect the finished product. All parts of the mug were dried for 24 hours before baking.
Based on my experiment, baking a Dollar Tree mug at 250 degrees for 2 hours provided the best results. The color of the paint remained largely the same and paint on the mug did not chip at all (except for the minor top chipping).
Tips from other tutorials and crafters:
- I used Pebeo Porcelaine 150 Paint Markers and they work great and do not come off. You can find them at Michaels or Amazon.com. I have even put them in the dishwasher. Stayed on great.
- It didn’t work for me! I just got a paint pen. They work perfectly fine and not any more expensive than sharpies.
- I monogrammed plates and cups with Sharpie oil based markers and did not bake. Let dry for 48 hours been in dishwasher many times and none of mine have come off at all.
- Here is what I find that works. Cheap Walmart mugs are best. Regular sharpies. Wipe first with alcohol to remove any residue. Careful not to touch drawing area with hands. After putting design on, wait 24 hours. Then put in cold oven. Turn temp to 425 and set timer for 30 minutes. At 30 minutes turn off oven, leaving project in until it’s completely cool. Hand wash then do a test run in the dishwasher.
- “I read an extensive article about this somewhere. First, cheap mugs work best due to the inexpensive glaze used. Put mugs in COLD oven, turn oven to 450 (not 350). The glaze needs to re-melt to incorporate the marker into it!! AFTER oven reaches temp, bake for 30 minutes. Turn oven off.. LEAVE MUGS IN CLOSED OVEN (not yelling, just important). Cool for 15 min, slightly crack oven open and let cool over night. This should properly incorporate the ink with the glaze.
- My aunt did it one year, I think she used car paint for scratch fixes. Not sure about the baking part. They lasted for years!
- You can get enamel/glass clear medium and paint over it with that and re-bake. That may help if that doesn’t work, then probably nothing will.
- Clean glass with rubbing alcohol first. Oil base isn’t for glass. Use Folk Art enamels paint applying with a brush or paint pens for glass only! You still have to bake for 30 minutes but let sit for 1 hour before you bake.
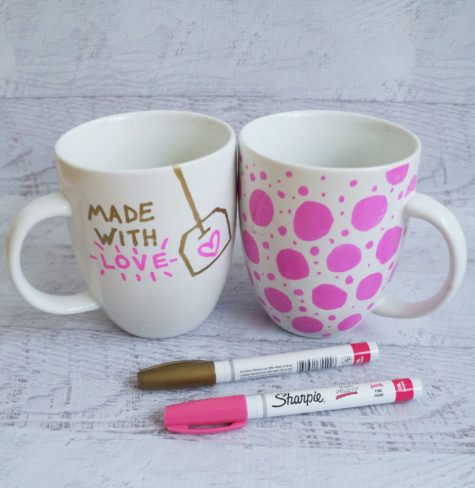
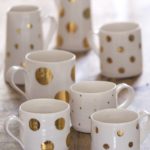
Design Ideas


Cute Felt Fairy Houses
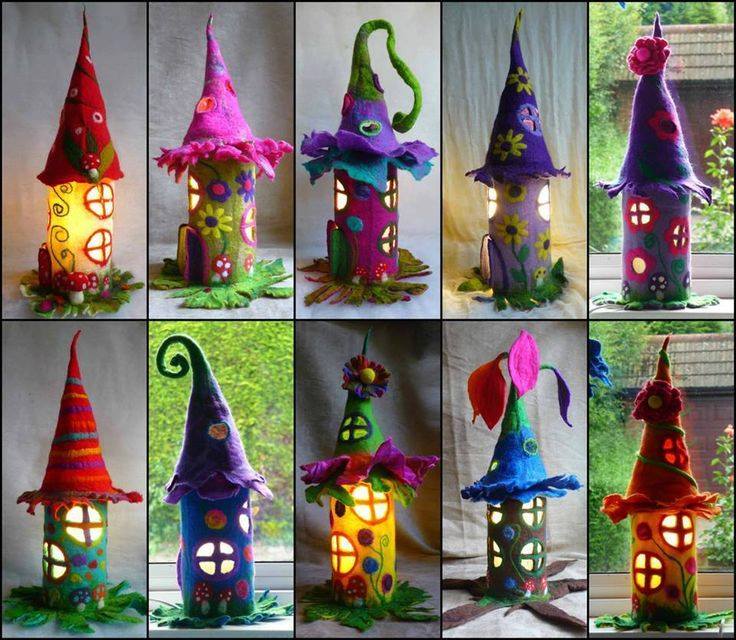
These cool houses are made with felt glued to bottles and lit from the bottom… at least they look lit up… what a great idea.
To make one of these cute little houses you will need a bottle, some felt for walls roof and base, yarn or ribbon for decoration and to frame the door and windows, glue, scissors, and an idea of what kind of house might just entice a winged friend to visit.
If you make the houses using a plastic bottle, the bottom could be cut out, and an LED candle inserted. If you are using a glass bottle, pick one with a wide mouth lid, and design your roof to be easily removeable. An LED candle can then be easily inserted through the top.
I looked for, but was unable to find a YouTube tutorial on how to make these. If I happen to find a tutorial, I’ll share it. In the mean time, use your imagination, and don’t be afraid to experiment.
Confused?
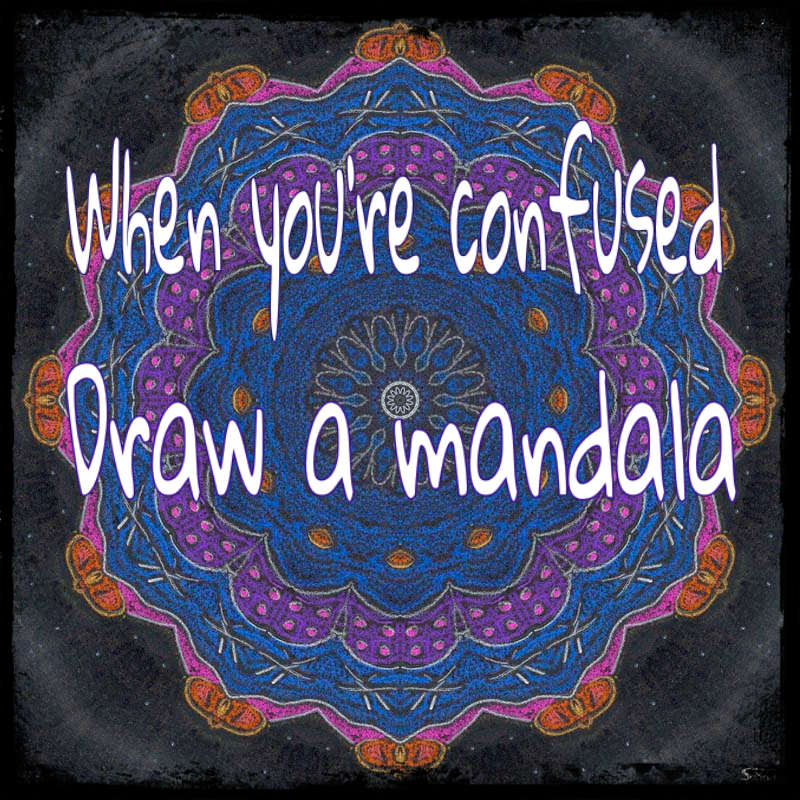
When you’re confused, draw a mandala.
100 Art Therapy Exercises
Here is a popular internet list of art therapy activities originally posted up many years ago by the Nursing School Blog. I agree that they would make interesting art therapy projects, and I also think this is a great list to browse through if you are looking for an idea or an inspiration.

Emotions
Deal with emotions like anger and sadness through these helpful exercises.
- Draw or paint your emotions.
In this exercise, you’ll focus entirely on painting what you’re feeling. - Create an emotion wheel.
Using color, this activity will have you thinking critically about your emotions. - Make a meditative painting.
Looking for a creative way to relax? Have trouble sitting still to meditate? Meditative painting might be just the thing you’re looking for. No painting skill or experience necessary – only a desire to relax and become more creative. - Put together a journal.
Journals don’t have to just be based around words. You can make an art journal as well, that lets you visually express your emotions. - Explore puppet therapy.
Puppets aren’t just for kids. Make your own and have them act out scenes that make you upset. - Use line art.
Line is one of the simplest and most basic aspects of art, but it can also contain a lot of emotion. Use simple line art to demonstrate visually how you’re feeling. - Design a postcard you will never send.
Are you still angry or upset with someone in your life? Create a postcard that expresses this, though you don’t have to ever send it. - Create a family sculpture.
For this activity, you makes a clay representation of each family member– mother, father, siblings, and any other close or influential family members to explore emotional dynamics and roles within your family. - Paint a mountain and a valley.
The mountain can represent a time where you were happy, the valley, when you were sad. Add elements that reflect specific events as well. - Attach a drawing or message to a balloon.
Send away negative emotions or spread positive ones by attaching a note or drawing to a balloon and setting it free. - Collage a heart.
Collage your childhood memories in a heart formation.
Relaxation
Art therapy can be a great way to relax. Consider these exercises if you’re looking to feel a little more laid back.
- Paint to music.
Letting your creativity flow in response to music is a great way to let out feelings and just relax. - Make a scribble drawing.
With this activity, you’ll turn a simple scribble into something beautiful, using line, color and your creativity. - Finger paint.
Finger painting isn’t just fun for kids– adults can enjoy it as well. Get your hands messy and really have fun spreading paint around. - Make a mandala.
Whether you use the traditional sand or draw one on your own, this meditative symbol can easily help you to loosen up. - Draw with your eyes closed.
Not being able to see what you are drawing intensifies fluidity, intuition, touch and sensitivity. - Draw something HUGE.
Getting your body involved and moving around can help release emotion as you’re drawing. - Use color blocks.
Colors often come with a lot of emotions attached. Choose several paint chips to work with and collage, paint and glue until you’ve created a colorful masterpiece. - Let yourself be free.
Don’t allow yourself to judge your work. If you think your paintings are too tight and controlled, this collection of tips and techniques to try should help you work in a looser style. - Only use colors that calm you.
Create a drawing or a painting using only colors that you find calming. - Draw in sand.
Like a Zen garden, this activity will have you drawing shapes and scenes in the sand, which can be immensely relaxing and a great way to clear your mind. - Make a zentangle.
These fun little drawings are a great tool for letting go and helping reduce stress. - Color in a design.
Sometimes, the simple act of coloring can be a great way to relax. Find a coloring book or use this mandala for coloring. - Draw outside.
Working en plein air can be a fun way to relax and get in touch with nature while you’re working on art.
Happiness
Art can not only help you deal with the bad stuff, but also help you appreciate and focus on the good. Check out these activities all about reflecting on your personal happiness.
- Collage your vision of a perfect day.
Think about what constitutes a perfect day to you and collage it. What about this collage can you make happen today? - Take photographs of things you think are beautiful.
No one else has to like them but you. Print and frame them to have constant reminders of the beautiful things in life. - Make a collage related to a quote you like.
Take the words of wisdom from someone else and turn them into something visually inspiring. - Create a drawing that represents freedom.
The Surrealists embraced automatic drawing as way to incorporate randomness and the subconscious into their drawings, and to free themselves from artistic conventions and everyday thinking. - Document a spiritual experience.
Have you ever had a spiritual experience in your life? Paint what it felt like intuitively. - Make a stuffed animal.
Soft, cuddly objects can be very comforting. Use this project to create an animal from your intuitive drawings. - Work on a softness project.
Using only soft or comforting objects, create a work of art. - Build a “home.”
What does home mean to you? This activity will have you create a safe, warm place that feels like home to you. - Document an experience.
An experience where you did something you didn’t think you could do. We all have to do things that we’re scared or unsure of sometimes. Use this activity as a chance to commemorate one instance in your life. - Think up a wild invention.
This invention should do something that can help make you happier– no matter what that is. - Make a prayer flag.
Send your prayers for yourself or those around you out into the universe with this project.
Portraits
Often, a great way to get to know yourself and your relationships with others is through portraits.
- Create a past, present and future self-portrait.
This drawing or painting should reflect where you have been, who you are today, and how see yourself in the future. - Draw a bag self-portrait.
On the outside of a paper bag, you’ll create a self-portrait. On the inside, you’ll fill it with things that represent who you are. - Choose the people who matter most to you in life and create unique art for each.
This is a great way to acknowledge what really matters to you and express your gratitude. - Collage someone you admire.
If someone has ever helped inspire your path, collage this person. - Create an expressive self-portrait.
Paint in expressive colors. Select colors for emotional impact. - Draw yourself as a warrior.
Start thinking about yourself as a strong, capable person by drawing yourself as a warrior in this activity. - Create a transformational portrait series.
Transform your perceptions about yourself with this list of self-portrait ideas. - Imitate Giuseppe Arcimboldo.
Using objects that have meaning to you, create a portrait of yourself. - Create a body image sketch.
Practice life drawing to fall in love with all of the varieties of the human body, including your own. - Draw a mirror.
This activity is based around a Piet Mondrian quote: “The purer the artist’s mirror is, the more true reality reflects in it.” It involves letting die what is not your true reflection, is getting back a truer reflection of yourself in your mirror. - Draw yourself as a superhero.
Many people like superhero stories. We resonate with the themes in the stories, with the dilemmas and problems that superheroes face, and we aspire to their noble impulses and heroic acts.
Trauma and Loss
These activities will ask you to face some unpleasant aspects of life, but with the goal of overcoming them.
- Draw a place where you feel safe.
An art therapy directive for finding your safe place for healing from trauma. - Create a mini-diorama.
This diorama can showcase an important moment in your life or some trauma that you’ve experienced. - Create a collage of your worries.
What worries you in your life? Cut out pictures from magazines to represent these worries. - Draw something that scares you.
Everyone is frightened of something and in this project you’ll get a chance to bring that fear to light and hopefully work towards facing it. - Turn your illness into art.
Struggling with a potentially terminal illness? Turn your illness into something meaningful with the creative journal method. - Paint a loss in your life.
If you’ve lost someone you love or something, paint it. This will help you to remember but also to recover. - Make art that is ephemeral.
Sometimes we have a hard time letting go, but this project will teach you that it’s ok if something doesn’t last. Use materials like sand, chalk, paper or water to create art that you will destroy when it’s done.
Collaging
If you prefer to cut and paste rather than draw or paint, these projects are for you.
- Create a motivational collage.
You can hang this collage somewhere you’ll see it everyday. Filled with images you find motivating, it’ll help you keep pushing on. - Create a face collage on a mask.
We all wear masks of some sort. This project lets you showcase what’s in your mask and the face you put on for the world. - Create a clutter collage.
Are there things cluttering up your life? In this project, use words and pictures to show the clutter in your way. - Create a calming collage.
Choose images that you find soothing, calming or even meditative and combine them to create an attractive collage that can help you to relax. - Collage a painting.
To complete this exercise, you’ll first need to create a simple, abstract painting on paper. Then, tear this painting up and create another. Think about how you felt when you had to tear up the first painting and which you like more.
Self
Examine aspects if who you are and how you see the world through these amazing art projects.
- Draw images of your good traits.
Creating drawings of your good traits will help you to become more positive and build a better self-image. - Draw yourself as an animal.
Is there an animal that you have a special interest in or feel like is a kindred spirit? Draw yourself as that animal. - Create a timeline and journal the most significant moments in your life.
This timeline will be the story of your life, with the most important moments highlighted visually. - Put together a jungle animal collage.
Choose jungle animals that you find the most interesting, draw them, and then reflect on why you’ve chosen these specific animals. - Sculpt your ideal self.
If you could make yourself into the perfect person, what would you look like? - Draw the different sides of yourself.
In this project, you’ll explore the different aspects of your personality, giving each a visual representation. You might only have one or two, or maybe even twelve. - Make art with your fingerprints.
Your fingerprints are as unique as you are. Use ink and paint to make art that uses your fingerprints. - Draw yourself as a tree.
Your roots will be loaded with descriptions of things that give you strength and your good qualities, while your leaves can be the things that you’re trying to change. - Design a fragments box.
In this project, you’ll put fragments of yourself into a box, helping construct a whole and happier you. - Paint an important childhood memory.
What was a pivotal memory in your childhood? This activity asks you to document it and try to understand why it was so important to you. - Write and illustrate a fairy tale about yourself.
If you could put yourself into a happily ever after situation, what role would you play and how would the story go? Create a book that tells the tale. - Design a visual autobiography.
This creative journaling project asks you to look back at your life and make a visual representation of it. - Create your own coat of arms.
Choose symbols that represent your strengths to build your own special coat of arms. - Draw a comic strip about a funny moment in your life.
Enjoy a moment of levity with this exercise that will focus in on a comical even that happened to you. - Build your own website.
Websites are very versatile ways to express yourself. Build your own to express what’s most important about you. - Create a box of values.
First, collage or paint a box the represents you. Then, place items inside the box that represent the things you value the most.
Gratitude
Here you’ll find a collection of projects that will help you be happy about what you have and express your gratitude for it.
- Document your gratitude visually.
What things are you grateful for in your life? Paint or collage a work that represents these things. - Create a family tree of strength.
This exercise honors those around you who support you. Paint those close to you who offer you the strength you need. - Make something for someone else.
Making something for someone else can be a great way to feel good and help someone else do so as well. - Make anchor art.
Who are the anchors in your life? In this project, you’ll make an anchor and decorate it with the people and things that provide you stability and strength. - Draw all the positive things in your life.
Everyone has at least one good thing in life, so sit down and figure out what makes you happy– then draw it. - Sculpt your hand in plaster.
Once it’s dry, write all the good things you can do with it right onto the hand. - Paint a rock.
This project is meant to offer you strength. You can approach it in two ways. One option is to paint the rock with things that empower you. The other is to paint it with struggles you overcome. - Write on leaves to create a gratitude tree.
What are you grateful for? This project asks you to write those things on leaves to construct a tree or banner of gratitude. - Map of consciousness collage.
More often than not, in a single day, we can feel conflicted in our consciousness in several different ways. This directive helps to explore personality dynamics by mapping them out visually with spontaneous collage and drawing. - Create a snowflake out of paper.
Write ideas about how you are unique on the snowflake. - Build a personal altar.
This is a highly personal project that will help connect you with your spiritual side and honor your resilience.
Inside the Mind
Take a look inside your mind to see what’s going on with these projects.
- Create a blot art.
Like a classic Rorschach test, fold paper in half with paint or ink in the middle and describe what you see. - Mind Mapping.
Make a visual representation of your thoughts to figure out how your mind works. - Make a dreamcatcher.
Having bad dreams? Create this age-old tool for catching your dreams with a few simple tools. - Draw your dreams.
You can learn a lot from what goes on in your dreams, so keep a dream journal and use it for inspiration to draw or paint.
Miscellaneous
If you’re still looking for something to empower, help or soothe you, these projects may fit the bill.
- Use natural materials.
Leaves, sticks, dirt, clay and other natural materials can help you get in touch with the natural world and the more primal side of yourself. - Build an archetype.
Check out this series of projects to build a set of archetypes, or ideal examples, that can help you explore how you see the world. - Use your body as a canvas.
You don’t need paper when you have you body. Paint on your hands and feet or anywhere else to feel more in touch with yourself. - Sculpt spirit figures.
Connect with those that have passed on or your own spiritual essence using these sculpted figures. - Make art out of recycled items.
You can reuse old items that have meaning to you or just re-purpose something you have laying around. Either way, you’ll get insights into how you can reshape and reevaluate your own life. - Collage with old photographs.
If you’re uncomfortable using old photos you can make copies, but with this project you’ll draw out one characteristic you see in the person in the photos. - Create your own interpretation of a famous work of art.
How would you have painted the Mona Lisa? Using a famous work as your inspiration, create your own work. It could help reveal more about your lens on the world. - Work collaboratively.
Art can be better when two work at it together, so find a partner and collaborate on just about anything. - Use a found or made object as a paintbrush.
Whether it’s something sharp or something soft, make your own artistic tool and use it to express what you’re feeling. - Make crayon stained glass.
Reflect upon your spiritual side with this project that lets you create your own stained glass window. - Paint a window.
Windows let you see in and see out. Paint yours with things you want to hide or show to the world.
Found at Intuitive Creativity


I think it's time to go shopping... maybe even buy some really cool stuff at my online shops!!
