Monthly Archives: September 2017
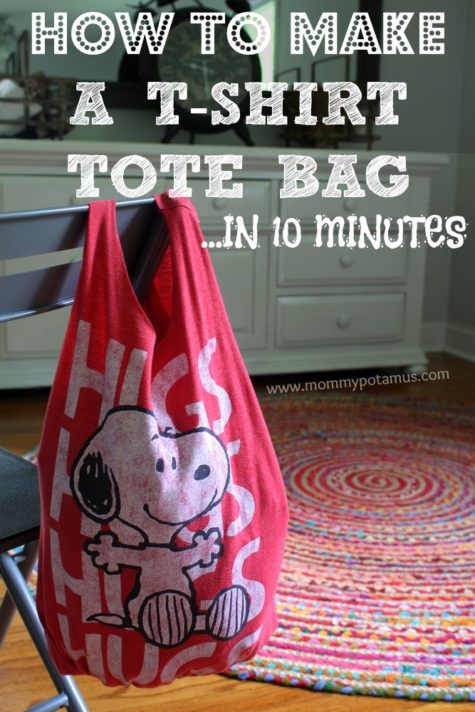
Make A T-Shirt Tote
Here’s a clever idea for making bags from T shirts. It requires no sewing skills whatsoever. I found it at Mommypotamus
I’ve been looking for an easy-to-carry, washable alternative for the kids to use, and over the weekend I came across the perfect solution. My local thrift shop was selling cute t-shirts for 99 cents apiece that were practically begging to be upcycled into a farmer’s market tote. They’re 100% washable, and when they’re no longer useful as bags I can cut them into rags to clean with.
There was just one problem: I can’t sew. At all.
Fortunately, I came across some no-sew ideas that Katie and I adapted to fit our style (which, if you’re curious, generally favors the color red and anything Snoopy). The took no more than 10 minutes from start to finish, and I love how they turned out.
Supplies:
- Old t-shirt – The thicker the fabric, the sturdier the bag
- Sharp scissors, preferably fabric scissors
- Washable marker (optional)
 Step 1: Cut the sleeves off
If you’d like to fold the t-shirt in half you can cut both sleeves at once so that they are identical.
Or, if your material is too thick to cut them both at once, you can cut one, then fold it in half and use the cut side as a guide for the next sleeve.
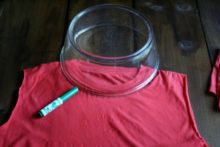 Step 2: Cut the neckline area
If you’d like, you can turn the shirt inside out and trace the outline of a bowl before cutting.
I used both methods and personally, I like free-hand cutting better because I prefer a slightly oval shape to a perfectly round one.
I ended up trimming this one a bit to make it more oval.
 Step 3: Determine how deep you want the bag to be
If you haven’t already turned your t-shirt inside out, do it now. Determine where you want the bottom of the bag to be and trace a line across.
Keep in mind that depending on the fabric used, your tote is likely stretch and become longer when it’s filled with stuff.
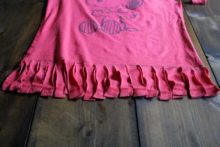 Step 4: Cut fringe
Now grab your scissors and cut slits from the bottom of the shirt up to the line marking the bottom of your bag.
You’ll want to cut both the front and back layers together because they need to match up for the next step.
I cut my slits about 3/4 to 1 inch apart.
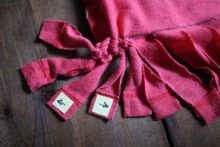 Step 5: Tie Fringe
Okay, this is going to sound really complicated, but it’s NOT, promise. Take your first pair of fringe and tie it into a knot, then tie two more pairs.
Now if you lift your bag you’ll see that although the pairs are pulling the bag together, there’s a hole between each pair. This next step will close those holes.
In the photo above you see three sets of fringe that have been tied in knots. What I do next is grab one strand from the middle set (the one with the arrow pointing left) and tie it in a knot with one of the strands on the left set. Then I take the other strand from the middle set (the one with the arrow pointing right) and tie it in a knot with one of the strands on the right set.
Then I take the remaining strand on the right set and tie it to the next set of strands, and so on and so forth until all the strands are tied. Now turn your t-shirt right side out again and voila, you’re done!
A Couple Of Fun Variations
- Turn the bag right side out when tying the fringe so that it hangs from the bottom.
- Tie the straps in knots, or tie bits of t-shirt scrap to the top as embellishments
Delicious and Aromatic
Here is a collection of recipes for some deliciously decadent wonderfully aromatic cleaning products that you can make yourself.

White vinegar is something of a super tool when it comes to cleaning. It’s non-toxic, inexpensive, easy to find, and cleans, oh, just about everything: It brightens windows, freshens laundry, banishes spots on carpeting, and much more. A spray-bottle of a vinegar solution is great to have around for pesky cleaning tasks (though, avoid using it on marble countertops and hardwood floors, since the acidity could damage them).
The most effective cleaning mixture is 50% white vinegar, 50% water, but you can also add fruit peels, herbs or essential oil to the bottle so your house will smell great, too. Just give it a shake and let it infuse for at least a week.
Here’s an all purpose recipe:
Get a spray bottle and fill it up. If you’re recycling a bottle from a previous cleaner make sure you rinse it out well before mixing your ingredients (duh).
You’ll need:
- Warm Water
- White Vinegar
- Isopropyl Alcohol
- Dish Soap (a drop)
- Fresh aromatic herbs and/or your favorite essential oil.
Put your leaves in the bottle and bruise them with a wooden spoon handle. You can also just twist them up or squeeze them in your hand. This activates the leaves to produce their natural oils. Make sure your herbs are very fresh so you get as much scent as possible from them. It’s really hard to completely mask the smell of vinegar but that’s just the price we pay for DIYing it. The smell quickly dissipates when it dries so it’s fiiiiine.
The mixture is easy:
- 1 part warm water,
- 1 part vinegar,
- 1/2 part alcohol.
- Add a DROP of dish soap and shake it up.
The herbs will permeate the mixture with their natural essential oils. Not only does it help cut the alcohol and vinegar scent some but herbs and essential oils also act as a natural antibacterial component.
There you go!
In summer I like to add orange or lemon peels. You can easily use essential oils to scent your spray as little or as much as you’d like. They work a little better since the scent is concentrated.
Note: You can refresh the scent with essential oils if and when your mixture begins to smell too much like vinegar.
Variations
1. A Balanced Blend: Two or three pieces of lemon rind and a few springs of rosemary blend together to create a clean, fresh scent. Plus, the fruit’s acid adds extra cleaning properties — perfect for stubborn stains.
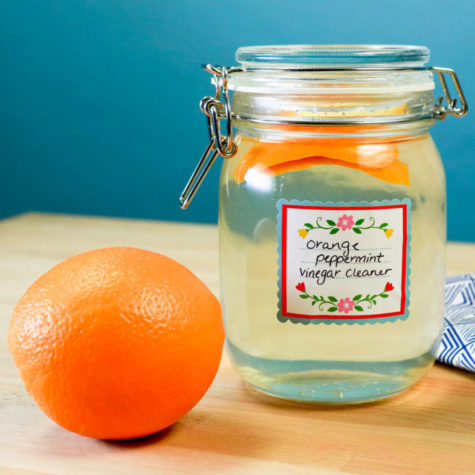
2. A Hint of Citrus: A little bit of essential oil goes a long way, and 2-3 drops of peppermint are just enough to lend an energizing burst to the summery scent of orange rinds.
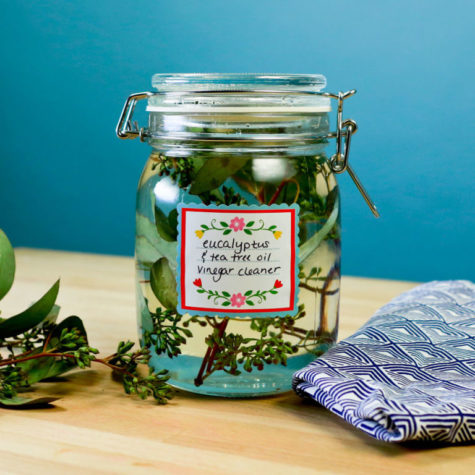
3. A Cool Burst: A few sprigs of eucalyptus and 2-3 drops of tea tree oil create a stench-absorbing powerhouse — and some people believe tea tree fights bacteria, too. Whether that’s true or not, this combination is incredibly invigorating.
4. An Earthy Option: Infuse your solution with fresh sage leaves.
5. Spicy and Sweet: This recipe adds interest with orange peels, cinnamon sticks and vanilla beans. You could also add cloves, allspice, and nutmeg for something a little more seasonal.
6. A Relaxing Aroma: Infuse your vinegar solution with fresh lavender, lemon balm, or even delightful spicy scented geranium leaves.
7. Play with Oils: Essential oils come in many fun scents (and some will kill bacteria and mold). Just be sure to shake to combine before using. Add about 10 drops of a pure essential oil (no synthetic fragrances or you’re defeating the purpose of non-toxic cleaning) to your half vinegar-half water spray bottle. Of all the essential oils I’ve tried, peppermint is one of the few that actually masks the odor of the acetic acid in vinegar. Not a mint fan, try clove or eucalyptus which are also strong oils.
Borrowed from: The Prosperity Project
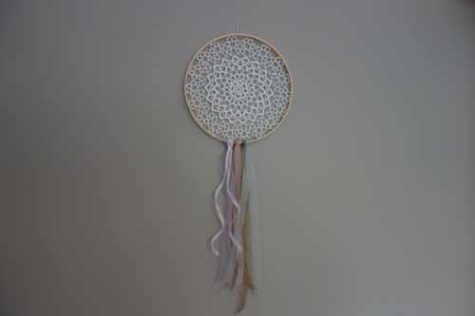
A Dream Catcher From A Doily
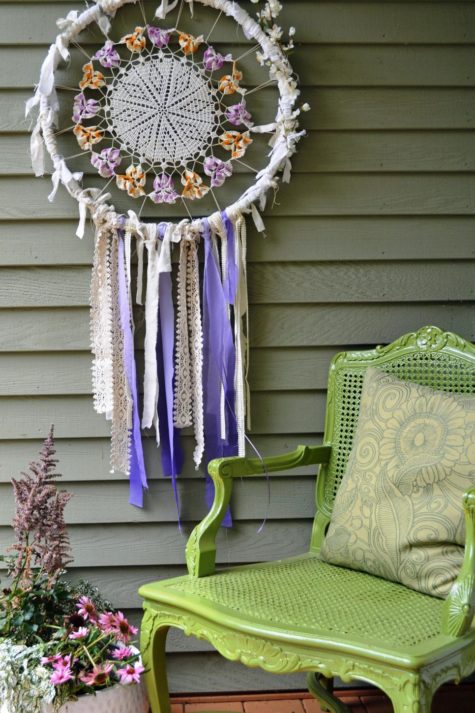
Hang a dream catcher on or next to your door. Let it catch your troubles as you pass. The one in the picture was made from a bicycle wheel, a doily and some ribbon. Dream catchers made from doilies are amazingly easy to put together!
Here’s a short visual tutorial:
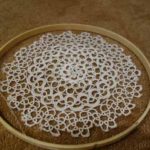
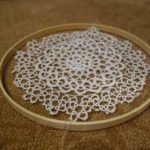
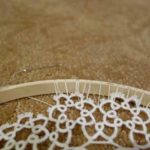
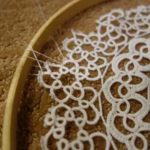

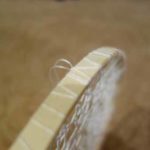
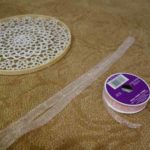
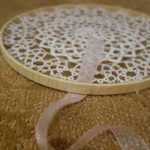

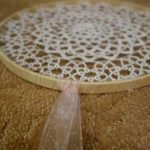

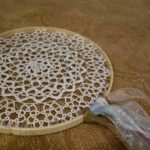
Basically, you use the inside hoop of an embroidery hoop for the frame, and then you tie the doily on in four places to keep it stabilized. Then, using embroidery thread, you attach the doily to the frame. When that’s complete, add the ribbon and voila! Read the complete tutorial at: Bumble Bee Linens
This is the finished product:
Borrowed from The Prosperity Project
Decorating Mugs!

Yesterday, I explored a magickal cup of coffee, and it got me thinking about coffee mugs and so I went on a DIY search and found a bunch of tutorials on how to personalize and decorate coffee mugs. The first tutorial, found at Pop Sugar, features the use of sharpies. Here it is:
How to Make A Sharpie Mug
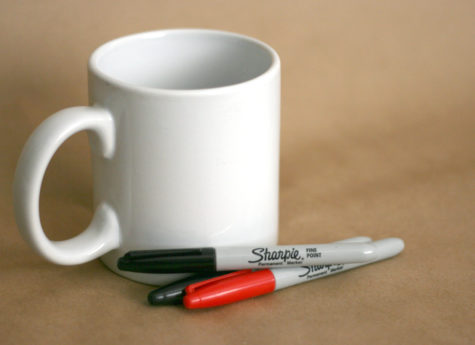
Do you have a plain, boring mug that needs a bit of spicing up? Personalize your cups and mugs by drawing on them! You can use them to add personality to your home or even give them as gifts to your loved ones. Here’s how to start:
- Buy some white cups or mugs. You can find them in superstores, thrift stores, dollar stores, and online. The cheaper the mug, the better this works.
- Pick a Sharpie. For long-lasting results, choose oil-based paint Sharpie markers. Regular Sharpie ink can come off even after baking. Pick a color to use on your mug. You can stay simple and choose one color, or be more ambitious and use multiple. If you’re sticking to one color, then black is usually a good choice, given its striking contrast to the white background of the mug.
- Wash the mug. Before applying the Sharpie, it’s important to get the mug completely clean and free of any oily residue from hands or fingers. Alcohol works well, after the mug has been washed with soap and water.
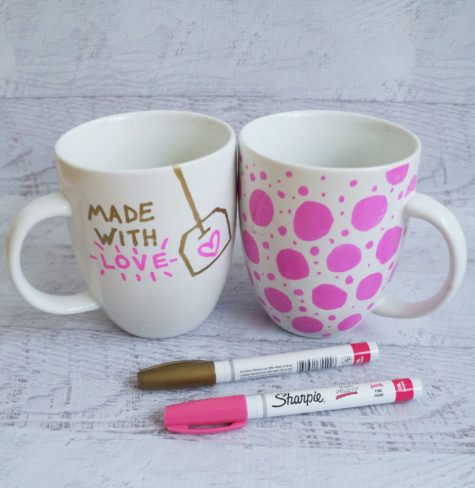
- Start drawing. Decide what you want to put on the cup, and maybe practice drawing it on a piece of paper before drawing on the mug. Pick a meaningful quote or a cute graphic to decorate the mug with, and get inspired by mugs being sold on Etsy or by googling examples of Sharpie mug projects online.
- Dry it out. For the best results, let the sharpie dry completely for 24 hours then bake at a low temp oven like 225° for 2 plus hours.
- Bake it. Remember to place the mug in the oven before it heats up and leave it in until the oven cools completely so there won’t be any cracks. You can choose to bake the mugs twice to really set in the Sharpie drawings. Baking the mug in the oven for 30 minutes at 350°F is what most tutorials recommend, but for best results, bake it at a lower temperature for a longer period of time (see above).
- Care and wash. If you use quality, oil-based sharpies, they should be dishwasher safe. All my pieces have gone through the dishwasher several times now, with no flaw. If you don’t feel sure about the dishwasher – hand washing is recommended.

Does it really work?
While Sharpie mugs are very popular right now, there doesn’t seem to be any consensus on how to best make the mugs. Some say that some of the colors change when baked, some say that they don’t stand up to dishwasher washing (or handwashing even…), and some say that the paint chips off the mugs after a couple uses.
I found an experiment using 14 colors of oil-based, fine point Sharpies and Dollar Tree mugs at Destination Decoration, and her results were as follows:
While decorating the mugs, I wore gloves so the oils from my skin did not affect the finished product. All parts of the mug were dried for 24 hours before baking.
Based on my experiment, baking a Dollar Tree mug at 250 degrees for 2 hours provided the best results. The color of the paint remained largely the same and paint on the mug did not chip at all (except for the minor top chipping).
Tips from other tutorials and crafters:
- I used Pebeo Porcelaine 150 Paint Markers and they work great and do not come off. You can find them at Michaels or Amazon.com. I have even put them in the dishwasher. Stayed on great.
- It didn’t work for me! I just got a paint pen. They work perfectly fine and not any more expensive than sharpies.
- I monogrammed plates and cups with Sharpie oil based markers and did not bake. Let dry for 48 hours been in dishwasher many times and none of mine have come off at all.
- Here is what I find that works. Cheap Walmart mugs are best. Regular sharpies. Wipe first with alcohol to remove any residue. Careful not to touch drawing area with hands. After putting design on, wait 24 hours. Then put in cold oven. Turn temp to 425 and set timer for 30 minutes. At 30 minutes turn off oven, leaving project in until it’s completely cool. Hand wash then do a test run in the dishwasher.
- “I read an extensive article about this somewhere. First, cheap mugs work best due to the inexpensive glaze used. Put mugs in COLD oven, turn oven to 450 (not 350). The glaze needs to re-melt to incorporate the marker into it!! AFTER oven reaches temp, bake for 30 minutes. Turn oven off.. LEAVE MUGS IN CLOSED OVEN (not yelling, just important). Cool for 15 min, slightly crack oven open and let cool over night. This should properly incorporate the ink with the glaze.
- My aunt did it one year, I think she used car paint for scratch fixes. Not sure about the baking part. They lasted for years!
- You can get enamel/glass clear medium and paint over it with that and re-bake. That may help if that doesn’t work, then probably nothing will.
- Clean glass with rubbing alcohol first. Oil base isn’t for glass. Use Folk Art enamels paint applying with a brush or paint pens for glass only! You still have to bake for 30 minutes but let sit for 1 hour before you bake.
Design Ideas


I think it's time to go shopping... maybe even buy some really cool stuff at my online shops!!
